|
|
PBP Commentary |
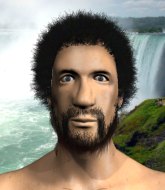
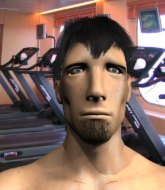
Coming up we have a light heavyweight MMA rules bout between Clark Kent (ranked 0 p4p, 0 weight class) and Howard Wallowitz (ranked 0 p4p, 0 weight class). Howard Wallowitz will no doubt be trying to keep this one on the feet, where he has a distinct advantage.
 |
|
 |
| 195 cm
20
218 lbs
1 - 0 - 0 |
|
208 cm
19
198 lbs
1 - 1 - 0 |
BJJ Purple Belt
Solid boxing
Insanely flexible |
|
BJJ Blue Belt
Excellent boxer
Granite chin |
|
| |
|
Ladies and gentlemen. This fight is 3 rounds, in the light heavyweight division.
Introducing the fighter to my left, fighting out of the red corner.
With a record of
1 - 0 - 0, fighting out of Sydney, Clark Kent!
And introducing the fighter to my right, fighting out of the blue corner.
With a record of
1 - 1 - 0, fighting out of Sydney, Howard Wallowitz!
The judges for this bout are Steve Erwin, Skip Squint and Eliza Hachem.

The bell rings for round one and we are underway!
Wallowitz feints a jab promting Kent to slip. Wallowitz then demonstrates his capabilities by jabbing again. Kent slips again and ducks right into an uppercut.

It looks like Clark Kent has been cut.
Kent tries for a takedown but Wallowitz sees it coming a mile off and avoids it easily.
Wallowitz connects with the punch.
Kent throws a head kick that misses.
Kent lands a jab followed by a nice looking cross.
The fans in attendance giving it up for the two fighters, who have really let it all hang out in the last minute or so!
Wallowitz swings and misses with a hook to the body.
Wallowitz tries to bum rush Kent with a series of wild strikes but Kent uses good footwork to avoid the assault.
Nice uppercut there from Wallowitz.
Kent tries to score a power double leg takedown but Wallowitz sees that one coming and sprawls well. That will dishearten Kent somewhat.
Wallowitz looks to score with a jab to the body but Kent is just out of range.
Wallowitz misses with a wild body shot.
Kent fails with a takedown attempt.
That's three failed takedown attempts in the round for Clark Kent. That's going to take a lot out of him.

Kent manages to get an easy takedown there - catching Wallowitz on his heels. He'll look to pass Wallowitz's guard now, I'm sure.
We could do with one of the fighters taking the initiative a bit more on the ground - they're both waiting to capitalize on a mistake.
Wallowitz looking to control.
Wallowitz utilising some decent striking defenses from the guard, preventing the ground and pound.

That's one minute gone in the round.

Wallowitz working from the bottom, still in full guard. He's managed to get a loose triangle. Kent doesn't seem to be doing much to defend here, obviously he feels comfortable in the position. Kent manages to throw the legs off his shoulder and he's back into guard - no problem.
Kent works over Wallowitz with some ground and pound from guard.

Kent drops back for a leg but he's not going to get it - he lets go and Wallowitz dives on top into guard.
Wallowitz trying to stand up but can't free himself from Kent's guard.
Wallowitz looking to pass the guard.
Wallowitz wants to get up but he can't break Kent's closed guard. He needs to be careful trying to break the legs open, as he's open to submissions here.
Kent has a closed guard, preventing anything of note from happening. Perhaps he's looking to stall.
The fighters are pressed up against the cage, both looking to find a bit of space to work.

That's two minutes gone in the round.

Kent manages to escape and get back to his feet.
Wallowitz lands with a right hand.
Clark Kent seems to be the more aggressive standup fighter in this bout.
Kent is looking to take this fight into the clinch.
Wallowitz throws a leg kick but he was too far away and it doesn't land.

Kent closes the distance and pushes Wallowitz back into the cage.
Kent turns his hips and lands a very nice judo throw into side control!
Kent takes a little break here. Wallowitz wants to take advantage but he is being controlled well.
Kent goes for an armbar here - this could be all over! But no, Wallowitz has escaped beautifully and is now on top in side control! Oh, that's unlucky for Kent but great work by Wallowitz.

That's three minutes gone in the round.
Kent is trying to get back to half guard. He's pushing on Wallowitz's leg. He's managed it. Nice work.
Kent trying to control here.
Wallowitz wants to take a breather but Kent is having none of it.
Kent won't allow Wallowitz to pass to mount.
Kent keeping hold of Wallowitz's head, controlling as best he can.
Kent slips a foot under and gets full guard. Nice work.
Kent working a defensive guard here.

That's four minutes gone in the round.
The crowd are showing their displeasure at the lack of action as loud boos ring out around the arena.
Kent manages to land a sweep and now he's in mount on top!
Kent prevents Wallowitz from getting the reversal.
Kent is landing with some decent strikes but Wallowitz is trying to advance his position so the referee is letting the fight continue.
Kent prevents Wallowitz from getting the reversal.
Kent tries to control but Wallowitz wriggling away.
As the round comes to an end the crowd are showing their appreciation for a great round of action.
Kent unloading with bombs!
Kent lands a big shot there that rocks Wallowitz but he's holding on and managing to survive for now.
Wallowitz tries to hold on but Kent pushes him away.
And thats the end of the round the fighters go back to their corners.
Clark Kent dominated that round.
The cut man is working on Clark Kent's cut.
The minute break is over - no more time for sponges and pep talks - back to the action!

Wallowitz defends well against a solid takedown attempt from Kent.
Wallowitz takes a swing at Kent's ribcage but misses.
Kent swings wildly with a couple of big hooks
and Kent takes a counter punch right on the button for his troubles.
Kent takes one to the side of the head.
Wallowitz is a painfully thin specimen of a man. You do wonder whether a good body kick would snap him clean in two.
Kent shoots in for a takedown. "Ole!" shouts Wallowitz as he jumps to the side.
Howard Wallowitz seems to be getting the better of the standup.
The fighters circle momentarily. Wallowitz darts into range and connects with a nice straight punch.
Wallowitz is using his reach advantage to land shots from outside his opponent's range.
Kent has Wallowitz up against the cage in a clinch.
Kent drops down looking for an ankle pick but Wallowitz pulls his leg out and moves away.
That's three failed takedown attempts in the round for Clark Kent. That's going to take a lot out of him.
Kent throws a jab, cross combination which is slipped
and Wallowitz counters with a good right hand that lands right on the jaw.
The crowd cheering loudly, showing their appreciation for the quality fight we're seeing here.
Kent takes a big uppercut there. He seems a bit wobbly but no, he's OK.
Clark Kent's cut is getting worse.
Kent throws a left and a right that both miss
and Kent takes a counter punch right on the button for his troubles.
Both fighters are absolutely exhausted here.
Wallowitz drops Kent with a naaaaasty hook - Kent is in real trouble here! Wallowitz dives in to side control and pounds out his opponent for a TKO victory! The crowd goes nuts!
Ladies and gentlemen, after 0:51 of round 2, we have a winner by way of TKO (Strikes). Howard Wallowitz!
|
|
|
|
|
|
|
|
|
|
|
|
|
|
|
|
|
|
|
|
|
|
|
| S |
C
A |
G |
S |
C
B |
G |
|
S |
C |
G |
|
energy
A | B |
|
hype
A | B |
|
pop
A | B |
|
mgr
A | B |
|
FIGHT
RATING
100% |
|
|
|
|
|
|
