|
|
PBP Commentary |
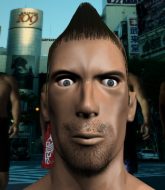
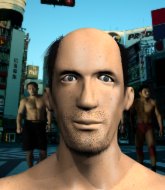
Coming up we have a welterweight MMA rules bout between Ricky Ho (ranked 0 p4p, 0 weight class) and Chris Booger (ranked 0 p4p, 0 weight class). Chris Booger has the power to score a knockout today if he connects clean with Ricky Ho's chin.
 |
|
 |
| 180 cm
22
184 lbs
5 - 3 - 1 |
|
185 cm
23
185 lbs
6 - 3 - 0 |
BJJ Purple Belt
Excellent boxer
Very strong |
|
Good wrestler
Excellent boxer
Powerful |
|
| |
|
Ladies and gentlemen. This fight is 3 rounds, in the welterweight division.
Introducing the fighter to my left, fighting out of the red corner.
With a record of
5 - 3 - 1, fighting out of Tokyo, Ricky Ho!
And introducing the fighter to my right, fighting out of the blue corner.
With a record of
6 - 3 - 0, fighting out of Tokyo, Chris Booger!
The judges for this bout are Shirou Masuda, Yukihiro Shimada and Shigeki Fujiwara.

The bell rings for round one and we are underway!

Ho has taken the fight to the clinch.
A head punch on the inside from Ho fails to land.
Ho keeps control of Booger as he tries to wriggle out of the double underhooks.
A head punch on the inside from Ho fails to land.

Booger has managed to pull guard. Let's see whether he can work an aggressive guard. It will also be interesting to see what tactics Ho uses from the top position.
Booger bucks up whilst keeping hold of a body lock, managing to reverse the position. Now he's in top in Ho's guard.
Ho keeping full guard, as Booger tries to pass.
Ho can't keep his opponent in guard - Booger advances to half guard, no doubt looking to mount.
Booger not throwing his punches with enough precision this time.
Booger not landing any meaningful shots this time.
Ho keeping his head moving to avoid the ground and pound.
Booger works his foot free and advances to mount.

That's one minute gone in the round.

Booger looking to secure an arm triangle but Ho defends it well.
Ho wriggling around on the bottom manages to avoid the strikes thrown by Booger.
Booger working to secure an arm triangle but it's not happening for him just yet.
Booger goes for an armbar but he's not got it
Ho turns into him and now he's in Booger's guard.

That's two minutes gone in the round.
Booger trying to control the position.
The fighters are pressed up against the cage, both looking to find a bit of space to work.
Booger working for submissions but it's allowed Ho to get to half guard.
Booger looking for submissions from an awkward position here.
It looks like Ho is going to stand back up.

That's three minutes gone in the round.
Booger missing with punches from the bottom.
Booger looking for a kimura from the bottom but Ho passes into side control!
Booger struggling a bit here.
Booger striking from the bottom but nothing landed.
Booger is trying to get back to half guard.
Booger is moving his hips around well on the bottom and has managed to get back to half guard.

That's four minutes gone in the round.
Well. There's a bit of a lull in the action here and the crowd are starting to get restless.
Booger is refusing to be controlled, as Ho sits in half guard.
Booger missing with punches from the bottom.
Booger slips a foot under and gets full guard. Nice work.
Booger looking for a sweep. Not yet Booger, not yet.
The crowd thankful this round is nearly over.
Booger is trying to keep Ho in close.
And thats the end of the round the fighters go back to their corners.
Chris Booger dominated that round.
That's time! Back to the action!

A shot to the body from Booger misses
and Ho makes him pay by landing a nice hook to the body before moving out of range.
Chris Booger seems to be the more aggressive standup fighter in this bout.
Ho misses with a wild body shot.
Booger throws a hook to the body but it doesn't connect.
Ho wants to clinch.
Booger keeps the fight on the outside.
We've had a slow start to the round here - hopefully the action picks up.
Ho misses with a series of wild punches.
Nice sprawl there from Ho as Booger shoots in.
That's one minute gone in the round.
Booger fakes a strike and closes the distance, dragging Ho to the ground. Booger is now in Ho's guard.
Booger in full guard, throwing the ground and pound. No damage this time.
Ho keeping full guard, as Booger tries to pass.
Booger is persisting with the attempt to improve his position.
That's two minutes gone in the round.
Booger won't allow Ho to sweep him here.
Booger looking to pass the guard.
Booger has the superior BJJ but he's also working some ground strikes into his gameplan.
Booger trying to move into half guard but instead Ho has managed to sweep!
Ho looking to pass the guard.
Booger looking to sweep here. No luck so far.
That's three minutes gone in the round.
Booger throwing strikes off his back to little effect.
Booger is working actively from the bottom, looking for submissions. He's escaped his hips to the side and he's going for an armbar! Ho has his hands clasped together but Booger extends an breaks Ho's desperate grasp, forcing a tap out due to armbar! Nice BJJ displayed there by Booger.
Ladies and gentlemen, after 3:28 of round 2, we have a winner by way of Submission (Armbar). Chris Booger!
|
|
|
|
|
|
|
|
|
|
|
|
|
|
|
|
|
|
|
|
|
|
|
| S |
C
A |
G |
S |
C
B |
G |
|
S |
C |
G |
|
energy
A | B |
|
hype
A | B |
|
pop
A | B |
|
mgr
A | B |
|
FIGHT
RATING
29% |
|
|
|
|
|
|
