|
|
PBP Commentary |
Coming up we have a light heavyweight MMA rules bout between Flash HIt Man (ranked 0 p4p, 0 weight class) and Paul Chris (ranked 0 p4p, 0 weight class). Well, I have no idea who's going to take this one!
 |
|
 |
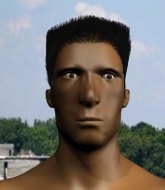
| 210 cm
20
206 lbs
0 - 2 - 0 |
|
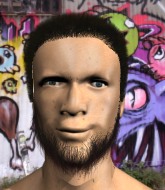
180 cm
21
215 lbs
0 - 1 - 1 |
BJJ White Belt
Basic striking
Granite chin |
|
Dangerous GnP
Brawler
Powerful |
|
| |
|
Ladies and gentlemen. This fight is 3 rounds, in the light heavyweight division.
Introducing the fighter to my left, fighting out of the red corner.
With a record of
0 - 2 - 0, fighting out of Las Vegas, Flash HIt Man!
And introducing the fighter to my right, fighting out of the blue corner.
With a record of
0 - 1 - 1, fighting out of Las Vegas, Paul Chris!
The judges for this bout are Chris Downing, Stewart Dunkirk and Robert Twigg.

The bell rings for round one and we are underway!

HIt Man has closed the distance and engaged Chris in a clinch.
Chris is trying to work for a single leg takedown but HIt Man pulls him back up using the underhooks.
HIt Man really does look like a pencil wearing a pair of gloves. Let's hope he has a gameplan to suit that ridiculous body shape.
Chris jumps guard but HIt Man stands there with Chris around his waist. Chris gives up and drops back to his feet. We remain in the clinch.

HIt Man breaks the clinch and we're back to striking at distance.
HIt Man lands a nice hook to Chris's body. Chris takes it in his stride and looks to land his own strikes.
Chris closes the distance looking to clinch
and HIt Man moves into the clinch.
HIt Man stops a takedown attempt from Chris.
Flash HIt Man has stuffed three takedown attempts in the round now. That's going to take a lot out of Paul Chris.

HIt Man decides to pull guard.
HIt Man avoiding any damage from the ground and pound.
HIt Man manages to land a sweep and now he's in mount on top!
HIt Man prevents Chris from getting the reversal.
HIt Man controlling the pace for now.

That's one minute gone in the round.
Chris keeping his composure momentarily, calmly looking to get back to half guard.
Chris taking shots to the head.
The ref warns both fighters not to hold the cage as they work up against the meshing.
HIt Man wants to control the pace but Chris is squirming around nicely.
HIt Man fakes a shot to the body and cracks his opponent in the head. Nice ground and pound there!
HIt Man lands a shot to the body, followed up by a shot to the exposed head of his trapped opponent.
HIt Man landing shots from mount.
HIt Man breaks from Chris's wrist control and lands an elbow.
HIt Man punishing his opponent with strikes.

That's two minutes gone in the round.
HIt Man lands with some vicious ground and pound - can Chris hang on?
Chris in a bad spot here, taking shots to the head.
Wooooo! Give it up for these two warriors! They are putting on a show!
HIt Man in mount throwing good strikes here, bouncing his opponent's head off the canvas.
HIt Man with the ground and pound from mount.
HIt Man is in the full mount, landing strikes.
HIt Man scores with a couple of good head shots there.
HIt Man unloading with bombs!
Chris is bucking up trying to escape but HIt Man cracks him with another couple of good strikes.
Chris is working to get back to half guard.
The referee warns Chris that he has to improve his position here as he takes two more clean shots to the head.

That's three minutes gone in the round.
HIt Man working the ground and pound effectively.
HIt Man is in the full mount, landing strikes.
HIt Man with a couple of short strikes.
HIt Man lands an elbow that was bordering on illegal but the referee lets it go with a warning.
HIt Man will need to keep those long limbs tucked in whilst he's on the ground, to prevent any submissions.
HIt Man is in the full mount, landing strikes.
Chris looks gassed!
Chris working to try and regain half guard.
HIt Man punishing his opponent with strikes.
HIt Man lands a nice shot to the head.
Chris is squirming around, avoiding HIt Man's attempts to control the action.

That's four minutes gone in the round.
Chris slips a leg in and gets back to half guard.
Wooooo! Give it up for these two warriors! They are putting on a show!
Chris tries to strike from the bottom but it doesn't land.
HIt Man throwing shots but they're hitting the canvas more than the man.

HIt Man is looking for a kimura. It's going to be difficult to finish that from half guard though and Chris defends it well.
HIt Man not landing any meaningful shots this time.
As the round comes to an end the crowd are showing their appreciation for a great round of action.
The fighters are battling for position here. Chris manages to regain full guard. Nice work.
Chris is trying to keep HIt Man in close.
And thats the end of the round the fighters go back to their corners.
Flash HIt Man dominated that round.
Well, the break between rounds is over. Let's get back to the scrappin!

Chris tries for a takedown but HIt Man circles away easily
and HIt Man counters by moving into the clinch. Good anticipation by HIt Man.
Chris has hold of a leg and is looking for a trip takedown. HIt Man avoids it nicely though and we remain in the clinch.
Chris jumps guard but HIt Man stands there with Chris around his waist. Chris gives up and drops back to his feet. We remain in the clinch.
Flash HIt Man has stuffed three takedown attempts in the round now. That's going to take a lot out of Paul Chris.
A nice glancing elbow lands by HIt Man.
Chris can't break the clinch.
HIt Man's corner calls for him to break the clinch, which he does.
HIt Man fails with the takedown.
HIt Man fails miserably with a takedown attempt.
HIt Man drives through and clinches with Chris against the cage.
HIt Man gets double underhooks to prevent a takedown attempt from Chris.
HIt Man stops a takedown attempt from Chris.
Chris is breathing heavily.
That's one minute gone in the round.
HIt Man has dropped down and is working for a takedown. Chris is trying to keep an underhook but HIt Man manages to get the takedown into half guard.
Neither fighter is being very active at the moment, with HIt Man in particular looking to stall.
HIt Man throwing shots but Chris is blocking nicely.
Chris tries to roll over but HIt Man keeps him under control.
Neither fighter is being very active at the moment, with HIt Man in particular looking to stall.
Chris is trying to maintain the position but HIt Man is very close to passing his half guard.
That's two minutes gone in the round.

We're going to have a standup here because Flash HIt Man wasn't active enough for the referee's liking.
Chris with a poor takedown
and HIt Man counters with a shot to the ribs. That looked like it hurt.
HIt Man bobs and weaves into range and then changes levels and scores with a nice takedown into side control.
Chris is not in a great position here, taking some shots.
HIt Man misses with a strike but at least he's keeping busy, looking to cause some damage - that will still help him when it comes to the judges scorecards.
HIt Man working away.
HIt Man landing with strikes to the head and body from side control.
Chris taking a bit of punishment here - HIt Man scoring with strikes.
That's three minutes gone in the round.
Chris is trying to escape and get back to his feet.
HIt Man wants to lay and pray for a moment but Chris keeps working.
HIt Man is really dominating this fight. Is there anything that Chris can do to turn this around?
Chris is trying to get back to half guard.
HIt Man controlling from side mount.
That's four minutes gone in the round.
A lull in the action here being met with boos from the crowd.
The referee wants the fighters to be more active or he's going to reset them on the feet.
HIt Man working the head and body with strikes.
Chris struggling a bit here.
Chris might have to switch it up a bit here because his efforts to control HIt Man kaven't been going to plan, at least at the current moment in time.
HIt Man creates some space and throws a big elbow, but Chris sees it coming and moves his head just enough to avoid the strike.

Chris throws HIt Man to one side and escapes!
Chris gets caught flat footed, as HIt Man shoots in with a quick takedown into guard.
And thats the end of the round the fighters go back to their corners.
Flash HIt Man dominated that second round.
That's time! Back to the action! Let's hear some noise people - this is the final round!

HIt Man uses good footwork to get in and out, landing a nice hook.
HIt Man doesn't succeed with the takedown
enabling Chris to counter with a crisp jab.
Chris tries to clinch but HIt Man moves out of range.
A jab from HIt Man finds it's way through Chris's defenses.
Chris gets tackled into the cage by HIt Man. HIt Man maintains the clinch.
HIt Man drops down looking for an ankle pick but Chris pulls his leg out and moves away.
HIt Man lands with a nice combination. Chris backs away looking to recover.
This fight brought to you by 5M nutrition - it's mmmmm tasty. Nice jab by HIt Man.
A punch combination from Chris misses.
Chris tries a switch kick but it misses it's target.
HIt Man throws a nice hook to the body that draws an oooh from the crowd.
HIt Man pushes forward with a 1-2 combination that forces Chris back to the cage. HIt Man follows up with a solid lead hook to the liver.
Both fighters are breathing heavily.
HIt Man throws a head kick that misses.
Chris shoots in looking for a takedown. HIt Man tries to sprawl out of it but Chris keeps driving through. The fighters are pinned against the cage. HIt Man manages to get underhooks and after a bit of a struggle, circles away and we're back to standing.
That's one minute gone in the round.
Chris gets his takedown attempt stuffed easily
and HIt Man counters with a nice jab to the body that keeps Chris thinking.
Chris doesn't succeed with the takedown
and HIt Man counters with a stiff right hand.
Flash HIt Man has stuffed three takedown attempts in the round now. That's going to take a lot out of Paul Chris.
HIt Man gets to the clinch - let's see what his plan is here.
HIt Man is trying to drag Chris to the mat but Chris just about manages to keep his footing. He used the cage to his advantage there.
HIt Man fails to pull the fight into his guard.
Chris pulls guard effortlessly.
Chris bucks up whilst keeping hold of a body lock, managing to reverse the position. Now he's in top in HIt Man's guard.
Chris trying to pass the guard but can't manage it just yet.
Chris throws a strike but HIt Man rolls with it and manages to sweep. Now he's in guard on top.
That's two minutes gone in the round.
HIt Man trying to control the position from guard on top but Chris is wriggling around, looking for whatever he can.
HIt Man thows a big elbow that misses.
HIt Man loading up with the ground and pound but he's missing more than he's landing in this flurry.
Chris manages to land a sweep and now he's in mount on top!
HIt Man keeping his composure momentarily, calmly looking to get back to half guard.
That's three minutes gone in the round.
Chris cracks HIt Man with a nasty head shot there - the crowd let out an audible gasp there, as the noise reverberated around the arena.
Chris dominating with strikes here.
Chris landing punches.
Flash HIt Man is fighting for a decision here - he's started to take the cautious approach.
HIt Man on his back here. We all know that wrestlers don't like being on their back so let's see if HIt Man tries to get out of the position.
Chris lands a shot to the body, followed up by a shot to the exposed head of his trapped opponent.
Paul Chris has stepped it up - he knows he needs a finish here!
Chris fakes a shot to the body and cracks his opponent in the head. Nice ground and pound there!
Chris putting on the heat here with some good ground and pound!
Chris is still in mount, landing shots to his trapped opponent. HIt Man can't stay in a position like this for much longer.
Chris with good strikes from the mount here!
HIt Man is trying desperately to improve position.
That's four minutes gone in the round.
Chris scoring with some good ground and pound from mount here. Will he manage to finish HIt Man?
Chris throwing shots from mount but they're not landing.
Chris putting on the heat here with some good ground and pound!
Chris unloading with bombs!
HIt Man in a bad spot here, taking shots to the head.
The fighters are pressed up against the cage, both looking to find a bit of space to work.
Chris thowing strikes but they're hitting the gloves, not doing any damage.
HIt Man tries to reverse the position but Chris maintains control.
Chris landing strikes, looking to finish!
Chris goes for an armbar but HIt Man turns quickly into his guard - lovely anticipation from HIt Man.
And that's the end of the fight!
Paul Chris comfortably won the final round on my scorecard.
Well HIt Man has outscored his opponent in every aspect of the fight today. Only a scarily incompetent judge or two will keep him from a well deserved win... Over to the ring announcer for the scorecards.
Ladies and gentlemen, after 3 rounds of action, we go to the scorecards for a decision.
Judge Chris Downing scores the fight 29:27
Judge Stewart Dunkirk scores the fight 29:27
Judge Robert Twigg scores the fight 29:27
In favor of your winner, by unanimous decision... Flash HIt Man!
|
|
|
|
|
|
|
|
|
|
|
|
|
|
|
|
|
|
|
|
|
|
|
| S |
C
A |
G |
S |
C
B |
G |
|
S |
C |
G |
|
energy
A | B |
|
hype
A | B |
|
pop
A | B |
|
mgr
A | B |
|
FIGHT
RATING
61% |
|
|
|
|
|
|
