|
|
PBP Commentary |
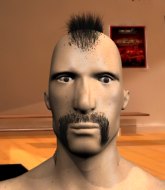
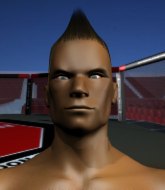
Coming up we have a bantamweight MMA rules bout between Aaran Hodges (ranked 0 p4p, 0 weight class) and Big Red (ranked 0 p4p, 0 weight class). Over to our ring announcer for the fighter introductions!
 |
|
 |
| 169 cm
19
136 lbs
0 - 0 - 0 |
|
165 cm
18
130 lbs
1 - 0 - 0 |
BJJ Blue Belt
Counter striker
Self confident |
|
BJJ White Belt
Brawler
Determined |
|
| |
|
Ladies and gentlemen. This fight is 3 rounds, in the bantamweight division.
Introducing the fighter to my left, fighting out of the red corner.
With a record of
0 - 0 - 0, fighting out of London, Aaran Hodges!
And introducing the fighter to my right, fighting out of the blue corner.
With a record of
1 - 0 - 0, fighting out of London, Big Red!
The judges for this bout are James Atkins, Colin Fotheringham and Paul Tew.

The bell rings for round one and we are underway!
Red fails to land the takedown.
Red fails with a rather predictable takedown attempt.
Red tries to clinch up but Hodges circles away and keeps his distance.
Red throws the left hand but Hodges avoids the punch easily.
Hodges moves in looking to clinch but Red pushes him off.
Hodges fails with a takedown attempt.
Red circles away from the clinch attempt

and Red counters with a nice double leg into side control. Hodges won't be happy with that.
Hodges manages to land a sweep and he's now on top! Lovely Jiu Jitsu!
The fighters are battling for position here. Red manages to regain full guard. Nice work.
Red wants to control but Hodges passes easily into half guard.

Red is looking to sinch up a gullotine here but Hodges pulls his head out easily.

That's one minute gone in the round.
Hodges wants to pass to mount but Red is defending the position.
Hodges is working for a kimura but Red is defending it quite comfortably.
Red is looking to control Hodges's leg but it's slowly edging free. Can Red avoid being mounted?
Hodges prevents Red from improving his position.

That's two minutes gone in the round.
The crowd are showing their displeasure at the lack of action as loud boos ring out around the arena.
Red trying to control here.

The referee decides to stand the fighters back up.
Hodges takes one on the chin but keeps coming.
A decent looking body kick lands there for Red.
Red will have to do better than that with his takedown attempts.
Aaran Hodges has stuffed three takedown attempts in the round now. That's going to take a lot out of Big Red.
Red looks gassed!
Red looking to shoot here. He's gone for it and he's landed a takedown into mount! Oh, that's bad for Hodges!
Red wants to take his opponent's back but instead Hodges manages to regain half guard.
Red throwing shots but they're hitting the canvas more than the man.
Hodges regains full guard. Nicely done.
Hodges looking for a sweep. Not yet Hodges, not yet.

That's three minutes gone in the round.
Red trying to control but Hodges is working from the bottom.
Hodges has a closed guard, preventing anything of note from happening. Perhaps he's looking to stall.
Red tries to free his leg and advance position but Hodges is retaining full guard.
Hodges is working an open guard here, looking to improve his position. No doubt that will leave him open to counters but at least he's being more offensive.
A big thud reverberates around the arena there as Red accidentally thumps the mat. Hopefully he's not broken his hand.
Hodges keeping moving, preventing Red from controlling successfully.

That's four minutes gone in the round.
The crowd are hurling abuse towards the fighters... You can hardly blame them though because there isn't a lot going on in the fight.
Neither fighter is doing enough for the referee's liking and he's decided to stand them back up.
Red shoots in and gets a takedown into half guard. Red showed some decent athleticism there.
Red is looking for the mount but instead finds himself back in full guard.
Red wants to control from the top but Hodges keeps moving.
Red is looking to stand up but Hodges won't let him.
Hodges trying to control the position.
The ref warns both fighters not to hold the cage as they work up against the meshing.
Red looking to pass the guard.
Red wants to control from the top but Hodges keeps moving.
And thats the end of the round the fighters go back to their corners.
Big Red dominated that round.
That's the end of the interval. I'm sure that seemed a lot quicker than a minute for our two fighters! Back to the action.

Red bobs and weaves into range and then changes levels and scores with a nice takedown into side control.
Red passes to full mount! That's big trouble for Hodges!
Red tries to control but Hodges wriggling away.
Red prevents Hodges from getting the reversal.
Red is trying to control here but Hodges has managed to regain half guard.
Red wants to pass the guard but Hodges is defending well.
Hodges trying to control but Red postures up.
Hodges gets full guard.
That's one minute gone in the round.
Red throwing strikes but missing.
Red trying to control but Hodges is working from the bottom.
Red is breathing heavily.
Hodges is working from a closed guard but he's struggling to control his opponent.
Red wants to control from the top but Hodges keeps moving.
Hodges trying to keep a closed guard but Red is proving a slippery customer.
The referee decides to stand the fighters back up.
Hodges gets caught flat footed, as Red shoots in with a quick takedown into guard.
Red stands up and looks to throw the legs aside to pass to side control. Hodges swivels though and keeps the full guard.
Hodges trying to control the position here.
That's two minutes gone in the round.
Hodges is working from a closed guard but he's struggling to control his opponent.
Redis looking to pass into half guard but Hodges pushes him away with his feet and jumps on top - now Hodges is in guard.
Red looking to control.
The fighters are pressed up against the cage, both looking to find a bit of space to work.
Red looking for a sweep. Not yet Red, not yet.
Red will have to put a bit more behind his punches if he's going to do any damage from this position.
Red trying to keep a closed guard but Hodges is proving a slippery customer.
The referee has ruled that neither fighter is active enough on the ground and has stood them back up.
Red closes the distance and looks for a trip takedown... aaaand he's got it - Red lands in his opponent's guard.
That's three minutes gone in the round.
Red wants to control from the top but Hodges keeps moving.
Hodges looking for a sweep. Not yet Hodges, not yet.
Red trying to land body shots but he keeps hitting the mat.
Red with a flurry of punches that miss.
Red trying to pass the guard but can't manage it just yet.
Red would like to get this fight back to the feet but can't get free from the closed guard.
Hodges has Red pulled in close to control his posture.
Hodges has a closed guard, preventing Red from standing up.
That's four minutes gone in the round.
The crowd are showing their displeasure at the lack of action as loud boos ring out around the arena.
Well, the referee has seen enough. Neither fighter is active enough on the ground so he's stood them back up.
Hodges displays some good footwork, moving neatly out of range as Red throws out the jab.

Red clinches with his opponent.
Red takes an elbow to the forehead.
Hodges drops down for a takedown but doesn't get it.
Red looking for a takedown.

Red breaks from the clinch.
Hodges doesn't manage to clinch there - Red circles away.
Red with a lazy takedown attempt
and Hodges counters into the clinch. Nicely done.
Hodges tries to land a knee to the head but Red blocks with his arms.
Hodges connects with a nasty looking knee right to Red's face.
Hodges is trying to trip Red. He has hold of a leg but Red is hopping around, keeping his balance for the moment. Hodges persists though and gets the takedown into guard.
Red can't do much from the bottom at the moment, as Hodges controls the pace.
And thats the end of the round the fighters go back to their corners.
Big Red showed his class in that round. I'd imagine he'll take it on all the scorecards.
The fighters' corners scream their final instructions, as the referee calls time. Here we go, back to the action! So, we enter the final round. Let's see if either fighter can bring us a finish, or whether we're going to the judges scorecards.

Hodges wants to clinch up but Red keeps it at a distance.
Red scores with a takedown into Hodges's guard.
Red thows a big elbow that misses.
Red stays in close to Hodges's body and controls the position.
Hodges lands a beautiful switch and he's in full mount! That could spell trouble for Red!
Red keeping his composure momentarily, calmly looking to get back to half guard.
Both fighters are breathing heavily.
Hodges controlling the position easily from mount.
That's one minute gone in the round.
Hodges putting on the heat here with some good ground and pound!
Big Red has got the better of the ground game so far.
Red is looking to improve his position but Hodges isn't that keen on the idea.
Hodges controlling the pace for now.
Red looking to escape from mount but he's given up his back!
Red trying to control the hands but Hodges breaks the grip.
That's two minutes gone in the round.
The crowd are showing their displeasure at the lack of action as loud boos ring out around the arena.
Hodges is working for the rear naked choke. He has one arm under the chin but Red has hold of the other arm. A bit of a stalemate here.
Red trying to control but he's just got himself in more trouble.
Red might have to switch it up a bit here because his efforts to control Hodges kaven't been going to plan, at least at the current moment in time.
Red is defending well here and trying to improve his position.
Red is persisting with the attempt to improve his position.
Red breaks Hodges's hooks off and manages to turn into his guard.
Red wants to control from the top but Hodges keeps moving.
That's three minutes gone in the round.
Neither fighter is doing enough for the referee's liking and he's decided to stand them back up.
Red scores with a nice takedown into half guard. Let's see what he's got on the ground.
Red is looking to pass Hodges's guard but actually Hodges recovers to full guard.
Red wants to control from the top but Hodges keeps moving.
Hodges wants to control here, rather than go for any submissions from the bottom. At least for now.
Red tries to stand but Hodges is controlling from the bottom.
Red must be cautious of submissions here, given that his opponent has the superior Jiu Jitsu.
That's four minutes gone in the round.
Red trying to control but Hodges is working from the bottom.
Red is in a good position here but he's just trying to control... And he's not even managing to do that successfully.
Well, the referee has seen enough. Neither fighter is active enough on the ground so he's stood them back up.
Red looks for a takedown. He's got it. We're now in half guard.
Red is looking for a kimura here.
Hodges is looking to control Red's leg but it's slowly edging free. Can Hodges avoid being mounted?
And that's the end of the fight!
Big Red comfortably won the final round on my scorecard.
I've got Red winning every round here. Surely the decision will go his way and he'll pick up a well deserved decision victory. Over to the ring announcer for the scorecards.
Ladies and gentlemen, after 3 rounds of action, we go to the scorecards for a decision.
Judge James Atkins scores the fight 27:30
Judge Colin Fotheringham scores the fight 27:30
Judge Paul Tew scores the fight 27:30
In favor of your winner, by unanimous decision... Big Red!
|
|
|
|
|
|
|
|
|
|
|
|
|
|
|
|
|
|
|
|
|
|
|
| S |
C
A |
G |
S |
C
B |
G |
|
S |
C |
G |
|
energy
A | B |
|
hype
A | B |
|
pop
A | B |
|
mgr
A | B |
|
FIGHT
RATING
37% |
|
|
|
|
|
|
