|
|
PBP Commentary |
Coming up we have a light heavyweight MMA rules bout between Steve Holt (ranked 0 p4p, 0 weight class) and Daniel White (ranked 0 p4p, 0 weight class). White has chosen Street Carp by Deftones as his entrance music. Fingers crossed for an exciting fight - I'm sure both fighters are looking for a nice under the table bonus!
 |
|
 |
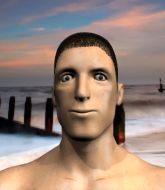
| 178 cm
22
209 lbs
7 - 6 - 0 |
|
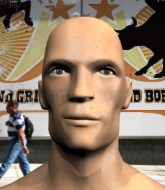
185 cm
26
221 lbs
8 - 3 - 0 |
Good wrestling
Excellent boxer
Good chin |
|
Decent wrestler
Excellent boxer
Granite chin |
|
| |
|
Ladies and gentlemen. This fight is 3 rounds, in the light heavyweight division.
Introducing the fighter to my left, fighting out of the red corner.
With a record of
7 - 6 - 0, fighting out of Hilo, Steve Holt!
And introducing the fighter to my right, fighting out of the blue corner.
With a record of
8 - 3 - 0, fighting out of Las Vegas, Daniel White!
The judges for this bout are , and .

The bell rings for round one and we are underway!
Holt wants to clinch up but White keeps it at a distance.
White ducks under an overhand right and circles away with a smile on his face.
Holt fails with the takedown.
Holt tries to close the distance and clinch up against the cage but White paws at him with a jab and circles away.
White takes a shot to the nose. Hopefully that hasn't broken it.
Holt wants to clinch up but White keeps it at a distance.
White uses some good footwork to avoid the body shot by Holt.
White dodges the punch combination from Holt.
Holt misses with a takedown attempt - White sprawls well and throws a nice strike on the way out which just misses.
Steve Holt seems to be the more aggressive standup fighter in this bout.
Holt fails with a rather predictable takedown attempt.
That's three failed takedown attempts in the round for Steve Holt. That's going to take a lot out of him.
Holt tries to close the distance and clinch up against the cage but White paws at him with a jab and circles away.
No luck with that takedown attempt from Holt.
White keeps the fight on the outside.

That's one minute gone in the round.
The fight stays on the outside here - Holt looks like he's thinking about clinching though.
Holt pushing out the jab but it's not landing.
Holt throws a looping left and ducks down for a takedown. He's got his arms around White's waist but White gets an underhook and avoids the takedown by throwing Holt off to one side.
Holt shoots in for a takedown but White shows good takedown defense.
Nice sprawl there from White as Holt shoots in.
Holt avoids a punch combination nicely.
White throws a low kick but Holt moves out of range easily.
White uses decent footwork to sidestep a right hand from Holt.
Daniel White is looking to keep the fight on the feet at all costs.
Holt shoots in for a double leg but White sprawls well. That's going to sap some energy.
Holt pushing out the jab but it's not landing.
White uses some good footwork to avoid the body shot by Holt.
Holt tries to land with a swinging hook to the body but White was well out of range. Poor timing from Holt.
White keeps the fight on the outside.
Holt shoots in but White avoids the takedown attempt easily.
Holt is breathing heavily.

That's two minutes gone in the round.
A lull in the action here being met with boos from the crowd.
A big left from Holt misses.
Some wild striking there from White.
White defending well as Holt loads up on a big left hand.
White throws a series of punches but Holt avoids them all with ease.
Holt fails with the takedown.

Holt drops down and drives through with a powerful takedown into guard.
We get told so often about how wrestlers don't like to be on their backs. Let's see if White can do anything to dispel that myth.
Holt stops White from standing up.
Holt throws a strike but White rolls with it and manages to sweep. Now he's in guard on top.
White controlling from the top position.

That's three minutes gone in the round.
Holt keeping full guard, as White tries to pass.
The ref warns both fighters not to hold the cage as they work up against the meshing.

White stands up from guard. Let's bang!
Holt is really struggling to find his range with his punches. White's reach advantage is clearly causing him problems.
White moves out of range of the strikes.
Holt shoots in but no luck this time.
Holt fails with the takedown.
White slaps away a takedown attempt from Holt, before circling back to the center of the mat.
White uses good head movement to avoid the hook from Holt.
Holt shoots in for a takedown but White shows good takedown defense there and keeps this one on the feet.

That's four minutes gone in the round.
White throws a one two combo.

It looks like Steve Holt has been cut.
White misses with a series of wild punches.
White misses with a jab, cross combination.
White throws a nice looking combination but Holt bobs and weaves to avoid any damage.
Holt throws a hook to the body but it doesn't connect.
Holt looks to land a left hand but White moved out of range nicely.
White swings away with a leg kick that misses.
Holt looks for a takedown but White sprawls well.
Holt shoots for a takedown but White saw that one coming a mile off and avoided it easily.
Holt avoids a punch combination nicely.
Holt thows a left - swing and a miss!
Holt fails with the takedown.
And thats the end of the round the fighters go back to their corners.
Daniel White dominated that round.
The cut man is working on Steve Holt's cut.
The fighters get back to their feet, the hooter sounds and we're back to the action!

Some wild striking there from White.
Holt misses with a body shot. Nice footwork from White.
White steps to the side to avoid the strikes from Holt.
White misses with the combination.
Holt shoots in looking for a takedown but White manages to keep the fight standing, pushing Holt's face into the canvas for good measure before circling away.
White misses with a few strikes there.
Holt throws a hook but White blocks it.
We've had a slow start to the round here - hopefully the action picks up.
Holt throws a looping overhand right but White ducks down to avoid it.
Holt shoots in for a takedown but White shows good takedown defense there and keeps this one on the feet.
Holt jabs White right on the nose. White blinks but takes it well.
Holt shoots in for a takedown. "I don't think so" says White as he avoids it easily.
That's three failed takedown attempts in the round for Steve Holt. That's going to take a lot out of him.
Both fighters are absolutely exhausted here.
A big left from Holt misses.
That's one minute gone in the round.
White steps to the side to avoid the strikes from Holt.
Holt dives in and grabs White's left leg, looking for a takedown. White pushes down on Holt's head and hops out.
Nice defenses there by White.
Holt slips a jab and a cross from White.
White misses with a series of wild punches.
A left and a right from White both land. Nice combination.
Holt misses with a double jab
and White counters with a left and a right that stings Holt.
White will need to close the distance a bit before he attacks - that leg kick was thrown from too far away.
White keeps the fight standing with a nice sprawl.
White lands a jab-cross combination.
This has been an exciting period of action!
White displays some good footwork, moving neatly out of range as Holt throws out the jab.
Sloppy strikes from White. Those never looked like landing.
That's two minutes gone in the round.
Holt tries to land with a swinging hook to the body but White was well out of range. Poor timing from Holt.
Holt dodges the punch combination from White.
Holt misses with a jab to the body
and White counters with a left and a right that stings Holt.

White drops Holt with a beautiful combination! Holt stares up at his opponent, who ushers him back to his feet - White is looking for the KO!

Holt is rocked!
Some wild striking there from White.
Oh Holt is still all over the place! His legs are completely gone! Will he be able to recover?!!
White misses with a low kick.
Holt seems to have got his legs back now.
Holt walks forward and throws out a flicking leg kick. White checks it nicely though, as he moves to the side.
Jab, cross, leg kick. Nice combination by White!
Holt swings and misses with a shot to the body
and White counters with a three punch combo that has Holt backing up. Holt nods at White to acknowledge the strikes.
Daniel White is looking to throw some combinations by the looks of things.
Holt misses with a body shot
and White counters with a left and a right... And another left! Holt is down! He's done! The ref dives in to save him and that's the end of the fight!
Ladies and gentlemen, after 2:48 of round 2, we have a winner by way of TKO (Strikes). Daniel White!
|
|
|
|
|
|
|
|
|
|
|
|
|
|
|
|
|
|
|
|
|
|
|
| S |
C
A |
G |
S |
C
B |
G |
|
S |
C |
G |
|
energy
A | B |
|
hype
A | B |
|
pop
A | B |
|
mgr
A | B |
|
FIGHT
RATING
57% |
|
|
|
|
|
|

