|
|
PBP Commentary |
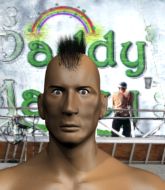
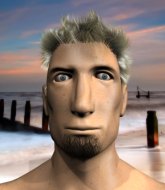
Coming up we have a featherweight MMA rules bout between Herbie Hide (ranked 0 p4p, 0 weight class) and Nathan Audet (ranked 0 p4p, 0 weight class). Hide comes to the cage accompanied by Taste of ink -The Used. Audet comes into a darkened arena with his song building. Black Eyed Peas - Pump it kicks in, the lights come on and the crowd goes wild! What a showman! Herbie Hide has the better chin. Will he look to stand and bang today?
 |
|
 |
| 160 cm
25
145 lbs
9 - 1 - 0 |
|
173 cm
26
157 lbs
7 - 6 - 0 |
BJJ Brown Belt
Solid boxing
Very strong |
|
BJJ Purple Belt
Good kicks
Determined |
|
| |
|
Ladies and gentlemen. This fight is 3 rounds, in the featherweight division.
Introducing the fighter to my left, fighting out of the red corner.
With a record of
9 - 1 - 0, fighting out of Montreal, Herbie Hide!
And introducing the fighter to my right, fighting out of the blue corner.
With a record of
7 - 6 - 0, fighting out of Montreal, Nathan Audet!
The judges for this bout are Ian Loll, Alec Ball and William Peck.

The bell rings for round one and we are underway!

Audet clinches.
Hide goes for a takedown attempt but Audet pushes him away and we're back to fighting at a distance.
Audet scores with a jab to the jaw of his opponent.

It looks like Herbie Hide has been cut.
Hide doesn't manage to clinch there - Audet circles away.
Audet misses with a two punch combination.
Audet throws a combination but it was largely blocked by Hide.
Audet darts in trying to clinch
and Hide counters with a quick right hand to the jaw.
Hide misses with a body shot.
Audet tries to clinch but fails miserably
and Hide counters with a straight punch to the midsection.
Audet darts in and clinches Hide up against the cage.
Hide has had enough of the clinch but Audet keeps him there for the moment.
Hide wants a takedown but no success here.
Audet with a knee to the head.
Good body shot from Hide.
Hide is trying to push Audet away but Audet has him pressed against the cage, so he's going nowhere.
Hide is trying to stall.
Hide on the defensive, avoiding the knees to the body.

That's one minute gone in the round.
Audet with the Thai clinch. He's looking to land a big knee but he's not managed it this time.
Audet is pressed up against the cage. Hide has hold of a leg and is looking to drag Audet down to the mat. Audet avoids the attempt though and has circled away. We're back to striking at a distance.
That's three failed takedown attempts in the round for Herbie Hide. That's going to take a lot out of him.
Hide misses with a double jab.
Hide misses with a combination
and Audet counters by clinching up.
Hide is trying to push Audet away but Audet has him pressed against the cage, so he's going nowhere.
A knee to the head by Audet.
Hide tries to circle away but Audet has him pinned against the cage.
Audet using the Thai clinch to land knees to the body.
Hide tries for a takedown but Audet manages to get underhooks.
Audet throws a knee to the head but misses.
Audet keeps the fight in the clinch, despite Hide's efforts to push away.
Hide wants to strike at distance but he can't break free of the clinch.
Hide wants a takedown.
Hide has hold of a leg and is looking for a trip takedown. Audet avoids it nicely though and we remain in the clinch.
Hide has had enough of the clinch but Audet keeps him there for the moment.
A knee to the head by Audet.
Audet throws a vicious knee straight up the middle but Hide blocks it with crossed arms.

Hide has moved round to his opponent's back and is looking for a suplex! Oh snap! He's tossed Audet clear over his head and slammed him to the mat!
Hide is breathing heavily.
Audet avoids the strikes from Hide.

That's two minutes gone in the round.
Audet is really stuck here.
Hide thows a huge left but connects with the canvas and not his opponent.
Audet is being controlled on the ground here - he must escape this position otherwise surely the end is near.
Hide is not going to allow Audet to sit and survive in this position.
Hide is trying to stick to Audet's back but Audet is turning into Hide. He's managed to reverse the position - now he's in Hide's guard. Polite applause from the crowd in appreciation of some nice Jiu Jitsu by Audet.
Hide wants to sweep here but Audet controlling him for the moment.
Hide might be looking to lock onto one of his opponent's long limbs for a submission, whilst we're on the ground.
Audet throwing elbows and punches but not connecting, as Hide works some decent striking defense from the bottom.

That's three minutes gone in the round.
Hide keeping full guard, as Audet tries to pass.
The fighters are pressed up against the cage, both looking to find a bit of space to work.
Hide not looking particularly offensive just at the moment.
Audet looking to sit in guard and control but Hide gets the butterfly guard and sweeps. He's now in the guard on the top.
Hide content to strike from guard, landing some decent shots.
Hide looking to pass the guard.
Hide is pushing down on Audet's leg trying to pass to half guard. Audet is fighting to maintain full guard but Hide has managed to sneak the leg through.

That's four minutes gone in the round.
The crowd are getting on the fighters' backs, as the pace has dropped off in the last minute or so.
Audet is refusing to be controlled, as Hide sits in half guard.
Hide missing with the ground and pound from half guard.
Hide takes advantage of the dominant position to land a couple of big hammer fists.
Hide is keen to just control but Audet is a slippery customer.
Audet wants to control but Hide is keeping busy and won't allow it.
Hide sitting and controlling from the half guard.
Hide has decided to stand back up but his arm is trapped. Whilst he's worrying about his arm, Audet works to full guard.
And thats the end of the round the fighters go back to their corners.
A close round but Nathan Audet will probably get the nod.
The cut man is working on Herbie Hide's cut.
The fighters get back to their feet, the hooter sounds and we're back to the action!

Audet darts in trying to clinch
and Hide counters with a driving takedown into guard. Nice work there by Hide.
Hide trying to land body shots but he keeps hitting the mat.
Audet avoiding any damage from the ground and pound.
Audet keeping full guard, as Hide tries to pass.

Hide stands and steps away. Audet gets to his feet too and we're back to the striking game.
Audet looks to clinch
and Hide counters by moving into the clinch. Good anticipation by Hide.
Audet is trying to stall.
Audet looking to throw knees to the head but Hide is blocking nicely.
Audet throws a knee to the head but misses.
Hide is trying to maintain a safe position but Audet gets an underhook and turns Hide into the cage.
Hide wants to break free. God knows he wants to breaaaak freeee.
That's one minute gone in the round.
A frustrated look appears on Hide's face as he tries to break the clinch.
Audet landing some nice looking knees to the body.
Hide is stalling here. The referee will be looking to step in if he doesn't pick up the pace.
Audet connects with a nasty looking knee right to Hide's face.
Audet is breathing heavily.
Audet misses with a knee strike.
Hide wants to strike at distance but he can't break free of the clinch.
Audet stalling in the clinch.
Hide tries to circle away but Audet has him pinned against the cage.
A nice glancing elbow lands by Audet.
Hide on the defensive, avoiding the knees to the body.
Audet is fighting off a takedown attempt but Hide is just too persistent for him and manages to trip Audet to the mat. Audet regains guard as soon as the fighters hit the mat.
Hide looking to sit in guard and control but Audet gets the butterfly guard and sweeps. He's now in the guard on the top.
Hide has been looking to land a fair amount of strikes on the ground. He might be looking to soften his opponent up in order to work for a submission.
Audet wants to stand and escape but instead Hide has hit a sweep and he's now on top in guard.
Hide in full guard, throwing the ground and pound. No damage this time.
That's two minutes gone in the round.
Hide trying to control but Audet is working from the bottom.
Audet keeping full guard, as Hide tries to pass.

Hide drops back for a leg but he's not going to get it - he lets go and Audet dives on top into guard.
Audet tries to free his leg and advance position but Hide is retaining full guard.
Audet postures up and lands some nice ground and pound.
Hide not looking particularly offensive just at the moment.
Audet pressing down on his opponent's thigh, looking to pass guard. Hide is keeping the position for now.
Audet must be cautious of submissions here, given that his opponent has the superior Jiu Jitsu.
That's three minutes gone in the round.
Audet won't allow Hide to sweep him here.
Audet pressing down on his opponent's thigh, looking to pass guard. Hide is keeping the position for now.
Hide seems keen to control Audet's posture.
The referee is asking the fighters to pick up the pace.
Audet trying to control the position from guard on top but Hide is wriggling around, looking for whatever he can.

It looks like we're going to have a standup here. Neither fighter is doing enough on the ground.
Audet closes the distance but Hide moves to the side
and Hide counters with a good right hand that lands right on the jaw.
Audet falls off balance throwing a combination
and Hide counters with a takedown into full mount! That could mean trouble for Audet!
Hide controlling the position easily from mount.
Audet is in a horrible position here, under a barrage of strikes, he's managing to avoid any damage.
That's four minutes gone in the round.
Hide lands a shot to the body, followed up by a shot to the exposed head of his trapped opponent.
Hide tries to control but Audet wriggling away.
The crowd applaud the fighters efforts here as the round comes to an end.
Hide with the ground and pound from mount.
Hide lands a nice shot to the head.
And thats the end of the round the fighters go back to their corners.
Herbie Hide dominated that second round.
The cut man is working on Herbie Hide's cut.
Well, the break between rounds is over. Let's get back to the scrappin! Let's hear some noise people - this is the final round!

Audet looks to clinch
and Hide holds on and brings the fighters into a clinch.
Audet prevents a takedown attempt there.
A short left from Hide.
Audet crunches a lovely knee into Hide's ribcage.
With the fighters up against the cage, Audet throws an elbow but misses.
Hide blocks an elbow strike.
Audet with an attempt at a knee that misses.
Hide has Audet pressed against the cage.
Hide has a body lock and is looking for a takedown. Audet is bouncing around trying to prevent the takedown and somehow he has indeed managed to stay on his feet.
Hide wants to break free. God knows he wants to breaaaak freeee.
Audet unloads a knee to the mid-section. Hide lets out a prehistoric sounding urrrrgh.

Hide's corner calls for him to break the clinch, which he does.
Audet tries to clinch up
and Hide counters with a crisp hook to the side of the head.
Audet closes the distance but Hide moves to the side
and Hide counters with a crisp hook to the side of the head.
Both fighters are breathing heavily.
Hide lands a jab.
That's one minute gone in the round.
Audet has Hide up against the cage in a clinch.
A shot in the inside from Hide.
A frustrated look appears on Hide's face as he tries to break the clinch.
Hide stalling in the clinch but Audet improves position.
Audet throws an elbow that misses.
Audet misses with a knee to the head.
Hide blocks a knee to the body. He'll have a nicely bruised forearm in the morning.
Audet is pressed up against the cage. Hide has hold of a leg and is looking to drag Audet down to the mat. Audet avoids the attempt though and has circled away. We're back to striking at a distance.
That's three failed takedown attempts in the round for Herbie Hide. That's going to take a lot out of him.
Audet clinches but Hide breaks the clinch
and Hide holds on and brings the fighters into a clinch.
Hide takes a knee to the side of the body.
Audet with the Thai clinch. He's looking to land a big knee but he's not managed it this time.
Hide fails to pull the fight into his guard.
Audet throws a knee to the head but misses.
Audet connects with a nasty looking knee right to Hide's face.
Hide wants to break free. God knows he wants to breaaaak freeee.
Audet trying to stall but Hide improves his position.
Hide wants to strike at distance but he can't break free of the clinch.
Hide is trying to slow down the pace of the fight but Audet is keeping busy.
That's two minutes gone in the round.
Hide is trying to drag Audet to the mat but Audet just about manages to keep his footing. He used the cage to his advantage there.
Hide is looking to control Audet's arms but Audet gets an underhook and turns him. Now Hide has his back to the cage.
Hide working hard to break the clinch.
Hide has hold of a leg and is looking for a trip takedown. Audet avoids it nicely though and we remain in the clinch.
Audet effectively controlling the action here.
Audet lands an elbow inside that Hide shrugs off.
Audet prevents Hide from breaking the clinch.
Audet tries to land a knee to the body but he is off balance and Hide avoids it.
Hide blocks an elbow strike from Audet.
Audet stops a takedown attempt from Hide.
Hide blocks an elbow strike.
Audet trying to stall but Hide improves his position.
Hide blocks a knee to the body. He'll have a nicely bruised forearm in the morning.
Hide is trying to push Audet away but Audet has him pressed against the cage, so he's going nowhere.
Audet missing with knees to the body.
Audet with an attempt at a knee that misses.
Hide manages to break the clinch.
Audet takes a jab right on the nose. That must have hurt but he shrugs his shoulders and looks to return the favor.
Hide swings and misses with a hook to the body.
That's three minutes gone in the round.
Hide uses good footwork to get in and out, landing a nice hook.
Hide lands a two punch combo.
Hide lands with an uppercut that bounces Audet off the cage and back into rage.
Hide scores with a jab to the body.
Audet falls off balance throwing a combination
and Hide counters with a shoot takedown into half guard.
The referee calls for the fighters to work.
Hide decides to stand and escape the position.
Hide shoots in from a long way out. He's driving through with the takedown attempt and he eventually gets it, landing in Audet's guard.
Hide loading up with the ground and pound but he's missing more than he's landing in this flurry.
That's four minutes gone in the round.
Hide in full guard, throwing the ground and pound. No damage this time.
The ref warns both fighters not to hold the cage as they work up against the meshing.
Hide trying to control the position from guard on top but Audet is wriggling around, looking for whatever he can.
Hide is trying to work a guillotine from the top, or something like that? Don't know how he thinks he's going to get a finish from there.
Hide throwing shots from guard but he's hitting more mat than opponent.
Audet controlling Hide's posture.
Hide trying to stand up but can't free himself from Audet's guard.
And that's the end of the fight!
Herbie Hide showed his dominance in that final round.
I think Hide has won this one but let's see what the judges have to say. Over to the ring announcer for the scorecards.
Ladies and gentlemen, after 3 rounds of action, we go to the scorecards for a decision.
Judge Ian Loll scores the fight 29:28
Judge Alec Ball scores the fight 30:28
Judge William Peck scores the fight 30:28
In favor of your winner, by unanimous decision... Herbie Hide!
|
|
|
|
|
|
|
|
|
|
|
|
|
|
|
|
|
|
|
|
|
|
|
| S |
C
A |
G |
S |
C
B |
G |
|
S |
C |
G |
|
energy
A | B |
|
hype
A | B |
|
pop
A | B |
|
mgr
A | B |
|
FIGHT
RATING
56% |
|
|
|
|
|
|
