|
|
PBP Commentary |
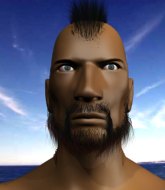
Coming up we have a bantamweight MMA rules bout between John Matua (ranked 0 p4p, 0 weight class) and Aoki Aomi (ranked 0 p4p, 0 weight class). The crowd giving both fighters a great reception on their way into the arena. That's good to see.
 |
|
 |
| 194 cm
24
135 lbs
1 - 3 - 0 |
|
170 cm
25
135 lbs
0 - 1 - 0 |
BJJ Blue Belt
Basic striking
Good chin |
|
BJJ Brown Belt
Basic striking
Experienced |
|
| |
|
Ladies and gentlemen. This fight is 3 rounds, in the bantamweight division.
Introducing the fighter to my left, fighting out of the red corner.
With a record of
1 - 3 - 0, fighting out of Helsinki, John Matua!
And introducing the fighter to my right, fighting out of the blue corner.
With a record of
0 - 1 - 0, fighting out of Helsinki, Aoki Aomi!
The judges for this bout are Marco Blurström, Tarja Halkonen and Matti Vanhoillinen.

The bell rings for round one and we are underway!
Matua tries a head kick but it misses.
Aomi shoots in for a takedown but Matua shows good takedown defense.
Matua throws a nice looking combination but Aomi bobs and weaves to avoid any damage.
Matua pulls out of a head kick attempt.
Matua really does look like a pencil wearing a pair of gloves. Let's hope he has a gameplan to suit that ridiculous body shape.
Nice takedown defense from Matua. No joy for Aomi on that attempt.
Aomi on the wrong end of a nice jab.
Aomi is looking to take this fight into the clinch.
Aomi blocks a head kick by Matua.
Aomi scores with a nice strike.
Matua avoids the clinch attempt nicely.
Aomi fails in his attempt to clinch.
Aomi fails with an attempt to clinch.
Aomi fails with a takedown attempt from distance.
John Matua has stuffed three takedown attempts in the round now. That's going to take a lot out of Aoki Aomi.
Aomi tries to clinch up.
Aomi looks frustrated there after his takedown attempt is stuffed easily.
Matua misses with a half-hearted attempt at a head kick.
Aoki Aomi seems to be the more aggressive standup fighter in this bout.
Matua throws a right high kick that is partially blocked by Aomi.
Aomi on the wrong end of a nice jab.
Matua throws a head kick that misses.
Matua tries a switch kick but it misses it's target.

That's one minute gone in the round.
Matua pulls out of a head kick attempt.
Matua lands a head kick!
Aomi is looking to take this fight into the clinch.
Aomi checks a low kick. Bone on bone - not my idea of a good time.
A combination from Matua does no damage.
A left and a right from Aomi both land. Nice combination.
Matua tries to land a front kick but Aomi steps back. That was a bit too telegraphed.
Matua throws a right hand that Aomi ducks under and follows up with a left that Aomi also avoids with ease.
Matua tries a head kick but it misses.
Matua circles away from the clinch attempt.
Left hook, right uppercut from Matua.

Matua has taken the fight to the clinch.

Matua breaks from the clinch.
Matua misses with a series of wild punches.

Aomi feints and then dives in with a takedown. That was a long way out but the feint bought him enough time to close the distance and complete the takedown. Now we'll play guard for a bit and see who can get the better of that position.
Matua wants to get back to his feet but Aomi is in a dominant position and won't allow it.
Matua is breathing heavily.

That's two minutes gone in the round.

Aomi has gone for a leg lock! Matua slips out almost immediately though and dives into Aomi's guard.
Aomi has a closed guard, preventing Matua from standing up.
Aomi looking for submissions from the bottom here. Moving his hips around, possibly looking for an armbar.
This has been an exciting period of action!
Matua would like to get this fight back to the feet but can't get free from the closed guard.
Aomi escapes his hips to the side and looks to be working for an armbar. Matua gives him a little smile and shakes his head. No chance.

That's three minutes gone in the round.
Matua wants to stand but Aomi is controlling his posture from full guard.
Aomi looking for submissions from the bottom but instead Matua passes into half guard.
Matua tries to stand but can't do so whilst Aomi controls his leg.
Aomi looking to work for a kimura from the bottom.

Matua postures up and decides to stand up, from the half guard. The ref calls for Aomi to stand up.

That's four minutes gone in the round.
The crowd are showing their displeasure at the lack of action as loud boos ring out around the arena.
Matua scores with a three punch combo!
Aomi takes a head kick and shrugs it off.
Matua fails to land with the punch combination there - jab, cross, hook, miss, miss, miss.
Aomi closes the distance looking to clinch
and Matua counters with a two punch combo.
John Matua is looking to keep the fight on the feet at all costs.
Aomi tries to grapple but his opponent circles
and Matua counters with a nice low kick that buckles Aomi's knee momentarily.
Matua lands with a kick to the temple. Aomi shrugs as if to say "is that all you've got?"
Matua throws a jab, cross combination which is slipped
and Aomi counters with a three punch combo that has Matua backing up. Matua nods at Aomi to acknowledge the strikes.
Matua misses with a double jab.
Aomi with a poor takedown
and Matua counters with a quick right hand to the jaw.
Aomi closes the distance but Matua moves to the side
and Matua finishes the little exchange by landing a big kick to the body.
The crowd applaud the fighters efforts here as the round comes to an end.
Matua tries a switch kick but it misses it's target.
And thats the end of the round the fighters go back to their corners.
John Matua dominated that round.
That's time! Back to the action!

Some wild striking there from Aomi.
Matua throws a right and a left that both miss.
Matua throws a wild combination but nothing lands.
Aomi tries to clinch but Matua moves away
and Matua counters with a nice leg kick.
Aomi darts in trying to clinch
and Matua counters with a nice body kick.
Aomi misses with a takedown
and Matua counters with a series of strikes. Aomi will be more careful next time no doubt.
Aomi darts in trying to clinch
and Matua counters by moving into the clinch.
Matua breaks the clinch and we're back to striking at distance.
Matua lands with a head kick! That's gotta hurt.
Both fighters are absolutely exhausted here.
Aomi tries to grapple but his opponent circles
and Matua counters with a flying knee. Nice.
That's one minute gone in the round.
Matua throws a head kick that misses.
Matua throws a combination but comes up with nothing but fresh air.
Matua tries a switch kick but it misses it's target.
Left hook, right uppercut from Matua.
Matua throws a combination but it was largely blocked by Aomi.
Matua lands with a two punch combination before moving back out of range.
Aomi looks to clinch
and Matua counters by moving into the clinch.
Aomi tries for a takedown. No joy.
Matua pushes off and circles away, back to the middle of the mat.
A head kick misses from Matua.
Matua pushing out the jab but it's not landing.
Matua misses with a head kick.
Aomi with a lazy takedown attempt
and Matua counters into the clinch. Nicely done.
John Matua has stuffed three takedown attempts in the round now. That's going to take a lot out of Aoki Aomi.
Matua breaks the clinch and we're back to striking at distance.
Aomi fails with the takedown
and Matua counters by moving into the clinch.
That's two minutes gone in the round.
Aomi tries to take the fight to the ground by pulling guard but can't manage it.
Matua breaks the clinch.
Matua scores with a straight right hand, right through his opponent's guard.
Matua fakes with a right hand and throws a good leg kick, right into the thigh. That had to hurt Aomi.
Matua takes a swing at Aomi's ribcage but misses.
Aomi with a poor takedown
and Matua counters with a quick right hand to the jaw.
Aomi swings wildly with a couple of big hooks
and Matua counters with a body kick that brings a smile to the face of both fighters.
Matua buckles his opponent's knee momentarily with a nice leg kick.
John Matua is looking to throw some combinations by the looks of things.
Matua scores with a jab to the body.
Aomi tries to clinch
and Matua counters with a two punch combo.
Aomi wants to clinch
and Matua counters by moving into the clinch.
Aomi fails to pull the fight into his guard.
Matua pushes off and circles away, back to the middle of the mat.
Aomi gets his takedown attempt stuffed easily
and Matua makes him pay by landing a nice hook to the body before moving out of range.
Crunch! Matua slams his shin into Aomi's torso.
That's three minutes gone in the round.
Aomi with a lazy takedown attempt
and Matua counters with a body kick that brings a smile to the face of both fighters.
Matua circles away from the clinch attempt
and Matua counters with a series of strikes. Aomi will be more careful next time no doubt.
Matua throws a right hand that Aomi ducks under and follows up with a left that Aomi also avoids with ease.
Matua circles away from the clinch attempt
and Matua counters into the clinch. Nicely done.
Aomi fails to pull guard.
Matua manages to break the clinch.
Aomi shoots in but doesn't get the takedown
and Matua counters with a series of strikes. Aomi will be more careful next time no doubt.
Matua throws a leg kick which misses Aomi's front leg but catches the back leg as Aomi tries to avoid it.
Aomi throws a left and a right that both miss
and Matua counters with a left and a right that stings Aomi.
Aomi wants to clinch
and Matua counters with a big head kick but Aomi shrugs it off.
That's four minutes gone in the round.
Aomi tries to grapple but his opponent circles
and Matua counters by clinching up.
Aomi is working for a takedown up against the cage. He can't get it on this occasion though.
Matua breaks the clinch and we return to the middle of the mat.
Matua throws a head kick but Aomi moves out of range.
Matua is using his reach advantage well here, landing the more effective single shots from range.
Aomi tries to grapple but his opponent circles
and Matua counters with a big head kick but Aomi shrugs it off.
Matua avoids a punch combination nicely.
Matua goes to the watering hole and comes back with a big thumbs up from the judges as he scores a three punch combo.
Aomi fails with the takedown
and Matua counters with a body kick.
Matua throws a head kick that misses.
Matua throws a nice inside leg kick.
Matua throws a head kick that misses.
And thats the end of the round the fighters go back to their corners.
John Matua dominated that second round.
The fighters' corners scream their final instructions, as the referee calls time. Here we go, back to the action! This is the final round!

Aomi wants to clinch but Matua slips to the side
and Matua cracks him with a counter punch right on the button.
Matua tries a switch kick but it misses it's target.
Aomi closes the distance looking to clinch
and Matua counters with a head kick. That will keep Aomi thinking before he tries any more sloppy attacks!
Aomi tries to clinch but fails miserably
and Matua counters with a head kick.
Matua is looking to score with low kicks.
Matua slips a jab and a cross from Aomi.
Aomi avoids a punch combination nicely.
Aomi tries to clinch up
and Matua holds on and brings the fighters into a clinch.
We've had a slow start to the round here - hopefully the action picks up.
Aomi tries to take the fight to the ground by pulling guard but can't manage it.
Aomi wants a takedown.
Aomi is trying to drag Matua to the mat but Matua just about manages to keep his footing. He used the cage to his advantage there.
John Matua has stuffed three takedown attempts in the round now. That's going to take a lot out of Aoki Aomi.
Both fighters are breathing heavily.
Matua escapes the clinch and we're back to striking.
That's one minute gone in the round.
Aomi gets cracked with a nice right hand there by Matua.
Aomi takes a head kick and keeps coming.
Matua moves into range and throws a combination. A nice jab followed by a hook to the body.
Aomi takes a kick to the side of the head.
A head kick misses from Matua.
Aomi has developed a nice purple lump on his ribcage, as a result of some heavy body kicks from Matua.
Aomi closes the distance but Matua moves to the side
and Matua counters with a good right hand that lands right on the jaw.
Matua is using his height advantage well here, landing a good percentage of his punches.
Matua misses with a straight right.
Aomi tries to grapple but his opponent circles
and Matua counters with a flying knee. Nice.
Matua lands with a thumping leg kick.
Crunch! Matua slams his shin into Aomi's torso.
John Matua is winning the standup battle so far.
Aomi gets his takedown attempt stuffed easily
and Matua makes him pay by landing a nice hook to the body before moving out of range.
Matua throws a one two combo.
That's two minutes gone in the round.
Matua throws a series of punches but Aomi avoids them all with ease.
Danga de danga de dang - Matua scores with a four punch combination!
Matua tries to land a front kick but Aomi steps back. That was a bit too telegraphed.
Matua misses with a two punch combination.
Matua circles away from the clinch attempt
and Matua counters with a flying knee. Nice.
Aomi tries to clinch
and Matua counters by clinching up.
Aomi tries to pull guard but Matua won't allow it.
Matua is pressed up against the cage. Aomi has hold of a leg and is looking to drag Matua down to the mat. Matua avoids the attempt though and has circled away. We're back to striking at a distance.
Aomi has his takedown stuffed
and Matua counters with a flying knee. Nice.
Aomi throws a head kick that misses
and Matua counters by clinching up.
Matua stops a takedown attempt from Aomi.
Matua breaks the clinch and we're back to striking at distance.
Matua is working the combinations to good effect here.
Matua throws a combination that misses
and Aomi counters with a driving takedown into guard. Nice work there by Aomi.
Matua on his back here. We all know that wrestlers don't like being on their back so let's see if Matua tries to get out of the position.
Aomi is holding a leg here, probably looking for an ankle lock - he drops back and goes for it! Matua is in trouble! Is it all over??? No! Matua has escaped and now he's on top!
That's three minutes gone in the round.
Aomi working from the bottom, still in full guard. He's managed to get a loose triangle. Matua doesn't seem to be doing much to defend here, obviously he feels comfortable in the position. Matua manages to throw the legs off his shoulder and he's back into guard - no problem.
Aomi has a loose triangle. He'll be looking to tighten that up but Matua can see exactly what he's planning and manages to posture up and free himself.
Aomi looking for a guillotine here but Matua defends easily.
Matua would like to get this fight back to the feet but can't get free from the closed guard.
That's four minutes gone in the round.
Aomi trying to keep a closed guard but Matua is proving a slippery customer.
Matua wants to stand but Aomi is controlling his posture from full guard.
Aomi has an omoplata and is looking to use it perhaps as a submission or perhaps to transition. Matua is in a bit of discomfort here, but he's managed to free himself and has dived into side control! That didn't work out too well for Aomi.
Matua decides to stand up, so the ref orders Aomi to his feet.
Aoki Aomi has stepped it up - he knows he needs a finish here!
John Matua is fighting for a decision here - he's started to take the cautious approach.
Matua looks to score with a combo but nothing lands.
And that's the end of the fight!
John Matua showed his dominance in that final round.
Well I reckon that's a shut out for Matua, winning every round. Will the judges agree? They are the ones who matter, even if they are often depressingly incompetent. Over to the ring announcer for the scorecards.
Ladies and gentlemen, after 3 rounds of action, we go to the scorecards for a decision.
Judge Marco Blurström scores the fight 30:26
Judge Tarja Halkonen scores the fight 30:26
Judge Matti Vanhoillinen scores the fight 30:27
In favor of your winner, by unanimous decision... John Matua!
|
|
|
|
|
|
|
|
|
|
|
|
|
|
|
|
|
|
|
|
|
|
|
| S |
C
A |
G |
S |
C
B |
G |
|
S |
C |
G |
|
energy
A | B |
|
hype
A | B |
|
pop
A | B |
|
mgr
A | B |
|
FIGHT
RATING
58% |
|
|
|
|
|
|

