|
|
PBP Commentary |
Coming up we have a featherweight MMA rules bout between Kenshin Batusai (ranked 0 p4p, 0 weight class) and Mike Durham (ranked 0 p4p, 0 weight class). Batusai comes into the arena with Step Up blaring out of the sound system. Durham has chosen Go WhiteBoy Go! - T-Bo ft S.C.C. as his entrance music, which hasn't gone down very well with the crowd. Mike Durham told me before the fight that he's been watching a lot of DVDs so let's see if that helps him in this one! I can't wait to find out!
 |
|
 |
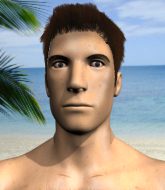
| 175 cm
20
150 lbs
4 - 3 - 0 |
|
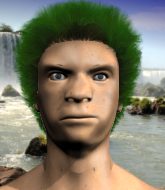
170 cm
19
154 lbs
3 - 0 - 0 |
BJJ Purple Belt
Decent elbows
Very strong |
|
Good takedowns
Basic striking
Granite chin |
|
| |
|
Ladies and gentlemen. This fight is 5 rounds, for the featherweight championship of the world!
Introducing the champion to my left, fighting out of the red corner.
With a record of
4 - 3 - 0, fighting out of Hilo, Kenshin Batusai!
And introducing the challenger to my right, fighting out of the blue corner.
With a record of
3 - 0 - 0, fighting out of Hilo, Mike Durham!
The judges for this bout are , and .

The bell rings for round one and we are underway!
Durham connects with the punch.

Durham is looking for a takedown here. He's shot in and has managed to get it, finishing up in Batusai's half guard.
Durham is looking to take a break and control but Batusai is keeping him honest, looking to work from the bottom.
Durham looking to pass the half guard. Not this time.
Durham thows a big elbow that misses, also allowing Batusai to regain full guard.
The fighters are trapped in the ropes so we're going to have a reposition here. The ref calls for a break and repositions the fighters in the center of the ring.
Durham throws a strike but Batusai rolls with it and manages to sweep. Now he's in guard on top.

Batusai gets to his feet and steps away from his opponent.

That's one minute gone in the round.
Batusai takes a shot to the body in his stride.
Durham throws the overhand right but ducks down into a quick takedown attempt. Batusai was covering up waiting for the punch and Durham finishes the takedown easily into guard.
The fighters are tangled up in the ropes here. We might need a restart if the fighters can't break free themselves.
Durham postures up in Batusai's guard and throws a big left but Batusai blocks it.
Durham must be cautious of submissions here, given that his opponent has the superior Jiu Jitsu.
Batusai keeping full guard, as Durham tries to pass.
Batusai pushes Durham off and scrambles back to his feet.
Durham looks for a takedown but Batusai sprawls well.

That's two minutes gone in the round.
Batusai stuffs a takedown. It's all about dictating where the fight takes place and Batusai wants it to stay on the feet.
Durham misses with a takedown attempt. He shot from a bit too far out.
Kenshin Batusai has stuffed three takedown attempts in the round now. That's going to take a lot out of Mike Durham.
Batusai tries to clinch but Durham moves out of range.
Durham scores with a nice head shot.
Durham shoots in for a takedown. "Ole!" shouts Batusai as he jumps to the side.
Kenshin Batusai is looking to keep the fight on the feet at all costs.
Durham shoots in for a takedown but Batusai shows good takedown defense there and keeps this one on the feet.
Batusai displays some good footwork, moving neatly out of range as Durham throws out the jab.
Durham lands a really nice looking cross but Batusai seems unphased.

That's three minutes gone in the round.
Durham throws a jab when Batusai was well out of range.
Batusai displays good takedown defense there as he swats away a double leg from Durham.
Batusai stuffs a takedown. It's all about dictating where the fight takes place and Batusai wants it to stay on the feet.
Batusai ducks under an overhand right and circles away with a smile on his face.
Batusai moves out of range as Durham strikes.
Batusai stuffs a takedown. It's all about dictating where the fight takes place and Batusai wants it to stay on the feet.
Batusai wants to clinch up but Durham keeps it at a distance.
Durham connects with a nice looking jab.
Batusai tries to close the distance and clinch up but Durham swats him away and circles back towards the center.
Durham shoots in with a takedown attempt and he has Batusai pinned against the cage. Batusai gets the underhooks and manages to circle away.
Batusai tries to close the distance and clinch up against the ropes but Durham paws at him with a jab and circles away.

That's four minutes gone in the round.
A lull in the action here being met with boos from the crowd.
A swing and a miss from Durham.
Durham misses with a takedown attempt - Batusai sprawls well and throws a nice strike on the way out which just misses.
Batusai stuffs the takedown.
Durham throws a looping left and ducks down for a takedown. He's got his arms around Batusai's waist but Batusai gets an underhook and avoids the takedown by throwing Durham off to one side.
Durham looks frustrated there after his takedown attempt is stuffed easily.
Durham shoots in looking for a takedown. Batusai tries to sprawl out of it but Durham keeps driving through. The fighters are pinned against the ropes. Batusai manages to get underhooks and after a bit of a struggle, circles away and we're back to standing.
Durham looks gassed!
Durham fails with a rather predictable takedown attempt.
And thats the end of the round the fighters go back to their corners.
That was a close round but I would say that Kenshin Batusai will probably get the nod.
The referee calls time. The cornermen exit stage left and we're back to business.

Batusai tries to clinch but Durham is having none of it.
Batusai wants to clinch.
Batusai is looking to take this fight into the clinch.
Nice straight punches there by Durham. You know Roy Jones Jr respects the hands of Durham.
Durham bobs and weaves into range and then changes levels and scores with a nice takedown into side control.
Durham trying to control the position but Batusai is working away.
Batusai is trying to stand back up. He's worked his way up against the ropes but Durham has just dragged him back down to the mat.
That's one minute gone in the round.
Durham wants to control but Batusai is keeping him busy.
The strikes coming from Durham are missing the target in this wave of attacks.
The ground and pound from Durham seems to be hitting the mat more than his opponent.
Durham throws an elbow but Batusai slips to the side and avoids it well.
The strikes coming from Durham are missing the target in this wave of attacks.
Durham misses with an attempted head punch from side control.

Neither fighter is doing enough for the referee's liking and he's decided to stand them back up.
Batusai looks shocked there as he takes a right hand to the temple.
Durham lands a head shot.

Batusai gets in close and instigates a clinch.
Batusai lands a damaging elbow.
Batusai misses with an elbow over the top.
That's two minutes gone in the round.
There's not a lot going on here and the crowd are letting the fighters know they're not willing to tolerate a lack of action.
Durham avoids a wild elbow strike from Batusai.
Batusai pushes off an throws an elbow but Durham leans to the side and avoids it. We're back to clinching against the ropes.
Batusai throws an elbow but it's blocked.
Durham takes an elbow to the temple.
Batusai is looking to score with knees to the body. Maybe he'll change it up and go body then head. Durham is defending well for now.
Durham blocks the elbow strike.
Batusai lands a nice elbow from the clinch.
Durham takes an elbow to the temple.
Batusai throws an elbow that misses.
A nice glancing elbow lands by Batusai.
Durham on the defensive, avoiding the knees to the body.
That's three minutes gone in the round.
Batusai lands a nice elbow.
Batusai throws an elbow that misses.
Durham blocks an elbow strike.
Durham takes an elbow to the forehead.
Batusai misses the knee to the body. Nice hip positioning from Durham.
Durham is trying to drag Batusai to the mat but Batusai just about manages to keep his footing. He used the ropes to his advantage there.
Batusai lands an elbow that stopped Durham in his tracks for a moment.
Batusai lands an elbow inside.
That's four minutes gone in the round.
The crowd are showing their displeasure at the lack of action as loud boos ring out around the arena.
Batusai lands a glancing elbow in the clinch.
Batusai lands an elbow inside that Durham shrugs off.
Durham drops to a knee looking for a takedown but Batusai gets the underhooks and prevents it.
Batusai misses with an elbow over the top.
Batusai creates a bit of distance and throws an elbow that only just misses.
Batusai is looking to score with knees to the body. Maybe he'll change it up and go body then head. Durham is defending well for now.
Batusai misses with an elbow over the top.
Boooooooooooooooooooo!!! God, this has been a terrible round. Come on you two, sort yourselves out!
Durham avoiding damage as Batusai throws knees to the body.
Batusai prevents a takedown attempt there.
Kenshin Batusai has stuffed three takedown attempts in the round now. That's going to take a lot out of Mike Durham.
Durham avoids a wild elbow strike from Batusai.
And thats the end of the round the fighters go back to their corners.
A close second round but Mike Durham will probably get the nod - 10:9.
The minute break is over - no more time for sponges and pep talks - back to the action!

Batusai has his head snapped back a nice jab. A little nod from Batusai there as he acknowledges the shot.
Durham scores with a punch to the head.
Batusai fails in his attempt to clinch.
Batusai tries to move into range but Durham moves to the side and lands with a nice right hand.
Durham will have to do better than that with his takedown attempts.
Durham feints and then dives in with a takedown. That was a long way out but the feint bought him enough time to close the distance and complete the takedown. Now we'll play guard for a bit and see who can get the better of that position.
Batusai kicks Durham off and gets to his feet.
Batusai wants to clinch.
Durham shoots in for a takedown - he's clinched up with Batusai but Batusai pushes him off and we're back to square one.
The fight stays on the outside here - Batusai looks like he's thinking about clinching though.
That's one minute gone in the round.
Durham keeps the fight on the outside.
Durham fails with a takedown attempt from distance.
Kenshin Batusai has stuffed three takedown attempts in the round now. That's going to take a lot out of Mike Durham.
Durham shoots in but no luck this time.
Durham shoots in for a takedown but Batusai shows good takedown defense.
Batusai is looking to clinch but Durham is avoiding it.
Durham looks to land a right hand but Batusai moved out of range.
Durham fails with a takedown attempt.
A left lands for Durham.
That's two minutes gone in the round.
The crowd are hurling abuse towards the fighters... You can hardly blame them though because there isn't a lot going on in the fight.
Durham looks frustrated there after his takedown attempt is stuffed easily.
Batusai avoids the body shot from Durham.
Durham looks for a takedown but Batusai sprawls well.
Durham misses the jab.
Durham shoots in for a takedown. "I don't think so" says Batusai as he avoids it easily.
Durham swings for the body but Batusai moves out of range.
Batusai is looking to clinch.
Durham lands a jab.
Batusai tries to clinch up.
That's three minutes gone in the round.
Batusai takes a shot right to the liver - Bas would have been proud of that punch.
Batusai stuffs the takedown.
Durham will have to do better than that with his takedown attempts.
Mike Durham seems to be the more aggressive standup fighter in this bout.
Durham takes a big intake of breath there - he's definitely tired.
Durham ducks down and throws a hook to the body but Batusai moves away.
Durham fails miserably with a takedown attempt.
Durham changes levels and drives through with a really nice takedown into side control. Batusai looks really pissed at himself for not defending that better.
Durham is looking to take a break and control but Batusai is keeping him honest, looking to work from the bottom.
Batusai is pushing Durham's head away, looking to escape. Durham manages to hold on to the position though.
That's four minutes gone in the round.
Batusai parries the strikes from Durham easily there. Durham is wary of posturing up too much because it might enable Batusai to escape.
Batusai defending against the ground and pound.
Durham misses with a strike but at least he's keeping busy, looking to cause some damage - that will still help him when it comes to the judges scorecards.
Durham is looking to take a break and control but Batusai is keeping him honest, looking to work from the bottom.
Durham with the ground and pound but Batusai regains half guard under the barage of strikes.
The crowd thankful this round is nearly over.
Batusai blocking the ground and pound attempt from Durham.
Neither fighter is doing enough for the referee's liking and he's decided to stand them back up.
Durham shoots in for a takedown but doesn't get it.
And thats the end of the round the fighters go back to their corners.
A close third round but Mike Durham just about did enough to take it.
The corners get their ten second warning. Both fighters stand from their stools and stare eachother down, ready to get back to the action.

Batusai closes the distance and presses his opponent up against the ropes.
Batusai lands a glancing elbow in the clinch.
Batusai lands an elbow that stopped Durham in his tracks for a moment.
Batusai creates a bit of space for himself and sneaks an elbow through Durham's defenses.
Durham drops down looking for an ankle pick but Batusai pulls his leg out and moves away.
Durham fakes high and shoots in for a takedown but Batusai avoids it really well and circles away.
We've had a slow start to the round here - hopefully the action picks up.
Durham shoots in for a takedown from distance. He catches Batusai napping and manages to drive through into side control!
That's one minute gone in the round.
Durham tries to advance position but instead Batusai slips a leg back in to half guard.
Batusai is trying to stand up here but Durham is controlling him well.
Durham is pressing down on Batusai's thigh, looking to free his foot. Batusai is holding on for now.
Durham trying to control from half guard but Batusai is working away.
Batusai looks like he's trying to stand up.
Batusai keeping his head moving to avoid the ground and pound.
That's two minutes gone in the round.
The crowd are getting on the fighters' backs, as the pace has dropped off in the last minute or so.
Durham trying to control from half guard but Batusai is working away.
Batusai is looking to escape.
The referee decides to stand the fighters back up.
Durham shoots in but Batusai avoids the takedown attempt easily.
Kenshin Batusai has stuffed three takedown attempts in the round now. That's going to take a lot out of Mike Durham.
Durham shoots in for a takedown - he's clinched up with Batusai but Batusai pushes him off and we're back to square one.
Durham is absolutely dripping with sweat - he looks exhausted.
Batusai is looking to clinch but Durham is avoiding it.
Batusai moves in looking to clinch but Durham pushes him off.
Durham throws the left hand but Batusai avoids the punch easily.
That's three minutes gone in the round.
Durham gets a takedown into half guard.
Batusai taking some punishment here, with Durham in his half guard.
Durham slows the pace down in half guard.
Durham thows a huge punch but Batusai dodges it nicely.
Durham wants to pass the guard but Batusai is defending well.
Durham sitting and controlling from the half guard.
That's four minutes gone in the round.
Durham is looking to advance position but Batusai won't allow it.
Durham wants to lay and pray for a moment but Batusai keeps working.
Neither fighter is being very active at the moment, with Durham in particular looking to stall.
The crowd thankful this round is nearly over.
Durham looking to pass the half guard. Not this time.
Durham thumps the canvas. Not on purpose obviously - he just missed Batusai's head.
And thats the end of the round the fighters go back to their corners.
Mike Durham dominated that fourth round.
The minute break is over - no more time for sponges and pep talks - back to the action! This is the final round!

No luck with that takedown attempt from Durham.
Durham misses with a takedown attempt. He shot from a bit too far out.
Durham misses with a wild body shot.
Durham looks for a takedown but Batusai sprawls well.
Kenshin Batusai has stuffed three takedown attempts in the round now. That's going to take a lot out of Mike Durham.
Durham fails to land the takedown.
We've had a slow start to the round here - hopefully the action picks up.
Batusai doesn't manage to clinch there - Durham circles away.
Durham is wobbling all over the place through exhaustion. Will he make it to the final bell?
Batusai doesn't manage to clinch there - Durham circles away.
That's one minute gone in the round.
Batusai defending well as Durham loads up on a big left hand.
Horrible takedown by Durham or perhaps it was just good defense by Batusai which made him look bad.
Durham closes this distance looking for a takedown but Batusai circles away.
Durham misses with a body shot.
Batusai defends well against a solid takedown attempt from Durham.
Batusai wants to clinch.
Durham swats away the attempt to clinch by Batusai.
Batusai ducks under a wild hook from Durham.
That's two minutes gone in the round.
The crowd are showing their displeasure at the lack of action as loud boos ring out around the arena.
Durham gets the takedown into side control.
Batusai is looking to work his way out of this bad position but Durham is controlling him well.

Durham swings around for an armbar but Batusai sees it coming a mile off and turns beautifully into Durham's guard.
Durham working a defensive guard but Batusai manages to pass into side control anyway.
Durham is trying to control Batusai's posture but Batusai avoids it.
That's three minutes gone in the round.
Batusai wants to stand but Durham is controlling his arm.
Batusai stands up and beckons Durham to his feet.
That's four minutes gone in the round.
The crowd are showing their displeasure at the lack of action as loud boos ring out around the arena.
The fight stays on the outside here - Batusai looks like he's thinking about clinching though.
Durham throws a hard body shot but it just misses.
Durham gets a takedown into half guard.
Durham misses with a head shot. Batusai uses the momentum to regain guard.
The crowd thankful this round is nearly over.
Durham working some strikes from top position.
And that's the end of the fight!
I would just about give that final round to Mike Durham.
I think Durham has won this one but let's see whether the judges agree with me. Over to the ring announcer for the scorecards.
Ladies and gentlemen, after 5 rounds of action, we go to the scorecards for a decision.
Judge Andi Peters scores the fight for Mike Durham!
Judge Gordon Ramsey scores the fight for Mike Durham!
Judge Frank Skinner scores the fight for Kenshin Batusai!
Mike Durham wins by split decision!
Mike Durham is the new featherweight champion!
|
|
|
|
|
|
|
|
|
|
|
|
|
|
|
|
|
|
|
|
|
|
|
| S |
C
A |
G |
S |
C
B |
G |
|
S |
C |
G |
|
energy
A | B |
|
hype
A | B |
|
pop
A | B |
|
mgr
A | B |
|
FIGHT
RATING
34% |
|
|
|
|
|
|
