|
|
PBP Commentary |
Coming up we have a welterweight MMA rules bout between Sendo Takeshi (ranked 0 p4p, 0 weight class) and Dylan Dunham (ranked 0 p4p, 0 weight class). Takeshi comes to the cage accompanied by 2Pac - Hit 'Em Up. Sendo Takeshi has the edge in experience - let's see if he can make that count tonight.
 |
|
 |
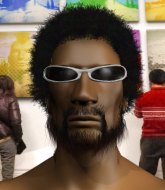
| 180 cm
27
185 lbs
5 - 2 - 0 |
|
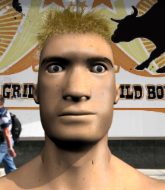
180 cm
21
175 lbs
1 - 1 - 0 |
BJJ Blue Belt
Excellent boxer
Very strong |
|
Good wrestler
Decent boxing
Powerful |
|
| |
|
Ladies and gentlemen. This fight is 3 rounds, in the welterweight division.
Introducing the fighter to my left, fighting out of the red corner.
With a record of
5 - 2 - 0, fighting out of Helsinki, Sendo Takeshi!
And introducing the fighter to my right, fighting out of the blue corner.
With a record of
1 - 1 - 0, fighting out of Helsinki, Dylan Dunham!
The judges for this bout are Roosa Järviläinen, Ben Zyskovitsi and Marco Blurström.

The bell rings for round one and we are underway!
Takeshi displaying good standup as he scores with a three punch combination.

It looks like Dylan Dunham has been cut.
Takeshi misses with a wild combination.
Dunham defending well as Takeshi loads up on a big left hand.
Takeshi lands a right hook to the body.
Takeshi misses with a body shot. Nice footwork from Dunham.
Takeshi misses with the combination.
Takeshi fakes a head shot and lands one to the body.
Takeshi ducks under a wild hook from Dunham.
Takeshi connects nicely with a jab. Noted by the judges no doubt.
Takeshi misses with a jab, cross combination.
Takeshi misses with a series of wild punches.
Dunham avoids a punch combination nicely.
Takeshi keeps the fight standing with a nice sprawl.

That's one minute gone in the round.
Dunham fails to land the takedown.
Takeshi throws a one two combo.
Takeshi throws a hook to the side of Dunham's head but Dunham sees it coming and ducks under it beautifully.
Takeshi misses with a double jab.
The crowd cheers as Takeshi lands an impressive looking overhand right. Dunham doesn't seem phased though.
Donk. Takeshi catches Dunham right on the button with a cross.
Takeshi looks to land a right hand but Dunham moved out of range.
Takeshi looks to land a combination but Dunham avoids it well.
Dunham blocks a jab.
Dunham takes a body punch that cleary hurt but he's trying not to show any weakness.
Dunham changes levels and looks for a double leg takedown. Takeshi tries to avoid it but Dunham manages to keep hold of a leg and drag Takeshi to the ground. Takeshi escapes though and pops straight back up to his feet.
Sendo Takeshi has stuffed three takedown attempts in the round now. That's going to take a lot out of Dylan Dunham.
Takeshi misses with a looping left.

That's two minutes gone in the round.
Takeshi tries to bum rush Dunham with a series of wild strikes but Dunham uses good footwork to avoid the assault.
Takeshi throws a nice looking combination but Dunham bobs and weaves to avoid any damage.
Takeshi throws a combination but it was largely blocked by Dunham.
Takeshi fakes high and swings low for a body shot but Dunham manages to avoid it.
Some wild striking there from Takeshi.
A telegraphed takedown attempt from Dunham is defended easily by Takeshi.
Dunham takes one on the button.
Takeshi scores with a nice right hand.
Dunham misses with a looping right.
Sendo Takeshi is looking to keep the fight on the feet at all costs.
Takeshi fakes high and swings low for a body shot but Dunham manages to avoid it.
Takeshi swings wildly with a right hand that was never going to find it's target.

That's three minutes gone in the round.
Dunham shoots in for a double leg but Takeshi sprawls well. That's going to sap some energy.
Takeshi lands with a shot to the body.
Dunham shoots in with a takedown attempt and he has Takeshi pinned against the cage. Takeshi gets the underhooks and manages to circle away.
Nice uppercut lands for Dunham. That snapped Takeshi's head back.
Takeshi throws a right and a left that both miss.
Takeshi lands three nice shots there - that looked like it hurt!
Takeshi throws out a loose jab but Dunham uses good head movement to avoid it.
Takeshi misses with a series of wild punches.
Dunham shoots in for a double leg but Takeshi sprawls well. That's going to sap some energy.
Takeshi throws a hard body shot but it just misses.
Takeshi misses with a wild body shot.

That's four minutes gone in the round.
Dunham closes the distance and takes a jab right on the nose as he does so.
Takeshi throws a body punch but Dunham moves out of range.
Takeshi tries to land with a swinging hook to the body but Dunham was well out of range. Poor timing from Takeshi.
Takeshi misses with a wild combination.
Takeshi fails to land with the punch combination there - jab, cross, hook, miss, miss, miss.
Dunham moves out of range of the strikes.
Dunham dodges the punch combination from Takeshi.
Dunham shoots in and drives through. Takeshi sprawls well.
Takeshi looks to score with a jab to the body but Dunham is just out of range.
Takeshi rushes forward with a series of wild hooks but Dunham moves out of range and avoids them all easily.
Takeshi slips under a jab from Dunham.
Dunham drops his hands and takes a jab to the jaw for his troubles.
And thats the end of the round the fighters go back to their corners.
Sendo Takeshi dominated that round.
The cut man is working on Dylan Dunham's cut.
That's time! Takeshi's corner gives him a slap on the ass as he gets ready to fight.

Takeshi throws a lazy right hand but Dunham sees it coming a mile off and sidesteps it easily.
Dunham takes a step back and watches a body kick go sailing past his mid section.
Dunham lands an overhand right.
Takeshi lunges in with an uppercut that skims his opponent's chin.
Dunham throws a looping left and ducks down for a takedown. He's got his arms around Takeshi's waist but Takeshi gets an underhook and avoids the takedown by throwing Dunham off to one side.
Dunham moves out of range of the strikes.
Takeshi stuffs the takedown.
Takeshi rushes forward with a series of wild hooks but Dunham moves out of range and avoids them all easily.
This fight brought to you by 5M nutrition - it's mmmmm tasty. Nice jab by Takeshi.
Takeshi leaves Dunham with his face pressed against the mat as he sprawls beautifully, defending against a solid takedown attempt.
Sendo Takeshi has stuffed three takedown attempts in the round now. That's going to take a lot out of Dylan Dunham.
A telegraphed takedown attempt from Dunham is defended easily by Takeshi.
Takeshi throws a hook to the side of Dunham's head but Dunham sees it coming and ducks under it beautifully.
That's one minute gone in the round.
Dunham is trying hard to land a takedown here. Takeshi sprawls well and keeps this one on the feet.
Takeshi misses with a hook.
Takeshi swings for the body but Dunham moves out of range.
Dunham looks for a takedown here. Will he get it? Takeshi is fending him off so far but Dunham persists. Nope, Takeshi circles away and we're back to standing.
Takeshi sizes up Dunham with a pawing jab and scores with a straight right down the middle.
Takeshi throws a hook to the body but it doesn't connect.
Dunham fails with a takedown attempt.
Takeshi paws at his opponent with the jab and then lunges in with a straight, right on the button.
Takeshi closes the distance and lands a one-two.

Dunham shoots in and scores a nice double leg takedown into half guard.
Dunham thows a wild elbow that connects with the canvas.
That's two minutes gone in the round.
Takeshi avoiding damage under a succession of punches from Dunham.
Dunham not landing any meaningful shots this time.
Dunham passes the guard and advances to mount!
Takeshi blocking the ground and pound.
Takeshi knows he needs to get back to his feet asap. He's simply no match for Dunham on the ground.
That's three minutes gone in the round.
Dunham looking to finish Takeshi with some ground and pound. This is bad for Takeshi!
Dunham punishing his opponent with strikes.
Dunham postures up and cracks his opponent a couple of times before moving back into close ground control. Takeshi looks a forlorn figure.
Dunham throwing shots from mount but they're not landing.
Dunham throws an elbow from mount that misses. Lucky escape for Takeshi because Dunham loaded up on that one.
Dunham trying to control but he's not successful this time.
Dunham scores with a couple of good head shots there.
That's four minutes gone in the round.
Dunham sitting in mount, just looking to control for the moment.
Takeshi is not a happy chappy
he wants out of there.
Dunham can't quite control the action as he would like just now, as Takeshi is looking to escape.
Dunham throws some wild stikes that Takeshi manages to avoid easily.
And thats the end of the round the fighters go back to their corners.
Dylan Dunham showed his class in that round. I'd imagine he'll take it on all the scorecards.
The cut man is working on Dylan Dunham's cut.
That's the end of the round. The referee orders the cornermen out of the cage so we can get back down to business. Ladies and gentlemen, this is the final round!

No luck for Dunham with that takedown attempt.
Dunham loads up on a big right hand but Takeshi slips the punch.
Dunham moves his head to the side to avoid a jab but walks straight into a cross.
Dunham displays some good footwork, moving neatly out of range as Takeshi throws out the jab.
Takeshi lunges in with swinging rights and lefts but Dunham circles away quickly and effectively.
Takeshi swings for the body but Dunham moves out of range.
Takeshi lands a jab followed by a nice looking cross.
Dunham shoots in for a takedown from distance. He catches Takeshi napping and manages to drive through into side control!
Dunham wants to lay and pray for a moment but Takeshi keeps working.
Takeshi is pushing Dunham's head away, looking to escape. Dunham manages to hold on to the position though.
That's one minute gone in the round.
Dunham working the ground and pound.
Takeshi dodges the ground and pound from Dunham.
Takeshi takes an elbow right on the bridge of the nose and winces in pain.
Dunham trying to control the position but Takeshi is working away.
Dunham lands a decent elbow from side control.
Takeshi managing to avoid any damage from the strikes thrown by Dunham.
Dunham working the ground and pound.
That's two minutes gone in the round.

Dunham thinks about going for a far side armbar but bails out and retains the dominant position instead.
Dunham is looking to take a break and control but Takeshi is keeping him honest, looking to work from the bottom.
Dunham misses with a strike but at least he's keeping busy, looking to cause some damage - that will still help him when it comes to the judges scorecards.
Dunham trying to control the position but Takeshi is working away.
That's three minutes gone in the round.
Dunham tries to score with some ground and pound. Takeshi controls his posture well this time though and the shots don't do any damage.
Dunham tries to cartwheel into mount but he doesn't manage it.
The ground and pound from Dunham seems to be hitting the mat more than his opponent.
Dunham scores with a couple of short elbows.
The fighters are pressed up against the cage, both looking to find a bit of space to work.
Dunham lands a knee to the body and a forearm to the face.
That's four minutes gone in the round.
The crowd are showing their displeasure at the lack of action as loud boos ring out around the arena.
Dunham throwing strikes but Takeshi manages to buck up and roll into a nice reversal - now he's on top in side control!
Dunham is looking to regain half guard here but Takeshi keeps moving and retains side control.
Dunham manages to get one leg in to regain half guard.
Dunham is looking to regain full guard. Not this time though.
Dunham has the superior BJJ but he's also working some ground strikes into his gameplan.
The crowd thankful this round is nearly over.
Dunham is persisting with the attempt to improve his position.
And that's the end of the fight!
Dylan Dunham comfortably won the final round on my scorecard.
I think Dunham has won this one but let's see whether the judges agree with me. Over to the ring announcer for the scorecards.
Ladies and gentlemen, after 3 rounds of action, we go to the scorecards for a decision.
Judge Roosa Järviläinen scores the fight 28:29
Judge Ben Zyskovitsi scores the fight 28:29
Judge Marco Blurström scores the fight 28:29
In favor of your winner, by unanimous decision... Dylan Dunham!
|
|
|
|
|
|
|
|
|
|
|
|
|
|
|
|
|
|
|
|
|
|
|
| S |
C
A |
G |
S |
C
B |
G |
|
S |
C |
G |
|
energy
A | B |
|
hype
A | B |
|
pop
A | B |
|
mgr
A | B |
|
FIGHT
RATING
26% |
|
|
|
|
|
|
