|
|
PBP Commentary |
Coming up we have a lightweight MMA rules bout between Soo Kim Yamamoto (ranked 0 p4p, 0 weight class) and ryan march (ranked 0 p4p, 0 weight class). ryan march acknowledges the crowd's support as he enters the cage.
 |
|
 |
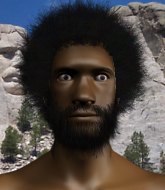
| 174 cm
20
162 lbs
0 - 0 - 0 |
|
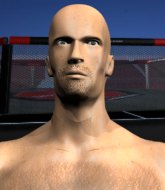
225 cm
18
154 lbs
0 - 1 - 0 |
BJJ Blue Belt
Brawler
Intelligent |
|
BJJ Blue Belt
Brawler
Solid chin |
|
| |
|
Ladies and gentlemen. This fight is 3 rounds, in the lightweight division.
Introducing the fighter to my left, fighting out of the red corner.
With a record of
0 - 0 - 0, fighting out of Los Angeles, Soo Kim Yamamoto!
And introducing the fighter to my right, fighting out of the blue corner.
With a record of
0 - 1 - 0, fighting out of Los Angeles, ryan march!
The judges for this bout are Timothy Bukovac, and .

The bell rings for round one and we are underway!

Yamamoto has march up against the cage in a clinch.
march looking for a takedown.
march fails to pull guard.

Yamamoto wants the takedown. march is fighting it off but Yamamoto persists and manages to bring the fight to the ground, ending up in march's guard against the cage.
Yamamoto is looking to work some ground and pound but march has wrist control.
Yamamoto wants to control from the top but march keeps moving.
Yamamoto pressing down on his opponent's thigh, looking to pass guard. march is keeping the position for now.
march not looking particularly offensive just at the moment.
Yamamoto chips away with some ground and pound.
Yamamoto passes march's right leg, so he's now in half guard.
Yamamoto not throwing his punches with enough precision this time.
Yamamoto looks over to his corner - he wants some instructions but his corner are not responding.
Yamamoto thumps the canvas. Not on purpose obviously - he just missed march's head.

That's one minute gone in the round.
march makes his way to full guard. A much better position for march.
A big thud reverberates around the arena there as Yamamoto accidentally thumps the mat. Hopefully he's not broken his hand.

march has a loose triangle. He'll be looking to tighten that up but Yamamoto can see exactly what he's planning and manages to posture up and free himself.
Yamamoto sitting in guard here, content to control.
march is a painfully thin specimen of a man. You do wonder whether a good body kick would snap him clean in two.
march is avoiding any damage by keeping wrist control.
march is trying to hold Yamamoto in close to prevent damage but Yamamoto has managed to pass into half guard.
Neither fighter is being very active at the moment, with Yamamoto in particular looking to stall.

That's two minutes gone in the round.
Yamamoto is keen to just control but march is a slippery customer.
march wants to get back to full guard.
Yamamoto is working for a kimura but march is defending it quite comfortably.
Yamamoto throwing shots but they're hitting the canvas more than the man.
The ref warns both fighters not to hold the cage as they work up against the meshing.
march is trying to maintain the position but Yamamoto is very close to passing his half guard.
march is trying to stand back up but Yamamoto is controlling him

That's three minutes gone in the round.

The referee decides to stand the fighters back up.
A really sloppy takedown attempt there from march.
Soo Kim Yamamoto has stuffed three takedown attempts in the round now. That's going to take a lot out of ryan march.
march looks gassed!
Excellent takedown into side control there by Yamamoto.
Yamamoto is looking to finish here, going for an Americana. march knows the correct defense though, so he's OK.
march tries to get back to half guard but can't.
march is working to avoid the ground and pound but Yamamoto connects with a decent elbow.
march gives up the full mount - oops, sloppy defensive grappling there!
Yamamoto controlling the position easily from mount.

That's four minutes gone in the round.
march tries to lock up and control but Yamamoto gives him a forearm to the face and pushes him away.
march really trying hard to get back to half guard here.
Yamamoto is in full mount, looking to secure a guillotine but march is surviving well by controlling Yamamoto's body position as best he can.
march gets back to half guard.
march has hold of Yamamoto's hands but Yamamoto slips his arm to the side and lands an elbow.
Yamamoto has freed up his trapped foot and advances to mount.
Yamamoto looking to control and managing it successfully.
And thats the end of the round the fighters go back to their corners.
Soo Kim Yamamoto dominated that round.
The minute break is over - no more time for sponges and pep talks - back to the action!

Yamamoto shoots in for a takedown and gets it. Oh and he's advanced to full mount straight away.
march is writhing around trying to get back to his feet.
Yamamoto controlling the position easily from mount.
Yamamoto jumps to the side looking to secure the arm triangle
. Ooooh, that looks tight
march is gargling but he's managed to escape! Nice work there by march and Yamamoto has given up the dominant position trying to land that submission.
march seems a little lost for a moment, as Yamamoto dominates the positioning.
That's one minute gone in the round.
march is positioning himself to get back to half guard.
march is breathing heavily.
You can see the frustration on march's face as Yamamoto controls the position.
Yamamoto has controlled the position for a good 20 seconds, which will no doubt be starting to frustrate his opponent.
march wants to control but Yamamoto postures up.
That's two minutes gone in the round.
A lull in the action here being met with boos from the crowd.
Yamamoto wants to lay and pray for a moment but march keeps working.
The referee stands the fighters back up. Soo Kim Yamamoto just wasn't active enough from the dominant position.
march fails with the takedown
and Yamamoto counters with a nice single leg takedown and he's in march's guard now.

Yamamoto stands up and waves to march to follow him.
Yamamoto gets the takedown into side control.
march dodges the ground and pound from Yamamoto.
march is looking for a sweep.
march wants to control but Yamamoto postures up.
Yamamoto has knee on belly and now moves to full mount! Trouble for march!
march bucks up and manages to get a nice reversal! He's in guard on the top - nicely done!
march throwing elbows and punches but not connecting, as Yamamoto works some decent striking defense from the bottom.
That's three minutes gone in the round.
march stops Yamamoto from standing up.
Yamamoto pulls march in close to prevent any damage.
march looking to sit in guard and control but Yamamoto gets the butterfly guard and sweeps. He's now in the guard on the top.
march tries to land a sweep but no joy.
march has managed to work for a loose triangle. I think Yamamoto should be able to defend this one pretty easily though. Oh, march has tightened it up now! Yamamoto should have reacted faster there - he's in big trouble and yes, he's tapped out! This one is all over!
Ladies and gentlemen, after 4:03 of round 2, we have a winner by way of Submission (Triangle). ryan march!
|
|
|
|
|
|
|
|
|
|
|
|
|
|
|
|
|
|
|
|
|
|
|
| S |
C
A |
G |
S |
C
B |
G |
|
S |
C |
G |
|
energy
A | B |
|
hype
A | B |
|
pop
A | B |
|
mgr
A | B |
|
FIGHT
RATING
31% |
|
|
|
|
|
|
