|
|
PBP Commentary |
Coming up we have a lightweight MMA rules bout between Paul Sass (ranked 0 p4p, 0 weight class) and Tim Gray (ranked 0 p4p, 0 weight class). Over to our ring announcer for the fighter introductions!
 |
|
 |
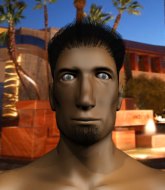
| 183 cm
25
157 lbs
2 - 2 - 0 |
|
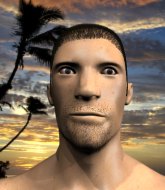
172 cm
18
161 lbs
2 - 0 - 0 |
Good takedowns
Brawler
Very quick |
|
BJJ Purple Belt
Brawler
Tends to cut |
|
| |
|
Ladies and gentlemen. This fight is 3 rounds, in the lightweight division.
Introducing the fighter to my left, fighting out of the red corner.
With a record of
2 - 2 - 0, fighting out of London, Paul Sass!
And introducing the fighter to my right, fighting out of the blue corner.
With a record of
2 - 0 - 0, fighting out of Amsterdam, Tim Gray!
The judges for this bout are James Ackerman, Andrew Berry and Daniel Bishop.

The bell rings for round one and we are underway!

Sass scores a takedown into full mount!
Gray working to try and regain half guard.
Sass will need to keep those long limbs tucked in whilst he's on the ground, to prevent any submissions.

Sass gets to his feet and calls his opponent to stand. Here come the fireworks!
Gray moves out of range as Sass throws a body kick.
Gray misses the shot to the body.
Sass tries to clinch but Gray moves out of range.
Sass swings wildly with a right hand that was never going to find it's target.
Sass wants to clinch.
Gray ducks under a wild hook from Sass.
Gray misses with an uppercut. Sass saw that one coming.
Gray slips under a jab.
Gray throws a right and a left that Sass avoids nicely.

Gray gets in close and instigates a clinch.
Gray displaying some good clinch control by pressing Sass up against the cage.
Sass tries to pull guard but can't drag his opponent to the mat. Gray just stands there and leans against the cage.
Sass looking for a takedown.
Sass is trying to work for a single leg takedown but Gray pulls him back up using the underhooks.
That's three failed takedown attempts in the round for Paul Sass. That's going to take a lot out of him.
Gray wants the takedown. Sass is fighting it off but Gray persists and manages to bring the fight to the ground, ending up in Sass's guard against the cage.

Sass is active off his back here, looking for submissions.

That's one minute gone in the round.
Gray postures up and scores with a shot to the body and a follow up elbow to the head.
Gray is in close to Sass's body, working some short punches and elbows.
Gray throws a big right hand that misses.
Sass is breathing heavily.
Sass is active off his back here, looking for submissions.
Sass avoiding any damage from the ground and pound.
Gray working some strikes from top position.
Gray landing with the ground and pound.
Gray working some ground and pound from guard but it's not doing any damage.
Sass working the defensive guard well to avoid strikes from Gray.
Gray content to strike from guard, landing some decent shots.
Gray with a flurry of punches that miss.
Sass is active off his back here, looking for submissions.
Gray in full guard, throwing the ground and pound. No damage this time.
Gray makes a bit of distance and scores with some ground and pound, still in guard.

That's two minutes gone in the round.
Gray content to strike from guard, landing some decent shots.
Gray trying to control but Sass is working from the bottom.
Sass preventing the ground and pound from doing any damage.
Sass escapes his hips to the side and looks to be working for an armbar. Gray gives him a little smile and shakes his head. No chance.
Gray scores with a decent looking elbow strike.
Gray working in close now, lands a nice elbow to the side of Sass's head.
Gray scoring with some ground and pound.
The crowd cheering loudly, showing their appreciation for the quality fight we're seeing here.
Gray with a couple of shots to the head there. Not particularly brutal.
The ref warns both fighters not to hold the cage as they work up against the meshing.
Gray scoring with some ground and pound.
Both fighters really going for it on the ground here!
Gray landing some decent shots from guard.
Sass looking for submissions off his back, moving his hips, looking for an opening.
Gray with a nice head shot there.

That's three minutes gone in the round.
Gray distracts Sass with his right hand and drops a big elbow with his other arm.
Gray scores with a decent looking elbow strike.
Sass working for a triangle but Gray defends it easily.
Gray is working the ground and pound from guard. He might want to try advancing position though to get more of an impact.
Sass looking for a guillotine here but Gray defends easily.
Sass working for a triangle but Gray defends it easily.
Gray is sitting in guard, working some ground and pound.
Gray with a couple of shots to the head there. Not particularly brutal.
The fighters are pressed up against the cage, both looking to find a bit of space to work.

That's four minutes gone in the round.
Gray tries to free his leg and advance position but Sass is retaining full guard.
Gray landing with the ground and pound.
Sass throwing his legs up looking for a triangle.
Gray lands a couple of digs.
Gray with a couple of shots to the head there. Not particularly brutal.
Gray lands a nice shot whilst sitting in his opponent's guard.
Gray landing with the ground and pound.
Gray distracts Sass with his right hand and drops a big elbow with his other arm.
Gray chips away with some ground and pound.
The crowd applaud the fighters efforts here as the round comes to an end.
Sass looking for submissions from the bottom here. Moving his hips around, possibly looking for an armbar.
Gray wants to control from the top but Sass keeps moving.
Sass is working actively off his back, looking to secure an arm or perhaps work for a triangle.
And thats the end of the round the fighters go back to their corners.
Tim Gray dominated that round.
Well, the break between rounds is over. Let's get back to the scrappin!

Gray misses with the combination.
Gray darts in and clinches Sass up against the cage.
Sass is trying to drag Gray to the mat but Gray just about manages to keep his footing. He used the cage to his advantage there.
Sass managing to block the knees to the body from Gray.
Gray has clasped his hands together around Sass's back... aaand, he's got a takedown into side control. Nicely done.
Gray misses with the ground and pound.
Sass is looking to reverse the position.
Sass manages to land a sweep and he's now on top! Lovely Jiu Jitsu!
Gray is looking to control Sass's leg but it's slowly edging free. Can Gray avoid being mounted?
Both fighters are absolutely exhausted here.
Gray pushes Sass off looking to stand but Sass dives back in and keeps control.
Sass tries to stand and escape but Gray is controlling the position.
Gray is looking to control Sass's leg but it's slowly edging free. Can Gray avoid being mounted?
That's one minute gone in the round.

The referee has ruled that neither fighter is active enough on the ground and has stood them back up.
Gray lands with a cross to side of his opponent's head.
Gray connects with a body shot.
Gray misses with a jab, cross combination.
Gray lands a straight punch to the body, keeping Sass at a distance.
Gray displaying good standup as he scores with a three punch combination.
Sass fails in his attempt to clinch.
Gray stooping low to avoid any incoming strikes and then lunges in with an uppercut come cross that lands flush.
Gray gets a clinch.
Gray creates a bit of space for himself and sneaks an elbow through Sass's defenses.
Sass takes an elbow to the forehead.
Sass's head jolts backwards as he takes an uppercut right on the button!
Sass's head jolts backwards as he takes an uppercut right on the button!
Sass jumps guard but Gray stands there with Sass around his waist. Sass gives up and drops back to his feet. We remain in the clinch.
Gray controlling the action here for a moment.
Sass fails to pull the fight into his guard.
That's three failed takedown attempts in the round for Paul Sass. That's going to take a lot out of him.
Gray comes over the top with an elbow. That landed flush.
Gray scores with a shoulder strike.
That's two minutes gone in the round.
A left hand lands to the body for Gray.
Gray effectively controlling the action here.

Gray's corner calls for him to break the clinch, which he does.
Gray closes the distance, clinches up and gets a nice trip takedown into side control. Very smooth.
Sass gets one leg under and gets the fight to half guard.
Fantastic stuff here - a very entertaining period of action, which has drawn cheers from the crowd.
Sass punching from the bottom.
Sass is trying to maintain the position but Gray is very close to passing his half guard.
Gray is trying to work for a kimura. This could be trouble! No, Sass has managed to free his arm - good work.
Sass actively working from the bottom here.
Sass is refusing to be controlled, as Gray sits in half guard.
That's three minutes gone in the round.
Sass looking for submissions from an awkward position here.
The referee has ruled that neither fighter is active enough on the ground and has stood them back up.
Gray scores with a takedown into Sass's guard.
Gray throwing shots from guard but he's hitting more mat than opponent.
Gray loading up with the ground and pound but he's missing more than he's landing in this flurry.
Gray passes easily into side control. Nice work.
Sass struggling a bit here.
Gray scoring with punches from side control.
Sass is looking for a sweep.
Sass is trying to control Gray's posture but Gray avoids it.
Gray working the head with strikes.
That's four minutes gone in the round.
Sass is looking to reverse the position.
Gray scores with a couple of short elbows.
Gray working away.
Well, the referee has seen enough. Neither fighter is active enough on the ground so he's stood them back up.
Gray looking to shoot here. He's gone for it and he's landed a takedown into mount! Oh, that's bad for Sass!
A nice elbow there by Gray.
Sass gets back to half guard.
Sass manages to escape and get back to his feet!
Sass misses with a takedown
and Gray counters with a nice body shot.
Gray lands with a good body shot.
Gray moving in and out of range nicely, whilst landing the scoring shot.
Sass fails with the takedown.
The crowd applaud the fighters efforts here as the round comes to an end.
Sass tries to move into range but Gray moves to the side and lands with a nice right hand.
A lazy left from Gray finds it's target.
Sass ducks under a wild hook from Gray.
And thats the end of the round the fighters go back to their corners.
Tim Gray showed his class in that round. I'd imagine he'll take it on all the scorecards.
The minute break is over - no more time for sponges and pep talks - back to the action! This is the final round!

Sass fails to land with the punch combination there - jab, cross, hook, miss, miss, miss.
Gray bobs and weaves and unloads with a good uppercut.
Gray clinches up with Sass and pushes him back against the cage.
Sass throws a punch but it's blocked by Gray.
Good body shot from Gray.
Gray lands a right hand.
Gray lands a takedown into guard.
Sass throwing his legs up looking for a triangle.
Sass trying to control the position.
Gray throwing shots from guard but he's hitting more mat than opponent.
Gray is looking to work some ground and pound but Sass has wrist control.
Gray chips away with some ground and pound.
Both fighters are breathing heavily.
Gray throwing strikes from guard but Sass blocks nicely.
Sass escapes his hips to the side and looks to be working for an armbar. Gray gives him a little smile and shakes his head. No chance.
Sass throwing his legs up looking for a triangle.
That's one minute gone in the round.
The referee decides to stand the fighters back up.
Gray fakes a head shot and lands one to the body.
Gray scores with a nice takedown into half guard. Let's see what he's got on the ground.
The two fighters exchange a few words. I couldn't hear what they were saying but maybe it's more fun if you make it up yourself. Gray connects with a nice short shot to Sass's temple.
Sass looking for submissions off his back.
Tim Gray has got the better of the ground game so far.
Sass actively working from the bottom here.
Sass is trying to control but can't.
Gray is looking for a kimura. It's going to be difficult to finish that from half guard though and Sass defends it well.
Gray working Sass over with strikes.
That's two minutes gone in the round.
Gray slips a nice elbow through Sass's hands, connecting with Sass's forehead.
Sass blocking the ground and pound attempt from Gray.
It looks like we're going to have a standup here. Neither fighter is doing enough on the ground.
Sass shoots in but Gray avoids the takedown attempt easily.
A punch combination from Gray misses.
Gray lands with a shot to the body.
Gray takes a punch to the jaw and another one to the bread basket.
Sass with poor footwork there. He got himself in a bit of a tangle, enabling Gray to score with a decent uppercut.
Wow, both these guys are really going for it!
Gray throws a hook but Sass blocks it.
Gray misses with a jab, cross combination.
Gray lands a vicious shot with the stealth of a sniper and the strength of a viper. Are vipers that strong? I can think of lots of things that are stronger than a viper - not many rhyme with sniper though.
Sass wants to clinch up but Gray keeps it at a distance.
Sass gets taken down but at least he's managed to land in guard.
Sass working the defensive guard well to avoid strikes from Gray.
Sass keeping moving, preventing Gray from controlling successfully.
That's three minutes gone in the round.
Sass looking for a guillotine here but Gray defends easily.
Gray postures up and scores with a shot to the body and a follow up elbow to the head.
Sass looking for a guillotine here but Gray defends easily.
Sass trying to control the position.
Sass escapes his hips to the side and looks to be working for an armbar. Gray gives him a little smile and shakes his head. No chance.
Gray lands a couple of elbows.
Sass trying to control the position.
That's four minutes gone in the round.
Gray trying to control but Sass is working from the bottom.
Sass utilising some decent striking defenses from the guard, preventing the ground and pound.
Gray must be cautious of submissions here, given that his opponent has the superior Jiu Jitsu.
Sass utilising some decent striking defenses from the guard, preventing the ground and pound.
Gray throwing strikes but missing.
Well, the referee has seen enough. Neither fighter is active enough on the ground so he's stood them back up.
Gray with a body punch. A glancing blow.
Sass misses with a takedown attempt
and Gray counters with a driving takedown into guard. Nice work there by Gray.
Paul Sass has stepped it up - he knows he needs a finish here!
Sass throwing his legs up looking for a triangle.
The crowd are loving this. Great action here.
Sass trying to control the position.
The crowd applaud the fighters efforts here as the round comes to an end.
Gray works over Sass with some ground and pound from guard.
Tim Gray is fighting for a decision here - he's started to take the cautious approach.
Gray wants to control from the top but Sass keeps moving.
And that's the end of the fight!
Tim Gray comfortably won the final round on my scorecard.
Well Gray has outworked and out performed his opponent in all aspects of the game today. He was simply too good and the decision should be no more than a formality. Over to the ring announcer for the scorecards.
Ladies and gentlemen, after 3 rounds of action, we go to the scorecards for a decision.
Judge James Ackerman scores the fight 27:30
Judge Andrew Berry scores the fight 27:30
Judge Daniel Bishop scores the fight 27:30
In favor of your winner, by unanimous decision... Tim Gray!
|
|
|
|
|
|
|
|
|
|
|
|
|
|
|
|
|
|
|
|
|
|
|
| S |
C
A |
G |
S |
C
B |
G |
|
S |
C |
G |
|
energy
A | B |
|
hype
A | B |
|
pop
A | B |
|
mgr
A | B |
|
FIGHT
RATING
100% |
|
|
|
|
|
|

