|
|
PBP Commentary |
Coming up we have a light heavyweight MMA rules bout between Rooster Cogburn (ranked 0 p4p, 0 weight class) and Chip Dawson (ranked 0 p4p, 0 weight class). Dawson has chosen Some Bodies Gonna Get It as his entrance music. The key to victory for Rooster Cogburn has got to be keeping the fight on the feet.
 |
|
 |
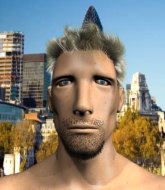
| 180 cm
25
205 lbs
1 - 0 - 0 |
|
190 cm
22
204 lbs
3 - 3 - 1 |
BJJ White Belt
Decent elbows
Intelligent |
|
BJJ Blue Belt
Brawler
Solid chin |
|
| |
|
Ladies and gentlemen. This fight is 3 rounds, in the light heavyweight division.
Introducing the fighter to my left, fighting out of the red corner.
With a record of
1 - 0 - 0, fighting out of Sydney, Rooster Cogburn!
And introducing the fighter to my right, fighting out of the blue corner.
With a record of
3 - 3 - 1, fighting out of Sydney, Chip Dawson!
The judges for this bout are Eliza Hachem, Damien Edna and Winston Howard.

The bell rings for round one and we are underway!
Cogburn tries to close the distance and clinch up against the cage but Dawson paws at him with a jab and circles away.
Dawson fails to land the takedown.
No luck with that takedown attempt from Dawson.

Cogburn drives through and clinches with Dawson against the cage.
Cogburn tries to land a knee to the body but he is off balance and Dawson avoids it.
Cogburn is trying to slow down the pace in the clinch, to catch his breath.
Cogburn fails to pull the fight into his guard.
Dawson drops to a knee looking for a takedown but Cogburn gets the underhooks and prevents it.
Rooster Cogburn has stuffed three takedown attempts in the round now. That's going to take a lot out of Chip Dawson.
Dawson blocks an elbow strike.
Cogburn could do with loosing a few pounds - he looks very soft around the mid section, to put it politely.
Cogburn is trying to break free.
Cogburn is pressed up against the cage. Dawson has hold of a leg and is looking to drag Cogburn down to the mat. Cogburn avoids the attempt though and has circled away. We're back to striking at a distance.
Cogburn fakes with an overhand right and moves in to clinch with Dawson, pushing him back against the cage.
Dawson tries to break free but Cogburn pushes him back against the cage.
Dawson drops to a knee looking for a takedown but Cogburn gets the underhooks and prevents it.
Cogburn gets an overhook and lands an elbow to the side of the head.

It looks like Chip Dawson has been cut.
Dawson is working for takedown but Cogburn is calmly controlling the position for now.

Cogburn manages to pull guard.
Cogburn looking to hit a scissor sweep but Dawson is one step ahead there.
Cogburn seems keen to control rather than go for a submission, at least for now.

That's one minute gone in the round.
Dawson sitting in guard, not really doing much.
The fighters are pressed up against the cage, both looking to find a bit of space to work.
Cogburn wants to stand but Dawson is controlling the position.
Cogburn looking to control.
Dawson stops Cogburn from standing up.
Dawson is intent on slowing down the pace of the fight, simply looking to control.

Dawson stands and steps away. Cogburn gets to his feet too and we're back to the striking game.
Dawson looks gassed!
Dawson throws a nice head kick!
It looks like Rooster Cogburn has been cut.
Cogburn moves in looking to clinch but Dawson pushes him off.
Cogburn tries to clinch but Dawson is having none of it.
Cogburn looks for a takedown. He's got it. We're now in half guard.
Cogburn is trying to get back to his feet now but his leg is trapped.

That's two minutes gone in the round.
Dawson is positioning himself well to prevent Cogburn advancing to mount.
Cogburn missing with the ground and pound from half guard.
Dawson moves his hips nicely and gets into full guard.
Dawson manages to escape and get back to his feet.
Cogburn fails with the takedown.
Cogburn moves in looking to clinch but Dawson pushes him off.
Dawson shoots in for a takedown - he's clinched up with Cogburn but Cogburn pushes him off and we're back to square one.
Cogburn is looking to take this fight into the clinch.

That's three minutes gone in the round.
Dawson stuffs the takedown.
Cogburn is looking to take this fight into the clinch.
Cogburn scores with a nice takedown into half guard. Let's see what he's got on the ground.
Dawson tries to roll over but Cogburn keeps him under control.
Cogburn tries to stand and escape but Dawson is controlling the position.
Cogburn missing with some ground and pound from the half guard.
Dawson kicks off Cogburn and gets to his feet.
Cogburn displays good takedown defense there as he swats away a double leg from Dawson.
Cogburn shoots in looking for a takedown. Dawson tries to sprawl out of it but Cogburn keeps driving through. The fighters are pinned against the cage. Dawson manages to get underhooks and after a bit of a struggle, circles away and we're back to standing.

That's four minutes gone in the round.
Cogburn tries to clinch but Dawson moves out of range.
Dawson tries to shoot in for a takedown. He's got hold of a leg but Cogburn swivels and escapes.
Cogburn looks for a takedown but Dawson sprawls well.
Dawson circles away from the clinch attempt.
Cogburn tries to bum rush Dawson with a series of wild strikes but Dawson uses good footwork to avoid the assault.
Dawson shoots in and drives through. Cogburn sprawls well.
Cogburn is looking to take this fight into the clinch.
Cogburn clinches up with Dawson and pushes him back against the cage.
Cogburn lands a glancing elbow in the clinch.
Dawson takes a knee to the side of the body.
The crowd applaud the fighters efforts here as the round comes to an end.
Dawson looks like he'd prefer to be striking at range right now.

Cogburn's corner calls for him to break the clinch, which he does.
Cogburn is looking to take this fight into the clinch.
Dawson stalks Cogburn and leaps in with a furious combination of punches. Uppercuts and crosses smash into Cogburn's face. Cogburn staggers backwards, shaken.
And thats the end of the round the fighters go back to their corners.
That was a close round but I would say that Rooster Cogburn will probably get the nod.
Both fighters have cut men working on them during the interval.
That's the end of the round. The referee orders the cornermen out of the cage so we can get back down to business.

Cogburn drives through and clinches with Dawson against the cage.
Dawson breaks from the clinch.
Dawson with a lazy takedown attempt
and Cogburn makes the exchange count by landing a cracking kick to the body. Dawson really felt that one!
No luck for Dawson with that takedown attempt.
Cogburn scores a takedown into full mount!
Cogburn tries to control but Dawson wriggling away.
Dawson trying desperately to get to his feet.
Both fighters are absolutely exhausted here.
That's one minute gone in the round.
Cogburn trying to control but he's not successful this time.
Dawson tries to lock up and control but Cogburn gives him a forearm to the face and pushes him away.
Cogburn prevents Dawson from getting the reversal.
The ref warns both fighters not to hold the cage as they work up against the meshing.
Cogburn trying to control but Dawson is having none of it.
Dawson can't escape the position.
That's two minutes gone in the round.
A lull in the action here being met with boos from the crowd.
Dawson wants to use the cage to get back to his feet here.
Dawson is looking to improve his position but Cogburn isn't that keen on the idea.
Cogburn looking to control but Dawson is working nicely, looking to advance position himself.
Dawson wants to control but Cogburn is having none of it.
Dawson wants to use the cage to get back to his feet here.
That's three minutes gone in the round.
Cogburn sitting in mount, just looking to control for the moment.
Dawson squirming around on the bottom, looking to escape.
Cogburn tries to control but Dawson wriggling away.
Dawson is looking to get to half guard.
Cogburn tries to control but Dawson wriggling away.
That's four minutes gone in the round.
A lull in the action here being met with boos from the crowd.
Cogburn avoids the attempt from Dawson to control.
Dawson is desperately trying to improve his position but Cogburn has a good base and remains in mount.
Cogburn looking to control but Dawson is working nicely, looking to advance position himself.
Cogburn avoids the attempt from Dawson to control.
Boooooooooooooooooooo!!! God, this has been a terrible round. Come on you two, sort yourselves out!
Dawson wants to use the cage to get back to his feet here.
Dawson is wriggling around trying to escape.
And thats the end of the round the fighters go back to their corners.
Rooster Cogburn dominated that second round.
Both fighters have cut men working on them during the interval.
That's the end of the round. The referee orders the cornermen out of the cage so we can get back down to business. This is the final round!

Dawson takes a punch right to his stomach. That took the wind out of him momentarily.
Dawson shoots in for a takedown. "I don't think so" says Cogburn as he avoids it easily.
Cogburn fails with an attempt to clinch.
Cogburn shoots in and bounces Dawson off the cage to secure the takedown into guard.
Cogburn tries to free his leg and advance position but Dawson is retaining full guard.
Dawson wants to stand but Cogburn is controlling the position.
Cogburn wants to get up but he can't break Dawson's closed guard. He needs to be careful trying to break the legs open, as he's open to submissions here.
Both fighters are breathing heavily.
Cogburn stopping the sweep attempt from Dawson.
Cogburn has decided he wants to stand but the closed guard of Dawson is proving hard to escape from.
That's one minute gone in the round.
Dawson wants to get back to his feet but Cogburn is in a dominant position and won't allow it.
Dawson looking for a sweep. Not yet Dawson, not yet.
Cogburn looking to pass the guard.

Well, the referee has seen enough. Neither fighter is active enough on the ground so he's stood them back up.
Dawson throws a series of punches but Cogburn avoids them all with ease.
Cogburn moves into the clinch successfully.
Cogburn landing knees to the body. They look like they could hurt.
Cogburn lands a shoulder strike that jolts his opponent's head backwards.
Cogburn leaning his opponent against the cage.
Cogburn lands a nice elbow.
That's two minutes gone in the round.
My god... these two guys really need to pick up the pace or everyone will leave to go get a beer.
Dawson has had enough of the clinch and is looking to separate.
Cogburn working Dawson over with knees to the body.
Dawson is trying to break the clinch but Cogburn has him pressed against the cage.
Cogburn pulls guard successfully.
Dawson sitting in guard, not really doing much.
Dawson trying to stand up but can't free himself from Cogburn's guard.
Dawson trying to control the position from guard on top but Cogburn is wriggling around, looking for whatever he can.
Cogburn on his back here. We all know that wrestlers don't like being on their back so let's see if Cogburn tries to get out of the position.
Dawson won't allow Cogburn to get back to his feet.
Dawson stands up from guard. Let's bang!
Dawson fails with a takedown attempt.
That's three minutes gone in the round.
Dawson shoots in for a takedown but doesn't get it.
Rooster Cogburn has stuffed three takedown attempts in the round now. That's going to take a lot out of Chip Dawson.
Cogburn moves into the clinch.
Dawson jumps guard but Cogburn stands there with Dawson around his waist. Dawson gives up and drops back to his feet. We remain in the clinch.
Kneeeeees! The crowd are calling for knees to the body. Cogburn obliges.
A nice left hand lands by Cogburn.
Cogburn working Dawson over with knees to the body.
Cogburn throws a punch but it's blocked by Dawson.
Dawson is trying to break the clinch but Cogburn has him pressed against the cage.
Dawson breaks the clinch and we're back to striking at distance.
Cogburn fails with a rather predictable takedown attempt.
Chip Dawson seems to be the more aggressive standup fighter in this bout.
Dawson fakes an overhand right and shoots for a takedown. Cogburn sprawls well initially but Dawson persists and gets the takedown into half guard.
Dawson prevents Cogburn from standing back up.
Cogburn trying to control here.
That's four minutes gone in the round.
Dawson content to control rather than advance.
Cogburn wants to get back to his feet.
Dawson stalling.
Cogburn is trying to stand.
Chip Dawson has stepped it up - he knows he needs a finish here!
Dawson controlling the action here.
Cogburn is looking to escape.
Rooster Cogburn is fighting for a decision here - he's started to take the cautious approach.
Dawson is thwarting Cogburn's attempts to control the position.
And that's the end of the fight!
That was a close round. You could make an argument for either fighter but I would give it to Rooster Cogburn.
Well I reckon that's a shut out for Cogburn, winning every round. Will the judges agree? They are the ones who matter, even if they are often depressingly incompetent. Over to the ring announcer for the scorecards.
Ladies and gentlemen, after 3 rounds of action, we go to the scorecards for a decision.
Judge Eliza Hachem scores the fight 30:28
Judge Damien Edna scores the fight 30:28
Judge Winston Howard scores the fight 29:29
In favor of your winner, by majority decision... Rooster Cogburn!
|
|
|
|
|
|
|
|
|
|
|
|
|
|
|
|
|
|
|
|
|
|
|
| S |
C
A |
G |
S |
C
B |
G |
|
S |
C |
G |
|
energy
A | B |
|
hype
A | B |
|
pop
A | B |
|
mgr
A | B |
|
FIGHT
RATING
38% |
|
|
|
|
|
|

