|
|
PBP Commentary |
Coming up we have a lightweight MMA rules bout between Strath More (ranked 0 p4p, 0 weight class) and Sanae Kondo (ranked 0 p4p, 0 weight class). Over to our ring announcer for the fighter introductions!
 |
|
 |
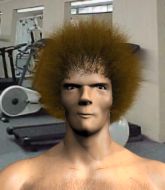
| 169 cm
22
155 lbs
0 - 0 - 1 |
|
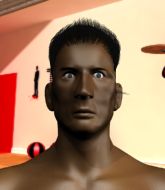
175 cm
23
160 lbs
0 - 1 - 0 |
BJJ Purple Belt
Counter striker
KO power |
|
BJJ Purple Belt
Counter striker
Tends to cut |
|
| |
|
Ladies and gentlemen. This fight is 3 rounds, in the lightweight division.
Introducing the fighter to my left, fighting out of the red corner.
With a record of
0 - 0 - 1, fighting out of Tokyo, Strath More!
And introducing the fighter to my right, fighting out of the blue corner.
With a record of
0 - 1 - 0, fighting out of Tokyo, Sanae Kondo!
The judges for this bout are Hirohito Nitta, Taro Takaoka and Shigeki Sano.

The bell rings for round one and we are underway!
Kondo tries a head kick but it misses.
No luck with that takedown attempt from More.
More changes levels and looks for a double leg takedown. Kondo tries to avoid it but More manages to keep hold of a leg and drag Kondo to the ground. Kondo escapes though and pops straight back up to his feet.

Kondo looks for a takedown. He's got it. We're now in half guard.
More tries to get to full guard but Kondo has control of the leg.
More is looking to control Kondo's leg but it's slowly edging free. Can More avoid being mounted?
Still in half guard, Kondo seems content to control.

Kondo is looking for an arm triangle, whilst trying to pass to side control. More doesn't seem that keen to cooperate though. No luck this time Kondo.
The referee calls for the fighters to work.

That's one minute gone in the round.
More is looking to control Kondo's leg but it's slowly edging free. Can More avoid being mounted?
Kondo tries to stand and escape but More is controlling the position.
Kondo trying to control from half guard but More is working away.

Neither fighter is doing enough for the referee's liking and he's decided to stand them back up.
Kondo gets his takedown attempt stuffed easily
and More decides to take the opportunity to score a takedown. He's landed in Kondo's guard.
Kondo is trying to control the position from the bottom.

Kondo manages to escape and get back to his feet.
Kondo feints and then dives in with a takedown. That was a long way out but the feint bought him enough time to close the distance and complete the takedown. Now we'll play guard for a bit and see who can get the better of that position.
Kondo looks gassed!
More has momentary wrist control but Kondo slips an elbow through the middle.
More is throwing his legs up, looking for submissions. Kondo is aware though and is defending well.

That's two minutes gone in the round.
More looking to control.
More is looking for a triangle but Kondo pushes his legs off easily.
More has an active guard here but Kondo has managed to pass into half guard.
Kondo is looking for a kimura here.
The ref warns both fighters not to hold the cage as they work up against the meshing.
Kondo with a momentary lay and pray from half guard.

That's three minutes gone in the round.
Kondo wants to stand up but More has a hold of him and won't allow it.
Kondo is pressing down on More's thigh, looking to free his foot. More is holding on for now.
More looking for submissions from an awkward position here.
Kondo seems very keen to just sit and control from half guard but More does not like that idea so much and is remaining active off his back.
More trying to control here.
Kondo seems content to maintain position for now, rather than mounting any offense.
The fighters are pressed up against the cage, both looking to find a bit of space to work.

That's four minutes gone in the round.
There's not a lot going on here and the crowd are letting the fighters know they're not willing to tolerate a lack of action.
Kondo wants to pass to mount but More is defending the position.
It looks like we're going to have a standup here. Neither fighter is doing enough on the ground.
Kondo darts in trying to clinch
and More decides to take the opportunity to score a takedown. He's landed in Kondo's guard.
Kondo throwing his legs up looking for a triangle.
More wants to control from the top but Kondo keeps moving.
And thats the end of the round the fighters go back to their corners.
A close round but Sanae Kondo will probably get the nod.
That's the end of the round. The referee orders the cornermen out of the cage so we can get back down to business.

More fails with the takedown
and Kondo counters with a shoot takedown. More fights it but they end up in guard.
Kondo is frustrating his opponent with some stalling tactics from top position.
Kondo trying to stand up but can't free himself from More's guard.
More is looking for a guillotine. You can't force these things though and Kondo defends well.
More keeping moving, preventing Kondo from controlling successfully.
More preventing the ground and pound from doing any damage.
Both fighters are absolutely exhausted here.
That's one minute gone in the round.
More looking for submissions from the bottom here. Moving his hips around, possibly looking for an armbar.
More trying to keep a closed guard but Kondo is proving a slippery customer.
Kondo controls from within his opponent's guard.
Kondo's corner are shouting for him to control the position and he seems happy to oblige.
Kondo drops back looking for a heel hook - he quickly realises he's not going to get it but More manages to dive on top of him before he can escape and now Kondo has More in his guard.
Kondo is working an open guard here, looking to improve his position. No doubt that will leave him open to counters but at least he's being more offensive.
That's two minutes gone in the round.
Neither fighter has done anything of merit for a good minute or two here and the crowd are not happy about it.
Kondo being controlled here, momentarily.
More thinks about going for a leg but decides against it, in order to maintain the position.
Kondo manages to escape and get back to his feet.
Kondo swings wildly with a couple of big hooks
and More counters with a nice single leg takedown and he's in Kondo's guard now.
More stopping the sweep attempt from Kondo.
More trying to control the position from guard on top but Kondo is wriggling around, looking for whatever he can.
That's three minutes gone in the round.
More pressing down on his opponent's thigh, looking to pass guard. Kondo is keeping the position for now.
More got a little sloppy there for a moment and Kondo has worked his way into a loose triangle - can he finish it?! No, More has managed to get both his arms back between Kondo's legs - danger averted.
Sanae Kondo has got the better of the ground game so far.
Kondo keeping moving, preventing More from controlling successfully.
More stopping the sweep attempt from Kondo.
That's four minutes gone in the round.
Well. There's a bit of a lull in the action here and the crowd are starting to get restless.
More wants to control from the top but Kondo keeps moving.
Kondo is adopting a defensive guard.
More avoids a guillotine attempt easily.
More has gone for a leg lock! Kondo slips out almost immediately though and dives into More's guard.
And thats the end of the round the fighters go back to their corners.
Sanae Kondo showed his class in that round. I'd imagine he'll take it on all the scorecards.
The fighters' corners scream their final instructions, as the referee calls time. Here we go, back to the action! Let's get this one finished - here comes the final round!

Kondo is looking to clinch but More is avoiding it.
Kondo gets his takedown attempt stuffed easily
and More counters with a nice double leg into half guard.
More is looking for a kimura but Kondo is holding onto that half guard position, so it's hard for More to get the leverage.
More is trying to control the action in half guard but Kondo is working away on the bottom, looking perhaps to get back to full guard.
Both fighters are breathing heavily.
More is trying to advance to mount but he's lost his balance and Kondo reverses the position - he's now on top in More's guard.
Kondo stands up and looks to throw the legs aside to pass to side control. More swivels though and keeps the full guard.
That's one minute gone in the round.
Kondo thinks about going for a leg but decides against it, in order to maintain the position.
Kondo got a little sloppy there for a moment and More has worked his way into a loose triangle - can he finish it?! No, Kondo has managed to get both his arms back between More's legs - danger averted.
More looking for subs off his back but Kondo has passed one foot through into half guard.
Kondo passes the half guard and he's now in mount! Big trouble for More!
Kondo takes a little breather and maintains the position. The referee will be looking for him to stay active from such a dominant position though.
That's two minutes gone in the round.
More tries to get back to half guard but can't.
More manages to regain half guard. Good work.
More is looking to sinch up a guillotine here but Kondo pulls his head out easily.
More actively working from the bottom here.
More wants to improve his position but Kondo is controlling well.
Kondo is working for a submission of some sort.
Kondo tries to pass the half guard into mount. More knows what he's doing though and prevents the attempt.
That's three minutes gone in the round.
More makes his way to full guard. A much better position for More.
Kondo looking to sit in guard and control but More gets the butterfly guard and sweeps. He's now in the guard on the top.
Kondo wants to stand up but More is controlling him.
Kondo looking to sweep here. No luck so far.
That's four minutes gone in the round.
The crowd are getting on the fighters' backs, as the pace has dropped off in the last minute or so.
More is taking a break and basically stalling. The referee will not allow him to do that for long.
More drops back looking for a heel hook - he quickly realises he's not going to get it but Kondo manages to dive on top of him before he can escape and now More has Kondo in his guard.
Kondo preventing the sweep.
Strath More has stepped it up - he knows he needs a finish here!
Sanae Kondo is fighting for a decision here - he's started to take the cautious approach.
The crowd thankful this round is nearly over.
Kondo not doing a lot at the moment. He'll have to show some more aggression or the fight will get stood up.
More is looking for a triangle but Kondo pushes his legs off easily.
And that's the end of the fight!
Strath More showed his dominance in that final round.
I think Kondo has won this one but let's see whether the judges agree with me. Over to the ring announcer for the scorecards.
Ladies and gentlemen, after 3 rounds of action, we go to the scorecards for a decision.
Judge Hirohito Nitta scores the fight 28:29
Judge Taro Takaoka scores the fight 28:29
Judge Shigeki Sano scores the fight 28:29
In favor of your winner, by unanimous decision... Sanae Kondo!
|
|
|
|
|
|
|
|
|
|
|
|
|
|
|
|
|
|
|
|
|
|
|
| S |
C
A |
G |
S |
C
B |
G |
|
S |
C |
G |
|
energy
A | B |
|
hype
A | B |
|
pop
A | B |
|
mgr
A | B |
|
FIGHT
RATING
44% |
|
|
|
|
|
|
