|
|
PBP Commentary |
Coming up we have a lightweight MMA rules bout between Colbey Lynch (ranked 0 p4p, 0 weight class) and Billy The Bar (ranked 0 p4p, 0 weight class). There are an array of beautiful celebrities at ringside tonight! I wonder if any of them paid for their tickets.
 |
|
 |
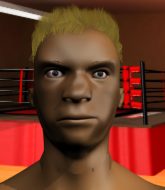
| 175 cm
22
165 lbs
1 - 1 - 0 |
|
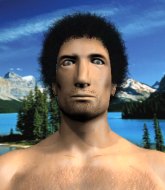
172 cm
18
165 lbs
2 - 1 - 0 |
BJJ Blue Belt
Good kicks
Cuts easily |
|
BJJ Blue Belt
Counter striker
Tends to cut |
|
| |
|
Ladies and gentlemen. This fight is 3 rounds, in the lightweight division.
Introducing the fighter to my left, fighting out of the red corner.
With a record of
1 - 1 - 0, fighting out of Los Angeles, Colbey Lynch!
And introducing the fighter to my right, fighting out of the blue corner.
With a record of
2 - 1 - 0, fighting out of Los Angeles, Billy The Bar!
The judges for this bout are , Jack Bonds and .

The bell rings for round one and we are underway!
Lynch fails with a takedown attempt.
Lynch fails with a takedown attempt.
The Bar avoids the head kick by Lynch.
The Bar avoids the head kick by Lynch.
Colbey Lynch seems to be the more aggressive standup fighter in this bout.
Lynch misses with a kick to the body.
We've had a slow start to the round here - hopefully the action picks up.
Lynch misses with a half-hearted attempt at a head kick.

The Bar rushes Lynch and pushes him back against the cage in a clinch.
The Bar avoiding damage as Lynch throws knees to the body.
The Bar prevents a takedown attempt there.
That's three failed takedown attempts in the round for Colbey Lynch. That's going to take a lot out of him.
Lynch can't get the takedown.

That's one minute gone in the round.
Lynch wants to strike at distance but he can't break free of the clinch.
The Bar looking to slow down the pace here.

Lynch breaks the clinch.
Lynch throws a sloppy head kick and The Bar moves out of range easily.
The Bar blocks a head kick by Lynch.

The Bar looking for a takedown here - he's got it.
Lynch tries to strike from the bottom.

The Bar is trying to work a guillotine from the top, or something like that? Don't know how he thinks he's going to get a finish from there.
The Bar slows down the pace of the fight, as he sits in guard.
Lynch working the defensive guard well to avoid strikes from The Bar.
Lynch keeping full guard, as The Bar tries to pass.
Lynch will have to put a bit more behind his punches if he's going to do any damage from this position.
The Bar works a leg free and moves into half guard.

That's two minutes gone in the round.
Lynch is looking to regain full guard. Not this time though.
The Bar passes to side control.
Lynch is breathing heavily.
Lynch stops The Bar from passing to mount.
Lynch tries to improve position but can't.
The Bar working hard here to secure a kimura but he's not really in the right position for it.
Lynch is trying to improve his position.
Lynch is sneaking out the side here. He's bucked The Bar off and has taken his back!
Lynch throwing wild punches that miss their target.
The Bar breaks Lynch's hooks off and manages to turn into his guard.
The Bar postures up and scores with a shot to the body and a follow up elbow to the head.
The Bar passes Lynch's left leg - he's now in half guard.
The Bar prevents Lynch from improving his position.
The Bar has freed up his trapped foot and advances to mount.

That's three minutes gone in the round.
Lynch tries to reverse the position but The Bar maintains control.
The Bar landing strikes from the mount.

Lynch is rocked!
The Bar wants to take his opponent's back but he's not managed it.
Oh Lynch is still in real trouble! Will he be able to recover?!!
Lynch really trying hard to get back to half guard here.
Lynch seems to have got his legs back now.
Lynch is working hard here to advance position.
The Bar wants to take his opponent's back but Lynch doesn't allow it.
Lynch has been looking to land a fair amount of strikes on the ground. He might be looking to soften his opponent up in order to work for a submission.
Lynch slips a leg in and gets back to half guard.
Lynch slips a foot under and gets full guard. Nice work.
Lynch manages to sweep nicely, so he's now on top. The Bar manages to get himself to full guard.
Lynch wants to control from the top but The Bar keeps moving.
Lynch drops back looking for a leg! The Bar is in trouble here! The fighters roll with the hold and The Bar manages to kick Lynch off! Lynch jumps back into The Bar's guard.
The fighters are pressed up against the cage, both looking to find a bit of space to work.
The Bar working the defensive guard well to avoid strikes from Lynch.

That's four minutes gone in the round.
Lynch passes easily into side control. Nice work.
The ref warns both fighters not to hold the cage as they work up against the meshing.
Lynch tries for a kimura. Not really close to a finish though.
The Bar is trying to get back to half guard. He's pushing on Lynch's leg. He's managed it. Nice work.
Lynch lands with an elbow from half guard - that looked like it hurt.
The Bar gets back to full guard.
Lynch trying to control the position from guard on top but The Bar is wriggling around, looking for whatever he can.
Lynch pressing down on his opponent's thigh, looking to pass guard. The Bar is keeping the position for now.
The Bar is working from a closed guard but he's struggling to control his opponent.
Lynch stopping the sweep attempt from The Bar.
And thats the end of the round the fighters go back to their corners.
Billy The Bar dominated that round.
The fighters get back to their feet, the hooter sounds and we're back to the action!

Lynch misses with a takedown attempt
letting The Bar counter with a right hand.
Lynch misses with a half-hearted attempt at a head kick.
Lynch misses with a lunging right hand
and The Bar counters with a lovely straight right hand!
Lynch slips a jab and a cross from The Bar.
Lynch throws and low kick but The Bar moves out of range easily.
Lynch stuffs the takedown attempt from The Bar. The Bar gets slowly back to his feet.
Lynch throws a lazy head kick
and The Bar counters with a shoot takedown into half guard.
The Bar blocks the strikes from Lynch.
The Bar is keeping good posture, landing some ground and pound.
The Bar wants to take a breather but Lynch is having none of it.
Lynch tries to get to full guard but The Bar has control of the leg.
Lynch is staying active underneath The Bar, who seems content to just control the action from this position.
Both fighters are absolutely exhausted here.
Lynch tries to get to full guard but The Bar has control of the leg.
Billy The Bar has got the better of the ground game so far.
That's one minute gone in the round.
The Bar is working for a submission here. He's got hold of the far side arm and he's looking for a kimura. He's cranking on the arm and he's got it! Lynch is tapping out! Ouch, that looked like it hurt!
Ladies and gentlemen, after 1:20 of round 2, we have a winner by way of Submission (Kimura). Billy The Bar!
|
|
|
|
|
|
|
|
|
|
|
|
|
|
|
|
|
|
|
|
|
|
|
| S |
C
A |
G |
S |
C
B |
G |
|
S |
C |
G |
|
energy
A | B |
|
hype
A | B |
|
pop
A | B |
|
mgr
A | B |
|
FIGHT
RATING
100% |
|
|
|
|
|
|
