|
|
PBP Commentary |
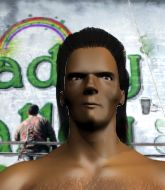
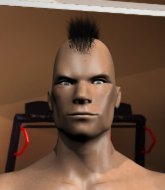
Coming up we have a middleweight MMA rules bout between Paul Harris (ranked 0 p4p, 0 weight class) and Mark Bigwood (ranked 0 p4p, 0 weight class). These two fighters really are very evenly matched on the feet - it will be fascinating to see who can assert themselves in that aspect of the fight.
 |
|
 |
| 184 cm
25
192 lbs
2 - 1 - 0 |
|
185 cm
21
185 lbs
1 - 1 - 0 |
Good takedowns
Counter striker
Cuts easily |
|
BJJ White Belt
Counter striker
Determined |
|
| |
|
Ladies and gentlemen. This fight is 3 rounds, in the middleweight division.
Introducing the fighter to my left, fighting out of the red corner.
With a record of
2 - 1 - 0, fighting out of Helsinki, Paul Harris!
And introducing the fighter to my right, fighting out of the blue corner.
With a record of
1 - 1 - 0, fighting out of Helsinki, Mark Bigwood!
The judges for this bout are Roosa Järviläinen, Ben Zyskovitsi and Matti Vanhoillinen.

The bell rings for round one and we are underway!
Bigwood is looking to take this fight into the clinch.
Harris fails with the takedown.
Harris ducks under an overhand right and circles away with a smile on his face.
Harris throws a sloppy head kick and Bigwood moves out of range easily.
Bigwood lands with a shot to the body.
Bigwood tries to close the distance and clinch but Harris swats him to one side with an open hand palm strike and circles away.
Harris shoots for a double leg takedown but Bigwood sprawls well. He's pushed Harris's face into the mat and manages to get back to his feet relatively easily.
We've had a slow start to the round here - hopefully the action picks up.
Bigwood tries a switch kick but it misses it's target.
Nice uppercut there from Bigwood.
Bigwood is the aggressor but that punch slipped nicely by Harris.
Bigwood misses with an attempted mid kick.

That's one minute gone in the round.
Bigwood scores with a jab to the head.
Bigwood doesn't manage to clinch there - Harris circles away.
Bigwood defending well as Harris loads up on a big left hand.
Bigwood keeping a good distance there, avoiding the body shot.
Harris takes a swing at Bigwood's ribcage but misses.

Harris closes the distance and scores a nice trip takedown into half guard. Bigwood did well to prevent Harris getting side control.

Harris is looking for a kimura. It's going to be difficult to finish that from half guard though and Bigwood defends it well.
Bigwood is staying active underneath Harris, who seems content to just control the action from this position.
Bigwood flails away from the bottom but he's not doing any damage.

That's two minutes gone in the round.
Harris is just sitting in half guard, waiting for something to happen.
Harris seems very keen to just sit and control from half guard but Bigwood does not like that idea so much and is remaining active off his back.
Bigwood is defending against the submission attempts here by Harris.
Harris wants to pass to mount but Bigwood is defending the position.
Bigwood avoiding damage under a succession of punches from Harris.

That's three minutes gone in the round.

Well, the referee has seen enough. Neither fighter is active enough on the ground so he's stood them back up.
Bigwood doesn't manage to clinch there - Harris circles away.
Harris misses with a wild body shot.
Harris chopped to the floor by a nice leg kick but he springs right back up before Bigwood can pounce on him.
Bigwood misses with a body kick.
Harris throws a low kick, looking for Bigwood's leg but Bigwood calmly moves out of range.
Harris lands with a nice combination. Bigwood backs away looking to recover.
Bigwood looking to land some kicks to the body here.
Mark Bigwood seems to be the more aggressive standup fighter in this bout.
Harris avoids the body shot from Bigwood.
Bigwood tries to bum rush Harris with a series of wild strikes but Harris uses good footwork to avoid the assault.
Bigwood lands a jab followed by a nice looking cross.

That's four minutes gone in the round.
Harris misses with a body shot.
Bigwood tries to clinch but Harris moves out of range.
Harris takes a shot right to the liver - Bas would have been proud of that punch.
Harris avoids the body shot from Bigwood.
Bigwood throws a series of punches but Harris moves out of range.
Bigwood lands a nice shot to the body.
Harris on the receiving end of a decent leg kick there by Bigwood. Bigwood obviously looking to wear him down.
Harris bobs and weaves well there to avoid the strikes.
A head kick misses from Bigwood.
Harris shoots in and gets a takedown into half guard. Harris showed some decent athleticism there.
And thats the end of the round the fighters go back to their corners.
A close round but Mark Bigwood will probably get the nod.
The corners get their ten second warning. Both fighters stand from their stools and stare eachother down, ready to get back to the action.

Harris closes the distance and clinches up, looking for a takedown. He shifts his weight and gets a nice trip into half guard.
Harris is looking for a kimura. It's going to be difficult to finish that from half guard though and Bigwood defends it well.
Still in half guard, Harris seems content to control.
Bigwood is not content to let Harris control the position.
Bigwood trying to hold on to Harris's head to control him but Harris postures up.
Bigwood won't allow Harris to pass to mount.
That's one minute gone in the round.
Bigwood holds on for dear life, maintaining half guard for now.
Bigwood won't allow Harris to pass to mount.
Harris is trying to work for a kimura. This could be trouble! No, Bigwood has managed to free his arm - good work.
Harris performing his best blanket impression for a moment.
Harris frees up his trapped foot and advances to mount.
Bigwood is squirming around, avoiding Harris's attempts to control the action.
That's two minutes gone in the round.
The crowd are starting to boo a lack of action.
Harris thowing shots but they're missing.
Harris has hold of Bigwood's left arm, perhaps looking for a submission. The two fighters tussle over control of the isolated limb and Bigwood manages to get his arm back to his side and away from danger.
We get told so often about how wrestlers don't like to be on their backs. Let's see if Bigwood can do anything to dispel that myth.
Harris lands with some vicious ground and pound - can Bigwood hang on?
Harris is working on an americana here. Ooh, that looks pretty nasty! Nope, Bigwood has managed to escape the submission attempt.
Bigwood really doesn't want to stay on the ground with Harris. If he can't get it back to his feet, it's only a matter of time before he'll be tapping out.
Harris wants to finish this one by submission but Bigwood is holding onto his waist, trying to prevent any attacks from Harris.
That's three minutes gone in the round.
Bigwood tries to lock up and control but Harris gives him a forearm to the face and pushes him away.
Harris unloads with some shots from mount but Bigwood bucks and avoids them well.
Bigwood tries to hold on but Harris postures up.
Bigwood is trying desperately to improve position.
Harris tries to control but Bigwood wriggling away.
That's four minutes gone in the round.
Well. There's a bit of a lull in the action here and the crowd are starting to get restless.
Bigwood has given up his back here. Will Harris look for the submission or keep pounding away?
Bigwood can't escape the position.
Harris is persistently looking for the submission but Bigwood is defending it well.
Harris is working really hard to secure the rear naked choke. Bigwood defends successfully for a significant amount of time. Both fighters are looking very determined.
Harris patiently working for the choke. Which fighter will keep their nerve here?
The crowd applaud the fighters efforts here as the round comes to an end.
Bigwood turns into Harris and is now in his guard.
And thats the end of the round the fighters go back to their corners.
Paul Harris dominated that second round.
That's the end of the round. The referee orders the cornermen out of the cage so we can get back down to business. Let's get this one finished - here comes the final round!

Bigwood dances in quickly and lands a nice inside leg kick on Harris. That did some damage!
Harris tries to land with a swinging hook to the body but Bigwood was well out of range. Poor timing from Harris.
Harris tries to clinch but is not successful on this occasion.
Harris avoids the clinch attempt nicely.

Harris clinches.
A head punch blocked on the inside by Harris.
Bigwood goes for a body shot but it's blocked.
We've had a slow start to the round here - hopefully the action picks up.
Bigwood prevents Harris from breaking the clinch.
Harris has a body lock and is looking for a takedown. Bigwood is bouncing around trying to prevent the takedown and somehow he has indeed managed to stay on his feet.
Bigwood wants to push off and get back to the center of the mat but Harris has him pressed against the cage.

Harris breaks the clinch and we're back to striking at distance.
That's one minute gone in the round.
Bigwood lands an overhand right.
Harris is looking to wear down Bigwood with body shots, infact he's throwing more body shots than head shots at the moment.
Bigwood throws a head kick that misses and slips in the process. He scrambles back to his feet and the fighters circle.
Bigwood is on the wrong end of a nice combination from Harris.
Bigwood throws a sloppy head kick and Harris moves out of range easily.
Bigwood tries to land a front kick but Harris steps back. That was a bit too telegraphed.
Bigwood moves out of range of the leg kick from Harris.
Harris scores to the head and body with a nice combination!
Mark Bigwood is looking to keep the fight on the feet at all costs.
Harris misses with a body shot. Nice footwork from Bigwood.
Bigwood throws a wild combination but nothing lands.
Harris staying out of range there.
That's two minutes gone in the round.
Harris swings wildly with a couple of big hooks
and Harris takes a counter punch right on the button for his troubles.
A looping hook to the body misses from Harris. Bigwood does a little dance to reset his feet.
Harris fakes high and shoots in for a takedown but Bigwood avoids it really well and circles away.
Harris throws a decent looking leg kick but it doesn't land clean.
Harris throws a body punch but Bigwood moves out of range.
Harris is looking to clinch.
Harris keeping a good distance there, avoiding the body shot.
Bigwood throws a jab but it's blocked by Harris.
That's three minutes gone in the round.
Bigwood throws a leg kick that misses.
Harris misses with a combination
and Bigwood counters with a stiff right hand.
Bigwood connects with a lovely right hand, straight down the pipe.
Harris avoids a kick to the body.
Harris dives in and grabs Bigwood's left leg, looking for a takedown. Bigwood pushes down on Harris's head and hops out.
That's three failed takedown attempts in the round for Paul Harris. That's going to take a lot out of him.
Bigwood throws a right and a left that both miss.
Bigwood is looking to take this fight into the clinch.
Bigwood throws a combination but comes up with nothing but fresh air.
That's four minutes gone in the round.
A lull in the action here being met with boos from the crowd.
Harris bobs and weaves well there to avoid the strikes.
Bigwood tries to clinch
and Harris counters with a nice jab to the body that keeps Bigwood thinking.
Bigwood lets loose with a powerful body kick. Harris will feel that in the morning.
Bigwood ducks under a wild hook from Harris.
Harris will need to tighten up his combinations if he doesn't want to gas himself out, swinging at thin air.
Paul Harris is looking to throw some combinations by the looks of things.
Harris misses the shot to the body.
Bigwood throws a head kick that misses and slips in the process. He scrambles back to his feet and the fighters circle.
Harris changes levels and drives through with a really nice takedown into side control. Bigwood looks really pissed at himself for not defending that better.
And that's the end of the fight!
I would just about give that final round to Mark Bigwood.
I think Bigwood has won this one but let's see whether the judges agree with me. Over to the ring announcer for the scorecards.
Ladies and gentlemen, after 3 rounds of action, we go to the scorecards for a decision.
Judge Roosa Järviläinen scores the fight 28:29
Judge Ben Zyskovitsi scores the fight 29:28
Judge Matti Vanhoillinen scores the fight 28:29
In favor of your winner, by split decision... Mark Bigwood!
|
|
|
|
|
|
|
|
|
|
|
|
|
|
|
|
|
|
|
|
|
|
|
| S |
C
A |
G |
S |
C
B |
G |
|
S |
C |
G |
|
energy
A | B |
|
hype
A | B |
|
pop
A | B |
|
mgr
A | B |
|
FIGHT
RATING
41% |
|
|
|
|
|
|
