|
|
PBP Commentary |
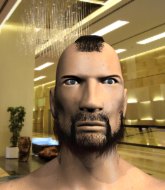
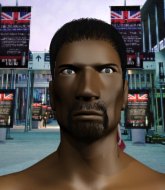
Coming up we have a heavyweight MMA rules bout between Mookie Blaylock (ranked 0 p4p, 0 weight class) and Lucas Rage (ranked 0 p4p, 0 weight class). Lucas Rage looks lathargic as he enters the arena. Wake up son, you're about to have a fight!
 |
|
 |
| 180 cm
20
240 lbs
0 - 0 - 0 |
|
191 cm
18
261 lbs
1 - 0 - 0 |
BJJ Blue Belt
Brawler
Good chin |
|
BJJ White Belt
Brawler
Solid chin |
|
| |
|
Ladies and gentlemen. This fight is 3 rounds, in the heavyweight division.
Introducing the fighter to my left, fighting out of the red corner.
With a record of
0 - 0 - 0, fighting out of Amsterdam, Mookie Blaylock!
And introducing the fighter to my right, fighting out of the blue corner.
With a record of
1 - 0 - 0, fighting out of Amsterdam, Lucas Rage!
The judges for this bout are Paul Aken, Saam Ante and Daniel Blasius.

The bell rings for round one and we are underway!
Rage circles away from the clinch attempt.

Rage clinches up with Blaylock and pushes him back against the cage.
Rage goes for a takedown attempt but Blaylock pushes him away and we're back to fighting at a distance.
Blaylock shoots in for a takedown but doesn't get it.
Blaylock throws a nice looking combination but Rage bobs and weaves to avoid any damage.

Blaylock drops down and drives through with a powerful takedown into guard.
Blaylock really is a fat lump.
Blaylock working from the guard for now, landing some ground and pound.
Rage really doesn't want to stay on the ground with Blaylock. If he can't get it back to his feet, it's only a matter of time before he'll be tapping out.
Blaylock stands up and looks to throw the legs aside to pass to side control. Rage swivels though and keeps the full guard.
Rage working the defensive guard well to avoid strikes from Blaylock.
The fighters are pressed up against the cage, both looking to find a bit of space to work.
Blaylock trying to land body shots but he keeps hitting the mat.
Blaylock working in close now, lands a nice elbow to the side of Rage's head.
Blaylock makes a bit of distance and scores with some ground and pound, still in guard.
Blaylock working some strikes from top position.
Rage has momentary wrist control but Blaylock slips an elbow through the middle.
Rage looks gassed!
Wooooo! Give it up for these two warriors! They are putting on a show!
Blaylock working from the guard for now, landing some ground and pound.

That's one minute gone in the round.
Blaylock is sitting in guard, working some ground and pound.
Blaylock throwing strikes from guard but Rage blocks nicely.
Blaylock lands a nice shot whilst sitting in his opponent's guard.
Blaylock throwing strikes but missing.
Blaylock missing there with some ground and pound from the guard.
Blaylock throwing strikes but missing.
Blaylock throwing strikes from guard but Rage blocks nicely.
Blaylock works over Rage with some ground and pound from guard.

Blaylock postures up as if he's going to throw some strikes but drops back for an ankle! Rage is in big trouble! He looks ready to tap! But no, he's escaped and dives on top of Blaylock, into his guard.
Rage stands up and looks to throw the legs aside to pass to side control. Blaylock swivels though and keeps the full guard.

That's two minutes gone in the round.
Blaylock is looking to get back to his feet but can't, whilst Rage is controlling him.
There's a bit of a scramble here and now Blaylock is on top in guard.
We get told so often about how wrestlers don't like to be on their backs. Let's see if Rage can do anything to dispel that myth.
The fighters are going at a pretty good pace and they're both starting to sweat now.
Blaylock connects with a couple of short punches.

That's three minutes gone in the round.
Rage controls Blaylock momentarily but Blaylock frees himself.
The ref warns both fighters not to hold the cage as they work up against the meshing.
Blaylock working in close now, lands a nice elbow to the side of Rage's head.
Blaylock landing with the ground and pound.
Blaylock postures up and lands some nice ground and pound.
Blaylock makes a bit of distance and scores with some ground and pound, still in guard.
Blaylock working in close now, lands a nice elbow to the side of Rage's head.
Blaylock throwing shots from guard but he's hitting more mat than opponent.
Blaylock postures up and scores with a shot to the body and a follow up elbow to the head.
Blaylock is working Rage over from the guard. He should look to pass the guard and do a little more damage with these strikes.
Blaylock might be looking to lock onto one of his opponent's long limbs for a submission, whilst we're on the ground.
Rage is looking to stand back up... there's a bit of a scramble and Blaylock dives into side control.

That's four minutes gone in the round.
Blaylock lands a knee to the body and a forearm to the face.
Blaylock works a knee to the body and follows up with a nice elbow to the head.
Blaylock scores with a couple of short elbows.
Blaylock working the head and body with strikes.
Blaylock advances nicely into full mount.
Rage is writhing around trying to get back to his feet.
Blaylock scoring with strikes but Rage is staying in there.
Blaylock raining down shots from the mount!
Blaylock connects with a couple of good shots from mount.
This has been an exciting period of action!
As the round comes to an end the crowd are showing their appreciation for a great round of action.
Blaylock postures up and cracks his opponent a couple of times before moving back into close ground control. Rage looks a forlorn figure.
Blaylock with a couple of short strikes.
And thats the end of the round the fighters go back to their corners.
Mookie Blaylock dominated that round.
The minute break is over - no more time for sponges and pep talks - back to the action!

Rage wants to clinch.
Rage shoots in for a takedown but Blaylock shows good takedown defense.
Mookie Blaylock seems to be the more aggressive standup fighter in this bout.
Blaylock closes the distance and scores a nice trip takedown into half guard. Rage did well to prevent Blaylock getting side control.
Blaylock looks to score some points with some ground and pound.
Blaylock lands strikes from half guard.
Blaylock scores with a couple of good hammerfists.
Rage on the receiving end of some nice ground and pound.
Blaylock working over Rage with some ground and pound. Rage looks like he wants out of this position, which is understandable.
Blaylock is scoring with some nice ground and pound from the dominant position.
Blaylock has been looking to land a fair amount of strikes on the ground. He might be looking to soften his opponent up in order to work for a submission.
Rage taking some punishment here, with Blaylock in his half guard.
Rage is trying to defend against the ground and pound but Blaylock scores with a couple of nice shots.
Both fighters are absolutely exhausted here.
Blaylock wants to control but Rage is keeping him busy.
That's one minute gone in the round.
Blaylock looks to score some points with some ground and pound.
Blaylock lands strikes from half guard.
Blaylock is working hard to pass the guard. He's done it - he's now in full mount! Trouble for Rage!
Blaylock scoring with strikes but Rage is staying in there.
Blaylock putting on the heat here with some good ground and pound!
Rage really trying hard to get back to half guard here.
Blaylock looking to ground and pound his opponent to a finish here.
Rage is desperately trying to improve his position but Blaylock has a good base and remains in mount.
Rage takes a big shot to the head but keeps on trying to improve his position.
Blaylock pausing momentarily but resumes with a couple of decent strikes that do a bit of damage.
Rage squirming around on the bottom, looking to escape.
That's two minutes gone in the round.
Rage is looking to get to half guard.
Blaylock scores with a couple of good head shots there.
Blaylock lands with some strikes.
Rage taking shots to the head.
Blaylock lands a nice shot to the head.
Blaylock prevents Rage from getting the reversal.
Rage tries to lock up and control but Blaylock gives him a forearm to the face and pushes him away.
Blaylock lands a big shot there that rocks Rage but he's holding on and managing to survive for now.
Blaylock is landing with some decent strikes but Rage is trying to advance his position so the referee is letting the fight continue.
Rage wants to control but Blaylock is having none of it.
A nice elbow there by Blaylock.
That's three minutes gone in the round.
Blaylock is in the full mount, landing strikes.
Blaylock landing strikes from the mount.
Rage tries to reverse the position but Blaylock maintains control.
Blaylock working Rage over with strikes here.
Blaylock blocks Rage's feeble attempts to strike from the bottom.
Rage is looking to get to half guard.
Blaylock with a couple of short strikes.
Blaylock landing strikes from the mount and Rage is in trouble!
Blaylock looking to ground and pound his opponent to a finish here.
Blaylock looks like he's working for a submission but he's not found anything just yet.
That's four minutes gone in the round.
A few boos can be heard. I'm sure they will multiply if the fighters don't pick up the pace.
Rage tries to get back to half guard but can't.
Blaylock dominating with strikes here.
Blaylock lands a big elbow.
Blaylock avoids the attempt from Rage to control.
Blaylock lands a big elbow.
Blaylock is still in mount, landing shots to his trapped opponent. Rage can't stay in a position like this for much longer.
Rage wants to control but Blaylock is having none of it.
BOOM! Blaylock connects with a massive shot to the dome!
And thats the end of the round the fighters go back to their corners.
Mookie Blaylock dominated that second round.
That's time! Back to the action! This is the final round!

Blaylock shoots in with a lovely double leg takedown. Rage manages to land in full guard to minimise the damage.
Blaylock is looking to work some ground and pound but Rage has wrist control.
Mookie Blaylock overall seems to be getting the better of the ground position in the fight so far.
Blaylock wants to control from the top but Rage keeps moving.
Blaylock works over Rage with some ground and pound from guard.
Blaylock advances position into side control!
Blaylock is looking to finish here, going for an Americana. Rage knows the correct defense though, so he's OK.
Blaylock working the ground and pound.
Both fighters are breathing heavily.
That's one minute gone in the round.
Blaylock creates a bit of distance and throws down some hard shots.
Blaylock lands a knee to the body and follows it up with some ground and pound to the head. That will wear Rage down.
Blaylock landing with strikes to the head and body from side control.
Blaylock working the body and head with strikes.
Blaylock scores with a couple of nice shots to the head there. The referee takes a look at Rage to see if he's OK.
Blaylock connects with a decent looking elbow from side control that caused Rage some visible discomfort.
Rage takes an elbow right on the bridge of the nose and winces in pain.
Rage tries to control the position but he's not in luck - Blaylock easily slips into full mount!
Rage tries to lock up and control but Blaylock gives him a forearm to the face and pushes him away.
That's two minutes gone in the round.
Neither fighter has done anything of merit for a good minute or two here and the crowd are not happy about it.
Blaylock putting on the heat here with some good ground and pound!
Blaylock in mount throwing good strikes here, bouncing his opponent's head off the canvas.
Rage is looking to get to half guard.
Blaylock scoring with some good ground and pound from mount here. Will he manage to finish Rage?
Rage takes a big shot to the head but keeps on trying to improve his position.
Blaylock lands with some strikes.
Rage tries to lock up and control but Blaylock gives him a forearm to the face and pushes him away.
Blaylock lands a big shot there that rocks Rage but he's holding on and managing to survive for now.
That's three minutes gone in the round.
Blaylock lands a heavy elbow.
Blaylock lands a couple of nice shots there from mount.
Blaylock landing shots from mount.
Rage throwing hammer fists to the chest of Blaylock. What's that going to do exactly?
Blaylock pausing momentarily but resumes with a couple of decent strikes that do a bit of damage.
Rage is trying desperately to improve position.
Blaylock can't quite control the action as he would like just now, as Rage is looking to escape.
You get the feeling that Rage really doesn't like being in this position too much.
Blaylock with good strikes from the mount here!
That's four minutes gone in the round.
My god... these two guys really need to pick up the pace or everyone will leave to go get a beer.
The referee warns Rage that he has to improve his position here as he takes two more clean shots to the head.
Blaylock raining down shots from the mount!
The referee warns Rage that he has to improve his position here as he takes two more clean shots to the head.
Blaylock looking to ground and pound his opponent to a finish here.
Blaylock lands a shot to the body, followed up by a shot to the exposed head of his trapped opponent.
Blaylock is in the full mount, landing strikes.
Blaylock lands a nice shot to the head.
Blaylock pausing momentarily but resumes with a couple of decent strikes that do a bit of damage.
Lucas Rage has stepped it up - he knows he needs a finish here!
Blaylock postures up and cracks his opponent a couple of times before moving back into close ground control. Rage looks a forlorn figure.
Blaylock landing strikes, looking to finish!
And that's the end of the fight!
Mookie Blaylock showed his dominance in that final round.
Well I reckon that's a shut out for Blaylock, winning every round. Will the judges agree? They are the ones who matter, even if they are often depressingly incompetent. Over to the ring announcer for the scorecards.
Ladies and gentlemen, after 3 rounds of action, we go to the scorecards for a decision.
Judge Paul Aken scores the fight 30:26
Judge Saam Ante scores the fight 30:26
Judge Daniel Blasius scores the fight 30:26
In favor of your winner, by unanimous decision... Mookie Blaylock!
|
|
|
|
|
|
|
|
|
|
|
|
|
|
|
|
|
|
|
|
|
|
|
| S |
C
A |
G |
S |
C
B |
G |
|
S |
C |
G |
|
energy
A | B |
|
hype
A | B |
|
pop
A | B |
|
mgr
A | B |
|
FIGHT
RATING
63% |
|
|
|
|
|
|
