|
|
PBP Commentary |
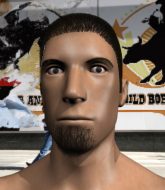
Coming up we have a lightweight MMA rules bout between Hiro Yatamoko (ranked 0 p4p, 0 weight class) and Jordan Hamasaki (ranked 0 p4p, 0 weight class). Hiro Yatamoko has the better chin. Will he look to stand and bang today?
 |
|
 |
| 225 cm
25
170 lbs
2 - 1 - 0 |
|
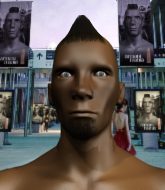
180 cm
24
163 lbs
2 - 0 - 0 |
Abu Dhabi Champ
Counter striker
Very strong |
|
BJJ White Belt
Solid Muay Thai
Powerful |
|
| |
|
Ladies and gentlemen. This fight is 3 rounds, in the lightweight division.
Introducing the fighter to my left, fighting out of the red corner.
With a record of
2 - 1 - 0, fighting out of Helsinki, Hiro Yatamoko!
And introducing the fighter to my right, fighting out of the blue corner.
With a record of
2 - 0 - 0, fighting out of Helsinki, Jordan Hamasaki!
The judges for this bout are Roosa Järviläinen, Arvi Lind and Ben Zyskovitsi.

The bell rings for round one and we are underway!
Yatamoko circles away from the clinch attempt.
Yatamoko keeps the fight on the outside.
Hamasaki is looking to clinch but Yatamoko is avoiding it.
Hamasaki tries to close the distance and clinch up but Yatamoko swats him away and circles back towards the center.
Hamasaki is looking to clinch but Yatamoko is avoiding it.
Hamasaki is looking to clinch but Yatamoko is avoiding it.
Hamasaki fails in his attempt to clinch.
Hamasaki tries to clinch up.
Hamasaki tries to close the distance and clinch up against the cage but Yatamoko paws at him with a jab and circles away.
Hamasaki tries to clinch but Yatamoko is having none of it.
Yatamoko really does look like a pencil wearing a pair of gloves. Let's hope he has a gameplan to suit that ridiculous body shape.
Yatamoko closes the distance and clinches up with Hamasaki, looking for a takedown. Yatamoko pushes Hamasaki against the cage but Hamasaki circles to the side and manages to break the clinch.
We've had a slow start to the round here - hopefully the action picks up.
Hamasaki tries to clinch but Yatamoko is having none of it.
Jordan Hamasaki seems to be the more aggressive standup fighter in this bout.
Hamasaki doesn't manage to clinch there - Yatamoko circles away.
Hamasaki is looking to clinch but Yatamoko is avoiding it.
Hamasaki walks straight into an uppercut. Luckily it didn't land flush.

That's one minute gone in the round.
Yatamoko looks for a takedown here. Will he get it? Hamasaki is fending him off so far but Yatamoko persists. Nope, Hamasaki circles away and we're back to standing.
Hamasaki moves in looking to clinch but Yatamoko pushes him off.
Hamasaki wants to clinch.
Yatamoko avoids the clinch attempt nicely.

Hamasaki fakes with an overhand right and moves in to clinch with Yatamoko, pushing him back against the cage.
Yatamoko fails to pull guard.
That's three failed takedown attempts in the round for Hiro Yatamoko. That's going to take a lot out of him.
Yatamoko takes an elbow to the temple.

It looks like Hiro Yatamoko has been cut.
Hamasaki misses with an elbow over the top.
Yatamoko fails to pull guard.
Hamasaki crunches a lovely knee into Yatamoko's ribcage.
Hamasaki looking to throw knees to the head but Yatamoko is blocking nicely.
Yatamoko jumps guard but Hamasaki stands there with Yatamoko around his waist. Yatamoko gives up and drops back to his feet. We remain in the clinch.
A knee to the head by Hamasaki.
Hamasaki softening up his opponent with strikes, against the cage.
Yatamoko fails to pull guard.
Yatamoko on the defensive, avoiding the knees to the body.
Hamasaki with an attempt at a knee that misses.
Yatamoko tries to pull guard but Hamasaki holds him up against the cage and eventually Yatamoko drops back down to his feet.

That's two minutes gone in the round.
Hamasaki lands a nice knee to the body.

Yatamoko jumps guard and drags Hamasaki to the mat. He's obviously going to be looking for submissions off his back.

Yatamoko working for a triangle but Hamasaki defends it easily.
The ref warns both fighters not to hold the cage as they work up against the meshing.
Yatamoko is breathing heavily.
Hamasaki with a flurry of punches that miss.
Hamasaki postures up in Yatamoko's guard and throws a big left but Yatamoko blocks it.
Hamasaki looking to pass the guard.
Hamasaki drops back for a leg! It's a sloppy attempt though and Hamasaki jumps back into guard quickly, to retain the dominant position.
Hamasaki tries to free his leg and advance position but Yatamoko is retaining full guard.
Yatamoko is working actively off his back, looking to secure an arm or perhaps work for a triangle.
Hamasaki tries to free his leg and advance position but Yatamoko is retaining full guard.
Yatamoko looking for submissions off his back, moving his hips, looking for an opening.
Wooooo! Give it up for these two warriors! They are putting on a show!
Yatamoko keeping full guard, as Hamasaki tries to pass.

That's three minutes gone in the round.
Yatamoko preventing the ground and pound from doing any damage.
Yatamoko has his foot on Hamasaki's thigh. He's trying to push off and get in position for a triangle, I think. Hamasaki works his way back into a safe position though.
Hamasaki trying to stand up but can't free himself from Yatamoko's guard.
Hamasaki must be cautious of submissions here, given that his opponent has the superior Jiu Jitsu.
Yatamoko avoiding any damage from the ground and pound.
Yatamoko is working actively off his back, looking to secure an arm or perhaps work for a triangle.
Hamasaki wants to control from the top but Yatamoko keeps moving.
The fighters are going at a pretty good pace and they're both starting to sweat now.
Hamasaki got a little sloppy there for a moment and Yatamoko has worked his way into a loose triangle - can he finish it?! No, Hamasaki has managed to get both his arms back between Yatamoko's legs - danger averted.
Hamasaki trying to control the position from guard on top but Yatamoko is wriggling around, looking for whatever he can.
Hamasaki tries to free his leg and advance position but Yatamoko is retaining full guard.
Hamasaki really doesn't want to stay on the ground with Yatamoko. If he can't get it back to his feet, it's only a matter of time before he'll be tapping out.

That's four minutes gone in the round.
Hamasaki got a little sloppy there for a moment and Yatamoko has worked his way into a loose triangle - can he finish it?! No, Hamasaki has managed to get both his arms back between Yatamoko's legs - danger averted.
Hamasaki looking to pass the guard.
Yatamoko is looking for a guillotine. You can't force these things though and Hamasaki defends well.
Hamasaki stands up and looks to throw the legs aside to pass to side control. Yatamoko swivels though and keeps the full guard.
Yatamoko had isolated an arm as going for a kimura. Hamasaki defends it easily.
Hamasaki has decided he wants to stand but the closed guard of Yatamoko is proving hard to escape from.
The fighters are pressed up against the cage, both looking to find a bit of space to work.

The referee decides to stand the fighters back up.
Yatamoko swats away the attempt to clinch by Hamasaki.
Yatamoko swats away the attempt to clinch by Hamasaki.
And thats the end of the round the fighters go back to their corners.
That was a close round but I would say that Hiro Yatamoko will probably get the nod.
The cut man is working on Hiro Yatamoko's cut.
That's time! Back to the action!

Hamasaki is looking to clinch.
Hamasaki is looking to clinch.
Yatamoko moves out of range as Hamasaki strikes.
Yatamoko fails with a takedown attempt.
Hamasaki is looking to take this fight into the clinch.
Yatamoko shoots in for a takedown. "Ole!" shouts Hamasaki as he jumps to the side.
We've had a slow start to the round here - hopefully the action picks up.
Yatamoko avoids the clinch attempt nicely.
Yatamoko swats away the attempt to clinch by Hamasaki.
That's one minute gone in the round.
Hamasaki tries to close the distance and clinch up but Yatamoko swats him away and circles back towards the center.
Yatamoko fails miserably with a takedown attempt.
That's three failed takedown attempts in the round for Hiro Yatamoko. That's going to take a lot out of him.
Yatamoko avoids the clinch attempt nicely.
Hamasaki is looking to clinch.
Hamasaki is looking to clinch.
Hamasaki clinches with his opponent.
Hamasaki lands a nice elbow from the clinch.
Kneeeeees! The crowd are calling for knees to the body. Hamasaki obliges.
Hamasaki lands an elbow that stopped Yatamoko in his tracks for a moment.
Yatamoko fails to pull the fight into his guard.
Hamasaki lands an elbow inside that Yatamoko shrugs off.
Hamasaki lands a knee to the head.
Hiro Yatamoko's cut is getting worse.
Both fighters are absolutely exhausted here.
Hamasaki lands a damaging elbow.
Hamasaki tries to land a knee to the head but misses.
Hamasaki lands an elbow inside that Yatamoko shrugs off.
That's two minutes gone in the round.
Hamasaki lands a knee to the body.
Nice elbow from Hamasaki.
Hiro Yatamoko's cut is bleeding quite badly. He's got to try and protect it.
Hamasaki lands a nice elbow from the clinch.
Hamasaki lands a damaging elbow.
Hamasaki utilising his Muay Thai to score with a knee to the body.
Hamasaki lands an elbow inside.
Hamasaki using the Thai clinch to land knees to the body.
Hamasaki landing some nice looking knees to the body.
Hamasaki lands an elbow inside that Yatamoko shrugs off.
Hamasaki gets an overhook and lands an elbow to the side of the head.
Hamasaki using the Thai clinch to land knees to the body.
Hamasaki lands a knee to the body.
The crowd cheering loudly, showing their appreciation for the quality fight we're seeing here.
Hamasaki with the Thai clinch. He's looking to land a big knee but he's not managed it this time.
Hamasaki utilising his Muay Thai to score with a knee to the body.
Hamasaki lands a body punch.
Hamasaki lands a nice elbow from the clinch.
Jeez, Hiro Yatamoko's cut is really nasty now. The referee must be thinking about getting that checked.
Hamasaki lands a damaging elbow.
Hamasaki scores with a knee to the head.
Kneeeeees! The crowd are calling for knees to the body. Hamasaki obliges.
Yatamoko takes a knee to the side of the body.
Hamasaki utilising his Muay Thai to score with a knee to the body.
Hamasaki throws a knee to the head but misses.
Knees to the body from Hamasaki.
That's three minutes gone in the round.
Nice elbow from Hamasaki.
Yatamoko takes an elbow to the temple.
Knees to the body from Hamasaki.
A body shot lands from Hamasaki.
Nice elbow from Hamasaki.
Hamasaki crunches a lovely knee into Yatamoko's ribcage.
A hook to the body from Hamasaki.
Hamasaki lands a nice elbow from the clinch.
Hamasaki lands a good knee to the midsection. Yatamoko won't want to take too many of those.
Yatamoko fails to pull guard.
Hamasaki using the Thai clinch to land knees to the body.
Yatamoko blocks an elbow strike from Hamasaki.
Hamasaki with the Thai clinch. He's looking to land a big knee but he's not managed it this time.
Yatamoko tries to pull guard but can't drag his opponent to the mat. Hamasaki just stands there and leans against the cage.
Hamasaki using the Thai clinch to land knees to the body.
Hamasaki trying to land knees to the body.
Yatamoko tries to pull guard but Hamasaki won't allow it.
With the fighters up against the cage, Hamasaki throws an elbow but misses.
Hamasaki trying to land knees to the body.
Yatamoko fails to pull the fight into his guard.
Hamasaki looks to throw an elbow but misses.
Yatamoko jumps guard but Hamasaki stands there with Yatamoko around his waist. Yatamoko gives up and drops back to his feet. We remain in the clinch.
Hamasaki is looking to score with knees to the body. Maybe he'll change it up and go body then head. Yatamoko is defending well for now.
Yatamoko tries to pull guard but Hamasaki holds him up against the cage and eventually Yatamoko drops back down to his feet.
That's four minutes gone in the round.
Hamasaki lands a nice uppercut.
Hamasaki tries to land a knee to the head but misses.
Hamasaki throws an elbow that misses.
Yatamoko tries to take the fight to the ground by pulling guard but can't manage it.
Yatamoko tries to take the fight to the ground by pulling guard but can't manage it.
Hamasaki scores a nice knee to the body.
Hamasaki tries a knee to the head but Yatamoko blocks it.
Yatamoko tries to jump guard but he falls flat on his backside. Hamasaki smiles and moves away.
Hamasaki wants to clinch up but Yatamoko keeps it at a distance.
Yatamoko shoots in for a takedown and gets it.
Hamasaki blocking the ground and pound attempt from Yatamoko.
And thats the end of the round the fighters go back to their corners.
Jordan Hamasaki showed his class in that round. I'd imagine he'll take it on all the scorecards.
The cut man is working on Hiro Yatamoko's cut.
Well, the break between rounds is over. Let's get back to the scrappin! And we move into the final round!

Hamasaki tries to clinch but is not successful on this occasion.
Hamasaki tries to clinch but Yatamoko is having none of it.
Hamasaki tries to clinch up but Yatamoko circles away and keeps his distance.
Hamasaki throws a monster uppercut resembling something out of street fighter but it doesn't land.
Yatamoko misses with a takedown attempt. He shot from a bit too far out.
Yatamoko shoots in for a double leg but Hamasaki sprawls well. That's going to sap some energy.
Hamasaki ducks under an overhand right and circles away with a smile on his face.
We've had a slow start to the round here - hopefully the action picks up.
Hamasaki is looking to clinch but Yatamoko is avoiding it.
Both fighters are breathing heavily.
Hamasaki is looking to clinch.
Yatamoko keeps the fight on the outside.
Hamasaki is looking to clinch but Yatamoko is avoiding it.
That's one minute gone in the round.
Yatamoko keeps the fight on the outside.
Hamasaki tries to clinch but Yatamoko moves out of range.
Hamasaki wants to clinch up but Yatamoko keeps it at a distance.
Hamasaki fails in his attempt to clinch.
Hamasaki is looking to clinch but Yatamoko is avoiding it.
Hamasaki is looking to take this fight into the clinch.
Yatamoko shoots in and scores a nice double leg takedown into half guard.
Hamasaki is looking to control Yatamoko's leg but it's slowly edging free. Can Hamasaki avoid being mounted?
Yatamoko is looking for a kimura but he's never going to get it from there.
That's two minutes gone in the round.
Yatamoko seems to be looking for submissions.
Hamasaki is trying to control but can't.
Yatamoko wants to pass the guard but Hamasaki is defending well.
Yatamoko seems to be working for a kimura but Hamasaki defends the submission attempt.
Hamasaki trying to hold on to Yatamoko's head to control him but Yatamoko postures up.
That's three minutes gone in the round.
Hamasaki keeping control of the leg, stopping his opponent passing to mount.
The referee decides to stand the fighters back up.
Yatamoko circles away from the clinch attempt.
Hamasaki moves in looking to clinch but Yatamoko pushes him off.
Hamasaki fails with an attempt to clinch.
Hamasaki tries to clinch there but Yatamoko circles away.
Jordan Hamasaki is looking to throw some combinations by the looks of things.
The fight stays on the outside here - Hamasaki looks like he's thinking about clinching though.
Yatamoko swats away the attempt to clinch by Hamasaki.
Hamasaki feints with a shoulder and throws a nice leg kick to Yatamoko's calf.
That's four minutes gone in the round.
There's not a lot going on here and the crowd are letting the fighters know they're not willing to tolerate a lack of action.
Yatamoko avoids the clinch attempt nicely.
Yatamoko swats away the attempt to clinch by Hamasaki.
Hamasaki tries to clinch up but Yatamoko circles away and keeps his distance.
Hamasaki gets in close and instigates a clinch.
Knees in the clinch landing for Hamasaki.
Hamasaki lands an elbow that stopped Yatamoko in his tracks for a moment.
Hamasaki scores with a shoulder strike.
Yatamoko blocks an elbow strike from Hamasaki.
Hamasaki lands an elbow inside.
Boooooooooooooooooooo!!! God, this has been a terrible round. Come on you two, sort yourselves out!
Yatamoko takes a knee to the side of the body.
Hamasaki using the Thai clinch to land knees to the body.
Yatamoko takes an elbow to the temple.
Yatamoko jumps guard but Hamasaki stands there with Yatamoko around his waist. Yatamoko gives up and drops back to his feet. We remain in the clinch.
That's three failed takedown attempts in the round for Hiro Yatamoko. That's going to take a lot out of him.
Hamasaki using the Thai clinch to land knees to the body.
And that's the end of the fight!
Jordan Hamasaki comfortably won the final round on my scorecard.
I think Hamasaki has won this one but let's see whether the judges agree with me. Over to the ring announcer for the scorecards.
Ladies and gentlemen, after 3 rounds of action, we go to the scorecards for a decision.
Judge Roosa Järviläinen scores the fight 28:29
Judge Arvi Lind scores the fight 28:29
Judge Ben Zyskovitsi scores the fight 28:29
In favor of your winner, by unanimous decision... Jordan Hamasaki!
|
|
|
|
|
|
|
|
|
|
|
|
|
|
|
|
|
|
|
|
|
|
|
| S |
C
A |
G |
S |
C
B |
G |
|
S |
C |
G |
|
energy
A | B |
|
hype
A | B |
|
pop
A | B |
|
mgr
A | B |
|
FIGHT
RATING
43% |
|
|
|
|
|
|

