|
|
PBP Commentary |
Coming up we have a lightweight MMA rules bout between Jeremy Torrem (ranked 0 p4p, 0 weight class) and Kal Too (ranked 0 p4p, 0 weight class). Both these guys have really solid chins. Will we see a standup war or will they both decide that a knockout is unlikely and try to win the fight elsewhere?
 |
|
 |
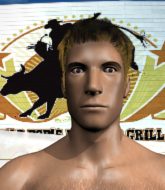
| 176 cm
22
163 lbs
4 - 2 - 0 |
|
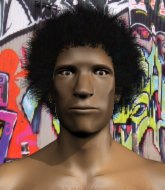
176 cm
20
161 lbs
3 - 0 - 0 |
BJJ Blue Belt
Decent elbows
KO power |
|
Powerful takedowns
Basic striking
Powerful |
|
| |
|
Ladies and gentlemen. This fight is 3 rounds, in the lightweight division.
Introducing the fighter to my left, fighting out of the red corner.
With a record of
4 - 2 - 0, fighting out of Tokyo, Jeremy Torrem!
And introducing the fighter to my right, fighting out of the blue corner.
With a record of
3 - 0 - 0, fighting out of Tokyo, Kal Too!
The judges for this bout are Shigeki Fujiwara, Yukihiro Shimada and Yukihiro Yamamoto.

The bell rings for round one and we are underway!
Torrem throws out a leg kick but Too moves out of range and Torrem only half commits.
Too avoids the clinch attempt nicely.
Torrem is looking to clinch.
Torrem tries to clinch there but Too circles away.
Too avoids the clinch attempt nicely.
Torrem tries to close the distance and clinch up against the cage but Too paws at him with a jab and circles away.

Too shoots in from a long way out. He's driving through with the takedown attempt and he eventually gets it, landing in Torrem's guard.
Too postures up to throw the ground and pound strikes but they don't connect.
Too with a flurry of punches that miss.
Too in full guard, throwing the ground and pound. No damage this time.
Too connects with a couple of short punches.
Too working some ground and pound from guard but it's not doing any damage.
Torrem looking to control the pace of the fight rather than finish it.
Too trying to land body shots but he keeps hitting the mat.
Torrem doesn't do any damage with a couple of strikes from the bottom.

It looks like we're going to have a standup here. Neither fighter is doing enough on the ground.
Too digs a good hook to Torrem's body.
Too shoots in but no luck this time.

That's one minute gone in the round.
Too scores with a nice takedown into half guard. Let's see what he's got on the ground.

Torrem kicks off Too and gets to his feet.
Too circles away from the clinch attempt.
Torrem tries to clinch up.
A big left from Torrem misses.
Left hook, right uppercut from Too.
Torrem wants to clinch.
Too is trying hard to land a takedown here. Torrem sprawls well and keeps this one on the feet.
Torrem doesn't manage to clinch there - Too circles away.
Too shoots in looking for a takedown. Torrem tries to sprawl out of it but Too keeps driving through. The fighters are pinned against the cage. Torrem manages to get underhooks and after a bit of a struggle, circles away and we're back to standing.
Jeremy Torrem has stuffed three takedown attempts in the round now. That's going to take a lot out of Kal Too.
Too shoots in for a double leg but Torrem sprawls well. That's going to sap some energy.
Too circles away from the clinch attempt.
Torrem is looking to clinch.
Too shoots in with a takedown attempt and he has Torrem pinned against the cage. Torrem gets the underhooks and manages to circle away.
Torrem fails with an attempt to clinch.

That's two minutes gone in the round.

Torrem moves into the clinch.
Too dodges an elbow strike from Torrem.
Torrem misses with a knee strike.
Torrem is struggling to control the position.
Too blocks a knee to the body. He'll have a nicely bruised forearm in the morning.
Too is trying to drag Torrem to the mat but Torrem just about manages to keep his footing. He used the cage to his advantage there.
Torrem trying to land knees to the body.
Too takes an elbow to the temple.
Too drops down looking for an ankle pick but Torrem pulls his leg out and moves away.
Too fails to land with a series of punches.

That's three minutes gone in the round.
Too closes the distance and clinches up, looking for a takedown. He shifts his weight and gets a nice trip into half guard.
Too is working hard to pass the guard. He's done it - he's now in full mount! Trouble for Torrem!

Too swings around for an armbar but it's a sloppy attempt and Torrem is now in Too's guard. A big mistake from Too there, giving up the dominant position!
Torrem wants to stand but Too is controlling his posture from full guard.
Too looking for a sweep. Not yet Too, not yet.
Torrem stands up and looks to throw the legs aside to pass to side control. Too swivels though and keeps the full guard.
Too bucks up whilst keeping hold of a body lock, managing to reverse the position. Now he's in top in Torrem's guard.
Too working some ground and pound from guard but it's not doing any damage.
Too in full guard, throwing the ground and pound. No damage this time.
The ref warns both fighters not to hold the cage as they work up against the meshing.
Too lands a couple of digs.

That's four minutes gone in the round.
Too chips away with some ground and pound.
Too stopping the sweep attempt from Torrem.
Torrem is working the butterfly guard. He manages to land a nice scissor sweep and is now in half guard on the top. Nice move.
Too gets full guard.
Too escapes his hips to the side and looks to be working for an armbar. Torrem gives him a little smile and shakes his head. No chance.
Too throwing his legs up looking for a triangle.
Torrem trying to stand up but can't free himself from Too's guard.
And thats the end of the round the fighters go back to their corners.
Kal Too dominated that round.
That's time! Torrem's corner gives him a slap on the ass as he gets ready to fight.

Torrem throws a head kick that misses and slips in the process. He scrambles back to his feet and the fighters circle.
Too misses with a takedown attempt - Torrem sprawls well and throws a nice strike on the way out which just misses.
Too looking for a takedown here - he's got it.
Too with a flurry of punches that miss.
Torrem looking for a sweep. Not yet Torrem, not yet.
Torrem working the defensive guard well to avoid strikes from Too.
Too looking to pass the guard.
The fighters are pressed up against the cage, both looking to find a bit of space to work.
Torrem preventing the ground and pound from doing any damage.
Torrem keeping full guard, as Too tries to pass.
Torrem avoiding any damage from the ground and pound.
That's one minute gone in the round.
Too stands and throws Torrem's legs to the side, diving into side control.
Too landing strikes.
Torrem is working to avoid the ground and pound but Too connects with a decent elbow.
Too postures up a little and throws a couple of hammerfists but they don't connect properly.
Too has the superior BJJ but he's also working some ground strikes into his gameplan.
Too is looking to take a break and control but Torrem is keeping him honest, looking to work from the bottom.
Too throwing strikes but missing, from side control.
Torrem is trying to get back to half guard. He's pushing on Too's leg. He's managed it. Nice work.
Too trying to pass the guard but Torrem defending well.
That's two minutes gone in the round.
Torrem is trying to control but can't.
Too missing with the ground and pound from half guard.
Neither fighter is doing enough for the referee's liking and he's decided to stand them back up.
Torrem is looking to clinch but Too is avoiding it.
Too moves into range and throws a combination. A nice jab followed by a hook to the body.
Too shoots for a double leg takedown but Torrem sprawls well. He's pushed Too's face into the mat and manages to get back to his feet relatively easily.
A head kick misses from Torrem.
Too shoots in and scores a nice double leg takedown into half guard.
Too trying to control the action but Torrem is working from the bottom.
Torrem wants to improve his position but Too is controlling well.
Too wants to lay and pray for a moment but Torrem keeps working.
That's three minutes gone in the round.
Too sitting in half guard, looking to land shots. Torrem defending well though.
Too slows the pace down in half guard.
Too is keen to just control but Torrem is a slippery customer.
Torrem manages to get to full guard.
Too prevents Torrem from getting back to his feet.
Too thows a big elbow that misses.
Too trying to land body shots but he keeps hitting the mat.
Too controlling from the top position.
That's four minutes gone in the round.
The crowd are showing their displeasure at the lack of action as loud boos ring out around the arena.
Too is looking to work some ground and pound but Torrem has wrist control.
Torrem keeping moving, preventing Too from controlling successfully.
Too wants to pass the guard but Torrem is keeping the position.
Too works over Torrem with some ground and pound from guard.
Neither fighter is doing enough for the referee's liking and he's decided to stand them back up.
Too circles away from the clinch attempt.
Too looks to score with a combo but nothing lands.
The crowd thankful this round is nearly over.
Too circles away from the clinch attempt.
Torrem tries to clinch but is not successful on this occasion.
Torrem tries to clinch but is not successful on this occasion.
Too throws a nice looking combination but Torrem bobs and weaves to avoid any damage.
And thats the end of the round the fighters go back to their corners.
Kal Too showed his class in that round. I'd imagine he'll take it on all the scorecards.
The fighters get back to their feet, the hooter sounds and we're back to the action! This is the final round!

Too fails with a takedown attempt.
Too keeps the fight on the outside.
A really sloppy takedown attempt there from Too.
Too shoots in looking for a single leg takedown. Torrem is trying to defend but Too finishes it well and ends up in half guard. Let's see if he can advance position further.
Torrem is looking to regain full guard. Not this time though.
Too missing with some ground and pound from the half guard.
Torrem wants to get back to his feet.
Too is looking for a kimura but Torrem is holding onto that half guard position, so it's hard for Too to get the leverage.
Too wants to lay and pray for a moment but Torrem keeps working.
Torrem tries to kick Too off but Too keeps his base steady and stays in half guard.
Both fighters are breathing heavily.
That's one minute gone in the round.
Too wants to pass the guard but Torrem is defending well.
Too takes advantage of the dominant position to land a couple of big hammer fists.
Torrem looks like he's trying to stand up.
The referee decides to stand the fighters back up.
Too lands a jab-cross combination.
Too drives through with a really nice takedown into side control.
Too wants to lay and pray for a moment but Torrem keeps working.
Too is looking for a kimura. He might have it! No, Torrem has escaped the position, nice work there.
Torrem throws Too to one side and escapes!
Jeremy Torrem is looking to keep the fight on the feet at all costs.
That's two minutes gone in the round.
Torrem tries to bum rush Too with a series of wild strikes but Too uses good footwork to avoid the assault.
Too has a takedown stuffed.
Jeremy Torrem has stuffed three takedown attempts in the round now. That's going to take a lot out of Kal Too.
Torrem gets a clinch.
Too's corner are urging him to control the action in the clinch for a moment, rather than mount any serious offense. I'm sure the crowd appreciate those instructions... not.
A battle for position here, against the cage.
Torrem misses with a knee to the head.
Jeremy Torrem has stepped it up - he knows he needs a finish here!
Too drops down looking for an ankle pick but Torrem pulls his leg out and moves away.
Too closes the distance, clinches up and gets a nice trip takedown into side control. Very smooth.
That's three minutes gone in the round.
The referee asks Too politely if he wouldn't mind getting on with it and actually doing something. Too prefers to stall for the moment though.
Too is chipping away with strikes.
Too grinds an elbow into Torrem's temple.
Too lands a decent elbow from side control.
Too working the ground and pound but he's contacting the mat, not the fighter.
Torrem is looking for a sweep.
Too takes a little break here. Torrem wants to take advantage but he is being controlled well.
Kal Too has got the better of the ground game so far.
The strikes coming from Too are missing the target in this wave of attacks.
That's four minutes gone in the round.
There's not a lot going on here and the crowd are letting the fighters know they're not willing to tolerate a lack of action.
Too fails to land a wild elbow strike.
Too works to advance to full mount. Torrem defends for a few seconds but eventually he succumbs.
Too tries to control but Torrem wriggling away.
Too landing punches.
Kal Too is fighting for a decision here - he's started to take the cautious approach.
Torrem is desperately trying to improve his position but Too has a good base and remains in mount.
Too lands a shot to the body, followed up by a shot to the exposed head of his trapped opponent.
Too landing shots from mount.
Torrem is looking to improve his position but Too isn't that keen on the idea.
Too looking to control and managing it successfully.
Too looking to control but Torrem is working nicely, looking to advance position himself.
And that's the end of the fight!
Kal Too comfortably won the final round on my scorecard.
I've got Too winning every round here. Surely the decision will go his way and he'll pick up a well deserved decision victory. Over to the ring announcer for the scorecards.
Ladies and gentlemen, after 3 rounds of action, we go to the scorecards for a decision.
Judge Shigeki Fujiwara scores the fight 27:30
Judge Yukihiro Shimada scores the fight 27:30
Judge Yukihiro Yamamoto scores the fight 27:30
In favor of your winner, by unanimous decision... Kal Too!
|
|
|
|
|
|
|
|
|
|
|
|
|
|
|
|
|
|
|
|
|
|
|
| S |
C
A |
G |
S |
C
B |
G |
|
S |
C |
G |
|
energy
A | B |
|
hype
A | B |
|
pop
A | B |
|
mgr
A | B |
|
FIGHT
RATING
44% |
|
|
|
|
|
|

