|
|
PBP Commentary |
Coming up we have a lightweight MMA rules bout between Preston Driver (ranked 0 p4p, 0 weight class) and Kumina Sato (ranked 0 p4p, 0 weight class). Driver comes into the arena with Candy Paint blaring out of the sound system. These two fighters really are very evenly matched on the feet - it will be fascinating to see who can assert themselves in that aspect of the fight.
 |
|
 |
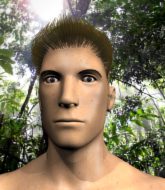
| 180 cm
26
168 lbs
12 - 7 - 0 |
|
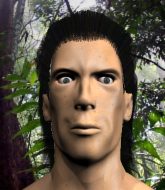
167 cm
21
169 lbs
4 - 4 - 0 |
BJJ Purple Belt
Solid boxing
KO power |
|
Good takedowns
Good kicks
Granite chin |
|
| |
|
Ladies and gentlemen. This fight is 3 rounds, in the lightweight division.
Introducing the fighter to my left, fighting out of the red corner.
With a record of
12 - 7 - 0, fighting out of Helsinki, Preston Driver!
And introducing the fighter to my right, fighting out of the blue corner.
With a record of
4 - 4 - 0, fighting out of Helsinki, Kumina Sato!
The judges for this bout are Matti Vanhoillinen, Roosa Järviläinen and Ben Zyskovitsi.

The bell rings for round one and we are underway!
Sato takes a shot to the nose. Hopefully that hasn't broken it.
Driver misses with a double jab.
Driver bobs and weaves and unloads with a good uppercut.
Driver misses with the combination.
Driver swings and misses with a hook to the body.
Sato lands a beauty of a right hand that gets the crowd cheering.
No joy there for Driver, who threw a few shots but didn't land.
A solid leg kick lands there for Sato.
Driver misses with a wild body shot.
Driver tries a head kick but it misses.
Sato moves out of range as Driver throws a body kick.
Driver throws a sloppy head kick and Sato moves out of range easily.
Sato ducks under a wild hook from Driver.

Sato clinches up with Driver and pushes him back against the cage.
Driver crunches a lovely knee into Sato's ribcage.
Wooooo! Give it up for these two warriors! They are putting on a show!
A hook to the body from Driver.
Sato tries to break free but Driver pushes him back against the cage.
Sato blocks a punch to the side of the head.
Sato working hard to break the clinch.
Sato tries to break free but Driver pushes him back against the cage.
Driver swings wildly with an uppercut but Sato uses good head movement to avoid it.
Driver lands an uppercut.
Driver lands a good knee to the midsection. Sato won't want to take too many of those.
Driver with the Thai clinch. He's looking to land a big knee but he's not managed it this time.

That's one minute gone in the round.
Sato is trying to work out of this bad position, with his back against the cage.
Driver lands a nice uppercut.
Sato's head jolts backwards as he takes an uppercut right on the button!
Driver tries a body shot but Sato blocks it.
Sato is trying to force a seperation but Driver has the dominant position.
Sato on the defensive, avoiding the knees to the body.

Sato breaks the clinch and we're back to striking at distance.
Sato cracks the inside of Driver's front leg.
Sato defending well as Driver loads up on a big left hand.
Sato finds nothing but air with that leg kick attempt.
Driver darts in trying to clinch
and Sato counters with a kick to the head that grazes his opponent. Driver is lucky that one didn't land flush.
Driver fakes a head shot and lands one to the body.

Driver gets caught on his heels momentarily as he allows Sato to score an easy takedown into full guard.
Driver will need to keep those long limbs tucked in whilst he's on the ground, to prevent any submissions.
Sato looks gassed!
Driver wants to sweep but no luck.

That's two minutes gone in the round.
Driver has Sato pulled in close to control his posture.
Sato content to strike from guard, landing some decent shots.
Driver is trying to keep Sato in close.
Driver looking to sweep here. No luck so far.
Driver has control of Sato's left arm, preventing Sato from doing any damage.
Sato wants to pass the guard but Driver is keeping the position.

That's three minutes gone in the round.
Sato looking to sit in guard and control but Driver gets the butterfly guard and sweeps. He's now in the guard on the top.
Driver with a flurry of punches that miss.
Driver would like to get this fight back to the feet but can't get free from the closed guard.
Driver trying to control but Sato is working from the bottom.
Driver makes a bit of distance and scores with some ground and pound, still in guard.
Sato looking for a sweep. Not yet Sato, not yet.
Driver wants to get up but he can't break Sato's closed guard. He needs to be careful trying to break the legs open, as he's open to submissions here.

Well, the referee has seen enough. Neither fighter is active enough on the ground so he's stood them back up.
Driver clobbers Sato with an overhand right that has the crowd gasping. That made a horrendous noise.
Sato throws a head kick that misses.
Sato scores a trip takedown into side control. Nice.

That's four minutes gone in the round.
Sato advances nicely into full mount.
Driver tries to hold on but Sato postures up.
Sato throwing sloppy strikes here. Perhaps if he tightened up his striking from such a dominant position, he'd be able to finish easier.
Sato throws an elbow from mount that misses. Lucky escape for Driver because Sato loaded up on that one.
Driver tries to hold on but Sato postures up.
Sato controlling his opponent.
Sato with the ground and pound from mount.
The crowd applaud the fighters efforts here as the round comes to an end.
Sato landing shots from mount.
And thats the end of the round the fighters go back to their corners.
Preston Driver dominated that round.
The corners get their ten second warning. Both fighters stand from their stools and stare eachother down, ready to get back to the action.

Sato has his head slapped from side to side by a 3 punch combination. That must have hurt him.
Sato scores with a hook to the body. Driver takes a step back and tries to catch his breath.
A solid body kick from Driver.
Driver looks to score with a jab to the body but Sato is just out of range.
Sato moves away from the strike by Driver.
Wow, both these guys are really going for it!
Sato clobbers Driver with an overhand right that has the crowd gasping. That made a horrendous noise.
Driver closes the distance and clinches.
With the fighters clinched against the cage, Driver creates a bit of distance for himself and scores with a nice uppercut.
Driver lands a nice elbow.
A short right from Driver.
Driver swings wildly with an uppercut but Sato uses good head movement to avoid it.
Sato tries for a takedown but Driver manages to get underhooks.
Sato blocks a couple of punches on the inside.
Sato is trying to work out of this bad position, with his back against the cage.
A bit of stalling here from Sato.
Driver tries to land a knee to the head but Sato blocks with his arms.
Sato is trying to stall.
Driver landing knees to the head.
Both fighters are absolutely exhausted here.
Driver is trying to maintain a safe position but Sato gets an underhook and turns Driver into the cage.
Driver lands a glancing elbow in the clinch.
That's one minute gone in the round.
Nice body punch from Driver.
Driver using the Thai plumb to throw knees but Sato has his back arched nicely, preventing the strike.
A head punch on the inside from Driver fails to land.
Driver looking to slow down the pace here.
Driver scores with an uppercut up the middle.
An uppercut to the body lands inside from Driver.
Driver working Sato over with knees to the body.
Driver pushes Sato back against the cage and unloads with a body punch.
Driver tries a knee to the head but he's missed.
Sato misses with a hook from the clinch.
Sato blocks a punch to the side of the head.
Driver looking to throw knees to the head but Sato is blocking nicely.
Driver is fighting off a takedown attempt but Sato is just too persistent for him and manages to trip Driver to the mat. Driver regains guard as soon as the fighters hit the mat.
Sato trying to pass the guard. He's being very persistent here but Driver manages to land a sweep and now he's on top!
Driver would like to get this fight back to the feet but can't get free from the closed guard.
Driver in full guard, throwing the ground and pound. No damage this time.
That's two minutes gone in the round.
Sato is trying to keep Driver in close.

Driver thinks about going for a leg but decides against it, in order to maintain the position.
Sato trying to control the position.
Sato has a closed guard, preventing Driver from standing up.
Sato keeping moving, preventing Driver from controlling successfully.
Neither fighter is doing enough for the referee's liking and he's decided to stand them back up.
Sato feints and as Driver raises his hands in defense, Sato changes levels and drives through with a takedown into guard.
Sato wants to pass the guard but Driver is keeping the position.
Sato connects with a couple of short punches.
That's three minutes gone in the round.
Sato pressing down on his opponent's thigh, looking to pass guard. Driver is keeping the position for now.
Sato drops back for a leg but he's not going to get it - he lets go and Driver dives on top into guard.
Sato preventing the ground and pound from doing any damage.
Driver preventing the sweep.
Driver drops back for a leg! It's a sloppy attempt though and Driver jumps back into guard quickly, to retain the dominant position.
Driver wants to get up but he can't break Sato's closed guard. He needs to be careful trying to break the legs open, as he's open to submissions here.
Driver got a little sloppy there for a moment and Sato has worked his way into a loose triangle - can he finish it?! No, Driver has managed to get both his arms back between Sato's legs - danger averted.
Sato is working actively off his back, looking to secure an arm or perhaps work for a triangle.
That's four minutes gone in the round.
Driver chips away with some ground and pound.
Driver thows a big elbow that misses.
Driver connects with a couple of short punches.
Sato wants to sweep here but Driver controlling him for the moment.
Driver throws a big right hand that misses.
Sato is throwing his legs up, looking for submissions. Driver is aware though and is defending well.
Sato looking for a guillotine here but Driver defends easily.
Neither fighter is doing enough for the referee's liking and he's decided to stand them back up.
A punch combination from Driver misses.
Driver darts in and out, connecting with a jab.
Sato throws a low kick but Driver avoids it.
And thats the end of the round the fighters go back to their corners.
Preston Driver dominated that second round.
The minute break is over - no more time for sponges and pep talks - back to the action! This is the final round!

Sato keeping his hands up high there, blocking the jab from Driver.
A punch combination from Driver misses.
Sato lands a body shot.
Sato scores with a body shot.
Sato tries a switch kick but it misses it's target.
Driver throws a jab, cross combination which is slipped
and Sato counters with a good low kick that Driver was not able to check.
Sato throws a nice looking combination but Driver bobs and weaves to avoid any damage.
Driver scores with a jab.
Sato rushes Driver and presses him up against the cage.
Sato has had enough of the clinch but Driver keeps him there for the moment.
An uppercut on the inside fails to land for Driver.
Sato trying to control the position but instead, Driver has worked for underhooks and has pushed Sato into the cage.
Driver is using his height advantage well here, landing a good percentage of his punches.
Sato breaks the clinch and we return to the middle of the mat.
Preston Driver is looking to throw some combinations by the looks of things.
Driver throws a monster uppercut resembling something out of street fighter but it doesn't land.
Driver tries to keep at a distance but Sato has taken the fight into the clinch.
Sato wants to break the clinch but can't.
Sato on the defensive, avoiding the knees to the body.
Driver avoiding damage as Sato throws knees to the body.
Both fighters are breathing heavily.
Both guys are working to get underhooks.
That's one minute gone in the round.
Sato's corner calls for him to break the clinch, which he does.
Driver fails in his attempt to clinch.
Driver throws out a token jab with nothing on it.
Sato chopping away at his opponent's legs.
Sato tries to clinch but Driver moves out of range.
Driver tries to clinch but Sato moves out of range.
Driver sizes up Sato with a pawing jab and scores with a straight right down the middle.
Sato shoots in for a takedown but doesn't get it.
A swing and a miss from Driver.
Sato throws a head kick that Driver semi-blocks.
Driver throws a leg kick
and Sato counters with a nice uppercut.
Sato misses with a low kick.
Driver throws a right and a left that both miss.
Sato takes one to the side of the head.
Driver tries a low kick but Sato avoids it.
Driver is using his reach advantage well here, landing the more effective single shots from range.
Sato shoots in with a lovely double leg takedown. Driver manages to land in full guard to minimise the damage.
Sato throwing shots from guard but he's hitting more mat than opponent.
The ref warns both fighters not to hold the cage as they work up against the meshing.
That's two minutes gone in the round.
Sato throwing strikes from guard but Driver blocks nicely.
Driver looking for a sweep. Not yet Driver, not yet.
Driver keeping moving, preventing Sato from controlling successfully.
Sato prevents Driver from getting back to his feet.
Sato slips nicely into half guard.
Driver is trying to control but can't.
Kumina Sato has stepped it up - he knows he needs a finish here!
Sato frees up his trapped foot and advances to mount.
Driver is bucking up trying to escape but Sato cracks him with another couple of good strikes.
That's three minutes gone in the round.
Sato lands a nice shot to the head.
Sato thowing shots but they're missing.
Driver sneaks a leg back under and regains half guard and is working straight away to try and get back to guard. He hasn't managed just yet though.
Sato passes the guard and advances to mount!
Sato lands a shot to the body, followed up by a shot to the exposed head of his trapped opponent.
Sato moves into side control, trying to work for a kimura. That looks painful! Will he finish!!?? No, Driver has worked his arm free - good work by Driver!
That's four minutes gone in the round.
Driver is looking to regain half guard here but Sato keeps moving and retains side control.
You can see the frustration on Driver's face, being in this tough position on the bottom.
Driver is looking for a sweep.
Driver manages to get back to half guard.
Driver is looking to escape.
Sato throwing punches and elbows but they're not doing any damage.
Preston Driver is fighting for a decision here - he's started to take the cautious approach.
Sato is trying a forearm choke
I don't think that's going to do much at this level of the game.
And that's the end of the fight!
Kumina Sato comfortably won the final round on my scorecard.
I think Driver has won this one but let's see what the judges have to say. Over to the ring announcer for the scorecards.
Ladies and gentlemen, after 3 rounds of action, we go to the scorecards for a decision.
Judge Matti Vanhoillinen scores the fight 29:28
Judge Roosa Järviläinen scores the fight 29:28
Judge Ben Zyskovitsi scores the fight 29:28
In favor of your winner, by unanimous decision... Preston Driver!
|
|
|
|
|
|
|
|
|
|
|
|
|
|
|
|
|
|
|
|
|
|
|
| S |
C
A |
G |
S |
C
B |
G |
|
S |
C |
G |
|
energy
A | B |
|
hype
A | B |
|
pop
A | B |
|
mgr
A | B |
|
FIGHT
RATING
63% |
|
|
|
|
|
|
