|
|
PBP Commentary |
Coming up we have a welterweight MMA rules bout between Paul Pierce (ranked 0 p4p, 0 weight class) and Nick Hammertree (ranked 0 p4p, 0 weight class). Nick Hammertree acknowledges the crowd's support as he enters the cage.
 |
|
 |
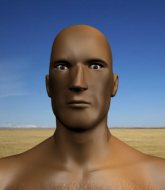
| 178 cm
18
170 lbs
1 - 0 - 0 |
|
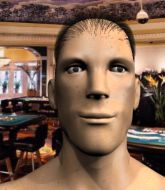
180 cm
22
170 lbs
0 - 0 - 0 |
BJJ Blue Belt
Counter striker
Cuts easily |
|
BJJ White Belt
Excellent boxer
Powerful |
|
| |
|
Ladies and gentlemen. This fight is 3 rounds, in the welterweight division.
Introducing the fighter to my left, fighting out of the red corner.
With a record of
1 - 0 - 0, fighting out of Amsterdam, Paul Pierce!
And introducing the fighter to my right, fighting out of the blue corner.
With a record of
0 - 0 - 0, fighting out of Amsterdam, Nick Hammertree!
The judges for this bout are Nard Betker, Saam Ante and Wagner Zegers.

The bell rings for round one and we are underway!
Hammertree closes the distance and lands a one-two.
Pierce checks the leg kick.
Hammertree tries to clinch up but Pierce circles away and keeps his distance.
Hammertree tries to clinch there but Pierce circles away.
Pierce stuffs the takedown.

Pierce scores a takedown into full mount!
We could do with one of the fighters taking the initiative a bit more on the ground - they're both waiting to capitalize on a mistake.
Pierce throwing shots from mount but they're not landing.
The ref warns both fighters not to hold the cage as they work up against the meshing.
Hammertree is in a horrible position here. Pierce smacks him with another shot as he tries to escape the position.
Pierce can't quite control the action as he would like just now, as Hammertree is looking to escape.
Hammertree is desperately trying to get back to half guard.
Hammertree wants to hold on but Pierce pushes him away.

That's one minute gone in the round.
Pierce throws some wild stikes that Hammertree manages to avoid easily.
Hammertree is trying to escape the mount.
Poor strikes thrown by Pierce there. More accuracy and less frantic strikes would help!
The fighters are pressed up against the cage, both looking to find a bit of space to work.
Pierce misses with a series of strikes from mount. He'll no doubt be working on his ground and pound when he gets back to the gym.
Hammertree wants to hold on but Pierce pushes him away.
Hammertree is desperately trying to improve his position but Pierce has a good base and remains in mount.
Pierce looking to ground and pound but Hammertree is blocking nicely.
Hammertree is writhing around trying to get back to his feet.
Pierce punishing his opponent with strikes.
Hammertree is desperately trying to get back to half guard.

Pierce is thinking about an arm triangle here, looking to tighten it up before moving to side control. Hammertree can see it coming though and defends well with a couple of strikes to the head and some good arm positioning.
Pierce is breathing heavily.
Hammertree is desperately trying to get back to half guard.

That's two minutes gone in the round.
A lull in the action here being met with boos from the crowd.
Hammertree wants to hold on but Pierce pushes him away.
Hammertree tries to get back to half guard but can't.
Pierce working for a submission but Hammertree is keeping him at bay.
Hammertree is desperately trying to improve his position but Pierce has a good base and remains in mount.
Pierce tries to control but Hammertree wriggling away.
Hammertree is looking to improve his position but Pierce isn't that keen on the idea.

That's three minutes gone in the round.
Pierce looking to control but Hammertree is working nicely, looking to advance position himself.
Pierce avoids the attempt from Hammertree to control.
Hammertree is trying to escape the mount.
Hammertree holding onto his opponent's waist for dear life, as Pierce tries to land some strikes to get him to release his grip.
Hammertree is looking to improve his position but Pierce isn't that keen on the idea.
Hammertree really wants to buck Pierce off and get back to his feet.
Hammertree tries to get back to half guard but can't.

That's four minutes gone in the round.
There's not a lot going on here and the crowd are letting the fighters know they're not willing to tolerate a lack of action.
Hammertree is writhing around trying to get back to his feet.
Hammertree is really trying hard to get back to his feet.
Hammertree tries to hold on but Pierce postures up.
Hammertree is desperately trying to improve his position but Pierce has a good base and remains in mount.
Boooooooooooooooooooo!!! God, this has been a terrible round. Come on you two, sort yourselves out!
Pierce thuds his fist into the canvas! Oooouch!
Hammertree is in all sorts of trouble here.
And thats the end of the round the fighters go back to their corners.
Paul Pierce dominated that round.
Well, the break between rounds is over. Let's get back to the scrappin!

Hammertree throws a solid leg kick but Pierce takes the impact on his shin and smiles at Hammertree.
Pierce checks a low kick. Bone on bone - not my idea of a good time.
Pierce checks a leg kick nicely.
Pierce leaves Hammertree with his face pressed against the mat as he sprawls beautifully, defending against a solid takedown attempt.
Hammertree misses with a body kick.
Hammertree throws a low kick, looking for Pierce's leg but Pierce calmly moves out of range.
Hammertree tries a switch kick but it misses it's target.
Pierce keeps the fight standing with a nice sprawl.
Paul Pierce is looking to throw some combinations by the looks of things.
Pierce fails with a rather predictable takedown attempt.
We've had a slow start to the round here - hopefully the action picks up.
Hammertree misses with a low kick.
Hammertree throws the overhand right but ducks down into a quick takedown attempt. Pierce was covering up waiting for the punch and Hammertree finishes the takedown easily into guard.
That's one minute gone in the round.
Hammertree wants to stand but Pierce has a closed guard, so he can't escape.
Both fighters are absolutely exhausted here.
Hammertree trying to control the position from guard on top but Pierce is wriggling around, looking for whatever he can.
Hammertree throwing strikes from guard but Pierce blocks nicely.
Hammertree is standing up over Pierce. Pierce looks to escape but Hammertree dives into side control.
That's two minutes gone in the round.
There's not a lot going on here and the crowd are letting the fighters know they're not willing to tolerate a lack of action.
Hammertree controls the position from side control.

Hammertree decides to take the fight back to the feet.
Hammertree lands a nice shot to the body.
Hammertree shoots in looking for a takedown. Pierce tries to sprawl out of it but Hammertree keeps driving through. The fighters are pinned against the cage. Pierce manages to get underhooks and after a bit of a struggle, circles away and we're back to standing.
Paul Pierce has stuffed three takedown attempts in the round now. That's going to take a lot out of Nick Hammertree.
Hammertree tries to close the distance and clinch up but Pierce swats him away and circles back towards the center.
Hammertree gets his takedown attempt stuffed easily

and Pierce counters by moving into the clinch. Good anticipation by Pierce.
That's three minutes gone in the round.
Hammertree fails to pull the fight into his guard.
Hammertree wants to get back to striking at distance but Pierce won't allow it.
Hammertree fails to pull the fight into his guard.
Hammertree gets double underhooks to prevent a takedown attempt from Pierce.
Hammertree is looking to break free of the clinch but Pierce has double underhooks.
Hammertree wants a takedown but no success here.
Hammertree wants to get back to striking at distance but Pierce won't allow it.
Pierce blocking some punches.
Pierce keeps the fight in the clinch, despite Hammertree's efforts to push away.
Pierce keeps the fight in the clinch, despite Hammertree's efforts to push away.
Hammertree is trying to force a seperation but Pierce has the dominant position.
Pierce blocks a body shot from Hammertree.
Hammertree dictating the pace here, as the fighters clinch against the cage.
A frustrated look appears on Hammertree's face as he tries to break the clinch.
That's four minutes gone in the round.
The crowd are getting on the fighters' backs, as the pace has dropped off in the last minute or so.
Hammertree tries to pull guard but can't drag his opponent to the mat. Pierce just stands there and leans against the cage.
Hammertree digs a right hand underneath Pierce's ribcage. Pierce let out a lung full of air as it connected.
Hammertree wants to push off and get back to the center of the mat but Pierce has him pressed against the cage.
Hammertree looks like he'd prefer to be striking at range right now.
Hammertree working hard to break the clinch.
Hammertree tries to pull guard but Pierce won't allow it.
Hammertree swings wildly with an uppercut but Pierce uses good head movement to avoid it.
Hammertree tries to break free but Pierce pushes him back against the cage.
Hammertree fails to pull the fight into his guard.
Hammertree drops down for a takedown but doesn't get it.
Hammertree is trying to break the clinch but Pierce has him pressed against the cage.
Pierce keeps control of Hammertree as he tries to wriggle out of the double underhooks.
Hammertree tries to take the fight to the ground by pulling guard but can't manage it.
The crowd thankful this round is nearly over.
Hammertree fails to pull guard.
Hammertree wants to break free. God knows he wants to breaaaak freeee.
Hammertree tries to pull guard but Pierce holds him up against the cage and eventually Hammertree drops back down to his feet.
Hammertree tries to pull guard but Pierce holds him up against the cage and eventually Hammertree drops back down to his feet.
And thats the end of the round the fighters go back to their corners.
Nick Hammertree showed his class in that round. I'd imagine he'll take it on all the scorecards.
The fighters' corners scream their final instructions, as the referee calls time. Here we go, back to the action! Let's get this one finished - here comes the final round!

Hammertree shoots in for a takedown but Pierce shows good takedown defense there and keeps this one on the feet.
Pierce is trying hard to land a takedown here. Hammertree sprawls well and keeps this one on the feet.
Hammertree tries a switch kick but it misses it's target.
Hammertree lands a right hook to the body.
Hammertree lands a jab. Then a cross. Then finally a nice hook to the body. Good work there by Hammertree.
Hammertree tries to close the distance and clinch up against the cage but Pierce paws at him with a jab and circles away.
Pierce with poor footwork there. He got himself in a bit of a tangle, enabling Hammertree to score with a decent uppercut.
Hammertree buckles his opponent's knee momentarily with a nice leg kick.
Nick Hammertree seems to be the more aggressive standup fighter in this bout.
Hammertree tries a head kick but it misses.
Like a baseball bat into the meat of his leg there - nice leg kick by Hammertree.
Jab, jab by Hammertree - just one landing.
Both fighters are breathing heavily.
Pierce moves out of range as Hammertree throws a body kick.
Hammertree lands a leg kick. The shin dug right into the meat of the thigh.
That's one minute gone in the round.
Hammertree tries to clinch but Pierce moves out of range.
Hammertree tries to close the distance and clinch but Pierce swats him to one side with an open hand palm strike and circles away.
Hammertree is looking to clinch.
Hammertree has a takedown stuffed.
Hammertree tries to clinch up.
Hammertree throws a leg kick but Pierce sees it coming and moves out of range.
Pierce chopped to the floor by a nice leg kick but he springs right back up before Hammertree can pounce on him.
Hammertree lands a jab followed by a nice looking cross.
Hammertree feints with a shoulder and throws a nice leg kick to Pierce's calf.
Hammertree closes the distance and lands a one-two.
Hammertree tries to close the distance and clinch up but Pierce swats him away and circles back towards the center.
Hammertree lands a jab-cross combination.
That's two minutes gone in the round.
Hammertree is looking to chop away at Pierce's legs.
Hammertree looks frustrated there after his takedown attempt is stuffed easily.
Paul Pierce has stuffed three takedown attempts in the round now. That's going to take a lot out of Nick Hammertree.
Pierce tries for a takedown but Hammertree sees it coming a mile off and avoids it easily.
Hammertree throws a low kick but his opponent is out of range.
Hammertree shoots in but Pierce avoids the takedown attempt easily.
A head kick from Hammertree lands but Pierce takes it in his stride.
Hammertree throws a low kick but Pierce avoids it.
Hammertree throws a body kick but he wasn't in range.
Hammertree throws a leg kick that misses.
Hammertree tries to clinch there but Pierce circles away.
Hammertree misses with a head kick.
That's three minutes gone in the round.
Hammertree misses with a leg kick.
Pierce avoids a low kick by using good footwork.
Hammertree fails to land the takedown.
Pierce avoids the clinch attempt nicely.
Hammertree is looking to score with low kicks.
Hammertree tries to clinch but Pierce is having none of it.
Hammertree instigates a clinch.
A head punch on the inside from Hammertree fails to land.
Pierce has Hammertree pressed against the cage, preventing Hammertree from circling away and getting back to striking at range.
Hammertree looks like he'd prefer to be striking at range right now.
A frustrated look appears on Hammertree's face as he tries to break the clinch.
Hammertree has had enough of the clinch but Pierce keeps him there for the moment.
Hammertree can't break the clinch.
Pierce tries to pull guard but Hammertree holds him up against the cage and eventually Pierce drops back down to his feet.
Pierce tries to pull guard but can't drag his opponent to the mat. Hammertree just stands there and leans against the cage.
That's four minutes gone in the round.
The crowd are getting on the fighters' backs, as the pace has dropped off in the last minute or so.
Hammertree working hard to break the clinch.
A frustrated look appears on Hammertree's face as he tries to break the clinch.
Hammertree misses with a short punch on the inside.
A head punch blocked on the inside by Pierce.
Hammertree wants to strike at distance but he can't break free of the clinch.
Hammertree wants to break free. God knows he wants to breaaaak freeee.
Hammertree has had enough of the clinch and is looking to separate.
Pierce successfully pulls guard.
Pierce looking for a sweep. Not yet Pierce, not yet.
Hammertree trying to control but Pierce is working from the bottom.
Hammertree got a little sloppy there for a moment and Pierce has worked his way into a loose triangle - can he finish it?! No, Hammertree has managed to get both his arms back between Pierce's legs - danger averted.
And that's the end of the fight!
Nick Hammertree comfortably won the final round on my scorecard.
I think Hammertree has won this one but let's see whether the judges agree with me. Over to the ring announcer for the scorecards.
Ladies and gentlemen, after 3 rounds of action, we go to the scorecards for a decision.
Judge Nard Betker scores the fight 28:29
Judge Saam Ante scores the fight 28:29
Judge Wagner Zegers scores the fight 28:29
In favor of your winner, by unanimous decision... Nick Hammertree!
|
|
|
|
|
|
|
|
|
|
|
|
|
|
|
|
|
|
|
|
|
|
|
| S |
C
A |
G |
S |
C
B |
G |
|
S |
C |
G |
|
energy
A | B |
|
hype
A | B |
|
pop
A | B |
|
mgr
A | B |
|
FIGHT
RATING
33% |
|
|
|
|
|
|

