|
|
PBP Commentary |
Coming up we have a featherweight MMA rules bout between Nathan Audet (ranked 0 p4p, 0 weight class) and Herbie Hide (ranked 0 p4p, 0 weight class). Audet comes to the cage accompanied by Black Eyed Peas - Pump it. These two fighters really are very evenly matched on the feet - it will be fascinating to see who can assert themselves in that aspect of the fight.
 |
|
 |
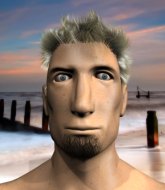
| 173 cm
24
157 lbs
5 - 3 - 0 |
|
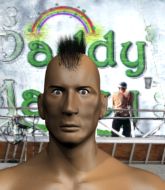
160 cm
23
145 lbs
5 - 0 - 0 |
BJJ Purple Belt
Solid Muay Thai
KO power |
|
BJJ Purple Belt
Decent boxing
Knockout power |
|
| |
|
Ladies and gentlemen. This fight is 5 rounds, for the featherweight championship of the world!
Introducing the champion to my left, fighting out of the red corner.
With a record of
5 - 3 - 0, fighting out of Montreal, Nathan Audet!
And introducing the challenger to my right, fighting out of the blue corner.
With a record of
5 - 0 - 0, fighting out of Montreal, Herbie Hide!
The judges for this bout are Yves DeLean, Elvis Blanc and Ian Loll.

The bell rings for round one and we are underway!
Audet tries to close the distance and clinch but Hide swats him to one side with an open hand palm strike and circles away.
Nathan Audet seems to be the more aggressive standup fighter in this bout.

The fight moves into the clinch position.
Audet tries to land a knee to the head but misses.
Audet throws an elbow that misses.
Audet misses the knee to the body. Nice hip positioning from Hide.
Audet throws a nice elbow but it doesn't land.
Audet throws a vicious knee straight up the middle but Hide blocks it with crossed arms.
Audet using the Thai plumb to throw knees but Hide has his back arched nicely, preventing the strike.
Hide is looking for a takedown up against the cage. Audet gets underhooks though and prevents the takedown attempt.
Audet with an attempt at a knee that misses.
Hide changes levels and goes for a takedown here. Audet fights it off and pushes away nicely.
Hide scores with a sloppy right hand. Audet should have avoided that one.
We've had a slow start to the round here - hopefully the action picks up.
Hide throws a right and a left that Audet avoids nicely.
Hide keeps the fight on the outside.
Hide lands with an uppercut that bounces Audet off the cage and back into rage.
Audet tries to close the distance and clinch up against the cage but Hide paws at him with a jab and circles away.
Audet tries to clinch but is not successful on this occasion.
Hide swats away the attempt to clinch by Audet.

That's one minute gone in the round.
Hide shoots in with a takedown attempt and he has Audet pinned against the cage. Audet gets the underhooks and manages to circle away.
Nathan Audet has stuffed three takedown attempts in the round now. That's going to take a lot out of Herbie Hide.
Audet moves in looking to clinch but Hide pushes him off.
Audet keeping a good distance there, avoiding the body shot.
Audet fails with an attempt to clinch.
Audet doesn't manage to clinch there - Hide circles away.
Hide avoids the clinch attempt nicely.
Audet wants to clinch.
Audet tries to clinch but Hide is having none of it.
Audet tries to clinch but Hide is having none of it.
Audet tries to keep at a distance but Hide has taken the fight into the clinch.
Audet tries a knee to the head but Hide blocks it.
Audet with an attempt at a knee that misses.
Audet gets an overhook and lands an elbow to the side of the head.
Hide blocks an elbow strike from Audet.

That's two minutes gone in the round.
The crowd are showing their displeasure at the lack of action as loud boos ring out around the arena.
Audet letting Hide take a breather here.
Hide avoiding damage as Audet throws knees to the body.
Hide is working for takedown but Audet is calmly controlling the position for now.
Audet comes over the top with an elbow. That landed flush.

It looks like Herbie Hide has been cut.
Audet unloads a knee to the mid-section. Hide lets out a prehistoric sounding urrrrgh.
Hide changes levels and goes for a takedown here. Audet fights it off and pushes away nicely.
A decent looking cross lands there for Hide.
Audet darts in trying to clinch
and Hide connects with a straight left hand counter down the middle.
Audet tries to grapple but his opponent circles
and Hide counters with a good right hand that lands right on the jaw.
Hide throws a right hand that Audet ducks under and follows up with a left that Audet also avoids with ease.
Hide tries to land with a swinging hook to the body but Audet was well out of range. Poor timing from Hide.
Audet clinches but Hide breaks the clinch

and Hide counters with a takedown into side control.

That's three minutes gone in the round.
Hide working the strikes but Audet uses the opportunity to regain half guard.
The ref warns both fighters not to hold the cage as they work up against the meshing.
Hide content to control rather than advance.
Audet is staying active underneath Hide, who seems content to just control the action from this position.
Hide tries to pass the half guard into mount. Audet knows what he's doing though and prevents the attempt.
Hide has the superior BJJ but he's also working some ground strikes into his gameplan.

Audet manages to escape and get back to his feet!
Audet looks to clinch
and Hide counters with a two punch combo.
Audet darts in trying to clinch
and Audet takes a counter punch right on the button for his troubles.
Nathan Audet is looking to keep the fight on the feet at all costs.

That's four minutes gone in the round.
Audet closes the distance but Hide moves to the side
and Hide cracks him with a counter punch right on the button.
Hide tries to shoot in for a takedown. He's got hold of a leg but Audet swivels and escapes.
Audet moves into range and clinches up with Hide.
Audet looks to throw an elbow but misses.
Audet pushes off and fires off an elbow that misses, before clinching up again, against the cage.
Audet trying to land knees to the body.
Audet with the Thai clinch. He's looking to land a big knee but he's not managed it this time.
Audet misses with a knee to the head.

Hide manages to break the clinch.
Audet clinches with his opponent.
Hide tries for a takedown. No joy.
Hide tries for a takedown. No joy.
Audet with the Thai clinch. He's looking to land a big knee but he's not managed it this time.
Audet comes over the top with an elbow. That landed flush.
Hide drops down looking for an ankle pick but Audet pulls his leg out and moves away.
And thats the end of the round the fighters go back to their corners.
Herbie Hide dominated that round.
The cut man is working on Herbie Hide's cut.
The referee calls time. The cornermen exit stage left and we're back to business.

Audet slips a jab and a cross from Hide.
Hide blocks a head kick by Audet.
Hide scores with a jab.
Audet wants to clinch
and Hide counters with a single leg into guard. Audet didn't expect that.
Hide trying to pass the guard but can't manage it just yet.
Hide passes Audet's right leg, so he's now in half guard.
The fighters are starting to perspire pretty heavily.
Hide wants to control but Audet is keeping him busy.
Hide missing with the ground and pound from half guard.
Hide thumps the canvas. Not on purpose obviously - he just missed Audet's head.
Hide drops an elbow to the side of Audet's head.
Hide is looking to pass Audet's guard but actually Audet recovers to full guard.
That's one minute gone in the round.
Hide tries to free his leg and advance position but Audet is retaining full guard.
Audet keeping moving, preventing Hide from controlling successfully.
Hide throwing elbows and punches but not connecting, as Audet works some decent striking defense from the bottom.
Hide tries to free his leg and advance position but Audet is retaining full guard.
Hide is looking to work some ground and pound but Audet has wrist control.
Hide trying to stand up but can't free himself from Audet's guard.
Hide stands up and looks to throw the legs aside to pass to side control. Audet swivels though and keeps the full guard.
That's two minutes gone in the round.
My god... these two guys really need to pick up the pace or everyone will leave to go get a beer.

Neither fighter is doing enough for the referee's liking and he's decided to stand them back up.
Hide scores to the head and body with a nice combination!
Hide circles away from the clinch attempt
and Hide counters with a series of strikes. Audet will be more careful next time no doubt.
Audet closes the distance but Hide moves to the side
and Hide counters with a single leg into guard. Audet didn't expect that.
Hide stands up and looks to throw the legs aside to pass to side control. Audet swivels though and keeps the full guard.
Hide trying to control the position from guard on top but Audet is wriggling around, looking for whatever he can.
That's three minutes gone in the round.
Audet bucks up whilst keeping hold of a body lock, managing to reverse the position. Now he's in top in Hide's guard.
Audet throws a big right hand that misses.
Audet throws a strike but Hide rolls with it and manages to sweep. Now he's in guard on top.
Hide trying to control the position from guard on top but Audet is wriggling around, looking for whatever he can.
Both fighters are absolutely exhausted here.
Audet tries to land a sweep but no joy.
That's four minutes gone in the round.
My god... these two guys really need to pick up the pace or everyone will leave to go get a beer.
Hide forces his way into half guard.
Audet trying to control but Hide postures up.
Hide throwing punches and elbows but they're not doing any damage.
Audet on his back here. We all know that wrestlers don't like being on their back so let's see if Audet tries to get out of the position.
Audet works his way to full guard. Good work.
Hide looking to pass the guard.
And thats the end of the round the fighters go back to their corners.
Herbie Hide showed his class in that round. I'd imagine he'll take it on all the scorecards.
The cut man is working on Herbie Hide's cut.
OK. That's time! The bell goes and we're back to the action.

Hide will have to do better than that with his takedown attempts.
Hide circles away from the clinch attempt
and Hide connects with a straight left hand counter down the middle.
Audet tries to clinch but fails miserably
letting Hide counter with a right hand.
A clash of legs there as Audet blocks the low kick.
Audet looks to clinch
enabling Hide to counter with a crisp jab.
Audet clinches but Hide breaks the clinch
so Hide counters with a double leg into guard. Good agility.
Hide throws and elbow that misses. Audet uses the momentum to reverse the position. He's now in Hide's guard. Nice move by Audet!
Audet trying to control the position from guard on top but Hide is wriggling around, looking for whatever he can.
Hide keeping full guard, as Audet tries to pass.
Both fighters are breathing heavily.

Audet has gone for a leg lock! Hide slips out almost immediately though and dives into Audet's guard.
That's one minute gone in the round.
Hide with a flurry of punches that miss.
Hide wants to get up but he can't break Audet's closed guard. He needs to be careful trying to break the legs open, as he's open to submissions here.
Hide wants to control from the top but Audet keeps moving.
Hide pressing down on his opponent's thigh, looking to pass guard. Audet is keeping the position for now.
Hide looking to sit in guard and control but Audet gets the butterfly guard and sweeps. He's now in the guard on the top.
That's two minutes gone in the round.
There's not a lot going on here and the crowd are letting the fighters know they're not willing to tolerate a lack of action.
Audet with a nice head shot there.
Hide bucks up whilst keeping hold of a body lock, managing to reverse the position. Now he's in top in Audet's guard.
Audet will need to keep those long limbs tucked in whilst he's on the ground, to prevent any submissions.
Hide throws and elbow that misses. Audet uses the momentum to reverse the position. He's now in Hide's guard. Nice move by Audet!
Audet postures up to throw the ground and pound strikes but they don't connect.
Audet loading up with the ground and pound but he's missing more than he's landing in this flurry.
The fighters are pressed up against the cage, both looking to find a bit of space to work.
Hide looking to control.
Audet postures up as if he's going to throw some strikes but drops back for an ankle! Hide is in big trouble! He looks ready to tap! But no, he's escaped and dives on top of Audet, into his guard.
Hide in full guard, throwing the ground and pound. No damage this time.
That's three minutes gone in the round.
Hide works a leg free and moves into half guard.
Hide is keen to just control but Audet is a slippery customer.
Audet won't allow Hide to pass to mount.
Hide scores with a couple of good hammerfists.
Hide works his way into side control.
Hide working the ground and pound from side control.
Hide stands up and beckons Audet to his feet.
That's four minutes gone in the round.
Hide fails with a takedown attempt.
Hide might want to mix his strikes up a bit more. He's just going for head shots at the moment and that can become a bit predictable.
Hide scores with a nice right hand.
Audet closes the distance looking to clinch
and Hide counters with a nice double leg into side control. Audet won't be happy with that.
Herbie Hide has got the better of the ground game so far.
Hide with the ground and pound but Audet regains half guard under the barage of strikes.
Hide decides to stand up and try his luck on the feet.
The crowd cheering loudly, showing their appreciation for the quality fight we're seeing here.
The crowd applaud the fighters efforts here as the round comes to an end.
Hide circles away from the clinch attempt
and Hide counters with a series of strikes. Audet will be more careful next time no doubt.
And thats the end of the round the fighters go back to their corners.
Herbie Hide really dominated that round.
The cut man is working on Herbie Hide's cut.
The corners get their ten second warning. Both fighters stand from their stools and stare eachother down, ready to get back to the action.

A combination from Hide does no damage.
Audet takes a jab on the nose. He smiles like he loves it and keeps coming.
Audet misses with a two punch combination.
Audet wants to clinch
and Audet takes a counter punch right on the button for his troubles.
The fighters circling - Audet throws out the jab but it was never going to land.
Audet gets cracked there but stands up to it.
Audet tries to grapple but his opponent circles
and Hide counters with a two punch combo.
Audet gets taken down but at least he's managed to land in guard.
Hide wants to control from the top but Audet keeps moving.
Audet has momentary wrist control but Hide slips an elbow through the middle.
It's got to the stage where if one of these guys blows hard enough, the other might fall over.
That's one minute gone in the round.
Hide throwing strikes from guard but Audet blocks nicely.
Hide pushes down on Audet's leg and manages to get into half guard.
Hide wants to pass the guard but Audet is defending well.
Hide missing with the ground and pound from half guard.
Hide wants to lay and pray for a moment but Audet keeps working.
Audet is trying to maintain the position but Hide is very close to passing his half guard.
That's two minutes gone in the round.
My god... these two guys really need to pick up the pace or everyone will leave to go get a beer.
Audet is not content to let Hide control the position.
Audet blocking the ground and pound attempt from Hide.
Well, the referee has seen enough. Neither fighter is active enough on the ground so he's stood them back up.
Audet tries to clinch
and Hide counters with a shot to the ribs. That looked like it hurt.
Hide darts in and lands a nice takedown into half guard.
Hide is trying to control the action in half guard but Audet is working away on the bottom, looking perhaps to get back to full guard.
Hide seems to be looking for submissions.
That's three minutes gone in the round.
Hide stalling.
Hide throwing shots but they're hitting the canvas more than the man.
Hide is looking for the mount but instead finds himself back in full guard.
Hide postures up to throw the ground and pound strikes but they don't connect.
Hide looking to pass the guard.
Hide drops back looking for a heel hook - he quickly realises he's not going to get it but Audet manages to dive on top of him before he can escape and now Hide has Audet in his guard.
Audet has to be careful here, sitting in the guard of a superior BJJ player.
That's four minutes gone in the round.
The crowd are showing their displeasure at the lack of action as loud boos ring out around the arena.
Audet with a flurry of punches that miss.
Hide preventing the ground and pound from doing any damage.
Hide keeping full guard, as Audet tries to pass.
Audet is looking to work some ground and pound but Hide has wrist control.
The crowd thankful this round is nearly over.
Hide is trying to control the position from the bottom.
Hide keeping moving, preventing Audet from controlling successfully.
And thats the end of the round the fighters go back to their corners.
Herbie Hide dominated that fourth round.
The cut man is working on Herbie Hide's cut.
The minute break is over - no more time for sponges and pep talks - back to the action! Ladies and gentlemen, this is the final round!

Audet tries to clinch
and Hide counters with a nice double leg into side control. Audet won't be happy with that.
Audet is trying to get back to half guard.
Hide tries to score with some ground and pound. Audet controls his posture well this time though and the shots don't do any damage.
Hide stands up.
Audet clinches but Hide breaks the clinch
and Hide counters with a nice jab to the body that keeps Audet thinking.
Audet tries to clinch but fails miserably
and Hide counters with a nice uppercut.
Hide throws a looping left and ducks down for a takedown. He's got his arms around Audet's waist but Audet gets an underhook and avoids the takedown by throwing Hide off to one side.
Audet darts in trying to clinch
and Hide counters with a nice uppercut.
Audet tries to grapple but his opponent circles
and Hide counters with a two punch combo.
That's one minute gone in the round.
Audet throws a head kick but Hide moves out of range.
Both of our modern day gladiators look out of it here - an gruelling 5 rounds of action taking it's toll on them, no doubt.
Audet fakes with an overhand right and moves in to clinch with Hide, pushing him back against the cage.
Audet tries to land knees in the clinch but Hide avoids the damage to the body.
Audet throws a knee to the head but misses.
Audet misses with a knee strike.
Hide tries to score a body lock takedown but Audet shows good agility there to stay on his feet.
Audet throws a knee to the head but misses.
Hide has picked Audet up - he's going for a ride! Hide dumps his opponent to the mat with a thud and settles into half guard.
Hide sitting in half guard, looking to land shots. Audet defending well though.
Hide works his foot free and advances to mount.
Audet is flailing around, obviously not happy about being mounted. Hide locks hold of one of his arms and spins for an armbar. He's got it! Audet is forced to tap!
Ladies and gentlemen, after 2:05 of round 5, we have a winner by way of Submission (Armbar). Herbie Hide! Herbie Hide retains his featherweight title!
|
|
|
|
|
|
|
|
|
|
|
|
|
|
|
|
|
|
|
|
|
|
|
| S |
C
A |
G |
S |
C
B |
G |
|
S |
C |
G |
|
energy
A | B |
|
hype
A | B |
|
pop
A | B |
|
mgr
A | B |
|
FIGHT
RATING
100% |
|
|
|
|
|
|
