|
|
PBP Commentary |
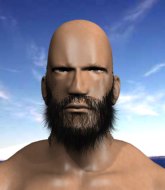
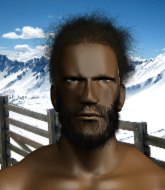
Coming up we have a super heavyweight MMA rules bout between Cloudy Disposition (ranked 0 p4p, 0 weight class) and Moo Shoo (ranked 0 p4p, 0 weight class). Well, I have no idea who's going to take this one!
 |
|
 |
| 182 cm
22
300 lbs
1 - 0 - 0 |
|
150 cm
22
300 lbs
0 - 1 - 0 |
Dangerous GnP
Excellent boxer
Good chin |
|
Good wrestler
Decent knees
Solid chin |
|
| |
|
Ladies and gentlemen. This fight is 3 rounds, in the super heavyweight division.
Introducing the fighter to my left, fighting out of the red corner.
With a record of
1 - 0 - 0, fighting out of Amsterdam, Cloudy Disposition!
And introducing the fighter to my right, fighting out of the blue corner.
With a record of
0 - 1 - 0, fighting out of Amsterdam, Moo Shoo!
The judges for this bout are Wagner Zegers, Saam Ante and Nard Betker.

The bell rings for round one and we are underway!
Disposition closes this distance looking for a takedown but Shoo circles away.
Shoo avoids the head kick by Disposition.

Shoo moves into the clinch.
Disposition prevents the takedown attempt.
Shoo can't get the takedown.
Disposition is breathing heavily.
Shoo wants a takedown.
Cloudy Disposition has stuffed three takedown attempts in the round now. That's going to take a lot out of Moo Shoo.
Shoo is trying to work for a single leg takedown but Disposition pulls him back up using the underhooks.
Shoo looking for a takedown.
Shoo wants a takedown.
Disposition throws a head punch that misses.
Shoo wants a takedown but no success here.
Shoo looking for a takedown.
Shoo is trying to drag Disposition to the mat but Disposition just about manages to keep his footing. He used the cage to his advantage there.
Shoo drops to a knee looking for a takedown but Disposition gets the underhooks and prevents it.
Disposition throws a nice elbow but it doesn't land.
Shoo has Disposition pressed up against the cage and is working for takedown. Disposition manages to improve position though and keeps the fight standing.
Disposition could do with loosing a few pounds - he looks very soft around the mid section, to put it politely.
Disposition prevents a takedown attempt there.
Disposition lands a knee to the body.
Disposition lands a body punch in the clinch.
The fans in attendance giving it up for the two fighters, who have really let it all hang out in the last minute or so!
Disposition works on Shoo's body with a couple of short punches.

That's one minute gone in the round.
Disposition lands with a good tight uppercut to the head.
Disposition misses with a knee strike.
Disposition creates a bit of space for himself and sneaks an elbow through Shoo's defenses.
Disposition gets double underhooks to prevent a takedown attempt from Shoo.
Disposition prevents a takedown attempt there.
Disposition lands a body shot.
Disposition prevents a takedown attempt there.
Nice body punch from Disposition - that landed with a thud.
Shoo has Disposition pressed up against the cage and is working for takedown. Disposition manages to improve position though and keeps the fight standing.
Disposition lands a shoulder strike that jolts his opponent's head backwards.
Disposition lands a nice uppercut.
Disposition has Shoo pressed up against the cage and is working for takedown. Shoo manages to improve position though and keeps the fight standing.
Disposition works on Shoo's body with a couple of short punches.
Disposition misses with an elbow strike.
Shoo takes a knee to the side of the body.
Disposition misses with a knee to the head.
Disposition stops a takedown attempt from Shoo.
Disposition stops a takedown attempt from Shoo.

That's two minutes gone in the round.
Shoo drops down for a takedown but doesn't get it.
Shoo avoiding damage as Disposition throws knees to the body.
A body shot lands from Disposition.
Shoo has hold of a leg and is looking for a trip takedown. Disposition avoids it nicely though and we remain in the clinch.
Disposition misses with a hook to the ribs.
Disposition tries a knee to the head but Shoo blocks it.
Shoo looking for a takedown.
Shoo is working for takedown but Disposition is calmly controlling the position for now.
Shoo tries for a takedown but Disposition manages to get underhooks.
Disposition stops a takedown attempt from Shoo.
Disposition lands on the inside with an uppercut.
Disposition prevents the takedown attempt.

Shoo gets the body lock takedown. After a quick scramble, Disposition regains guard.
We could do with one of the fighters taking the initiative a bit more on the ground - they're both waiting to capitalize on a mistake.

Disposition is working actively off his back, looking to secure an arm or perhaps work for a triangle.
Shoo postures up in Disposition's guard and throws a big left but Disposition blocks it.
Shoo thows a big elbow that misses.
Disposition knows he needs to get back to his feet asap. He's simply no match for Shoo on the ground.
Shoo lands a couple of decent looking shots.

That's three minutes gone in the round.
Shoo postures up in Disposition's guard and throws a big left but Disposition blocks it.
Shoo working some ground and pound from guard but it's not doing any damage.
Shoo trying to land body shots but he keeps hitting the mat.
Shoo in full guard, throwing the ground and pound. No damage this time.

The referee has ruled that neither fighter is active enough on the ground and has stood them back up.
Disposition will have to do better than that with his takedown attempts.
Disposition will need to tighten up his combinations if he doesn't want to gas himself out, swinging at thin air.
Cloudy Disposition seems to be the more aggressive standup fighter in this bout.
Disposition is trying hard to land a takedown here. Shoo sprawls well and keeps this one on the feet.
Disposition looks frustrated there after his takedown attempt is stuffed easily.
Disposition wants to clinch but Shoo slips to the side
and Shoo counters into the clinch. Nicely done.
Disposition gets double underhooks to prevent a takedown attempt from Shoo.
Disposition prevents a takedown attempt there.
Disposition misses with a knee strike.

That's four minutes gone in the round.
A lull in the action here being met with boos from the crowd.
Shoo has Disposition pressed up against the cage and is working for takedown. Disposition manages to improve position though and keeps the fight standing.
Disposition is trying to work for a single leg takedown but Shoo pulls him back up using the underhooks.
Shoo wants a takedown but no success here.
Disposition throws a knee to the head but misses.
A short right from Disposition on the inside.
Shoo tries for a takedown but Disposition manages to get underhooks.
Disposition prevents a takedown attempt there.
Shoo is working for a takedown up against the cage. He can't get it on this occasion though.
Shoo drops to a knee looking for a takedown but Disposition gets the underhooks and prevents it.
Shoo tries for a takedown. No joy.
Shoo blocks a knee to the body. He'll have a nicely bruised forearm in the morning.
Shoo goes for a takedown attempt but Disposition pushes him away and we're back to fighting at a distance.
The crowd applaud the fighters efforts here as the round comes to an end.
Disposition shoots in for a takedown - he's clinched up with Shoo but Shoo pushes him off and we're back to square one.
And thats the end of the round the fighters go back to their corners.
Cloudy Disposition dominated that round.
That's the end of the round. The referee orders the cornermen out of the cage so we can get back down to business.

Disposition tries to clinch but Shoo moves away
and Shoo counters into the clinch. Nicely done.
Disposition prevents a takedown attempt there.
An uppercut on the inside fails to land for Disposition.
Shoo wants a takedown but no success here.
A short uppercut from Disposition.
Disposition lands a knee to the body.
Shoo goes for a takedown attempt but Disposition pushes him away and we're back to fighting at a distance.
Cloudy Disposition has stuffed three takedown attempts in the round now. That's going to take a lot out of Moo Shoo.
Disposition closes the distance but Shoo moves to the side
and Shoo counters into the clinch. Nicely done.
A right handed body shot lands from Disposition.
Cloudy Disposition has scored more points in the clinch so far.
Shoo goes for a takedown in the clinch but Disposition prevents it.
Shoo is working for a takedown up against the cage. He can't get it on this occasion though.
Shoo goes for a takedown attempt but Disposition pushes him away and we're back to fighting at a distance.
Disposition shoots for a takedown but Shoo saw that one coming a mile off and avoided it easily.
Both fighters are absolutely exhausted here.
That's one minute gone in the round.
Disposition shoots for a double leg takedown but Shoo sprawls well. He's pushed Disposition's face into the mat and manages to get back to his feet relatively easily.
Disposition is moving around nicely and scores here with a single head shot.
Shoo stuffs a takedown. It's all about dictating where the fight takes place and Shoo wants it to stay on the feet.
Shoo keeping at a good range here, avoiding a leg kick.
We are yet to see a takedown attempt from Shoo in the fight. On paper you would think he is the more dominant ground fighter so let's see if these unusual tactics pay off.
Disposition has a takedown stuffed.
Disposition misses with a wild combination.
Disposition lands with a kick to the temple. Shoo shrugs as if to say "is that all you've got?"
Shoo stuffs the takedown.
Disposition wants to clinch but Shoo slips to the side
and Shoo counters by clinching up.
Disposition working some nice short punches in the clinch.
That's two minutes gone in the round.
Disposition scores a nice knee to the body.
Shoo is trying to work for a single leg takedown but Disposition pulls him back up using the underhooks.
Disposition stops a takedown attempt from Shoo.
Shoo wants a takedown.
Disposition drops down for a takedown but doesn't get it.
Shoo goes for a takedown in the clinch but Disposition prevents it.
Shoo tries for a takedown. No joy.
Shoo wants a takedown but no success here.
Shoo tries to score a body lock takedown but Disposition shows good agility there to stay on his feet.
Disposition lands a left hand.
Shoo wants a takedown.
Shoo can't get the takedown.
Shoo goes for a takedown in the clinch but Disposition prevents it.
Shoo tries for a takedown. No joy.
Shoo is working for takedown but Disposition is calmly controlling the position for now.
Disposition prevents a takedown attempt there.
Shoo is working for a takedown up against the cage. He can't get it on this occasion though.
That's three minutes gone in the round.
Shoo has Disposition pressed up against the cage and is working for takedown. Disposition manages to improve position though and keeps the fight standing.
Shoo is working for a takedown up against the cage. He can't get it on this occasion though.
Disposition lands a body shot in the clinch.
Disposition lands a nice uppercut.
Shoo tries for a takedown but Disposition manages to get underhooks.
Disposition lands an elbow inside.
Disposition lands an elbow that stopped Shoo in his tracks for a moment.
Shoo managing to block the knees to the body from Disposition.
Disposition lands an elbow that stopped Shoo in his tracks for a moment.
Shoo tries for a takedown. No joy.
Shoo tries to score a body lock takedown but Disposition shows good agility there to stay on his feet.
A head punch on the inside from Disposition fails to land.
Disposition landing some nice looking knees to the body.
Shoo goes for a takedown in the clinch but Disposition prevents it.
Shoo is trying to drag Disposition to the mat but Disposition just about manages to keep his footing. He used the cage to his advantage there.
Disposition using the Thai plumb to throw knees but Shoo has his back arched nicely, preventing the strike.
Shoo looking for a takedown.
Shoo tries to score a body lock takedown but Disposition shows good agility there to stay on his feet.
That's four minutes gone in the round.
Shoo is trying to work for a single leg takedown but Disposition pulls him back up using the underhooks.
Disposition is pressed up against the cage. Shoo has hold of a leg and is looking to drag Disposition down to the mat. Disposition avoids the attempt though and has circled away. We're back to striking at a distance.
Disposition tries to clinch but fails miserably
and Shoo holds on and brings the fighters into a clinch.
Disposition prevents the takedown attempt.
Disposition is pressed up against the cage. Shoo has hold of a leg and is looking to drag Disposition down to the mat. Disposition avoids the attempt though and has circled away. We're back to striking at a distance.
Moo Shoo is looking to keep the fight on the feet at all costs.
Disposition falls off balance throwing a combination
and Shoo counters into the clinch. Nicely done.
Shoo is working for takedown but Disposition is calmly controlling the position for now.
Shoo drops down looking for an ankle pick but Disposition pulls his leg out and moves away.
Disposition fails with a takedown attempt.
Disposition misses with a low kick.
And thats the end of the round the fighters go back to their corners.
Cloudy Disposition dominated that second round.
The minute break is over - no more time for sponges and pep talks - back to the action! This is the final round!

Disposition clinches but Shoo breaks the clinch
and Shoo counters into the clinch. Nicely done.
Shoo changes levels and goes for a takedown here. Disposition fights it off and pushes away nicely.
Shoo is looking to clinch.
Disposition shoots in for a takedown but Shoo shows good takedown defense.
Disposition closes the distance looking to clinch
and Shoo moves into the clinch.
We've had a slow start to the round here - hopefully the action picks up.
Shoo tries for a takedown. No joy.
Both fighters are breathing heavily.
Shoo is trying to drag Disposition to the mat but Disposition just about manages to keep his footing. He used the cage to his advantage there.
Cloudy Disposition has stuffed three takedown attempts in the round now. That's going to take a lot out of Moo Shoo.
Disposition lands a hook that snaps the head of Shoo backwards.
That's one minute gone in the round.
Shoo wants a takedown.
Disposition comes over the top with an elbow. That landed flush.
Disposition pushes off and fires off an elbow that misses, before clinching up again, against the cage.
Shoo blocks a knee to the body. He'll have a nicely bruised forearm in the morning.
Shoo wants a takedown.
Shoo changes levels and goes for a takedown here. Disposition fights it off and pushes away nicely.
Disposition closes the distance looking to clinch
and Shoo counters by clinching up.
Disposition scores a nice knee to the body.
Shoo drops to a knee looking for a takedown but Disposition gets the underhooks and prevents it.
Shoo is working for takedown but Disposition is calmly controlling the position for now.
Shoo is trying to drag Disposition to the mat but Disposition just about manages to keep his footing. He used the cage to his advantage there.
Disposition putting his Muay Thai to good use. He has Shoo in a tight clinch and is doing some damage with knees to the body.
Shoo avoiding damage as Disposition throws knees to the body.
Moo Shoo has stepped it up - he knows he needs a finish here!
That's two minutes gone in the round.
Shoo can't get the takedown.
Shoo goes for a takedown attempt but Disposition pushes him away and we're back to fighting at a distance.
Shoo defends well against a solid takedown attempt from Disposition.
Disposition with a lazy takedown attempt
and Shoo counters by moving into the clinch.
Shoo is working for takedown but Disposition is calmly controlling the position for now.
Shoo is looking for a takedown up against the cage. Disposition gets underhooks though and prevents the takedown attempt.
Shoo is working for a takedown up against the cage. He can't get it on this occasion though.
Shoo drops to a knee looking for a takedown but Disposition gets the underhooks and prevents it.
Shoo changes levels and goes for a takedown here. Disposition fights it off and pushes away nicely.
Disposition shoots in for a double leg but Shoo sprawls well. That's going to sap some energy.
That's three minutes gone in the round.
Disposition changes levels and looks for a double leg takedown. Shoo tries to avoid it but Disposition manages to keep hold of a leg and drag Shoo to the ground. Shoo escapes though and pops straight back up to his feet.
Disposition tries to clinch but fails miserably
and Shoo counters by moving into the clinch.
Shoo gets double underhooks to prevent a takedown attempt from Disposition.
Shoo is working for takedown but Disposition is calmly controlling the position for now.
Shoo is looking for a takedown up against the cage. Disposition gets underhooks though and prevents the takedown attempt.
Shoo has Disposition pressed up against the cage and is working for takedown. Disposition manages to improve position though and keeps the fight standing.
Disposition goes for a takedown attempt but Shoo pushes him away and we're back to fighting at a distance.
Shoo tries to clinch but Disposition moves out of range.
Shoo throws out a token jab with nothing on it.
Disposition fails with a rather predictable takedown attempt.
Shoo circles away from the clinch attempt
and Shoo moves into the clinch.
That's four minutes gone in the round.
Disposition tries a knee to the head but Shoo blocks it.
Shoo is working for takedown but Disposition is calmly controlling the position for now.
Shoo is working for takedown but Disposition is calmly controlling the position for now.
Shoo changes levels and goes for a takedown here. Disposition fights it off and pushes away nicely.
Disposition misses with a few strikes there.
Disposition closes the distance but Shoo moves to the side
and Shoo counters by clinching up.
Shoo can't find room to land a body shot as Disposition controls the action.
Disposition is working for takedown but Shoo is calmly controlling the position for now.
Disposition gets through Shoo's defenses to land a nice punch to the side of the head.
Disposition working Shoo over with knees to the body.
And that's the end of the fight!
I would just about give that final round to Moo Shoo.
I think Disposition has won this one but let's see what the judges have to say. Over to the ring announcer for the scorecards.
Ladies and gentlemen, after 3 rounds of action, we go to the scorecards for a decision.
Judge Wagner Zegers scores the fight 30:27
Judge Saam Ante scores the fight 29:28
Judge Nard Betker scores the fight 30:28
In favor of your winner, by unanimous decision... Cloudy Disposition!
|
|
|
|
|
|
|
|
|
|
|
|
|
|
|
|
|
|
|
|
|
|
|
| S |
C
A |
G |
S |
C
B |
G |
|
S |
C |
G |
|
energy
A | B |
|
hype
A | B |
|
pop
A | B |
|
mgr
A | B |
|
FIGHT
RATING
61% |
|
|
|
|
|
|
