|
|
PBP Commentary |
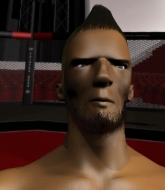
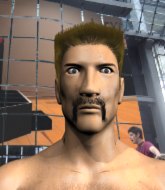
Coming up we have a welterweight MMA rules bout between Billy Mandyson (ranked 0 p4p, 0 weight class) and Jimmy Balmer (ranked 0 p4p, 0 weight class). Jimmy Balmer acknowledges the crowd's support as he enters the cage.
 |
|
 |
| 185 cm
24
180 lbs
4 - 5 - 0 |
|
178 cm
22
162 lbs
5 - 3 - 0 |
BJJ Purple Belt
Solid boxing
Granite chin |
|
Good takedowns
Counter striker
Determined |
|
| |
|
Ladies and gentlemen. This fight is 3 rounds, in the welterweight division.
Introducing the fighter to my left, fighting out of the red corner.
With a record of
4 - 5 - 0, fighting out of London, Billy Mandyson!
And introducing the fighter to my right, fighting out of the blue corner.
With a record of
5 - 3 - 0, fighting out of London, Jimmy Balmer!
The judges for this bout are Daniel Bishop, Andrew Berry and James Ackerman.

The bell rings for round one and we are underway!
Balmer showing good head movement there, avoiding the strikes from Mandyson.
Nice defenses there by Balmer.
The fight stays on the outside here - Mandyson looks like he's thinking about clinching though.

Balmer shoots in for a takedown! He's got it and he's managed to land in full mount! That's better than Balmer was expecting from the takedown attempt, I'm sure!
Mandyson can't escape the position.

Balmer is working on an americana here. Ooh, that looks pretty nasty! Nope, Mandyson has managed to escape the submission attempt.
Mandyson is in all sorts of trouble here.
Balmer wants to take Mandyson's back here but Mandyson is holding on to an arm, himself looking to escape.
Mandyson keeping his composure momentarily, calmly looking to get back to half guard.
Balmer is looking to secure an arm. He's managed it! He's pivoting for an armbar - that looks tight! But Mandyson has managed to get out of it and now he's in a dominant position. Nice work from Mandyson!

That's one minute gone in the round.
Mandyson wants to get up but he can't break Balmer's closed guard. He needs to be careful trying to break the legs open, as he's open to submissions here.
Balmer is looking for a guillotine. You can't force these things though and Mandyson defends well.
Balmer looking for submissions off his back, moving his hips, looking for an opening.
Mandyson looking to control the position here, rather than advance.
Mandyson trying to pass the guard but can't manage it just yet.
Balmer is working actively off his back, looking to secure an arm or perhaps work for a triangle.
Balmer being controlled here, momentarily.
Balmer had isolated an arm as going for a kimura. Mandyson defends it easily.
Balmer looks gassed!

That's two minutes gone in the round.
The crowd are starting to boo a lack of action.
Mandyson stopping the sweep attempt from Balmer.
Mandyson sitting in guard here, content to control.
The fighters are starting to perspire pretty heavily.
Mandyson has controlled the position for a good 20 seconds, which will no doubt be starting to frustrate his opponent.
Mandyson working some ground and pound from guard but it's not doing any damage.
Balmer keeping moving, preventing Mandyson from controlling successfully.
Balmer working from the bottom, still in full guard. He's managed to get a loose triangle. Mandyson doesn't seem to be doing much to defend here, obviously he feels comfortable in the position. Mandyson manages to throw the legs off his shoulder and he's back into guard - no problem.

That's three minutes gone in the round.
Balmer working from the bottom, still in full guard. He's managed to get a loose triangle. Mandyson doesn't seem to be doing much to defend here, obviously he feels comfortable in the position. Mandyson manages to throw the legs off his shoulder and he's back into guard - no problem.
Mandyson is intent on slowing down the pace of the fight, simply looking to control.
Balmer looking for submissions from the bottom here. Moving his hips around, possibly looking for an armbar.
Balmer working for submissions but it's allowed Mandyson to get to half guard.
Mandyson slows the pace down in half guard.

That's four minutes gone in the round.

Mandyson decides he's had enough of the ground and stands up.
Balmer shoots for a takedown but Mandyson saw that one coming a mile off and avoided it easily.
The fight stays on the outside here - Mandyson looks like he's thinking about clinching though.

Mandyson closes the distance and clinches.
Balmer tries to score a body lock takedown but Mandyson shows good agility there to stay on his feet.
Balmer tries to pull guard but Mandyson holds him up against the cage and eventually Balmer drops back down to his feet.
Billy Mandyson has stuffed three takedown attempts in the round now. That's going to take a lot out of Jimmy Balmer.
Mandyson wants to break the clinch but can't.
And thats the end of the round the fighters go back to their corners.
Billy Mandyson dominated that round.
The fighters' corners scream their final instructions, as the referee calls time. Here we go, back to the action!

Mandyson fails in his attempt to clinch.
Mandyson ducks down and throws a hook to the body but Balmer moves away.
Balmer fails miserably with a takedown attempt.
Mandyson stuffs the takedown attempt from Balmer. Balmer gets slowly back to his feet.
Balmer shoots in but no luck this time.
Billy Mandyson has stuffed three takedown attempts in the round now. That's going to take a lot out of Jimmy Balmer.
Mandyson misses with a body shot.
We've had a slow start to the round here - hopefully the action picks up.
Mandyson slaps away a takedown attempt from Balmer, before circling back to the center of the mat.
No joy there for Mandyson, who threw a few shots but didn't land.
Balmer is breathing heavily.
That's one minute gone in the round.
Mandyson rushes forward with a series of wild hooks but Balmer moves out of range and avoids them all easily.
Mandyson looks to score with a jab to the body but Balmer is just out of range.
Mandyson leaves Balmer with his face pressed against the mat as he sprawls beautifully, defending against a solid takedown attempt.
Balmer shoots in looking for a double leg takedown. Mandyson defends it nicely.
Mandyson fails with a takedown attempt from distance.
Billy Mandyson seems to be the more aggressive standup fighter in this bout.
Mandyson gets a takedown into half guard.
Balmer is looking to sinch up a guillotine here but Mandyson pulls his head out easily.
That's two minutes gone in the round.
Mandyson wants to lay and pray for a moment but Balmer keeps working.
Balmer looking for submissions off his back.
Balmer looking for submissions off his back.
Balmer actively working from the bottom here.
Mandyson is taking a breather. Balmer says something to him but it's hard to make out. Perhaps he's telling him to get on with it and actually do something.
Balmer looking for submissions from an awkward position here.
Balmer looking to work for a kimura from the bottom.
That's three minutes gone in the round.

It looks like we're going to have a standup here. Neither fighter is doing enough on the ground.
Balmer slips a jab and a cross from Mandyson.
Mandyson throws a series of punches but Balmer avoids them all with ease.
Balmer with a poor takedown
and Mandyson connects with a straight left hand counter down the middle.
Balmer gets his takedown attempt stuffed easily
and Mandyson counters by moving into the clinch.
Mandyson has managed to pull guard. Let's see whether he can work an aggressive guard. It will also be interesting to see what tactics Balmer uses from the top position.
Balmer scoring with punches to the head and body.
The fighters are pressed up against the cage, both looking to find a bit of space to work.
Balmer drops back looking for a heel hook - he quickly realises he's not going to get it but Mandyson manages to dive on top of him before he can escape and now Balmer has Mandyson in his guard.
Balmer keeping moving, preventing Mandyson from controlling successfully.
That's four minutes gone in the round.
Balmer has a loose triangle. He'll be looking to tighten that up but Mandyson can see exactly what he's planning and manages to posture up and free himself.
Balmer is active off his back here, looking for submissions.
Balmer is throwing his legs up, looking for submissions. Mandyson is aware though and is defending well.
The crowd thankful this round is nearly over.
Mandyson is in close to Balmer's body, working some short punches and elbows.
Mandyson stopping the sweep attempt from Balmer.
And thats the end of the round the fighters go back to their corners.
Billy Mandyson dominated that second round.
The fighters' corners scream their final instructions, as the referee calls time. Here we go, back to the action! Let's hear some noise people - this is the final round!

Mandyson is looking to clinch but Balmer is avoiding it.
Billy Mandyson is looking to throw some combinations by the looks of things.
Mandyson is looking to take this fight into the clinch.
Mandyson tries to clinch up.
Mandyson throws the left hand but Balmer avoids the punch easily.
Both fighters are breathing heavily.
We've had a slow start to the round here - hopefully the action picks up.
Mandyson tries to close the distance and clinch up against the cage but Balmer paws at him with a jab and circles away.
Balmer gets his takedown attempt stuffed easily
and Mandyson counters with a straight punch to the midsection.
Mandyson looks to land a combination but Balmer avoids it well.
That's one minute gone in the round.
Mandyson swinging wildly here.
Balmer gets his takedown attempt stuffed easily
and Mandyson counters with a two punch combo.
Mandyson misses with a looping left.
Balmer keeping his hands up high there, blocking the jab from Mandyson.
Balmer misses with a takedown attempt
and Mandyson cracks him with a counter punch right on the button.
Billy Mandyson has stuffed three takedown attempts in the round now. That's going to take a lot out of Jimmy Balmer.
Mandyson is looking to clinch but Balmer is avoiding it.
Balmer steps to the side to avoid the strikes from Mandyson.
Mandyson wants to clinch.
Mandyson fails to land with the punch combination there - jab, cross, hook, miss, miss, miss.
That's two minutes gone in the round.
Neither fighter has done anything of merit for a good minute or two here and the crowd are not happy about it.
The fighters circling - Mandyson throws out the jab but it was never going to land.
Mandyson is looking to clinch.
Mandyson swings for the body but Balmer moves out of range.
Mandyson throws a wild combination but nothing lands.
Balmer feints and then dives in with a takedown. That was a long way out but the feint bought him enough time to close the distance and complete the takedown. Now we'll play guard for a bit and see who can get the better of that position.
Balmer stands up and looks to throw the legs aside to pass to side control. Mandyson swivels though and keeps the full guard.
Balmer stands up over Mandyson, holding his feet. He dives back in and lands a decent shot to the head.
Balmer pushes down on Mandyson's leg and manages to get into half guard.
That's three minutes gone in the round.
Balmer is working hard to pass the guard. He's done it - he's now in full mount! Trouble for Mandyson!
Balmer is working for a guillotine from mount but Mandyson frees his head quite easily.
Balmer jumps to the side looking to secure the arm triangle
. Ooooh, that looks tight
Mandyson is gargling but he's managed to escape! Nice work there by Mandyson and Balmer has given up the dominant position trying to land that submission.
Mandyson tries to bench press Balmer off him but Balmer keeps the position.
Balmer in side control, working for a kimura. He's got hold of an arm and he's torquing it... Mandyson is tapping! That's the end of the fight!
Ladies and gentlemen, after 4:01 of round 3, we have a winner by way of Submission (Kimura). Jimmy Balmer!
|
|
|
|
|
|
|
|
|
|
|
|
|
|
|
|
|
|
|
|
|
|
|
| S |
C
A |
G |
S |
C
B |
G |
|
S |
C |
G |
|
energy
A | B |
|
hype
A | B |
|
pop
A | B |
|
mgr
A | B |
|
FIGHT
RATING
43% |
|
|
|
|
|
|
