|
|
PBP Commentary |
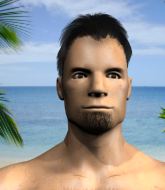
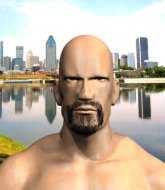
Coming up we have a heavyweight MMA rules bout between Johnny Stark (ranked 0 p4p, 0 weight class) and James Tames (ranked 0 p4p, 0 weight class). Stark comes to the cage accompanied by Dance Hall Days. Tames has chosen "The Distance" by Cake as his entrance music. I don't know about you partner, but I'm pumped for this one!
 |
|
 |
| 190 cm
25
236 lbs
6 - 2 - 0 |
|
200 cm
20
275 lbs
5 - 0 - 0 |
BJJ Purple Belt
Solid boxing
Very strong |
|
BJJ Purple Belt
Decent boxing
Heavy handed |
|
| |
|
Ladies and gentlemen. This fight is 3 rounds, in the heavyweight division.
Introducing the fighter to my left, fighting out of the red corner.
With a record of
6 - 2 - 0, fighting out of New York, Johnny Stark!
And introducing the fighter to my right, fighting out of the blue corner.
With a record of
5 - 0 - 0, fighting out of New York, James Tames!
The judges for this bout are Bruno Lombardi, John Kavanagh and Franklyn Lucas.

The bell rings for round one and we are underway!
Jab, cross, leg kick. Nice combination by Tames!
Tames fakes low and throws an overhand right that catches Stark on the side of the head.
Tames looking to land some kicks to the body here.
Tames slips under a jab.
Tames looks frustrated there after his takedown attempt is stuffed easily.
Tames is looking to clinch.
Stark showing good head movement there, avoiding the strikes from Tames.
Stark throws a looping overhand right but Tames ducks down to avoid it.
Stark stooping low to avoid any incoming strikes and then lunges in with an uppercut come cross that lands flush.
Tames lands with a hook. Stark tried to avoid it but it clipped the top of his head.
Tames misses with a hook. Stark ducked under it nicely.
James Tames seems to be the more aggressive standup fighter in this bout.
Tames throws a lazy right hand but Stark sees it coming a mile off and sidesteps it easily.
Stark scores with a leg kick.
We've seen a great period of action over the last minute or so - credit to both fighters for going all out!

Stark closes the distance and looks for a trip takedown... aaaand he's got it - Stark lands in his opponent's guard.

Tames is active off his back here, looking for submissions.

That's one minute gone in the round.
Stark with a flurry of punches that miss.
Tames looks to be working for a triangle here. Oh, it looks like he might have it! Stark has picked Tames up and slammed him! Tames can't keep hold of the triangle and Stark manages to pass to side control!
Stark lands a decent elbow from side control.
Stark working away.
Stark misses with a strike but at least he's keeping busy, looking to cause some damage - that will still help him when it comes to the judges scorecards.
Stark trying to control the action but Tames is working from the bottom.
Tames is looking for a sweep.
Stark tries for a kimura. Not really close to a finish though.
Tames wants to control but Stark postures up.
Stark looks up at the clock and then as Tames takes his cue and looks up at the clock too, Stark smacks him right in the chops with a big elbow! How rude!
The fighters are pressed up against the cage, both looking to find a bit of space to work.

That's two minutes gone in the round.
Stark looking to punish the body of his opponent here but Tames is avoiding damage well.
Tames is trying to get back to his feet.
Tames is trying to control Stark's posture but Stark avoids it.
Stark is looking to take a break and control but Tames is keeping him honest, looking to work from the bottom.
Stark throwing ground and pound but whilst doing so, he forgets to control position and Tames works his way back to half guard. Good composure under pressure.
Tames looking for submissions off his back.
Tames is looking to regain full guard. Not this time though.
Tames wants to sweep but Stark has passed to side control!

That's three minutes gone in the round.
Stark landing strikes.
Tames defending against the ground and pound.
Tames is not content to let Stark control the position.
Tames is working hard to escape and get back to his feet. After a battle for position, Stark asserts his dominance and retains side control.
Tames is not content to let Stark control the position.
Tames is pushing Stark's head away, looking to escape. Stark manages to hold on to the position though.
Stark looking to control but instead Tames has slipped a leg in, to regain half guard.
Stark is trying to work for a kimura but Tames is defending well.

That's four minutes gone in the round.
A lull in the action here being met with boos from the crowd.
Stark is just sitting in half guard, waiting for something to happen.

It looks like we're going to have a standup here. Neither fighter is doing enough on the ground.
Stark closes the distance and takes a jab right on the nose as he does so.
Tames lands with a nice body punch.
Tames tries for a takedown but Stark circles away easily
and Stark counters with a straight punch to the midsection.

Stark drives through and clinches with Tames against the cage.
The crowd applaud the fighters efforts here as the round comes to an end.
Stark lands a knee to the head there! That was nasty!

Tames escapes the clinch and we're back to striking.
Tames gets caught flat footed, as Stark shoots in with a quick takedown into guard.
Tames throwing his legs up looking for a triangle.
And thats the end of the round the fighters go back to their corners.
That was a close round but I would say that Johnny Stark will probably get the nod.
The fighters get back to their feet, the hooter sounds and we're back to the action!

Some wild striking there from Tames.
Tames misses with a few strikes there.
Stark moves into the clinch successfully.
Stark misses with a knee to the head.
Tames misses with the head strike.
Stark lands on the inside with an uppercut.
Stark lands a right hand that snaps the head of Tames backwards.
Stark tries a shoulder strike but it doesn't do any damage.
Good anti-grappling being displayed by Stark as Tames tries to tie him up.
We've had a slow start to the round here - hopefully the action picks up.
Stark gets through Tames's defenses to land a nice punch to the side of the head.
Stark misses with a shot to the kidneys.
Stark wants to stall.
Stark tries a knee to the head but Tames blocks it.
Tames stalling in the clinch but Stark improves position.
That's one minute gone in the round.
Stark lands a nice elbow from the clinch.
Stark breaks the clinch and we return to the middle of the mat.
Stark closes the distance and presses his opponent up against the cage.
Stark lands punches inside but they're not really causing much damage.
Stark tries to land a knee to the head but misses.
Stark misses with a hook to the ribs.
Stark lands an uppercut.
Both fighters working to control the clinch.
Stark lands a body punch in the clinch.
Stark lands with a quick shot inside that doesn't really do much damage.
Stark digs a right hand underneath Tames's ribcage. Tames let out a lung full of air as it connected.
Stark swings wildly with an uppercut but Tames uses good head movement to avoid it.
Tames can't break the clinch.
The two fighters are working to gain dominance in the clinch.
Both guys are working to get underhooks.
Tames escapes the clinch and we're back to striking.
Stark dips to his left and cracks Tames with an uppercut!
Tames wants to clinch but Stark slips to the side
and Stark counters with a crisp hook to the side of the head.
Tames misses with a takedown
and Stark counters with a nice uppercut.
Tames is breathing heavily.
That's two minutes gone in the round.
Stark closes the distance and clinches up, looking for a takedown. He shifts his weight and gets a nice trip into half guard.
The ref warns both fighters not to hold the cage as they work up against the meshing.
Stark is working for submissions here but there's nothing on.
Tames tries to roll over but Stark keeps him under control.
Tames slips a foot under and gets full guard. Nice work.
It really doesn't seem like the step up in weight is hurting Stark here at all. He's more than holding his own against the bigger man.
The crowd cheering loudly, showing their appreciation for the quality fight we're seeing here.
Stark missing there with some ground and pound from the guard.
Tames is working actively off his back, looking to secure an arm or perhaps work for a triangle.
Stark scoring with punches to the head and body.
Stark trying to land body shots but he keeps hitting the mat.
That's three minutes gone in the round.
Tames is trying to control the position from the bottom.
Stark works over Tames with some ground and pound from guard.
Stark forces his way into half guard.
Stark missing with some ground and pound from the half guard.
Tames is looking to sinch up a guillotine here but Stark pulls his head out easily.
Stark seems to be looking for submissions.
Tames is looking to improve his position.
Tames keeping his head moving to avoid the ground and pound.
Stark landing with strikes to the body and head, softening up his opponent.
That's four minutes gone in the round.
Tames moves his hips nicely and gets into full guard.
Stark postures up in Tames's guard and throws a big left but Tames blocks it.
Stark has been looking to land a fair amount of strikes on the ground. He might be looking to soften his opponent up in order to work for a submission.
Stark stands up and looks to throw the legs aside to pass to side control. Tames swivels though and keeps the full guard.
Tames looking for a guillotine here but Stark defends easily.
Tames avoiding any damage from the ground and pound.
Stark with a flurry of punches that miss.
And thats the end of the round the fighters go back to their corners.
Johnny Stark dominated that second round.
Well, the break between rounds is over. Let's get back to the scrappin! The crowd applaud as we get ready to start the final round!

Tames scores with a crisp jab that stopped Stark in his tracks.
Tames throws a jab, cross combination which is slipped
and Stark counters with a straight right hand.
Tames tries to grapple but his opponent circles
and Stark counters with a nice double leg into half guard.
Stark is nestled in close to Tames, controlling him well. He's worked in a nice elbow to the side of the head as well, for good measure.
Stark content to sit in half guard and control for a moment.
Tames looking to work for a kimura from the bottom.
Tames wants to control but Stark is keeping busy.
Tames takes a big intake of breath there - he's definitely tired.
Stark seems to be taking a bit of a break to think of his next move. He lands a short punch in the meantime.
That's one minute gone in the round.
Stark not landing any meaningful shots this time.
Tames looking for subs from the bottom but Stark mounts him!
Tames is writhing around trying to get back to his feet.
Tames is in a horrible position here. Stark smacks him with another shot as he tries to escape the position.
Stark scores with a couple of good head shots there.
Both fighters really going for it on the ground here!
Stark with good strikes from the mount here!
Stark landing shots from mount.
This is a great period of action - very entertaining stuff!
Tames wants to control but Stark is having none of it.
Stark has his opponent pinned against the cage, landing some nasty ground and pound that is really making a bit of a mess out of Tames's face.
Stark jumps to the side looking to secure the arm triangle
. Ooooh, that looks tight
Tames is gargling but he's managed to escape! Nice work there by Tames and Stark has given up the dominant position trying to land that submission.
Johnny Stark overall seems to be getting the better of the ground position in the fight so far.
That's two minutes gone in the round.
Stark wants to control but Tames is keeping him busy.
Stark misses with a strike but at least he's keeping busy, looking to cause some damage - that will still help him when it comes to the judges scorecards.
Stark looks up at the clock and then as Tames takes his cue and looks up at the clock too, Stark smacks him right in the chops with a big elbow! How rude!
Tames tries to improve position but can't.
Stark tries to land with some ground and pound but misses.
Tames can't do much from the bottom here.
Stark landing strikes.
Stark lands some shots froms side control.
That's three minutes gone in the round.
Stark is looking for a kimura. He might have it! No, Tames has escaped the position, nice work there.
Tames gets back to half guard.
Stark is trying to control the action in half guard but Tames is working away on the bottom, looking perhaps to get back to full guard.
Stark prevents Tames from improving his position.
Tames trying to hold on to Stark's head to control him but Stark postures up.
Tames wants to get back to full guard.
That's four minutes gone in the round.
The crowd are getting on the fighters' backs, as the pace has dropped off in the last minute or so.
Stark throws a strike but Tames avoids it easily and moves to full guard.
Stark won't allow Tames to sweep him here.
The referee decides to stand the fighters back up.
Tames ducks under a wild hook from Stark.
Stark moves into the clinch.
An uppercut to the body lands inside from Stark.
Stark lands with a short punch from the clinch.
Stark lands a body shot in the clinch.
Johnny Stark is fighting for a decision here - he's started to take the cautious approach.
Stark lands with a light punch inside.
Nice body punch from Stark - that landed with a thud.
Stark has a body lock and is looking for a takedown. Tames is bouncing around trying to prevent the takedown and somehow he has indeed managed to stay on his feet.
A knee to the head by Stark.
Come on Stark - let's have some action - none of this stalling nonsense.
James Tames has stepped it up - he knows he needs a finish here!
As the round comes to an end the crowd are showing their appreciation for a great round of action.
Tames is trying to break free.
Stark lands a hook to the side of the head.
Tames gets underhooks to prevent Stark's takedown attempt.
Stark keeps control of Tames as he tries to wriggle out of the double underhooks.
And that's the end of the fight!
Johnny Stark showed his dominance in that final round.
Well I reckon that's a shut out for Stark, winning every round. Will the judges agree? They are the ones who matter, even if they are often depressingly incompetent. Over to the ring announcer for the scorecards.
Ladies and gentlemen, after 3 rounds of action, we go to the scorecards for a decision.
Judge Bruno Lombardi scores the fight 30:27
Judge John Kavanagh scores the fight 30:27
Judge Franklyn Lucas scores the fight 30:27
In favor of your winner, by unanimous decision... Johnny Stark!
|
|
|
|
|
|
|
|
|
|
|
|
|
|
|
|
|
|
|
|
|
|
|
| S |
C
A |
G |
S |
C
B |
G |
|
S |
C |
G |
|
energy
A | B |
|
hype
A | B |
|
pop
A | B |
|
mgr
A | B |
|
FIGHT
RATING
78% |
|
|
|
|
|
|
