|
|
PBP Commentary |
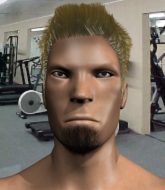
Coming up we have a super heavyweight MMA rules bout between Chris Farley (ranked 0 p4p, 0 weight class) and Diesel Maddox (ranked 0 p4p, 0 weight class). Both fighters look fresh as a daisy as they make their way towards the cage.
 |
|
 |
| 225 cm
22
300 lbs
3 - 0 - 0 |
|
220 cm
18
280 lbs
3 - 1 - 0 |
BJJ Blue Belt
Basic striking
Granite chin |
|
BJJ Blue Belt
Brawler
Determined |
|
| |
|
Ladies and gentlemen. This fight is 3 rounds, in the super heavyweight division.
Introducing the fighter to my left, fighting out of the red corner.
With a record of
3 - 0 - 0, fighting out of Las Vegas, Chris Farley!
And introducing the fighter to my right, fighting out of the blue corner.
With a record of
3 - 1 - 0, fighting out of Las Vegas, Diesel Maddox!
The judges for this bout are Tiny Johnson, Cecil Peabody and Robert Twigg.

The bell rings for round one and we are underway!

Maddox gets taken down but at least he's managed to land in guard.
Maddox being controlled here, momentarily.
Maddox pulls Farley in close to prevent any damage.
Farley tries to stand but Maddox is controlling from the bottom.
Farley distracts Maddox with his right hand and drops a big elbow with his other arm.
Farley trying to control but Maddox is working from the bottom.

Maddox looking for a guillotine here but Farley defends easily.
Maddox bucks up whilst keeping hold of a body lock, managing to reverse the position. Now he's in top in Farley's guard.

That's one minute gone in the round.
Maddox seems content to control from guard here. He's going to have to remain active though if he doesn't want to get stood back up.
Farley has a butterfly guard looking to sweep but Maddox has passed into side control.
Maddox trying to control the position but Farley is working away.
Farley being controlled for a moment.
Farley tries to buck Maddox off but Maddox is having none of it.
Maddox tries for a kimura. Not really close to a finish though.
Maddox looks up at the clock and then as Farley takes his cue and looks up at the clock too, Maddox smacks him right in the chops with a big elbow! How rude!

That's two minutes gone in the round.
Maddox connects with a decent looking elbow from side control that caused Farley some visible discomfort.
Farley struggling a bit here.
The fighters are starting to get a bit slippery now, which will make submissions a bit more difficult.
Farley tries to slip a leg under to move to half guard but Maddox presses down on the leg and jumps into full mount!
Maddox has his opponent pinned against the cage, landing some nasty ground and pound that is really making a bit of a mess out of Farley's face.
Farley tries to lock up and control but Maddox gives him a forearm to the face and pushes him away.

Maddox stands up from mount. Strange move.
Farley looks frustrated there after his takedown attempt is stuffed easily.
Farley is breathing heavily.
Farley scores a trip takedown into side control. Nice.
We've seen a great period of action over the last minute or so - credit to both fighters for leaving it all in the cage!
Farley gets to mount! Maddox was on the offensive and wasn't defending properly.
Maddox tries to get back to half guard but can't.
The ref warns both fighters not to hold the cage as they work up against the meshing.

That's three minutes gone in the round.
Farley is working for a guillotine from mount but Maddox frees his head quite easily.
Farley avoids the attempt from Maddox to control.
Farley prevents Maddox from getting the reversal.
Maddox bucks up and manages to get a nice reversal! He's in guard on the top - nicely done!
Maddox passes easily into side control. Nice work.
Farley is not content to let Maddox control the position.
Farley is positioning himself to get back to half guard.

That's four minutes gone in the round.
A few boos can be heard. I'm sure they will multiply if the fighters don't pick up the pace.
Maddox cracks Farley with a big elbow.
The fighters are pressed up against the cage, both looking to find a bit of space to work.
Maddox wants to lay and pray for a moment but Farley keeps working.
Farley is looking for a sweep.
Farley manages to get one leg in to regain half guard.
Farley moves his hips nicely and gets into full guard.
Maddox postures up.
Maddox prevents Farley from getting back to his feet.
The crowd applaud the fighters efforts here as the round comes to an end.
Farley manages to escape and get back to his feet.

The fight moves into the clinch position.
Farley lands a nice elbow.
A short right hand to the side of the head by Farley.
Farley lands an uppercut.
And thats the end of the round the fighters go back to their corners.
A close round but Diesel Maddox will probably get the nod.
Well, the break between rounds is over. Let's get back to the scrappin!

A left and a right from Farley both land. Nice combination.
Farley misses with a takedown attempt. He shot from a bit too far out.
Maddox has his takedown stuffed
and Farley counters with a nice kick to the body.
Maddox doesn't succeed with the takedown
and Farley counters with a good, hard body kick but Maddox shrugs it off.
Farley closes the distance and clinches.
Farley goes for a takedown attempt but Maddox pushes him away and we're back to fighting at a distance.
Chris Farley is looking to throw some combinations by the looks of things.
Farley gets caught flat footed, as Maddox shoots in with a quick takedown into guard.
Wooooo! Give it up for these two warriors! They are putting on a show!
Farley wants to stand but Maddox is controlling the position.
Maddox advances to half guard.
Both fighters are absolutely exhausted here.
Maddox moves into full mount! Farley won't be happy about that!
Farley keeping his composure momentarily, calmly looking to get back to half guard.
Maddox trying to control but Farley is having none of it.
That's one minute gone in the round.
Diesel Maddox has got the better of the ground game so far.
Maddox is in a good position here but he's just trying to control... And he's not even managing to do that successfully.
Farley takes a big shot to the head but keeps on trying to improve his position.
Maddox trying to control but he's not successful this time.
Farley is trying to escape the mount.
Maddox lands a heavy elbow.
Maddox working from mount. He moves in close and looks like he might be going for an arm triangle... He's hopped off to the side and he's transitioned into an Anaconda choke. Farley turning a nasty shade of purple. He's refusing to tap but he's gone! He's out! The ref rips Maddox off and cradles Farley's limp body as Maddox celebrates with his corner.
Ladies and gentlemen, after 2:01 of round 2, we have a winner by way of Submission (Anaconda Choke). Diesel Maddox!
|
|
|
|
|
|
|
|
|
|
|
|
|
|
|
|
|
|
|
|
|
|
|
| S |
C
A |
G |
S |
C
B |
G |
|
S |
C |
G |
|
energy
A | B |
|
hype
A | B |
|
pop
A | B |
|
mgr
A | B |
|
FIGHT
RATING
79% |
|
|
|
|
|
|
