|
|
PBP Commentary |
Coming up we have a light heavyweight MMA rules bout between Kenichi Uzomaki (ranked 0 p4p, 0 weight class) and Ryuga Hideki (ranked 0 p4p, 0 weight class). Over to our ring announcer for the fighter introductions!
 |
|
 |
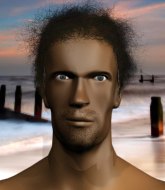
| 190 cm
21
215 lbs
6 - 3 - 0 |
|
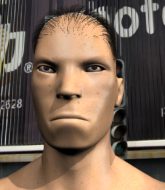
185 cm
25
212 lbs
7 - 4 - 1 |
BJJ Purple Belt
Basic striking
Granite chin |
|
BJJ Purple Belt
Good elbows
Granite chin |
|
| |
|
Ladies and gentlemen. This fight is 3 rounds, in the light heavyweight division.
Introducing the fighter to my left, fighting out of the red corner.
With a record of
6 - 3 - 0, fighting out of Tokyo, Kenichi Uzomaki!
And introducing the fighter to my right, fighting out of the blue corner.
With a record of
7 - 4 - 1, fighting out of Tokyo, Ryuga Hideki!
The judges for this bout are Shirou Masuda, Taro Takaoka and Kenichi Hosakawa.

The bell rings for round one and we are underway!
Uzomaki misses with a takedown attempt - Hideki sprawls well and throws a nice strike on the way out which just misses.
Hideki shakes his hands off, looking to compose himself, but takes a jab to the jaw whilst he does it.
Hideki throws a right and a left that Uzomaki avoids nicely.
Hideki wants to clinch.

Uzomaki shoots in from a long way out. He's driving through with the takedown attempt and he eventually gets it, landing in Hideki's guard.

Uzomaki drops back, looking for a kneebar! Hideki looks panicked! The fighters roll across the mat, one looking to finish, one looking to escape. Hideki looks to have wriggled free... Yes, he's got his leg free and he's dived into side control! Good work there from Hideki!
Hideki tries to advance to mount but can't.
Uzomaki takes a big shot right to the temple there but he's taken it well.
The fighters are pressed up against the cage, both looking to find a bit of space to work.
Uzomaki seems a little lost for a moment, as Hideki dominates the positioning.
Uzomaki is looking to regain half guard here but Hideki keeps moving and retains side control.
Both fighters really going for it on the ground here!
Hideki is looking for a kimura. He might have it! No, Uzomaki has escaped the position, nice work there.
Hideki tries to move into full mount but can't pass Uzomaki's legs.
Hideki slows the pace down.

That's one minute gone in the round.
Hideki working the ground and pound from side control.
Uzomaki tries to work a leg under to get back to half guard but Hideki wriggles his own leg back out and remains in side control.
Hideki trying to control the position but Uzomaki is working away.
Hideki landing with strikes to the head and body from side control.
Hideki wants to control but Uzomaki is keeping him busy.
Hideki landing strikes.
Uzomaki tries to bench press Hideki off him but Hideki keeps the position.
Uzomaki is trying to control Hideki's posture but Hideki avoids it.
Hideki landing a few strikes.
Hideki wants to lay and pray for a moment but Uzomaki keeps working.

That's two minutes gone in the round.
The ref warns both fighters not to hold the cage as they work up against the meshing.
Hideki is in a good position here but he's just trying to control... And he's not even managing to do that successfully.
Uzomaki tries to work a leg under to get back to half guard but Hideki wriggles his own leg back out and remains in side control.
Hideki wants to control but Uzomaki is keeping him busy.
Hideki lands a few punches from side control.
Hideki is putting a hurting on Uzomaki here, landing some big shots from side control.
Uzomaki manages to land a sweep and he's now on top! Lovely Jiu Jitsu!
Uzomaki is breathing heavily.
Uzomaki seems to be working for a kimura but Hideki defends the submission attempt.
Hideki is looking for a sweep. Uzomaki is wise to his cunning plan and keeps the top position.
Hideki gets full guard.

That's three minutes gone in the round.
Hideki manages to land a sweep and now he's in mount on top!
Hideki putting on the heat here with some good ground and pound!
Uzomaki is looking to improve his position but Hideki isn't that keen on the idea.
Hideki can't quite control the action as he would like just now, as Uzomaki is looking to escape.
Hideki avoids the attempt from Uzomaki to control.
Hideki is in the full mount, landing strikes.
Hideki in mount throwing good strikes here, bouncing his opponent's head off the canvas.
Hideki scoring with strikes but Uzomaki is staying in there.
Fantastic stuff here - a very entertaining period of action, which has drawn cheers from the crowd.
BOOM! Hideki connects with a massive shot to the dome!
Hideki landing shots from mount.
Uzomaki wants to hold on but Hideki pushes him away.

That's four minutes gone in the round.
Hideki lands a big elbow.
Hideki lands a nice shot to the head.
Hideki has control of Uzomaki's right arm, working for a kimura. It's a bit of a token attempt though and Uzomaki regains control of the situation pretty easily.
Hideki controlling his opponent.
Hideki can't quite control the action as he would like just now, as Uzomaki is looking to escape.
The crowd growing excited in anticipation of a finish here! Right on cue, Hideki cracks his opponent with a massive right hand that draws loud cheers!
As the round comes to an end the crowd are showing their appreciation for a great round of action.
Hideki landing strikes, looking to finish!
Uzomaki is squirming around, avoiding Hideki's attempts to control the action.
Hideki landing strikes from the mount and Uzomaki is in trouble!
Hideki lands an elbow that was bordering on illegal but the referee lets it go with a warning.
And thats the end of the round the fighters go back to their corners.
Ryuga Hideki dominated that round.
That's the end of the round. The referee orders the cornermen out of the cage so we can get back down to business.

Hideki shoots in from a long way out. He's driving through with the takedown attempt and he eventually gets it, landing in Uzomaki's guard.
Hideki looking to pass the guard.
Hideki sneaks a leg through and gets to half guard. That was like a knife through butter how easily he passed Uzomaki's guard.
Hideki passes to side control.
Hideki is trying to land an Americana. He has the arm isolated but Uzomaki is keeping cool and he's avoided the danger for now.
Uzomaki takes a couple of big shots there - the referee warns him that he has to defend himself better.
Uzomaki tries to improve position but can't.
Hideki looks up at the clock and then as Uzomaki takes his cue and looks up at the clock too, Hideki smacks him right in the chops with a big elbow! How rude!
Hideki working away diligently from side control. Landing strikes effectively there - that will score him some points on the judges scorecards.
Hideki tries to move into full mount but can't pass Uzomaki's legs.
Hideki thinks about going for a far side armbar but bails out and retains the dominant position instead.
Both fighters are absolutely exhausted here.
Hideki landing a few strikes.
That's one minute gone in the round.
Hideki is looking to take a break and control but Uzomaki is keeping him honest, looking to work from the bottom.
Ryuga Hideki has got the better of the ground game so far.
Hideki is maintaining the dominant position - no doubt Uzomaki will start to get frustrated soon if he's not already.
Uzomaki can't do much from the bottom here.
Hideki wants to control but Uzomaki is keeping him busy.
Uzomaki can't do much from the bottom here.
Hideki looking for an arm triangle but it's way too loose to do anything.
Uzomaki is looking to reverse the position.
Uzomaki is working hard here to advance position.
That's two minutes gone in the round.
Neither fighter has done anything of merit for a good minute or two here and the crowd are not happy about it.

It looks like we're going to have a standup here. Neither fighter is doing enough on the ground.

Hideki has closed the distance and engaged Uzomaki in a clinch.
Uzomaki changes levels and goes for a takedown here. Hideki fights it off and pushes away nicely.
Hideki shoots in and drives through. Uzomaki sprawls well.
The fight stays on the outside here - Hideki looks like he's thinking about clinching though.
Hideki with a poor takedown
and Uzomaki counters into the clinch. Nicely done.
Uzomaki takes an elbow to the temple.
Hideki lands a nice elbow.
Hideki lands an elbow inside that Uzomaki shrugs off.
Hideki gets an overhook and lands an elbow to the side of the head.
Hideki tries for a takedown but Uzomaki manages to get underhooks.
Kenichi Uzomaki has stuffed three takedown attempts in the round now. That's going to take a lot out of Ryuga Hideki.
Hideki comes over the top with an elbow. That landed flush.
Uzomaki jumps guard but his hands slip and he falls flat on his back. Well, he's made himself look a right mug there, as Hideki walks away with a smile on his face. Uzomaki gets slowly back to his feet and shakes his head.
Hideki tries to clinch up but Uzomaki circles away and keeps his distance.
Uzomaki lands an overhand left. A wild punch that just about connected.
Wow, both these guys are really going for it!
Hideki defends well against a solid takedown attempt from Uzomaki.
Hideki closes the distance and clinches up, looking for a takedown. He shifts his weight and gets a nice trip into half guard.
Uzomaki is looking for a sweep. Hideki is wise to his cunning plan and keeps the top position.
Hideki working Uzomaki over with strikes.
That's three minutes gone in the round.
Hideki passes the half guard and he's now in mount! Big trouble for Uzomaki!
Hideki is thinking about an arm triangle here, looking to tighten it up before moving to side control. Uzomaki can see it coming though and defends well with a couple of strikes to the head and some good arm positioning.
Hideki looking to control but Uzomaki is working nicely, looking to advance position himself.
Uzomaki is wriggling around trying to escape.
Hideki with good strikes from the mount here!
Hideki tries to control but Uzomaki wriggling away.
Uzomaki tries to get back to half guard but can't.
A nice elbow there by Hideki.
Uzomaki really wants to buck Hideki off and get back to his feet.
Hideki looking to secure an arm triangle but Uzomaki defends it well.
That's four minutes gone in the round.
Hideki looking to control and managing it successfully.
Uzomaki keeping his composure momentarily, calmly looking to get back to half guard.
Hideki scoring with some good ground and pound from mount here. Will he manage to finish Uzomaki?
The referee warns Uzomaki that he has to improve his position here as he takes two more clean shots to the head.
Hideki has been the more effective fighter overall so far.
Hideki jumps to side control looking for an arm triangle but Uzomaki manages to avoid the submission attempt.
Uzomaki tries to get back to half guard but can't.
The crowd applaud the fighters efforts here as the round comes to an end.
Hideki wants to lay and pray for a moment but Uzomaki keeps working.
Hideki might have to switch it up a bit here because his efforts to control Uzomaki kaven't been going to plan, at least at the current moment in time.
And thats the end of the round the fighters go back to their corners.
Ryuga Hideki showed his class in that round. I'd imagine he'll take it on all the scorecards.
The fighters' corners scream their final instructions, as the referee calls time. Here we go, back to the action! Ladies and gentlemen, this is the final round!

Hideki fails in his attempt to clinch.
Hideki shoots in but Uzomaki avoids the takedown attempt easily.
Uzomaki keeps the fight on the outside.
Hideki moves into the clinch.
Uzomaki goes for a takedown attempt but Hideki pushes him away and we're back to fighting at a distance.
Ryuga Hideki seems to be the more aggressive standup fighter in this bout.
Uzomaki feints and then dives in with a takedown. That was a long way out but the feint bought him enough time to close the distance and complete the takedown. Now we'll play guard for a bit and see who can get the better of that position.
Hideki looking to hit a scissor sweep but Uzomaki is one step ahead there.
Uzomaki has gone for a leg lock! Hideki slips out almost immediately though and dives into Uzomaki's guard.
Uzomaki is working from a closed guard but he's struggling to control his opponent.
Both fighters are breathing heavily.
Hideki with a couple of shots to the head there. Not particularly brutal.
That's one minute gone in the round.
Hideki lands a couple of elbows.
Hideki chips away with some ground and pound.
Hideki scores with a decent looking elbow strike.
Hideki's corner is telling him to maintain position.
Hideki thinks about going for a leg but decides against it, in order to maintain the position.
Hideki postures up in Uzomaki's guard and throws a big left but Uzomaki blocks it.
Uzomaki wants to sweep here but Hideki controlling him for the moment.
Hideki works over Uzomaki with some ground and pound from guard.
Hideki postures up and lands some nice ground and pound.
Hideki tries to free his leg and advance position but Uzomaki is retaining full guard.
Hideki trying to control but Uzomaki is working from the bottom.
Uzomaki working for a triangle but Hideki defends it easily.
The referee decides to stand the fighters back up.
Hideki tries to clinch
and Uzomaki counters with a nice double leg into side control. Hideki won't be happy with that.
That's two minutes gone in the round.
Hideki regains half guard, as Uzomaki was trying to land strikes.
Uzomaki is pressing down on Hideki's thigh, looking to free his foot. Hideki is holding on for now.
Hideki wants to control but Uzomaki is keeping busy.
Hideki moves into full guard.
Uzomaki stopping the sweep attempt from Hideki.
Hideki pulls Uzomaki in to control the position.
Uzomaki trying to control but Hideki is working from the bottom.
That's three minutes gone in the round.
Uzomaki trying to stand up but can't free himself from Hideki's guard.
Hideki controlling Uzomaki's posture.
Hideki keeping moving, preventing Uzomaki from controlling successfully.
Uzomaki won't allow Hideki to sweep him here.
Kenichi Uzomaki has stepped it up - he knows he needs a finish here!
Uzomaki is pushing down on Hideki's leg trying to pass to half guard. Hideki is fighting to maintain full guard but Uzomaki has managed to sneak the leg through.
Hideki moves into full guard.
Hideki wants to stand and escape but Uzomaki is having none of it.
Hideki looking to hit a scissor sweep but Uzomaki is one step ahead there.
Uzomaki is trying to work a guillotine from the top, or something like that? Don't know how he thinks he's going to get a finish from there.
That's four minutes gone in the round.
My god... these two guys really need to pick up the pace or everyone will leave to go get a beer.
Hideki controlling the position.
Uzomaki has gone for a leg lock! Hideki slips out almost immediately though and dives into Uzomaki's guard.
Uzomaki being controlled here, momentarily.
Uzomaki looking for a guillotine here but Hideki defends easily.
Hideki scoring with some ground and pound.
And that's the end of the fight!
I would just about give that final round to Ryuga Hideki.
I've got Hideki winning every round here. Surely the decision will go his way and he'll pick up a well deserved decision victory. Over to the ring announcer for the scorecards.
Ladies and gentlemen, after 3 rounds of action, we go to the scorecards for a decision.
Judge Shirou Masuda scores the fight 27:30
Judge Taro Takaoka scores the fight 27:30
Judge Kenichi Hosakawa scores the fight 27:30
In favor of your winner, by unanimous decision... Ryuga Hideki!
|
|
|
|
|
|
|
|
|
|
|
|
|
|
|
|
|
|
|
|
|
|
|
| S |
C
A |
G |
S |
C
B |
G |
|
S |
C |
G |
|
energy
A | B |
|
hype
A | B |
|
pop
A | B |
|
mgr
A | B |
|
FIGHT
RATING
100% |
|
|
|
|
|
|

