|
|
PBP Commentary |
Coming up we have a featherweight MMA rules bout between Cronic Blazer (ranked 0 p4p, 0 weight class) and Tim Marks (ranked 0 p4p, 0 weight class). The key to victory for Cronic Blazer has got to be keeping the fight on the feet.
 |
|
 |
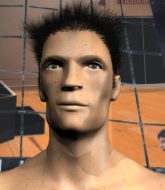
| 183 cm
21
153 lbs
1 - 0 - 1 |
|
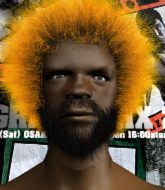
175 cm
19
150 lbs
1 - 2 - 0 |
BJJ White Belt
Solid boxing
Very strong |
|
Good wrestler
Counter striker
Determined |
|
| |
|
Ladies and gentlemen. This fight is 3 rounds, in the featherweight division.
Introducing the fighter to my left, fighting out of the red corner.
With a record of
1 - 0 - 1, fighting out of New York, Cronic Blazer!
And introducing the fighter to my right, fighting out of the blue corner.
With a record of
1 - 2 - 0, fighting out of New York, Tim Marks!
The judges for this bout are Steve Montenegro, Reed Andrews and Lou da Vinci.

The bell rings for round one and we are underway!

Marks has Blazer up against the ropes in a clinch.
Marks fails to pull guard.
Blazer really does look like a pencil wearing a pair of gloves. Let's hope he has a gameplan to suit that ridiculous body shape.
Marks prevents Blazer from breaking the clinch.
Blazer has had enough of the clinch and is looking to separate.

Marks breaks the clinch and we're back to striking at distance.
Blazer fakes a jab and throws a low kick but Marks checks it well.
Cronic Blazer seems to be the more aggressive standup fighter in this bout.
Marks moves out of range of the leg kick from Blazer.
Some bone on bone action there as Marks checks a low kick. Luckily it wasn't a particularly hard one.
Marks takes a body punch that cleary hurt but he's trying not to show any weakness.

Marks changes levels and drives through with a really nice takedown into side control. Blazer looks really pissed at himself for not defending that better.
Blazer managing to avoid any damage from the strikes thrown by Marks.
Blazer is pushing Marks's head away, looking to escape. Marks manages to hold on to the position though.
Marks tries to score with some ground and pound. Blazer controls his posture well this time though and the shots don't do any damage.
Blazer is trying to control Marks's posture but Marks avoids it.
Marks throws a knee to the body but it doesn't do much damage.
Marks prevents Blazer from escaping the position.
Marks looking to punish the body of his opponent here but Blazer is avoiding damage well.
Marks working the ground and pound but Blazer is defending the strikes.

That's one minute gone in the round.

The referee decides to stand the fighters back up.
Marks closes the distance and gets a double leg, slamming Blazer to the mat! Blazer manages to get full guard.
Blazer utilising some decent striking defenses from the guard, preventing the ground and pound.
Marks throwing strikes from guard but Blazer blocks nicely.
Marks won't allow Blazer to get back to his feet.
A big thud reverberates around the arena there as Marks accidentally thumps the mat. Hopefully he's not broken his hand.
Blazer on his back here. We all know that wrestlers don't like being on their back so let's see if Blazer tries to get out of the position.
Blazer is trying to control the position but Marks postures up.
Blazer utilising some decent striking defenses from the guard, preventing the ground and pound.
A big thud reverberates around the arena there as Marks accidentally thumps the mat. Hopefully he's not broken his hand.
Blazer wants to sweep here but Marks controlling him for the moment.
The referee has ruled that neither fighter is active enough on the ground and has stood them back up.
Marks takes a punch right to his stomach. That took the wind out of him momentarily.
Blazer scores with the left hand. Marks knows he should have avoided that one.
Some wild striking there from Blazer.
Marks shoots in for a takedown. "I don't think so" says Blazer as he avoids it easily.
Marks walks straight into a jab right on the nose. That one stung - he's blinking and trying to clear his head.

That's two minutes gone in the round.
Marks shoots in for a takedown but Blazer shows good takedown defense there and keeps this one on the feet.
Cronic Blazer has stuffed three takedown attempts in the round now. That's going to take a lot out of Tim Marks.
Blazer throws a series of punches but Marks avoids them all with ease.
Blazer looks to land a combination but Marks avoids it well.
Marks moves in looking to clinch but Blazer pushes him off.
Blazer throws a two punch combo that lands nicely.

It looks like Tim Marks has been cut.
We've seen a great period of action over the last minute or so - credit to both fighters for going all out!
Nice takedown defense from Blazer. No joy for Marks on that attempt.
Blazer throws a combination. Marks tries to block but a couple of punches get through.
Blazer scores with the left hand. Marks knows he should have avoided that one.
Blazer connects with a looping right hand.
Blazer tests Marks's chin there with a solid looking shot.
Marks closes the distance and pushes Blazer back into the ropes.
Blazer wants to break free but Marks has control.
Marks has Blazer pressed against the ropes, preventing Blazer from circling away and getting back to striking at range.

That's three minutes gone in the round.
Marks has moved round to his opponent's back and is looking for a suplex! Oh snap! He's tossed Blazer clear over his head and slammed him to the mat!
Watch the back of the head! Comes the shout from the referee towards Marks.
Blazer staying busy and making it hard for Marks to control.
Blazer is trying to stand back up.
Blazer covering up well and avoiding damage.
Marks misses with punches from the back.
Both fighters really going for it on the ground here!
Marks missing with strikes from the back.
Marks trying desperately to keep hold of the dominant position.
Marks misses with an elbow to the head.
Blazer is trying to get back to his feet but he's not managed it yet.
Marks throwing damaging strikes from the back! Blazer could be in trouble here!
Marks somehow managing to miss with a strike from the back.

That's four minutes gone in the round.
Even with his hooks in, Marks manages to miss with strikes from the back.

Marks has his hand under the chin of his opponent looking for the choke. He's nearly got it! This one could be all over! But no, Blazer has freed his hand and lives to survive another
well, another couple of seconds at least!
Marks looks gassed!
Blazer manages to reverse the position and now he's in Marks's guard. Nice work there by Blazer.
The fighters are trapped in the ropes so we're going to have a reposition here. The ref calls for a break and repositions the fighters in the center of the ring.
Blazer trying to control the position from guard on top but Marks is wriggling around, looking for whatever he can.
The referee decides to stand the fighters back up.
Marks throws a right and a left that both miss.
Blazer misses with a combination
and Marks moves into the clinch.
The crowd applaud the fighters efforts here as the round comes to an end.
Marks keeps the fight in the clinch, despite Blazer's efforts to push away.
Marks drops down for a takedown but doesn't get it.
And thats the end of the round the fighters go back to their corners.
Cronic Blazer dominated that round.
The cut man is working on Tim Marks's cut.
The referee calls time. The cornermen exit stage left and we're back to business.

Blazer throws out a leg kick but Marks moves out of range and Blazer only half commits.
Blazer fails to land with the punch combination there - jab, cross, hook, miss, miss, miss.
Marks closes the distance and clinches.
Marks wants a takedown but no success here.
Blazer stops a takedown attempt from Marks.
Blazer wants to break the clinch but can't.
Blazer can't break the clinch.
Marks has Blazer pressed against the ropes, preventing Blazer from circling away and getting back to striking at range.
We've had a slow start to the round here - hopefully the action picks up.
Blazer tries to circle away but Marks has him pinned against the ropes.
Marks drops down looking for an ankle pick but Blazer pulls his leg out and moves away.
Cronic Blazer has stuffed three takedown attempts in the round now. That's going to take a lot out of Tim Marks.
Marks avoids a punch combination nicely.
That's one minute gone in the round.
Blazer will need to tighten up his combinations if he doesn't want to gas himself out, swinging at thin air.
Blazer throws a good cross that connects.
Blazer scores with a shot to the body.
Blazer throws a left and a right that both miss
so Marks counters with a double leg into guard. Good agility.
Marks is trying to work a guillotine from the top, or something like that? Don't know how he thinks he's going to get a finish from there.
Marks is breathing heavily.
Marks throwing strikes from guard but Blazer blocks nicely.
Marks stands and throws Blazer's legs to the side, diving into side control.

Blazer throws his opponent off and manages to get back to his feet! Nicely done!
Blazer looks to land a combination. Marks sees it coming but can only parry a couple of the shots.
That's two minutes gone in the round.
Wooooo! Give it up for these two warriors! They are putting on a show!
Blazer throws a wild combination but nothing lands.
Blazer is using his height advantage well here, landing a good percentage of his punches.
Marks tries to shoot in for a takedown. He's got hold of a leg but Blazer swivels and escapes.
Blazer lands a jab, followed by a cross and another cross, as Marks backs up against the ropes.
Marks fails with the takedown.
Blazer throws a right and a left that Marks avoids nicely.
Marks shoots in for a takedown but Blazer shows good takedown defense.
Blazer is looking to chop away at Marks's legs.
Blazer swings away but doesn't land with a series of punches.
Marks looks frustrated there after his takedown attempt is stuffed easily.
Blazer attempts a low kick but it misses it's target.
Blazer throws a series of strikes that have Marks backpedaling.
Cronic Blazer is winning the standup battle so far.
That's three minutes gone in the round.
Blazer scores with a nice one two combo and darts back out of range to avoid anything coming in the opposite direction.
Marks gets the takedown into side control.
Blazer dodges the ground and pound from Marks.
Marks trying to control the position but Blazer is working away.
Blazer tries to escape but Marks is in control.
The ground and pound from Marks seems to be hitting the mat more than his opponent.
Marks is looking to take a break and control but Blazer is keeping him honest, looking to work from the bottom.
Marks is trying to get an arm triangle but Blazer is defending well.
Blazer wants to get back to his feet but Marks drags him back down.
The referee decides to stand the fighters back up.
Marks misses with a takedown attempt - Blazer sprawls well and throws a nice strike on the way out which just misses.
That's four minutes gone in the round.
Some bone on bone action there as Marks checks a low kick. Luckily it wasn't a particularly hard one.
Blazer thows a left - swing and a miss!
Blazer defends well against a solid takedown attempt from Marks.
Marks moves out of range of the leg kick from Blazer.
Blazer misses with a combination
and Marks counters with a nice double leg into half guard.
Blazer pushes Marks off looking to stand but Marks dives back in and keeps control.
Marks throwing shots but they're hitting the canvas more than the man.
Marks thumps the canvas. Not on purpose obviously - he just missed Blazer's head.
The crowd applaud the fighters efforts here as the round comes to an end.
Marks missing with the ground and pound from half guard.
Marks sitting in half guard, looking to land shots. Blazer defending well though.
Well, if Marks is going to just lie there, perhaps we should talk about what we're having for dinner tonight
I'm having a ham and pineapple pizza
Yum. Can't wait.
Blazer trying to hold on to Marks's head to control him but Marks postures up.
And thats the end of the round the fighters go back to their corners.
A close second round but Tim Marks will probably get the nod - 10:9.
The cut man is working on Tim Marks's cut.
OK. That's time! The bell goes and we're back to the action. Let's hear some noise people - this is the final round!

Blazer throws a combination but it was largely blocked by Marks.
Marks checks a low kick. Bone on bone - not my idea of a good time.
Marks darts in and lands a nice takedown into half guard.
Marks is working for a kimura but Blazer is defending it quite comfortably.
Marks not landing any meaningful shots this time.
Marks not throwing his punches with enough precision this time.
Marks stops Blazer from getting back to his feet.
Tim Marks has got the better of the ground game so far.
Marks scoring with strikes to the body and head.
Both fighters are breathing heavily.
Blazer trying to control here.
Marks throwing shots but Blazer is blocking nicely.
That's one minute gone in the round.
Marks seems to be taking a bit of a break to think of his next move. He lands a short punch in the meantime.
Marks sitting in half guard, looking to land shots. Blazer defending well though.
It looks like we're going to have a standup here. Neither fighter is doing enough on the ground.
Marks takes a solid shot to the body. That one hurt him but he's trying not to show it.
Marks shoots in for a takedown but doesn't get it.
Marks dodges the punch combination from Blazer.
Blazer scores with a nice right hand.
Blazer scores with a hook.
Blazer thows a body shot but no joy.
Blazer looks to score with a combo but nothing lands.
Blazer gets caught flat footed, as Marks shoots in with a quick takedown into guard.
Blazer working the defensive guard well to avoid strikes from Marks.
Marks thows a big elbow that misses.
That's two minutes gone in the round.
Marks working some ground and pound from guard but it's not doing any damage.
Blazer is looking to stand up but Marks isn't so interested in that idea.
Marks sneaks a leg through and gets to half guard. That was like a knife through butter how easily he passed Blazer's guard.
Marks sitting in half guard, looking to land shots. Blazer defending well though.
Blazer keeping his head moving to avoid the ground and pound.
Blazer is looking to escape.
Well, the referee has seen enough. Neither fighter is active enough on the ground so he's stood them back up.
Blazer misses with a two punch combination.
Cronic Blazer is looking to throw some combinations by the looks of things.
Marks shoots in from a long way out. He's driving through with the takedown attempt and he eventually gets it, landing in Blazer's guard.
Blazer trying to keep a closed guard but Marks is proving a slippery customer.
Marks wants to pass the guard but Blazer is keeping the position.
Blazer is looking to get back to his feet but can't, whilst Marks is controlling him.
Marks wants to control from the top but Blazer keeps moving.
That's three minutes gone in the round.
Marks is looking to work some ground and pound but Blazer has wrist control.
Marks drops back for a leg! It's a sloppy attempt though and Marks jumps back into guard quickly, to retain the dominant position.
Marks won't allow Blazer to get back to his feet.
Marks stopping the sweep attempt from Blazer.
The referee decides to stand the fighters back up.
Marks scores a trip takedown into side control. Nice.
Marks sitting in side control, looking to soften his opponent up with elbows and hammerfists but Blazer is avoiding damage well and looking to escape the position.
Blazer is pushing Marks's head away, looking to escape. Marks manages to hold on to the position though.
Marks postures up a little and throws a couple of hammerfists but they don't connect properly.
Marks throws a strike aimed at the side of Blazer's head but Blazer avoids it well.
Marks creates some space and throws a big elbow, but Blazer sees it coming and moves his head just enough to avoid the strike.
Marks working the ground and pound from side control.
That's four minutes gone in the round.
Marks throws a knee to the body but it doesn't do much damage.
Marks looking for an arm triangle but it's way too loose to do anything.
The referee has ruled that neither fighter is active enough on the ground and has stood them back up.
Blazer scores with a hook to the body. Marks takes a step back and tries to catch his breath.
Marks checks the leg kick.
Blazer throws a left and a right that both miss
and Marks counters with a shoot takedown. Blazer fights it but they end up in guard.
Marks wants to control from the top but Blazer keeps moving.
Marks stopping the sweep attempt from Blazer.
Blazer is looking to get back to his feet but can't, whilst Marks is controlling him.
Marks decides to stand up and beckons his opponent to follow.
And that's the end of the fight!
Tim Marks comfortably won the final round on my scorecard.
I think Marks has won this one but let's see whether the judges agree with me. Over to the ring announcer for the scorecards.
Ladies and gentlemen, after 3 rounds of action, we go to the scorecards for a decision.
Judge Steve Montenegro scores the fight 28:29
Judge Reed Andrews scores the fight 28:29
Judge Lou da Vinci scores the fight 28:29
In favor of your winner, by unanimous decision... Tim Marks!
|
|
|
|
|
|
|
|
|
|
|
|
|
|
|
|
|
|
|
|
|
|
|
| S |
C
A |
G |
S |
C
B |
G |
|
S |
C |
G |
|
energy
A | B |
|
hype
A | B |
|
pop
A | B |
|
mgr
A | B |
|
FIGHT
RATING
74% |
|
|
|
|
|
|

