|
|
PBP Commentary |
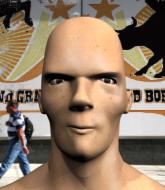
Coming up we have a middleweight MMA rules bout between Matt Hawk (ranked 0 p4p, 0 weight class) and Albert Ashton (ranked 0 p4p, 0 weight class). Matt Hawk has the better chin. Will he look to stand and bang today?
 |
|
 |
| 191 cm
23
192 lbs
11 - 8 - 0 |
|
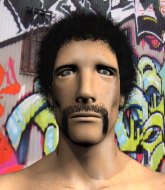
178 cm
25
190 lbs
9 - 7 - 0 |
BJJ Blue Belt
Solid boxing
Good chin |
|
Good takedowns
Decent boxing
Determined |
|
| |
|
Ladies and gentlemen. This fight is 3 rounds, in the middleweight division.
Introducing the fighter to my left, fighting out of the red corner.
With a record of
11 - 8 - 0, fighting out of Sydney, Matt Hawk!
And introducing the fighter to my right, fighting out of the blue corner.
With a record of
9 - 7 - 0, fighting out of Sydney, Albert Ashton!
The judges for this bout are Hugh Johnson, Eliza Hachem and Skip Squint.

The bell rings for round one and we are underway!
Hawk misses with a double jab.

Ashton scores with a nice takedown into half guard. Let's see what he's got on the ground.

Ashton is trying to work for a kimura. This could be trouble! No, Hawk has managed to free his arm - good work.
Ashton is looking for an arm triangle, whilst trying to pass to side control. Hawk doesn't seem that keen to cooperate though. No luck this time Ashton.
Hawk is defending against the submission attempts here by Ashton.
Ashton seems to be looking for submissions.

That's one minute gone in the round.
Ashton seems to be trying to get a kimura but instead Hawk has recovered full guard.
Ashton looking to pass the guard.
Ashton throws a big right hand that misses.
Ashton postures up as if he's going to throw some strikes but drops back for an ankle! Hawk is in big trouble! He looks ready to tap! But no, he's escaped and dives on top of Ashton, into his guard.

That's two minutes gone in the round.
The crowd are getting on the fighters' backs, as the pace has dropped off in the last minute or so.
Hammerfist, elbow! yells Hawk's corner. There ya go! There ya go!
Ashton working a defensive guard here.
Hawk has to be careful here, sitting in the guard of a superior BJJ player.
A big thud reverberates around the arena there as Hawk accidentally thumps the mat. Hopefully he's not broken his hand.
Hawk trying to control but Ashton is working from the bottom.
Ashton looking to control.

Ashton is edging up against the cage. He's using the cage to get back to his feet. Nice work there - the fighters are clinched.
Ashton drops down looking for an ankle pick but Hawk pulls his leg out and moves away.
Hawk throws a body punch but Ashton moves out of range.
Ashton fails with a takedown attempt from distance.

That's three minutes gone in the round.
No luck for Ashton with that takedown attempt.
Matt Hawk has stuffed three takedown attempts in the round now. That's going to take a lot out of Albert Ashton.
Ashton looks gassed!
Hawk stuffs a takedown. It's all about dictating where the fight takes place and Hawk wants it to stay on the feet.
A combination from Hawk does no damage.
Hawk throws a right and a left that Ashton avoids nicely.
Ashton slips a jab and a cross from Hawk.
Hawk throws a series of punches but Ashton avoids them all with ease.
Hawk misses with a jab and misses with a cross straight after too.
Matt Hawk seems to be the more aggressive standup fighter in this bout.
Hawk misses with a few strikes there.
Hawk throws a big shot that misses.
A big left from Hawk misses.
Hawk will need to tighten up his combinations if he doesn't want to gas himself out, swinging at thin air.
Ashton closes the distance and clinches up with Hawk, looking for a takedown. Ashton pushes Hawk against the cage but Hawk circles to the side and manages to break the clinch.

That's four minutes gone in the round.
My god... these two guys really need to pick up the pace or everyone will leave to go get a beer.
Hawk misses with a series of wild punches.
Hawk takes a swing at Ashton's ribcage but misses.
Hawk looks to land a combination but Ashton avoids it well.
Ashton slips a straight right by Hawk.
Hawk tries to bum rush Ashton with a series of wild strikes but Ashton uses good footwork to avoid the assault.
A jab from Hawk misses.
Hawk gets his takedown attempt stuffed easily
and Ashton counters with a nice double leg into half guard.
Ashton is looking for a kimura but he's never going to get it from there.
Ashton is looking for a kimura here.
And thats the end of the round the fighters go back to their corners.
Albert Ashton dominated that round.
The corners get their ten second warning. Both fighters stand from their stools and stare eachother down, ready to get back to the action.

Hawk falls off balance throwing a combination
and Ashton counters with a takedown into side control.
Ashton is trying to get an arm triangle but Hawk is defending well.
Ashton is looking for a kimura. He might have it! No, Hawk has escaped the position, nice work there.
Ashton working hard here to secure a kimura but he's not really in the right position for it.
Ashton goes for an armbar here - this could be all over! But no, Hawk has escaped beautifully and is now on top in side control! Oh, that's unlucky for Ashton but great work by Hawk.
Both fighters are absolutely exhausted here.
That's one minute gone in the round.
Ashton is not content to let Hawk control the position.
Ashton is trying to get back to half guard. He's pushing on Hawk's leg. He's managed it. Nice work.
Hawk thows a big elbow that misses, also allowing Ashton to regain full guard.
Ashton not looking particularly offensive just at the moment.
Hawk knows he needs to get back to his feet asap. He's simply no match for Ashton on the ground.
Ashton is looking for a triangle but Hawk pushes his legs off easily.
Hawk missing there with some ground and pound from the guard.
Both fighters really going for it on the ground here!
Hawk throwing shots from guard but he's hitting more mat than opponent.
Ashton avoiding any damage from the ground and pound.
That's two minutes gone in the round.
Ashton looking to hit a scissor sweep but Hawk is one step ahead there.
Ashton keeping moving, preventing Hawk from controlling successfully.
Hawk tries to free his leg and advance position but Ashton is retaining full guard.
Hawk postures up to throw the ground and pound strikes but they don't connect.
Hawk avoids a guillotine attempt easily.
Ashton working the defensive guard well to avoid strikes from Hawk.
Hawk distracts Ashton with his right hand and drops a big elbow with his other arm.
Ashton has managed to work for a loose triangle. I think Hawk should be able to defend this one pretty easily though. Oh, Ashton has tightened it up now! Hawk should have reacted faster there - he's in big trouble and yes, he's tapped out! This one is all over!
Ladies and gentlemen, after 3:04 of round 2, we have a winner by way of Submission (Triangle). Albert Ashton!
|
|
|
|
|
|
|
|
|
|
|
|
|
|
|
|
|
|
|
|
|
|
|
| S |
C
A |
G |
S |
C
B |
G |
|
S |
C |
G |
|
energy
A | B |
|
hype
A | B |
|
pop
A | B |
|
mgr
A | B |
|
FIGHT
RATING
49% |
|
|
|
|
|
|
