|
|
PBP Commentary |
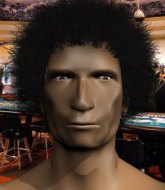
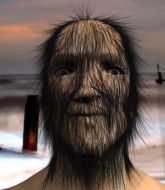
Coming up we have a welterweight MMA rules bout between Richard Holle (ranked 0 p4p, 0 weight class) and Karel Krakemheds (ranked 0 p4p, 0 weight class). Holle comes to the cage accompanied by Ektomorf - Show your fist. Krakemheds comes into a darkened arena with his song building. Werewolf in london kicks in, the lights come on and the crowd goes wild! What a showman! Karel Krakemheds is the more experienced fighter, so let's see if that makes a difference tonight.
 |
|
 |
| 183 cm
23
186 lbs
2 - 1 - 0 |
|
187 cm
25
183 lbs
6 - 2 - 0 |
BJJ Blue Belt
Solid boxing
Very strong |
|
BJJ Purple Belt
Good kicks
Powerful |
|
| |
|
Ladies and gentlemen. This fight is 3 rounds, in the welterweight division.
Introducing the fighter to my left, fighting out of the red corner.
With a record of
2 - 1 - 0, fighting out of Rio de Janeiro, Richard Holle!
And introducing the fighter to my right, fighting out of the blue corner.
With a record of
6 - 2 - 0, fighting out of Rio de Janeiro, Karel Krakemheds!
The judges for this bout are Daniel Cesar, Matheus Silva and Leandro Rodrigues.

The bell rings for round one and we are underway!
Holle throws a series of punches but Krakemheds moves out of range.
Holle misses with a series of wild punches.

Krakemheds scores a trip takedown into side control. Nice.

Krakemheds is trying to get an arm triangle but Holle is defending well.
Holle sneaks a leg under to get back to half guard.
Krakemheds is trying to control the action in half guard but Holle is working away on the bottom, looking perhaps to get back to full guard.
Krakemheds is looking for a kimura but he's never going to get it from there.

Holle manages to escape and get back to his feet!
A big left from Holle misses.
A jab from Holle misses.
Krakemheds throws a sloppy head kick and Holle moves out of range easily.
Holle throws a leg kick but he was too far away and it doesn't land.
Holle misses with a looping left.
Karel Krakemheds seems to be the more aggressive standup fighter in this bout.
Krakemheds throws a hook to the side of Holle's head but Holle sees it coming and ducks under it beautifully.

That's one minute gone in the round.
Krakemheds misses with a body kick.
Holle slaps away a takedown attempt from Krakemheds, before circling back to the center of the mat.
Holle tries to bum rush Krakemheds with a series of wild strikes but Krakemheds uses good footwork to avoid the assault.
Holle missing with a left hand there. Krakemheds was out of range so wasted energy throwing that one.
Nice uppercut there from Krakemheds.
Holle cracks Krakemheds with a good jab.
Holle is looking to chop away at Krakemheds's legs.
Holle blocks a head kick by Krakemheds.
Krakemheds scores with a takedown into Holle's guard.
Krakemheds stands up and looks to throw the legs aside to pass to side control. Holle swivels though and keeps the full guard.
Holle looking to hit a scissor sweep but Krakemheds is one step ahead there.
The fighters are pressed up against the cage, both looking to find a bit of space to work.
Holle keeping moving, preventing Krakemheds from controlling successfully.

That's two minutes gone in the round.
There's a bit of a scramble here and now Holle is on top in guard.
Krakemheds bucks up whilst keeping hold of a body lock, managing to reverse the position. Now he's in top in Holle's guard.
Krakemheds stops Holle from standing up.
Krakemheds trying to control but Holle is working from the bottom.
Holle looking to hit a scissor sweep but Krakemheds is one step ahead there.
Holle wants to stand up but Krakemheds is controlling him.
Krakemheds drops back for a leg! It's a sloppy attempt though and Krakemheds jumps back into guard quickly, to retain the dominant position.
Krakemheds drops back for a leg! It's a sloppy attempt though and Krakemheds jumps back into guard quickly, to retain the dominant position.
Krakemheds looks gassed!
Holle wants to sweep here but Krakemheds controlling him for the moment.
The ref warns both fighters not to hold the cage as they work up against the meshing.

That's three minutes gone in the round.
Krakemheds won't allow Holle to get back to his feet.

The referee decides to stand the fighters back up.
Krakemheds pulls out of a head kick attempt.
Krakemheds throws a sloppy head kick and Holle moves out of range easily.
Krakemheds goes for a high kick. It partially lands.
Holle defends well against a solid takedown attempt from Krakemheds.
Holle lands a jab followed by a nice looking cross.

It looks like Karel Krakemheds has been cut.
Krakemheds pulls out of a head kick attempt.
Krakemheds misses with a head kick.
Krakemheds throws a head kick that misses.
Holle throws a wild combination but nothing lands.
Krakemheds fakes with a right hand and throws a good leg kick, right into the thigh. That had to hurt Holle.
Krakemheds shoots in and drives through. Holle sprawls well.
Richard Holle has stuffed three takedown attempts in the round now. That's going to take a lot out of Karel Krakemheds.
Holle misses with a looping right.
Holle scores with the left hand. Krakemheds knows he should have avoided that one.

That's four minutes gone in the round.
Krakemheds motions for Holle to come forward. Krakemheds throws a leg kick but it misses it's target.
Krakemheds fails with a rather predictable takedown attempt.
Krakemheds tries to land a leg kick but Holle saw it coming and moves away.
Krakemheds looking to throw a kick but he's pulled out of it.
Krakemheds slips under a jab.
A low kick from Holle misses
and Krakemheds counters with a takedown into full mount! That could mean trouble for Holle!
Fantastic stuff here - a very entertaining period of action, which has drawn cheers from the crowd.
Holle regains half guard.
Krakemheds is working for submissions here but there's nothing on.
Holle kicks Krakemheds off and gets back to his feet.
The crowd applaud the fighters efforts here as the round comes to an end.
Krakemheds shoots in but no luck this time.
Holle misses with a body shot. Nice footwork from Krakemheds.
Krakemheds takes one to the side of the head.
Krakemheds pulls out of a head kick attempt.
And thats the end of the round the fighters go back to their corners.
Richard Holle dominated that round.
The cut man is working on Karel Krakemheds's cut.
OK. That's time! The bell goes and we're back to the action.

Holle throws a leg kick but Krakemheds checks it.
Krakemheds misses with a head kick.
Krakemheds fails with a rather predictable takedown attempt.
Krakemheds throws a body kick that digs right into the meat.
Holle throws a right and a left that both miss.
Holle with poor footwork there. He got himself in a bit of a tangle, enabling Krakemheds to score with a decent uppercut.
Krakemheds throws a head kick but Holle moves out of range.
Krakemheds throws a right high kick that is partially blocked by Holle.
Holle works his jab well there, keeping his opponent at a distance.
Richard Holle is looking to throw some combinations by the looks of things.
Holle loads up on a big right hand but Krakemheds slips the punch.
Holle tries to bum rush Krakemheds with a series of wild strikes but Krakemheds uses good footwork to avoid the assault.
Holle misses the shot to the body.
Nice uppercut there from Holle.
Holle takes a nasty kick to the mid section... That should keep him thinking. Does he try and block and risk a head kick landing?
Holle moves out of range as Krakemheds strikes.
Holle avoids the head kick by Krakemheds.
That's one minute gone in the round.
Krakemheds has a takedown stuffed.
Krakemheds is breathing heavily.
Krakemheds closes the distance and looks for a trip takedown... aaaand he's got it - Krakemheds lands in his opponent's guard.
Holle is controlling Krakemheds's posture.
Holle tries to land a sweep but no joy.
Krakemheds wants to control from the top but Holle keeps moving.
Holle scrambles and gets back to his feet.
A low kick from Holle is predictable there
and Krakemheds counters with a right hand to the body.
Krakemheds uses decent footwork to sidestep a right hand from Holle.
Holle throws a combination but comes up with nothing but fresh air.
Holle fails to land with the punch combination there - jab, cross, hook, miss, miss, miss.
Krakemheds lands a head kick. Holle smiles back at him and beckons him forward.
That's two minutes gone in the round.
Holle has a nice red mark on his side after a thudding body kick by Krakemheds.
Holle pulls out of a head kick attempt.
Holle misses with a jab, cross combination.
Holle steps to his left, right into the path of a big body kick from Krakemheds. That one must have hurt.
Krakemheds fails with a takedown attempt.
Richard Holle has stuffed three takedown attempts in the round now. That's going to take a lot out of Karel Krakemheds.
Krakemheds throws the overhand right but ducks down into a quick takedown attempt. Holle was covering up waiting for the punch and Krakemheds finishes the takedown easily into guard.
Krakemheds trying to control but Holle is working from the bottom.
Krakemheds drops back looking for a leg! Holle is in trouble here! The fighters roll with the hold and Holle manages to kick Krakemheds off! Krakemheds jumps back into Holle's guard.
That's three minutes gone in the round.
Krakemheds wants to control from the top but Holle keeps moving.
Holle pulls Krakemheds in close to prevent any damage.
Holle is trying to stand up but he's not managed so far.
Holle pushes Krakemheds off for just long enough to get back to his feet. Very athletic spring there.
Krakemheds dances in quickly and lands a nice inside leg kick on Holle. That did some damage!
Krakemheds shoots in for a takedown - he's clinched up with Holle but Holle pushes him off and we're back to square one.
Krakemheds throws a lazy head kick
and Holle counters with a good low kick that Krakemheds was not able to check.
Krakemheds fails with a takedown attempt.
That's four minutes gone in the round.
Krakemheds takes a jab on the nose there. A little bit of blood seems to be coming out. Hopefully that won't affect his breathing.
Holle just misses with a punch to the body.
Holle throws a jab when Krakemheds was well out of range.
Holle sizes up Krakemheds with a pawing jab and scores with a straight right down the middle.
Holle takes a nice looking leg kick right on the meat of his thigh there.
Holle just misses with a punch to the body.
Krakemheds thuds his shin into the meat of Holle's side.
Krakemheds shoots in but no luck this time.
Krakemheds shoots for a double leg takedown but Holle sprawls well. He's pushed Krakemheds's face into the mat and manages to get back to his feet relatively easily.
Holle scores with a nice strike.
Holle slips under a jab.
This fight brought to you by 5M nutrition - it's mmmmm tasty. Nice jab by Holle.
Holle loads up on a big right hand but Krakemheds slips the punch.
Holle fakes and then throws a beautiful body shot. Krakemheds looks a bit winded and takes a step backwards to take a breath.
And thats the end of the round the fighters go back to their corners.
Richard Holle dominated that second round.
The cut man is working on Karel Krakemheds's cut.
The fighters get back to their feet, the hooter sounds and we're back to the action! This is the final round!

Holle digs a good body shot into Krakemheds's ribs.
Holle misses with a two punch combination.
Krakemheds throws a jab when Holle was well out of range.
Krakemheds misses with a half-hearted attempt at a head kick.
Holle misses with a shot to the body
and Krakemheds counters with a driving takedown into guard. Nice work there by Krakemheds.
Krakemheds wants to pass the guard but Holle is keeping the position.
Krakemheds loading up with the ground and pound but he's missing more than he's landing in this flurry.
Krakemheds trying to control but Holle is working from the bottom.
Krakemheds is fighting to break Holle's control of his arms but Holle is doing a good job of controlling the position at the moment.
Krakemheds tries to free his leg and advance position but Holle is retaining full guard.
Both fighters are breathing heavily.
Krakemheds has gone for a leg lock! Holle slips out almost immediately though and dives into Krakemheds's guard.
Holle's corner is telling him to maintain position.
That's one minute gone in the round.
Holle wants to control from the top but Krakemheds keeps moving.
Holle preventing the sweep.
Holle showing good wrestling skills to control the position.
Holle pushes down on Krakemheds's leg and manages to get into half guard.
It looks like Holle is going to stand back up.
Holle is looking to advance position but Krakemheds won't allow it.
That's two minutes gone in the round.
Neither fighter has done anything of merit for a good minute or two here and the crowd are not happy about it.
Krakemheds trying to control here.
Krakemheds slips a foot under and gets full guard. Nice work.
Krakemheds looking for submissions from the bottom but instead Holle passes into half guard.
Holle is trying to get back to his feet now but his leg is trapped.
That's three minutes gone in the round.
The referee calls for the fighters to work.
Krakemheds moves his hips nicely and gets into full guard.
Krakemheds manages to sweep nicely, so he's now on top. Holle manages to get himself to full guard.
Krakemheds sitting in guard, not really doing much.
Holle wants to sweep here but Krakemheds controlling him for the moment.
Holle keeping full guard, as Krakemheds tries to pass.
Holle looking for a sweep. Not yet Holle, not yet.
Holle manages to sweep nicely, so he's now on top. Krakemheds manages to get himself to full guard.
That's four minutes gone in the round.
Krakemheds looking to sweep here. No luck so far.
Krakemheds is working actively off his back, looking to secure an arm or perhaps work for a triangle.
Krakemheds can't do much from the bottom at the moment, as Holle controls the pace.
Krakemheds had isolated an arm as going for a kimura. Holle defends it easily.
Richard Holle is fighting for a decision here - he's started to take the cautious approach.
Krakemheds working from the bottom, still in full guard. He's managed to get a loose triangle. Holle doesn't seem to be doing much to defend here, obviously he feels comfortable in the position. Holle manages to throw the legs off his shoulder and he's back into guard - no problem.
Krakemheds looking to sweep here. No luck so far.
And that's the end of the fight!
I would just about give that final round to Karel Krakemheds.
I think Holle has won this one but let's see what the judges have to say. Over to the ring announcer for the scorecards.
Ladies and gentlemen, after 3 rounds of action, we go to the scorecards for a decision.
Judge Daniel Cesar scores the fight 29:28
Judge Matheus Silva scores the fight 29:28
Judge Leandro Rodrigues scores the fight 29:28
In favor of your winner, by unanimous decision... Richard Holle!
|
|
|
|
|
|
|
|
|
|
|
|
|
|
|
|
|
|
|
|
|
|
|
| S |
C
A |
G |
S |
C
B |
G |
|
S |
C |
G |
|
energy
A | B |
|
hype
A | B |
|
pop
A | B |
|
mgr
A | B |
|
FIGHT
RATING
56% |
|
|
|
|
|
|
