|
|
PBP Commentary |
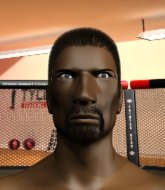
Coming up we have a bantamweight MMA rules bout between Seekh Shawerma (ranked 0 p4p, 0 weight class) and Khara Al Matayze (ranked 0 p4p, 0 weight class). Seekh Shawerma has the better chin. Will he look to stand and bang today?
 |
|
 |
| 176 cm
18
138 lbs
0 - 0 - 0 |
|
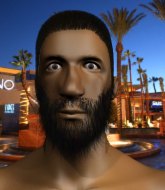
158 cm
22
138 lbs
0 - 1 - 0 |
BJJ Blue Belt
Brawler
Granite chin |
|
BJJ Blue Belt
Decent boxing
Determined |
|
| |
|
Ladies and gentlemen. This fight is 3 rounds, in the bantamweight division.
Introducing the fighter to my left, fighting out of the red corner.
With a record of
0 - 0 - 0, fighting out of Sydney, Seekh Shawerma!
And introducing the fighter to my right, fighting out of the blue corner.
With a record of
0 - 1 - 0, fighting out of Sydney, Khara Al Matayze!
The judges for this bout are Donatello Bradman, Steve Erwin and Hugh Johnson.

The bell rings for round one and we are underway!
Al Matayze closes the distance and clinches up with Shawerma, looking for a takedown. Al Matayze pushes Shawerma against the cage but Shawerma circles to the side and manages to break the clinch.
Al Matayze should think about turning a few of those tyres round his middle into muscle if he wants people to take him seriously as an athlete.
Shawerma shoots in but doesn't get the takedown

and Al Matayze counters with a nice double leg into guard.
The ref warns both fighters not to hold the cage as they work up against the meshing.

Al Matayze postures up as if he's going to throw some strikes but drops back for an ankle! Shawerma is in big trouble! He looks ready to tap! But no, he's escaped and dives on top of Al Matayze, into his guard.
Shawerma wants to control from the top but Al Matayze keeps moving.
Shawerma sneaks a leg through and gets to half guard. That was like a knife through butter how easily he passed Al Matayze's guard.
Al Matayze looking to work for a kimura from the bottom.
Al Matayze actively working from the bottom here.
Shawerma throwing punches and elbows but they're not doing any damage.
Al Matayze actively working from the bottom here.

That's one minute gone in the round.
Shawerma perhaps working for something from half guard, or maybe not. It looks like he's just sitting there.
Shawerma will need to keep those long limbs tucked in whilst he's on the ground, to prevent any submissions.
Al Matayze actively working from the bottom here.
Al Matayze looking for submissions from an awkward position here.
Al Matayze looks gassed!
Al Matayze trying to control but Shawerma postures up.

The referee has ruled that neither fighter is active enough on the ground and has stood them back up.
Shawerma shoots and misses
and Al Matayze decides to take the opportunity to score a takedown. He's landed in Shawerma's guard.
Shawerma bucks up whilst keeping hold of a body lock, managing to reverse the position. Now he's in top in Al Matayze's guard.
Al Matayze has an active guard here but Shawerma has managed to pass into half guard.
Shawerma passes to side control.
Shawerma wants to control but Al Matayze is keeping him busy.

That's two minutes gone in the round.
Al Matayze is trying to get back to half guard.
Al Matayze is not content to let Shawerma control the position.
Shawerma really does look like a pencil wearing a pair of gloves. Let's hope he has a gameplan to suit that ridiculous body shape.
Al Matayze tries to work a leg under to get back to half guard but Shawerma wriggles his own leg back out and remains in side control.
The ground and pound from Shawerma seems to be hitting the mat more than his opponent.
It looks like we're going to have a standup here. Neither fighter is doing enough on the ground.
Shawerma misses with a takedown attempt
and Al Matayze counters with a nice double leg into guard.
That's three failed takedown attempts in the round for Seekh Shawerma. That's going to take a lot out of him.

That's three minutes gone in the round.
Al Matayze postures up.
Al Matayze wants to control from the top but Shawerma keeps moving.
Al Matayze preventing the sweep.
Shawerma looking to control.
Al Matayze trying to control the position from guard on top but Shawerma is wriggling around, looking for whatever he can.
The fighters are pressed up against the cage, both looking to find a bit of space to work.
Shawerma is trying to control the position from the bottom.
Al Matayze has gone for a leg lock! Shawerma slips out almost immediately though and dives into Al Matayze's guard.
Al Matayze working from the bottom, still in full guard. He's managed to get a loose triangle. Shawerma doesn't seem to be doing much to defend here, obviously he feels comfortable in the position. Shawerma manages to throw the legs off his shoulder and he's back into guard - no problem.

That's four minutes gone in the round.
The crowd are getting on the fighters' backs, as the pace has dropped off in the last minute or so.
Al Matayze working from the bottom, still in full guard. He's managed to get a loose triangle. Shawerma doesn't seem to be doing much to defend here, obviously he feels comfortable in the position. Shawerma manages to throw the legs off his shoulder and he's back into guard - no problem.
Al Matayze is throwing his legs up, looking for submissions. Shawerma is aware though and is defending well.
Shawerma looking to pass the guard.
Shawerma got a little sloppy there for a moment and Al Matayze has worked his way into a loose triangle - can he finish it?! No, Shawerma has managed to get both his arms back between Al Matayze's legs - danger averted.
Shawerma looking to pass the guard.
And thats the end of the round the fighters go back to their corners.
Khara Al Matayze dominated that round.
Well, the break between rounds is over. Let's get back to the scrappin!

Shawerma shoots in for a takedown and gets it. Oh and he's advanced to full mount straight away.
Shawerma trying to control but Al Matayze is having none of it.
Al Matayze is desperately trying to get back to half guard.
Al Matayze regains half guard.
Al Matayze moves his hips nicely and gets into full guard.
Both fighters are absolutely exhausted here.
Shawerma is looking to work some ground and pound but Al Matayze has wrist control.
Shawerma pressing down on his opponent's thigh, looking to pass guard. Al Matayze is keeping the position for now.
That's one minute gone in the round.
Al Matayze keeping moving, preventing Shawerma from controlling successfully.
Al Matayze throws a couple of shots from the bottom but they don't land.
Al Matayze is looking for a triangle but Shawerma pushes his legs off easily.
Shawerma wants to control from the top but Al Matayze keeps moving.
Shawerma loading up with the ground and pound but he's missing more than he's landing in this flurry.
Al Matayze is looking for a guillotine. You can't force these things though and Shawerma defends well.
There's a bit of a scramble here and now Al Matayze is on top in guard.
Shawerma looking to hit a scissor sweep but Al Matayze is one step ahead there.
That's two minutes gone in the round.
Al Matayze trying to control the position from guard on top but Shawerma is wriggling around, looking for whatever he can.
Al Matayze drops back looking for a leg! Shawerma is in trouble here! The fighters roll with the hold and Shawerma manages to kick Al Matayze off! Al Matayze jumps back into Shawerma's guard.
Al Matayze postures up as if he's going to throw some strikes but drops back for an ankle! Shawerma is in big trouble! He looks ready to tap! But no, he's escaped and dives on top of Al Matayze, into his guard.
Shawerma avoids a guillotine attempt easily.
That's three minutes gone in the round.
Al Matayze throws his legs up looking to secure a triangle. Oh, that looks pretty tight, I gotta say! Shawerma escapes and throws Al Matayze's legs to the side, diving into side control!

Shawerma decides to stand back up. Shawerma steps back and let's Al Matayze get back to his feet.
Al Matayze shoots and misses
and Shawerma counters with a takedown into full mount! That could mean trouble for Al Matayze!
Shawerma landing strikes from the mount.
Al Matayze is desperately trying to improve his position but Shawerma has a good base and remains in mount.
Shawerma looking to ground and pound his opponent to a finish here.
That's four minutes gone in the round.
Al Matayze avoids a series of strikes thrown by Shawerma.
Al Matayze tries to hold on but Shawerma postures up.
Al Matayze is not a happy chappy
he wants out of there.
Al Matayze working to try and regain half guard.
Al Matayze wants to control but Shawerma is having none of it.
Al Matayze is looking to improve his position but Shawerma isn't that keen on the idea.
Shawerma looking to control but Al Matayze is working nicely, looking to advance position himself.
Al Matayze holds on to Shawerma around his waist, trying desperately to prevent any attacks.
And thats the end of the round the fighters go back to their corners.
Seekh Shawerma dominated that second round.
That's the end of the round. The referee orders the cornermen out of the cage so we can get back down to business. This is the final round!

Al Matayze bobs and weaves into range and then changes levels and scores with a nice takedown into side control.
Al Matayze thinks about going for a far side armbar but bails out and retains the dominant position instead.
Shawerma is trying to stand back up. He's worked his way up against the cage but Al Matayze has just dragged him back down to the mat.
Shawerma struggling a bit here.
Shawerma wants to get back to his feet.
Shawerma is trying to control Al Matayze's posture but Al Matayze avoids it.
Both fighters are breathing heavily.
That's one minute gone in the round.
Al Matayze tries for a kimura. Not really close to a finish though.
Al Matayze has worked his way into a potential kimura here. Shawerma is trying to get out of the position but his squirming has just got him deeper into trouble. Al Matayze yanks on the arm and Shawerma is forced to tap due to a very painful looking submission! Nice work by Al Matayze.
Ladies and gentlemen, after 1:29 of round 3, we have a winner by way of Submission (Kimura). Khara Al Matayze!
|
|
|
|
|
|
|
|
|
|
|
|
|
|
|
|
|
|
|
|
|
|
|
| S |
C
A |
G |
S |
C
B |
G |
|
S |
C |
G |
|
energy
A | B |
|
hype
A | B |
|
pop
A | B |
|
mgr
A | B |
|
FIGHT
RATING
100% |
|
|
|
|
|
|
