|
|
PBP Commentary |
Coming up we have a welterweight MMA rules bout between Johny Burns (ranked 0 p4p, 0 weight class) and Russian Experiment II (ranked 0 p4p, 0 weight class). Burns comes to the cage accompanied by "Firestarter" by The Prodigy. Experiment II comes into a darkened arena with his song building. Terminator 2 - Bad to the Bone kicks in, the lights come on and the crowd goes wild! What a showman! Russian Experiment II has the better chin. Will he look to stand and bang today?
 |
|
 |
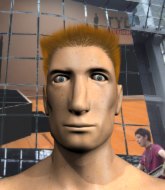
| 180 cm
25
183 lbs
10 - 2 - 0 |
|
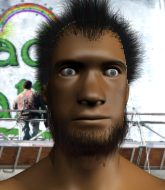
185 cm
26
184 lbs
15 - 4 - 0 |
Powerful takedowns
Basic striking
Very quick |
|
BJJ Purple Belt
Excellent boxer
Powerful |
|
| |
|
Ladies and gentlemen. This fight is 5 rounds, for the welterweight championship of the world!
Introducing the champion to my left, fighting out of the red corner.
With a record of
10 - 2 - 0, fighting out of Los Angeles, Johny Burns!
And introducing the challenger to my right, fighting out of the blue corner.
With a record of
15 - 4 - 0, fighting out of Los Angeles, Russian Experiment II!
The judges for this bout are Jack Bonds, and Timothy Bukovac.

The bell rings for round one and we are underway!
Burns pivots as if he's going to throw a leg kick but stops half way.
Experiment II tests Burns's chin there with a solid looking shot.
Burns throws a low kick but Experiment II avoids it.
Burns ducks under a wild hook from Experiment II.
Burns throws a looping overhand right but Experiment II ducks down to avoid it.
Burns connects with a crisp jab.
Burns blocks a jab.
Burns fails with a takedown attempt.
Burns uses good head movement to avoid the hook from Experiment II.
Burns closes the distance and clinches up with Experiment II, looking for a takedown. Burns pushes Experiment II against the cage but Experiment II circles to the side and manages to break the clinch.
Burns lands with a nice low kick. That'll leave a bruise.
Burns moves away from the strike by Experiment II.

That's one minute gone in the round.
Burns displays some good footwork, moving neatly out of range as Experiment II throws out the jab.
Burns is looking to chop away at Experiment II's legs.
Burns throws a head kick that misses and slips in the process. He scrambles back to his feet and the fighters circle.
Experiment II looks to throw the jab but Burns is out of range.
Experiment II throws a hook to the side of Burns's head but Burns sees it coming and ducks under it beautifully.
Burns attempts a low kick but it misses it's target.
Burns throws a push kick but Experiment II slaps the foot to one side.
Experiment II moves out of range as Burns strikes.
Experiment II misses with an uppercut. Burns saw that one coming.
Experiment II connects with a hook to the side of his opponent's head.
Burns misses with an attempted mid kick.
Burns fakes with the hands and throws a leg kick but Experiment II is out of range.

That's two minutes gone in the round.
There's not a lot going on here and the crowd are letting the fighters know they're not willing to tolerate a lack of action.
A jab from Experiment II misses.
Experiment II looks to throw the jab but Burns is out of range.
Burns pulls out of a head kick attempt.
Burns throws a leg kick that misses.
Experiment II throws a nice looking combination but Burns bobs and weaves to avoid any damage.
Burns motions for Experiment II to come forward. Burns throws a leg kick but it misses it's target.
Burns throws a sloppy head kick and Experiment II moves out of range easily.
No luck for Burns with that takedown attempt.
That's three failed takedown attempts in the round for Johny Burns. That's going to take a lot out of him.
Burns displays some good footwork, moving neatly out of range as Experiment II throws out the jab.
Experiment II tests Burns's chin there with a solid looking shot.
Burns attempts a leg kick but it's missed by a good margin.

That's three minutes gone in the round.
Experiment II misses the jab.
Burns looking to land some kicks to the body here.
Burns fakes with a right hand and throws a good leg kick, right into the thigh. That had to hurt Experiment II.
A slapping leg kick lands for Burns.
Experiment II checks the leg kick.
Experiment II throws a hook but Burns avoids it easily.

Burns gets a takedown into half guard.
Experiment II wants to improve his position but Burns is controlling well.
Experiment II pushes Burns off looking to stand but Burns dives back in and keeps control.

That's four minutes gone in the round.
Burns wants to pass to mount but Experiment II is defending the position.
Burns is trying to control the action in half guard but Experiment II is working away on the bottom, looking perhaps to get back to full guard.
Experiment II won't allow Burns to pass to mount.

Burns seems to be looking for submissions.
Experiment II gets full guard.
Burns wants to pass the guard but Experiment II is keeping the position.

Well, the referee has seen enough. Neither fighter is active enough on the ground so he's stood them back up.
Burns shoots in and scores a nice double leg takedown into half guard.
Experiment II looks like he's trying to stand up.
Experiment II is looking to improve his position.
Burns thumps the canvas. Not on purpose obviously - he just missed Experiment II's head.
And thats the end of the round the fighters go back to their corners.
A close round but Russian Experiment II will probably get the nod.
That's the end of the round. The referee orders the cornermen out of the cage so we can get back down to business.

Burns blocks a jab.
Burns shoots for a double leg takedown but Experiment II sprawls well. He's pushed Burns's face into the mat and manages to get back to his feet relatively easily.
Burns throws a head kick that misses and slips in the process. He scrambles back to his feet and the fighters circle.
Experiment II lunges in with swinging rights and lefts but Burns circles away quickly and effectively.
Experiment II on the receiving end of a decent leg kick there by Burns. Burns obviously looking to wear him down.
Burns on the wrong end of a nice hook.
Burns tries to score with a leg kick but it misses it's target.
An inside leg kick from Burns misses.
Burns throws a leg kick that misses.
Burns tries to score with a leg kick but it misses it's target.
Burns tries to score with a low kick but Experiment II moves his leg out of the way.
Burns closes the distance and clinches up with Experiment II, looking for a takedown. Burns pushes Experiment II against the cage but Experiment II circles to the side and manages to break the clinch.
That's one minute gone in the round.
Burns scores with a nice takedown into half guard. Let's see what he's got on the ground.
Experiment II manages to get to full guard.
Experiment II is pulling down on Burns's head. It's preventing any offense from Burns, at least for the moment.
Experiment II looking to hit a scissor sweep but Burns is one step ahead there.
Experiment II wants to stand but Burns is controlling the position.
Burns stands up and looks to throw the legs aside to pass to side control. Experiment II swivels though and keeps the full guard.
Burns scoring with punches to the head and body.
That's two minutes gone in the round.
Burns trying to control the position from guard on top but Experiment II is wriggling around, looking for whatever he can.
Experiment II bucks up whilst keeping hold of a body lock, managing to reverse the position. Now he's in top in Burns's guard.
Experiment II stopping the sweep attempt from Burns.
Experiment II sitting in guard here, content to control.
Burns working a defensive guard here.
Burns can't do much from the bottom at the moment, as Experiment II controls the pace.
Burns is trying to control the position but Experiment II postures up.
That's three minutes gone in the round.
Experiment II trying to control the position from guard on top but Burns is wriggling around, looking for whatever he can.

Experiment II gets to his feet and steps away from his opponent.
A clash of legs there as Experiment II blocks the low kick.
Burns shoots in for a takedown. "I don't think so" says Experiment II as he avoids it easily.
That's three failed takedown attempts in the round for Johny Burns. That's going to take a lot out of him.
Experiment II throws a wild combination but nothing lands.
Burns works his jab well there, keeping his opponent at a distance.
Experiment II chopped to the floor by a nice leg kick but he springs right back up before Burns can pounce on him.
Burns tries to land with a swinging hook to the body but Experiment II was well out of range. Poor timing from Burns.
Experiment II might want to mix his strikes up a bit more. He's just going for head shots at the moment and that can become a bit predictable.
Burns ducks under an overhand right and circles away with a smile on his face.
That's four minutes gone in the round.
Burns misses with a low kick.
Experiment II looks shocked there as he takes a right hand to the temple.
Experiment II missing with a left hand there. Burns was out of range so wasted energy throwing that one.
Burns scoring well with a low kick there.
Burns uses good head movement to avoid the hook from Experiment II.
Experiment II gets caught flat footed, as Burns shoots in with a quick takedown into guard.
Burns stops Experiment II from standing up.
Experiment II utilising some decent striking defenses from the guard, preventing the ground and pound.
The ref warns both fighters not to hold the cage as they work up against the meshing.
Experiment II wants to sweep but no luck.
Burns drops back for a leg! It's a sloppy attempt though and Burns jumps back into guard quickly, to retain the dominant position.
Burns advances position into side control!
Both fighters are absolutely exhausted here.
Experiment II is trying to buck Burns off.
And thats the end of the round the fighters go back to their corners.
That was a close second round but I would say that Johny Burns will probably get the nod.
The referee calls time. The cornermen exit stage left and we're back to business.

Burns ducks under an overhand right and circles away with a smile on his face.
Johny Burns seems to be the more aggressive standup fighter in this bout.
Burns darts in and lands a nice takedown into half guard.
Experiment II trying to control from the bottom.
Burns throwing punches and elbows but they're not doing any damage.
Burns working Experiment II over with strikes.
Burns working Experiment II over with strikes.
Burns winds up and cracks Experiment II with a swinging punch to the side of the head.
Experiment II is in trouble now - Burns has advanced to mount!
Experiment II squirming around on the bottom, looking to escape.
Burns looking to ground and pound his opponent to a finish here.
Burns lands a big elbow.
That's one minute gone in the round.
Experiment II really trying hard to get back to half guard here.
Experiment II takes a big intake of breath there - he's definitely tired.
Experiment II manages to regain half guard. Good work.
Experiment II pushes Burns off looking to stand but Burns dives back in and keeps control.
Burns wants to work for an arm triangle but Experiment II is really keeping half guard well and defending the submission attempt.
Burns working some ground and pound from close in. He's looking to maintain this position and strike for a while by the looks of things... although he'll probably advance to full mount in a minute now I've said that.
Burns not throwing his punches with enough precision this time.
Experiment II trying to control but Burns postures up.
Burns tries to pass to full mount but Experiment II defends it.
Experiment II moves his hips nicely and gets into full guard.
Burns has been looking to land a fair amount of strikes on the ground. He might be looking to soften his opponent up in order to work for a submission.
Experiment II is looking to get back to his feet but can't, whilst Burns is controlling him.
That's two minutes gone in the round.
A lull in the action here being met with boos from the crowd.
Experiment II is working an open guard here, looking to improve his position. No doubt that will leave him open to counters but at least he's being more offensive.
Experiment II is avoiding any damage by keeping wrist control.
Experiment II wants to sweep but no luck.
Experiment II avoiding any damage from the ground and pound.
Burns working some strikes from top position.
Burns won't allow Experiment II to get back to his feet.
The fighters are pressed up against the cage, both looking to find a bit of space to work.
Burns trying to control the position from guard on top but Experiment II is wriggling around, looking for whatever he can.
The referee has ruled that neither fighter is active enough on the ground and has stood them back up.
Burns walks forward and throws out a flicking leg kick. Experiment II checks it nicely though, as he moves to the side.
A clash of legs there as Experiment II blocks the low kick.
A swing and a miss from Experiment II.
That's three minutes gone in the round.
Burns avoids a lazy jab quite easily.
Burns looking to land some kicks to the body here.
Experiment II waving his hands out in front of him, looking to distract Burns.
Good leg kick by Burns there. It's the ones that make that thud noise that hurt and that was an almighty thud.
Experiment II throws a lazy right hand but Burns sees it coming a mile off and sidesteps it easily.
A solid leg kick lands there for Burns.
Burns misses with a head kick.
Burns tries to score with a leg kick but it misses it's target.
Burns feints with a shoulder and throws a nice leg kick to Experiment II's calf.
A nice leg kick lands there from Burns.
That's four minutes gone in the round.
Burns throws an uppercut from half a mile away. Experiment II sees it coming and avoids it easily.
Burns misses with a hook.
Burns misses the jab.
Burns throws a head kick but Experiment II moves out of range.
Experiment II takes a step back and watches a body kick go sailing past his mid section.
Experiment II moves out of range as Burns throws a body kick.
Experiment II's leg has a nasty welt from taking a succession of leg kicks. That must be slowing him down.
Burns scores a takedown into full mount!
Experiment II sneaks a leg back under and regains half guard and is working straight away to try and get back to guard. He hasn't managed just yet though.
Experiment II has no desire to be mounted, so is trying to control. Burns is working away from the top position though.
Burns moves into full mount! Experiment II won't be happy about that!
Burns lands a big elbow.
And thats the end of the round the fighters go back to their corners.
Johny Burns clearly takes that round.
That's the end of the interval. I'm sure that seemed a lot quicker than a minute for our two fighters! Back to the action.

Experiment II blocks a head kick by Burns.
Burns shoots in for a takedown and gets it.
Burns thows a huge punch but Experiment II dodges it nicely.
Experiment II won't allow Burns to pass to mount.
Burns is looking for an arm triangle, whilst trying to pass to side control. Experiment II doesn't seem that keen to cooperate though. No luck this time Burns.
Experiment II is trying to maintain the position but Burns is very close to passing his half guard.
Experiment II is trying to stand.
Experiment II is trying to control but can't.
Burns wants to pass to mount but Experiment II is defending the position.
It's got to the stage where if one of these guys blows hard enough, the other might fall over.
That's one minute gone in the round.
Experiment II is trying to stand back up but Burns is controlling him
Well, the referee has seen enough. Neither fighter is active enough on the ground so he's stood them back up.
Burns throws a solid leg kick but Experiment II takes the impact on his shin and smiles at Burns.
Burns throws a wild body kick that Experiment II sees coming a mile off.
Experiment II misses with a straight left.
Burns displays some good footwork, moving neatly out of range as Experiment II throws out the jab.
Experiment II throws a nice looking combination but Burns bobs and weaves to avoid any damage.
Burns throws a hard body shot but it just misses.
A big right from Burns misses.
Burns blocks a jab.
Experiment II displaying good standup as he scores with a three punch combination.
That's two minutes gone in the round.
A slow jab from Experiment II misses its intended target.
Experiment II looks to land a left hand but Burns moved out of range nicely.
Burns connects with a leg kick. He turned his hip over nicely there.
Experiment II checks the leg kick.
Experiment II slips a jab from Burns.
Burns throws a leg kick but he was too far away and it doesn't land.
Experiment II throws a one two combo.
Burns misses with a takedown attempt. He shot from a bit too far out.
Experiment II defending well as Burns loads up on a big left hand.
That's three minutes gone in the round.
Experiment II blocks the body kick.
Russian Experiment II is looking to keep the fight on the feet at all costs.
Experiment II throws a hook to the side of Burns's head but Burns sees it coming and ducks under it beautifully.
Experiment II misses with a series of wild punches.
A solid leg kick lands there for Burns.
Burns keeps his opponent at a distance with a nice jab.
Experiment II chopped to the floor by a nice leg kick but he springs right back up before Burns can pounce on him.
A punch combination from Experiment II misses.
Burns shoots in for a takedown and gets it.
Experiment II wants to improve his position but Burns is controlling well.
That's four minutes gone in the round.
Burns lands with an elbow from half guard - that looked like it hurt.
Experiment II works his way to full guard. Good work.
Experiment II controls Burns momentarily but Burns frees himself.
Experiment II is working an open guard here, looking to improve his position. No doubt that will leave him open to counters but at least he's being more offensive.
Burns passes into half guard.
Burns is trying to control. Experiment II wants to improve his position but can't escape this time.
Burns thows a huge punch but Experiment II dodges it nicely.
Experiment II is trying to get back to full guard.
Burns landing with strikes to the body and head, softening up his opponent.
And thats the end of the round the fighters go back to their corners.
That was a close fourth round but I would say that Johny Burns will probably get the nod.
The fighters get back to their feet, the hooter sounds and we're back to the action! Let's hear some noise people - this is the final round!

Burns tries to land a leg kick but Experiment II saw it coming and moves away.
Experiment II takes a thudding leg kick, right into the meat of the thigh.
Burns misses with a low kick.
Burns fakes with the hands and throws a leg kick but Experiment II is out of range.
Burns uses good footwork to avoid the strikes from Experiment II.
Burns feints and then cracks Experiment II's leading leg with a nice low kick. He's obviously looking to slow Experiment II down.
Experiment II checks the leg kick nicely there.
We've had a slow start to the round here - hopefully the action picks up.
Burns tries a switch kick but it misses it's target.
Burns scoring well with a low kick there.
Burns lands with a thumping leg kick.
Burns uses good head movement to avoid the hook from Experiment II.
Experiment II is wobbling all over the place through exhaustion. Will he make it to the final bell?
That's one minute gone in the round.
Burns does a little shimmy and throws a leg kick. The leg kick missed by a considerable margin though, making him look a little bit silly for doing the shimmy.
Burns throws a leg kick but Experiment II sees it coming and checks it nicely.
Burns shoots in for a takedown. He's persisting with it as Experiment II sprawls well. Experiment II wins this battle and keeps the fight standing. Burns gets slowly back to his feet.
Burns lands a nice leg kick that just misses Experiment II's sensitive parts.
Burns throws a head kick that misses and slips in the process. He scrambles back to his feet and the fighters circle.
Experiment II staying out of range there.
Experiment II uses some good footwork to avoid the body shot by Burns.
Burns fakes with the hands and throws a leg kick but Experiment II is out of range.
Russian Experiment II has stepped it up - he knows he needs a finish here!
That's two minutes gone in the round.
A few boos can be heard. I'm sure they will multiply if the fighters don't pick up the pace.
Experiment II throws a big shot that misses.
Experiment II misses with the combination.
Burns attempts a leg kick but it's missed by a good margin.
Burns blocks a jab.
Burns looks frustrated there after his takedown attempt is stuffed easily.
An inside leg kick from Burns misses.
Burns misses with a leg kick.
Experiment II bobs and weaves well there to avoid the strikes.
Experiment II throws a hook but Burns blocks it.
Johny Burns is fighting for a decision here - he's started to take the cautious approach.
That's three minutes gone in the round.
Experiment II throws a shot from downtown. Burns moves away and avoids it.
Burns throws a solid leg kick but Experiment II takes the impact on his shin and smiles at Burns.
Burns throws a nice inside leg kick.
Burns misses with a body shot.
Experiment II stumbles momentarily as he takes a strong leg kick from Burns.
Burns scores with a nice takedown into half guard. Let's see what he's got on the ground.
Burns trying to pass the guard but Experiment II defending well.
Experiment II is refusing to be controlled, as Burns sits in half guard.
Burns prevents Experiment II from standing back up.
Experiment II is pressing down on Burns's left leg trying to get back to full guard. He's managed it.
That's four minutes gone in the round.
Experiment II is looking to get back to his feet but can't, whilst Burns is controlling him.
Burns postures up.
Experiment II keeping moving, preventing Burns from controlling successfully.
Experiment II looking for submissions from the bottom but instead Burns passes into half guard.
Burns with a momentary lay and pray from half guard.
Burns is thwarting Experiment II's attempts to control the position.
Burns with a momentary lay and pray from half guard.
The crowd thankful this round is nearly over.
Experiment II is trying to stand.
Burns is working hard to pass the guard. He's done it - he's now in full mount! Trouble for Experiment II!
And that's the end of the fight!
Johny Burns showed his dominance in that final round.
I think Burns has won this one but let's see what the judges have to say. Over to the ring announcer for the scorecards.
Ladies and gentlemen, after 5 rounds of action, we go to the scorecards for a decision.
Judge Jack Bonds scores the fight 49:46
Judge Suge Night scores the fight 49:46
Judge Timothy Bukovac scores the fight 49:46
In favor of your winner, by unanimous decision... Johny Burns!
Johny Burns retains his welterweight title!
|
|
|
|
|
|
|
|
|
|
|
|
|
|
|
|
|
|
|
|
|
|
|
| S |
C
A |
G |
S |
C
B |
G |
|
S |
C |
G |
|
energy
A | B |
|
hype
A | B |
|
pop
A | B |
|
mgr
A | B |
|
FIGHT
RATING
64% |
|
|
|
|
|
|
