|
|
PBP Commentary |
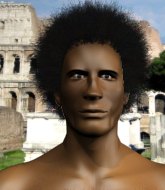
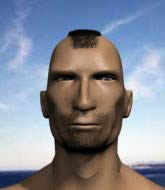
Coming up we have a lightweight MMA rules bout between Cho Kli Trayne (ranked 0 p4p, 0 weight class) and trevion Dazmere (ranked 0 p4p, 0 weight class). Rumors backstage are that the fighters have been paid to keep it standing but we know that would never happen in MMA!
 |
|
 |
| 187 cm
18
161 lbs
0 - 1 - 0 |
|
176 cm
18
165 lbs
0 - 0 - 0 |
BJJ White Belt
Brawler
Granite chin |
|
BJJ Purple Belt
Brawler
Determined |
|
| |
|
Ladies and gentlemen. This fight is 3 rounds, in the lightweight division.
Introducing the fighter to my left, fighting out of the red corner.
With a record of
0 - 1 - 0, fighting out of Helsinki, Cho Kli Trayne!
And introducing the fighter to my right, fighting out of the blue corner.
With a record of
0 - 0 - 0, fighting out of Helsinki, trevion Dazmere!
The judges for this bout are Roosa Järviläinen, Ben Zyskovitsi and Marco Blurström.

The bell rings for round one and we are underway!

Trayne fakes with an overhand right and moves in to clinch with Dazmere, pushing him back against the cage.
Trayne wants a takedown but no success here.
Dazmere can't break the clinch.
Dazmere takes a knee right on the jaw!
Dazmere can't break the clinch.
Dazmere fails to pull the fight into his guard.

Trayne pushes off and circles away, back to the middle of the mat.
Trayne clinches with his opponent.
Trayne working some nice short punches in the clinch.
Trayne with a knee to the head.
Dazmere tries to land a knee to the head but Trayne blocks with his arms.

Trayne tightens his grip and picks Dazmere up, before dumping him to the ground. Dazmere manages to land in guard.
Dazmere keeping moving, preventing Trayne from controlling successfully.
Dazmere pulls Trayne in close to prevent any damage.

That's one minute gone in the round.
Dazmere keeping moving, preventing Trayne from controlling successfully.
Trayne stands up and looks to throw the legs aside to pass to side control. Dazmere swivels though and keeps the full guard.
Trayne will need to keep those long limbs tucked in whilst he's on the ground, to prevent any submissions.
Trayne wanted to stand there but Dazmere had control of the position.

Trayne stands up from guard. Let's bang!
Dazmere shoots in looking for a double leg takedown. Trayne defends it nicely.
Dazmere looks for a takedown. He's got it. We're now in half guard.
Dazmere looks gassed!

That's two minutes gone in the round.
Trayne is trying to control but can't.
The fighters are pressed up against the cage, both looking to find a bit of space to work.
Trayne is trying to stand.
Trayne is trying to maintain the position but Dazmere is very close to passing his half guard.
Dazmere decides he's had enough of the ground and stands up.
Trayne fakes with an overhand right and moves in to clinch with Dazmere, pushing him back against the cage.
Trayne goes for a takedown in the clinch but Dazmere prevents it.
A frustrated look appears on Dazmere's face as he tries to break the clinch.

That's three minutes gone in the round.
Trayne has dropped down and is working for a takedown. Dazmere is trying to keep an underhook but Trayne manages to get the takedown into half guard.
Trayne blocks the strikes from Dazmere.

Trayne is looking for a kimura here.
Dazmere is staying active underneath Trayne, who seems content to just control the action from this position.
Dazmere is holding on to half guard well.
Trayne thows a wild elbow that connects with the canvas.

That's four minutes gone in the round.
Dazmere moves his hips nicely and gets into full guard.
A real slowdown in the pace of the fight for a moment, as Dazmere holds on and takes a little breather.
Dazmere being controlled here, momentarily.
There's a bit of a scramble here and now Dazmere is on top in guard.
Dazmere wants to stand but Trayne is controlling his posture from full guard.
And thats the end of the round the fighters go back to their corners.
Cho Kli Trayne dominated that round.
The minute break is over - no more time for sponges and pep talks - back to the action!

Trayne stuffs the takedown attempt from Dazmere. Dazmere gets slowly back to his feet.
Trayne gets to the clinch - let's see what his plan is here.
Some stalling of biblical proportions here from Trayne.
Trayne breaks the clinch and we return to the middle of the mat.
Trayne has closed the distance and engaged Dazmere in a clinch.
Trayne escapes the clinch and we're back to striking.
Dazmere is breathing heavily.
Trayne pushes Dazmere up against the cage in a clinch.
Dazmere is trying to work out of this bad position, with his back against the cage.
Trayne is trying to wear down his opponent with knees to the body.
That's one minute gone in the round.
Dazmere being controlled against the cage.
Trayne breaks the clinch and we're back to striking at distance.
Trayne closes the distance and clinches.
Trayne breaks the clinch and we're back to striking at distance.
Dazmere wants to clinch
and Trayne decides to take the opportunity to score a takedown. He's landed in Dazmere's guard.
Trayne decides to stand up and beckons his opponent to follow.
Dazmere shoots in for a takedown but Trayne shows good takedown defense there and keeps this one on the feet.
Trayne shoots in but doesn't get the takedown
and Dazmere counters with a shoot takedown. Trayne fights it but they end up in guard.
Trayne knows he needs to get back to his feet asap. He's simply no match for Dazmere on the ground.
That's two minutes gone in the round.
This has been an exciting period of action!
Dazmere showing good wrestling skills to control the position.
Trayne is trying to control the position from the bottom.
Trayne looking for a sweep. Not yet Trayne, not yet.
Trayne really does look like a pencil wearing a pair of gloves. Let's hope he has a gameplan to suit that ridiculous body shape.
Trayne working a defensive guard here.
Trayne looking for a sweep. Not yet Trayne, not yet.
Trayne looking for submissions off his back, moving his hips, looking for an opening.
That's three minutes gone in the round.
Trayne trying to strike off his back.
Trayne keeping moving, preventing Dazmere from controlling successfully.

Neither fighter is doing enough for the referee's liking and he's decided to stand them back up.
Trayne fakes with an overhand right and moves in to clinch with Dazmere, pushing him back against the cage.
Trayne breaks the clinch and we're back to striking at distance.
Dazmere displays good takedown defense there as he swats away a double leg from Trayne.
Dazmere tries to clinch
and Trayne counters with a lovely shot to the body.
Dazmere fails with a rather predictable takedown attempt.
Cho Kli Trayne has stuffed three takedown attempts in the round now. That's going to take a lot out of trevion Dazmere.
Dazmere shoots in but Trayne avoids the takedown attempt easily.
That's four minutes gone in the round.
A few boos can be heard. I'm sure they will multiply if the fighters don't pick up the pace.
Trayne moves in looking to clinch but Dazmere pushes him off.
Trayne fails with a takedown attempt.
Dazmere swings away but doesn't land with a series of punches.
Cho Kli Trayne is looking to throw some combinations by the looks of things.
Trayne closes the distance and pushes Dazmere back into the cage.
Trayne breaks from the clinch.
Dazmere throws a sloppy head kick and Trayne moves out of range easily.
Dazmere displays good takedown defense there as he swats away a double leg from Trayne.
Dazmere clinches.
And thats the end of the round the fighters go back to their corners.
Cho Kli Trayne dominated that second round.
That's the end of the round. The referee orders the cornermen out of the cage so we can get back down to business. This is the final round!

Trayne tries to clinch but Dazmere is having none of it.
Trayne clinches up with Dazmere and pushes him back against the cage.
A right hook to the body lands for Trayne.
Trayne wants the takedown. Dazmere is fighting it off but Trayne persists and manages to bring the fight to the ground, ending up in Dazmere's guard against the cage.
Trayne tries to free his leg and advance position but Dazmere is retaining full guard.
Dazmere tries to land a sweep but no joy.
Dazmere manages to sweep nicely, so he's now on top. Trayne manages to get himself to full guard.
Trayne throws a couple of weedy looking strikes off his back.
Dazmere trying to control but Trayne is working from the bottom.
Trayne looking to sweep here. No luck so far.
Both fighters are breathing heavily.
That's one minute gone in the round.
Trayne has his feet on Dazmere's hips. He pushes off and gets to his feet. Nice work.
Trayne shoots in looking for a double leg takedown. Dazmere defends it nicely.
Dazmere wants to clinch but Trayne slips to the side
and Trayne counters with a nice double leg into guard.
Trayne avoids a guillotine attempt easily.
Dazmere controls Trayne momentarily but Trayne frees himself.
That's two minutes gone in the round.
Trayne throwing shots from guard but he's hitting more mat than opponent.
Dazmere is trying to keep Trayne in close.
Trayne trying to control but Dazmere is working from the bottom.
Dazmere has a closed guard, preventing Trayne from standing up.
The ref warns both fighters not to hold the cage as they work up against the meshing.
That's three minutes gone in the round.
Dazmere trying to control the position.
It looks like we're going to have a standup here. Neither fighter is doing enough on the ground.
Trayne gets a clinch.
Trayne has moved round to his opponent's back and is looking for a suplex! Oh snap! He's tossed Dazmere clear over his head and slammed him to the mat!
Dazmere tries to escape the position - he's now mounted. Is that better or worse? Hard to tell!
Dazmere is wriggling around trying to escape.
That's four minutes gone in the round.
Dazmere tries to hold on but Trayne pushes him away.
Dazmere flailing away with punches but nothing is landing.
Dazmere swinging wildly from the bottom but he's not landing.
Dazmere blocking the ground and pound.
Trayne tries to control but Dazmere wriggling away.
Trayne looking for an armbar but decides to keep the dominant position instead.
Dazmere manages to regain half guard whilst avoiding the strikes.
And that's the end of the fight!
Cho Kli Trayne showed his dominance in that final round.
Well Trayne has outscored his opponent in every aspect of the fight today. Only a scarily incompetent judge or two will keep him from a well deserved win... Over to the ring announcer for the scorecards.
Ladies and gentlemen, after 3 rounds of action, we go to the scorecards for a decision.
Judge Roosa Järviläinen scores the fight 30:27
Judge Ben Zyskovitsi scores the fight 30:27
Judge Marco Blurström scores the fight 30:27
In favor of your winner, by unanimous decision... Cho Kli Trayne!
|
|
|
|
|
|
|
|
|
|
|
|
|
|
|
|
|
|
|
|
|
|
|
| S |
C
A |
G |
S |
C
B |
G |
|
S |
C |
G |
|
energy
A | B |
|
hype
A | B |
|
pop
A | B |
|
mgr
A | B |
|
FIGHT
RATING
45% |
|
|
|
|
|
|
