|
|
PBP Commentary |
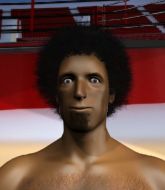
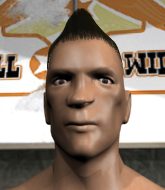
Coming up we have a welterweight MMA rules bout between Frank Pembelton (ranked 0 p4p, 0 weight class) and Anthony Stark (ranked 0 p4p, 0 weight class). Chooooooooon! I think Pembelton might be my favorite fighter, now he's come out to Hail Mary by Tupac. Stark has chosen Iron Man-Black Sabbath as his entrance music. Frank Pembelton has the better chin. Will he look to stand and bang today?
 |
|
 |
| 177 cm
23
179 lbs
8 - 2 - 0 |
|
189 cm
21
180 lbs
6 - 2 - 0 |
BJJ Brown Belt
Counter striker
Very strong |
|
BJJ Purple Belt
Decent boxing
Powerful |
|
| |
|
Ladies and gentlemen. This fight is 3 rounds, in the welterweight division.
Introducing the fighter to my left, fighting out of the red corner.
With a record of
8 - 2 - 0, fighting out of Las Vegas, Frank Pembelton!
And introducing the fighter to my right, fighting out of the blue corner.
With a record of
6 - 2 - 0, fighting out of Las Vegas, Anthony Stark!
The judges for this bout are Jorge Garcia, Russell Pearce and Bruno Lombardi.

The bell rings for round one and we are underway!
Pembelton uses some good footwork to avoid the body shot by Stark.
Stark is looking to clinch but Pembelton is avoiding it.
Stark misses with a looping right.
Stark looks to score with a jab to the body but Pembelton is just out of range.
Stark swings for the body but Pembelton moves out of range.
Stark ducks down and throws a hook to the body but Pembelton moves away.
A swing and a miss from Pembelton.
Pembelton keeping a good distance there, avoiding the body shot.

Pembelton clinches up against the cage.
Pembelton has hold of a leg and is looking for a trip takedown. Stark avoids it nicely though and we remain in the clinch.
Stark is trying to break free.
Stark wants to break free. God knows he wants to breaaaak freeee.

Stark breaks the clinch and we return to the middle of the mat.
Stark thows a body shot but no joy.
Stark tries to clinch

and Pembelton counters with a shoot takedown. Stark fights it but they end up in guard.
Pembelton wants to control from the top but Stark keeps moving.
Stark pulls Pembelton in to control the position.
Stark looking for a sweep. Not yet Stark, not yet.
Pembelton looking to pass the guard.
Stark manages to sweep nicely, so he's now on top. Pembelton manages to get himself to full guard.

That's one minute gone in the round.
Stark wants to stand but Pembelton is controlling his posture from full guard.
Pembelton wants to sweep but no luck.
Pembelton is working hard here to advance position.
The ref warns both fighters not to hold the cage as they work up against the meshing.

Pembelton pushes Stark off for just long enough to get back to his feet. Very athletic spring there.
Stark tries to grapple but his opponent circles
and Pembelton counters with a takedown into full mount! That could mean trouble for Stark!
Pembelton controlling the pace for now.

That's two minutes gone in the round.
Pembelton can't quite control the action as he would like just now, as Stark is looking to escape.
Stark is looking to get to half guard.

Pembelton has control of Stark's right arm, working for a kimura. It's a bit of a token attempt though and Stark regains control of the situation pretty easily.
Stark is writhing around trying to get back to his feet.
Pembelton goes for an armbar but he's not got it
Stark turns into him and now he's in Pembelton's guard.
The fighters are starting to get a bit slippery now, which will make submissions a bit more difficult.
Pembelton has his foot on Stark's thigh. He's trying to push off and get in position for a triangle, I think. Stark works his way back into a safe position though.

That's three minutes gone in the round.
Stark is trying to work a guillotine from the top, or something like that? Don't know how he thinks he's going to get a finish from there.
Stark wants to stand but Pembelton is controlling his posture from full guard.
Pembelton keeping moving, preventing Stark from controlling successfully.
Pembelton throwing his legs up looking for a triangle.
Stark is looking to stand up but Pembelton won't let him.
Pembelton looking for submissions off his back, moving his hips, looking for an opening.
Stark wants to stand but Pembelton has a closed guard, so he can't escape.

That's four minutes gone in the round.
The crowd are getting on the fighters' backs, as the pace has dropped off in the last minute or so.
Pembelton had isolated an arm as going for a kimura. Stark defends it easily.
Stark trying to control but Pembelton is working from the bottom.
Pembelton is working the butterfly guard. He manages to land a nice scissor sweep and is now in half guard on the top. Nice move.
Pembelton wants to take a breather but Stark is having none of it.
Stark holds on for dear life, maintaining half guard for now.
Stark wants to get back to full guard.
And thats the end of the round the fighters go back to their corners.
Frank Pembelton dominated that round.
Well, the break between rounds is over. Let's get back to the scrappin!

Stark connects nicely with a jab. Noted by the judges no doubt.
Pembelton drives through with a really nice takedown into side control.
Stark wants to control but Pembelton postures up.
Pembelton trying to control the position but Stark is working away.
Stark wants to control but Pembelton postures up.
Pembelton trying to control the action but Stark is working from the bottom.
Stark sneaks a leg under to get back to half guard.
The fighters are pressed up against the cage, both looking to find a bit of space to work.
Stark is looking for a sweep. Pembelton is wise to his cunning plan and keeps the top position.
Stark trying to control from the bottom.
The fighters are battling for position here. Stark manages to regain full guard. Nice work.
Pembelton won't allow Stark to sweep him here.
That's one minute gone in the round.
Pembelton wants to control from the top but Stark keeps moving.
Stark controlling the position.
Stark looking for submissions from the bottom here. Moving his hips around, possibly looking for an armbar.
Stark is breathing heavily.
Pembelton trying to control but Stark is working from the bottom.
Pembelton trying to pass the guard but can't manage it just yet.
Stark working a defensive guard here.
Pembelton tries to free his leg and advance position but Stark is retaining full guard.

The referee has ruled that neither fighter is active enough on the ground and has stood them back up.
Stark throws an uppercut from half a mile away. Pembelton sees it coming and avoids it easily.
Pembelton fakes high and swings low for a body shot but Stark manages to avoid it.
Pembelton defending well as Stark loads up on a big left hand.
Pembelton gets the takedown into side control.
That's two minutes gone in the round.
Pembelton controlling from side mount.
Pembelton is trying to get an arm triangle but Stark is defending well.
Stark is working hard to escape and get back to his feet. After a battle for position, Pembelton asserts his dominance and retains side control.
Pembelton is trying to land an Americana. He has the arm isolated but Stark is keeping cool and he's avoided the danger for now.
Stark is trying to improve his position.
That's three minutes gone in the round.
Stark gets one leg under and gets the fight to half guard.
Pembelton prevents Stark from improving his position.
Stark has no desire to be mounted, so is trying to control. Pembelton is working away from the top position though.
Pembelton prevents Stark from improving his position.
Pembelton seems very keen to just sit and control from half guard but Stark does not like that idea so much and is remaining active off his back.
The referee decides to stand the fighters back up.
Stark avoids the body shot from Pembelton.
Stark is throwing a lot of body shots here, looking to wear down Pembelton rather than just go for the knockout.
Pembelton uses some good footwork to avoid the body shot by Stark.
Stark misses the jab.
Pembelton with a body punch. A glancing blow.
Stark swings and misses with a shot to the body
and Pembelton counters with a takedown into full mount! That could mean trouble for Stark!
That's four minutes gone in the round.
Pembelton wants to control the pace but Stark is squirming around nicely.
Pembelton is going to have to think about doing something other than just controlling because Stark is managing to avoid having the position dictated to him.
Pembelton goes for an armbar but Stark turns quickly into his guard - lovely anticipation from Stark.
Pembelton looking to sweep here. No luck so far.
Pembelton wants to stand but Stark is controlling the position.
Stark stands up from guard. Let's bang!
Pembelton avoids the body shot from Stark.
Stark throws a couple of head shots and lands with the final one - a decent hook, which struck Pembelton on the side of the head.
Stark looks to score with a jab to the body but Pembelton is just out of range.
Pembelton shoots in for a takedown from distance. He catches Stark napping and manages to drive through into side control!
And thats the end of the round the fighters go back to their corners.
Frank Pembelton dominated that second round.
The fighters get back to their feet, the hooter sounds and we're back to the action! This is the final round!

Pembelton rushes Stark and presses him up against the cage.
Pembelton tries for a takedown but Stark manages to get underhooks.
Stark breaks the clinch and we're back to striking at distance.
Pembelton on the wrong end of a nice jab.
Stark is using his reach advantage to land shots from outside his opponent's range.
Stark clinches but Pembelton breaks the clinch
and Pembelton decides to take the opportunity to score a takedown. He's landed in Stark's guard.
Stark pulls Pembelton in close to prevent any damage.
Pembelton is holding a leg here, probably looking for an ankle lock - he drops back and goes for it! Stark is in trouble! Is it all over??? No! Stark has escaped and now he's on top!
Stark showing good wrestling skills to control the position.
Stark stands up and waves to Pembelton to follow him.
That's one minute gone in the round.
Stark darts in trying to clinch
and Pembelton counters with a takedown into full mount! That could mean trouble for Stark!
Pembelton thowing strikes but they're hitting the gloves, not doing any damage.
Stark is trying desperately to improve position.
Pembelton working to secure an arm triangle but it's not happening for him just yet.
Stark is in all sorts of trouble here.
Frank Pembelton overall seems to be getting the better of the ground position in the fight so far.
Pembelton tucks in and makes sure he doesn't lose the dominant position.
Stark sneaks a leg back under and regains half guard and is working straight away to try and get back to guard. He hasn't managed just yet though.
That's two minutes gone in the round.
Stark is looking for a sweep. Pembelton is wise to his cunning plan and keeps the top position.
Stark is defending against the submission attempts here by Pembelton.
Both fighters are breathing heavily.
Stark slips a foot under and gets full guard. Nice work.
Pembelton sitting in guard here, content to control.
Anthony Stark has stepped it up - he knows he needs a finish here!
Pembelton wants to control from the top but Stark keeps moving.
Pembelton is really struggling to control Stark but he's trying to hold on to the position.
Pembelton has a momentary lapse of concentration, allowing Stark to throw up a leg and lock on what appears to be a pretty tight triangle! Pembelton is fighting it off but it's all too little too late - Stark pulls down on the head and he's put Pembelton to sleep! This one is all over!
Ladies and gentlemen, after 3:02 of round 3, we have a winner by way of Submission (Triangle). Anthony Stark!
|
|
|
|
|
|
|
|
|
|
|
|
|
|
|
|
|
|
|
|
|
|
|
| S |
C
A |
G |
S |
C
B |
G |
|
S |
C |
G |
|
energy
A | B |
|
hype
A | B |
|
pop
A | B |
|
mgr
A | B |
|
FIGHT
RATING
62% |
|
|
|
|
|
|
