|
|
PBP Commentary |
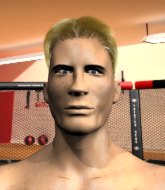
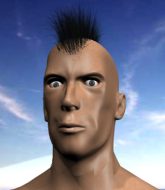
Coming up we have a middleweight MMA rules bout between Max Hazelett (ranked 0 p4p, 0 weight class) and Reverend Maynard (ranked 0 p4p, 0 weight class). Reverend Maynard has the eye of the tiger tonight.
 |
|
 |
| 180 cm
22
198 lbs
1 - 0 - 0 |
|
185 cm
22
198 lbs
1 - 0 - 0 |
Good takedowns
Basic striking
Good chin |
|
BJJ Blue Belt
Counter striker
Granite chin |
|
| |
|
Ladies and gentlemen. This fight is 3 rounds, in the middleweight division.
Introducing the fighter to my left, fighting out of the red corner.
With a record of
1 - 0 - 0, fighting out of Hilo, Max Hazelett!
And introducing the fighter to my right, fighting out of the blue corner.
With a record of
1 - 0 - 0, fighting out of Hilo, Reverend Maynard!
The judges for this bout are , and .

The bell rings for round one and we are underway!
A big right from Maynard misses.
Maynard throws a low kick, looking for Hazelett's leg but Hazelett calmly moves out of range.
Nice sprawl there from Maynard as Hazelett shoots in.

Hazelett drives through with a really nice takedown into side control.

Hazelett thinks about going for a far side armbar but bails out and retains the dominant position instead.
Maynard can't do much from the bottom here.
Hazelett is trying to get an arm triangle but Maynard is defending well.
The fighters are pressed up against the cage, both looking to find a bit of space to work.
Maynard is working hard to escape and get back to his feet. After a battle for position, Hazelett asserts his dominance and retains side control.
Maynard wants to control but Hazelett postures up.
The ref warns both fighters not to hold the cage as they work up against the meshing.

That's one minute gone in the round.
Maynard avoids any damage from the ground and pound of Hazelett.
Hazelett tries for a kimura but Maynard is defending well.
Hazelett tries for an arm triangle. That looks pretty tight to me. Is this one over!?! Possibly, maybe, no Hazelett has let go of the choke. Obviously it wasn't as tight as we thought!
Hazelett thinks about going for a far side armbar but bails out and retains the dominant position instead.
Maynard wants to control but Hazelett postures up.
Hazelett working hard here to secure a kimura but he's not really in the right position for it.
Hazelett tries for an arm triangle. That looks pretty tight to me. Is this one over!?! Possibly, maybe, no Hazelett has let go of the choke. Obviously it wasn't as tight as we thought!
Hazelett is breathing heavily.

That's two minutes gone in the round.
Maynard tries to work a leg under to get back to half guard but Hazelett wriggles his own leg back out and remains in side control.
The fighters are going at a pretty good pace and they're both starting to sweat now.
Maynard is persisting with the attempt to improve his position.
Maynard is trying to control Hazelett's posture but Hazelett avoids it.
Hazelett throws a knee to the body but it doesn't do much damage.
Hazelett goes for an armbar here - this could be all over! But no, Maynard has escaped beautifully and is now on top in side control! Oh, that's unlucky for Hazelett but great work by Maynard.
Hazelett throws a couple of strikes even though he's not really in a good position to do so.
Hazelett is trying to improve his position.

That's three minutes gone in the round.
Maynard trying to control the position but Hazelett is working away.

The referee decides to stand the fighters back up.
Hazelett swings for the body but Maynard moves out of range.
Reverend Maynard is looking to keep the fight on the feet at all costs.
Maynard slaps away a takedown attempt from Hazelett, before circling back to the center of the mat.
Maynard keeps the fight standing with a nice sprawl.
That's three failed takedown attempts in the round for Max Hazelett. That's going to take a lot out of him.
Hazelett shoots in looking for a takedown. Maynard tries to sprawl out of it but Hazelett keeps driving through. The fighters are pinned against the cage. Maynard manages to get underhooks and after a bit of a struggle, circles away and we're back to standing.

Maynard drops Hazelett with a beautiful combination! Hazelett stares up at his opponent, who ushers him back to his feet - Maynard is looking for the KO!

It looks like Max Hazelett has been cut.
The crowd cheering loudly, showing their appreciation for the quality fight we're seeing here.
Maynard throws a head kick but Hazelett moves out of range.
Hazelett shoots in for a takedown. He's persisting with it as Maynard sprawls well. Maynard wins this battle and keeps the fight standing. Hazelett gets slowly back to his feet.
Maynard lands with a kick to the ribs.

That's four minutes gone in the round.
Hazelett avoids the body shot from Maynard.
Hazelett fails with the takedown.
Hazelett chopped to the floor by a nice leg kick but he springs right back up before Maynard can pounce on him.
Maynard looks to score with a combo but nothing lands.
Maynard misses with a wild combination.

Maynard darts in and clinches Hazelett up against the cage.
Maynard is pushing Hazelett up against the cage, for a bit of lean and pray action. Action being used the in the loosest possible sense of the word.
Maynard unloads a knee to the mid-section. Hazelett lets out a prehistoric sounding urrrrgh.
Hazelett takes an elbow to the forehead.

Maynard breaks the clinch.
As the round comes to an end the crowd are showing their appreciation for a great round of action.
Maynard cracks a nice hook into Hazelett's ribs.
Maynard lands a jab. Then a cross. Then finally a nice hook to the body. Good work there by Maynard.
Maynard feints and then cracks Hazelett's leading leg with a nice low kick. He's obviously looking to slow Hazelett down.
Maynard tries a head kick but it misses.
And thats the end of the round the fighters go back to their corners.
Reverend Maynard dominated that round.
The cut man is working on Max Hazelett's cut.
That's the end of the interval. I'm sure that seemed a lot quicker than a minute for our two fighters! Back to the action.

Maynard moves into range and lands a nice leg kick.
A punch combination from Maynard misses.
Hazelett shoots in but no luck this time.
Maynard scoring well with a low kick there.
Maynard drives through and clinches with Hazelett against the cage.
Maynard lands a nice knee to the body.
Maynard breaks from the clinch.
Maynard clinches up with Hazelett and pushes him back against the cage.
Maynard lands an elbow that stopped Hazelett in his tracks for a moment.
Maynard leaning his opponent against the cage.
Maynard breaks from the clinch.
Maynard does a little shimmy and throws a leg kick. The leg kick missed by a considerable margin though, making him look a little bit silly for doing the shimmy.
Maynard looks to land a body kick but Hazelett moved away.
Hazelett shoots in but no luck this time.
Maynard avoids the body shot from Hazelett.
Both fighters are absolutely exhausted here.
Nice sprawl there from Maynard as Hazelett shoots in.
That's three failed takedown attempts in the round for Max Hazelett. That's going to take a lot out of him.
Maynard scores with a kick to the body.
Max Hazelett seems to be the more aggressive standup fighter in this bout.
That's one minute gone in the round.
Maynard takes a step towards his opponent and connects with a left hand, before circling away.
Nice body kick from Maynard.
Maynard misses with a head kick.
Maynard throws a wild body kick that Hazelett sees coming a mile off.
Maynard with a nice looking leg kick. You could hear that one land in a back row.
Fantastic stuff here - a very entertaining period of action, which has drawn cheers from the crowd.
Hazelett uses some good footwork to avoid the body shot by Maynard.
Maynard throws a right and a left that Hazelett avoids nicely.
Maynard scores with a spinning back kick!
Hazelett takes an uppercut right on the button but keeps his composure.
Maynard connects with a high kick.
Hazelett tries for a takedown but Maynard sees it coming a mile off and avoids it easily.
Maynard throws a hook to the side of Hazelett's head but Hazelett sees it coming and ducks under it beautifully.
Hazelett closes this distance looking for a takedown but Maynard circles away.
Maynard lands a jab to the nose.
Reverend Maynard seems to be getting the better of the standup.
Maynard drives through and clinches with Hazelett against the cage.
That's two minutes gone in the round.
Maynard is struggling to control the position.
A knee to the head by Maynard.
Maynard's corner calls for him to break the clinch, which he does.
Hazelett fails with a takedown attempt.
A decent looking cross lands there for Maynard.
A combination from Maynard does no damage.
Maynard looks to land a combination but Hazelett avoids it well.
Hazelett shoots in looking for a takedown. Maynard tries to sprawl out of it but Hazelett keeps driving through. The fighters are pinned against the cage. Maynard manages to get underhooks and after a bit of a struggle, circles away and we're back to standing.
Ouch! a nice leg kick from Maynard, right into the meat.
Maynard takes the fight into the clinch.
Maynard prevents a takedown attempt there.
Maynard breaks the clinch.
Reverend Maynard is looking to throw some combinations by the looks of things.
That's three minutes gone in the round.
Hazelett shoots in for a takedown. "Ole!" shouts Maynard as he jumps to the side.
Hazelett fails with a takedown attempt.
Maynard connects with a right hand. Hazelett shakes it off.
A head kick misses from Maynard.
Maynard lands a big head kick that sends Hazelett tumbling to the mat! Maynard takes a step backwards and waves Hazelett back to his feet - he wants the finish!

Hazelett is rocked!
This has been an exciting period of action!
Maynard throws and low kick but Hazelett moves out of range easily.
Hazelett shoots in but Maynard avoids the takedown attempt easily.
Hazelett staying out of range there.
Hazelett shoots in and drives through. Maynard sprawls well.
Maynard lands a head kick. Hazelett smiles back at him and beckons him forward.
Maynard thumps Hazelett with a low kick.
That's four minutes gone in the round.
Maynard tries a switch kick but it misses it's target.
Hazelett dives in and grabs Maynard's left leg, looking for a takedown. Maynard pushes down on Hazelett's head and hops out.
Maynard pulls out of a head kick attempt.
Maynard plants his feet and lands a nice head kick!
Maynard throws a head kick that misses.
Hazelett has a takedown stuffed.
Maynard looks to land a combination but Hazelett avoids it well.
Maynard defending well as Hazelett loads up on a big left hand.
No luck with that takedown attempt from Hazelett.
Hazelett shoots in and drives through. Maynard sprawls well.
The crowd are going absolutely nuts as the round comes to an end - what a fantastic round of action!
Maynard misses with a few strikes there.
Maynard rushes forward with a series of wild hooks but Hazelett moves out of range and avoids them all easily.
Maynard throws a nice head kick!
And thats the end of the round the fighters go back to their corners.
Reverend Maynard showed his class in that round. I'd imagine he'll take it on all the scorecards.
The cut man is working on Max Hazelett's cut.
The referee calls time. The cornermen exit stage left and we're back to business. This is the final round!

Maynard misses with a wild combination.
Maynard looks to land a combination. Hazelett sees it coming but can only parry a couple of the shots.
Maynard rushes forward with a series of wild hooks but Hazelett moves out of range and avoids them all easily.
Hazelett shoots in for a takedown but doesn't get it.
Hazelett shoots in and drives through. Maynard sprawls well.
Hazelett fails with a takedown attempt.
That's three failed takedown attempts in the round for Max Hazelett. That's going to take a lot out of him.
No joy there for Maynard, who threw a few shots but didn't land.
Hazelett will have to do better than that with his takedown attempts.
A combination from Maynard does no damage.
Both fighters are breathing heavily.
Maynard lands an overhand right.
Hazelett shoots in for a takedown but Maynard shows good takedown defense there and keeps this one on the feet.
Hazelett takes a big uppercut there. He seems a bit wobbly but no, he's OK.
A kick lands to the mid section there for Maynard.
That's one minute gone in the round.
Maynard misses with a double jab.
Maynard slaps away a takedown attempt from Hazelett, before circling back to the center of the mat.
Maynard stooping low to avoid any incoming strikes and then lunges in with an uppercut come cross that lands flush.
Maynard misses with a half-hearted attempt at a head kick.
Hazelett fails with a rather predictable takedown attempt.
Hazelett shoots in for a takedown but doesn't get it.
Maynard plants his feet and lands a nice head kick!
Hazelett ducks under an overhand right and circles away with a smile on his face.
Hazelett avoids the head kick by Maynard.
Hazelett shoots in but no luck this time.
Hazelett avoids a low kick by using good footwork.
Nice sprawl there from Maynard as Hazelett shoots in.
That's two minutes gone in the round.
Maynard fakes with an overhand right and moves in to clinch with Hazelett, pushing him back against the cage.
Maynard manages to break the clinch.
Maynard gets his head snapped back by a nice shot there.
Maynard drives through and clinches with Hazelett against the cage.
Maynard manages to break the clinch.
No joy there for Maynard, who threw a few shots but didn't land.
Maynard misses with a half-hearted attempt at a head kick.
Hazelett shoots in but Maynard avoids the takedown attempt easily.
Maynard showing good head movement there, avoiding the strikes from Hazelett.
Hazelett misses with a takedown attempt. He shot from a bit too far out.
Hazelett takes a thudding leg kick, right into the meat of the thigh.
Maynard throws a body punch but Hazelett moves out of range.
Maynard has been the more effective fighter overall so far.
That's three minutes gone in the round.
Hazelett blocks a head kick by Maynard.
Hazelett darts in and lands a nice takedown into half guard.
Hazelett looking for a kimura but he'll have to free his other leg if he wants to finish that. Perhaps he's just using it as a distraction technique.
Hazelett trying to pass the guard but Maynard defending well.
Hazelett is trying for a guillotine from the top but the pressure isn't in the right place so Maynard is just riding it out for now. Hazelett eventually gives up the hold.
Reverend Maynard is fighting for a decision here - he's started to take the cautious approach.
That's four minutes gone in the round.
Maynard is trying to stand.
Maynard is looking to control Hazelett's leg but it's slowly edging free. Can Maynard avoid being mounted?
Hazelett is trying to work for a kimura. He's got his hands clasped together - this could be trouble! No, Maynard has managed to free his arm - good work.
Hazelett seems to be trying to get a kimura but instead Maynard has recovered full guard.
Hazelett won't allow Maynard to get back to his feet.
And that's the end of the fight!
Reverend Maynard comfortably won the final round on my scorecard.
I've got Maynard winning every round here. Surely the decision will go his way and he'll pick up a well deserved decision victory. Over to the ring announcer for the scorecards.
Ladies and gentlemen, after 3 rounds of action, we go to the scorecards for a decision.
Judge Andi Peters scores the fight 26:30
Judge Gordon Ramsey scores the fight 26:30
Judge Frank Skinner scores the fight 26:30
In favor of your winner, by unanimous decision... Reverend Maynard!
|
|
|
|
|
|
|
|
|
|
|
|
|
|
|
|
|
|
|
|
|
|
|
| S |
C
A |
G |
S |
C
B |
G |
|
S |
C |
G |
|
energy
A | B |
|
hype
A | B |
|
pop
A | B |
|
mgr
A | B |
|
FIGHT
RATING
100% |
|
|
|
|
|
|

