|
|
PBP Commentary |
Coming up we have a welterweight MMA rules bout between Jason The Diamond (ranked 0 p4p, 0 weight class) and Johny Burns (ranked 0 p4p, 0 weight class). The crowd seem to be enjoying Burns's choice of entrance music: "Firestarter" by The Prodigy. Johny Burns told me before the fight that he's been watching a lot of DVDs so let's see if that helps him in this one! I can't wait to find out!
 |
|
 |
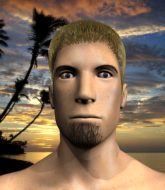
| 185 cm
25
178 lbs
8 - 2 - 0 |
|
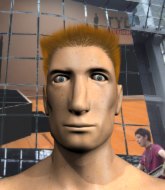
180 cm
24
183 lbs
8 - 2 - 0 |
BJJ Blue Belt
Excellent boxer
Very strong |
|
Powerful takedowns
Basic striking
Powerful |
|
| |
|
Ladies and gentlemen. This fight is 5 rounds, for the welterweight championship of the world!
Introducing the champion to my left, fighting out of the red corner.
With a record of
8 - 2 - 0, fighting out of Las Vegas, Jason The Diamond!
And introducing the challenger to my right, fighting out of the blue corner.
With a record of
8 - 2 - 0, fighting out of Los Angeles, Johny Burns!
The judges for this bout are Frank Antenori, Jack Bonds and .

The bell rings for round one and we are underway!
Burns chopping away at his opponent's legs.
The Diamond misses with an uppercut.
The Diamond ducks down and throws a hook to the body.
The Diamond keeps the fight on the outside.

Burns gets in close and instigates a clinch.
The Diamond can't break the clinch.

The Diamond breaks from the clinch.
Burns throws a body kick that misses.
Burns has managed to clinch.
Burns tries to work over The Diamond's body with a swooping hook but it only glances the target.
Burns lands a body shot in the clinch.
The Diamond's corner calls for him to break the clinch, which he does.
Burns throws a feint and then finishes with a kick to the body.
Burns keeping a good distance there, avoiding the body shot.
The Diamond stooping low to avoid any incoming strikes and then lunges in with an uppercut come cross that lands flush.
The Diamond dips down and scores with a jab to the body.
The Diamond misses the jab.
The Diamond bobs and weaves well there to avoid the strikes.
The Diamond looks to score with a combo but nothing lands.
The Diamond pushing out the jab but it's not landing.
Burns throws a leg kick but The Diamond moved away.
Burns wants to clinch.

That's one minute gone in the round.
The Diamond scores with a sloppy punch to the body. Not much technique there but it did the business.
The Diamond stumbles momentarily as he takes a strong leg kick from Burns.
Burns throws a low kick but his opponent is out of range.
The Diamond lands with an overhand left.
Burns dodges the punch combination from The Diamond.
Nice body punch from The Diamond.
Jason The Diamond is looking to keep the fight on the feet at all costs.
Good shot there by The Diamond.
The Diamond lands a jab to the head.
The Diamond misses the shot to the body.
Burns feints with a shoulder and throws a nice leg kick to The Diamond's calf.
Good leg kick by Burns there. It's the ones that make that thud noise that hurt and that was an almighty thud.
This is a great period of action - very entertaining stuff!
The Diamond swings for the body but Burns moves out of range.
The Diamond connects with a single shot there.
Horrible takedown by Burns or perhaps it was just good defense by The Diamond which made him look bad.

That's two minutes gone in the round.
The Diamond ducks under an overhand right and circles away with a smile on his face.
The Diamond throws a combination but comes up with nothing but fresh air.
Burns avoids the body shot from The Diamond.
Burns avoids a punch combination nicely.
The Diamond lands with a nice body punch.
Burns throws a looping left and ducks down for a takedown. He's got his arms around The Diamond's waist but The Diamond gets an underhook and avoids the takedown by throwing Burns off to one side.
The Diamond misses with a jab and misses with a cross straight after too.
A solid leg kick lands there for Burns.
Burns looking to take his opponent's legs away with the low kicks.
The Diamond misses with a series of wild punches.
A really sloppy takedown attempt there from Burns.
Jason The Diamond has stuffed three takedown attempts in the round now. That's going to take a lot out of Johny Burns.
The Diamond throws a body punch but Burns moves out of range.

That's three minutes gone in the round.
Burns misses with a takedown attempt - The Diamond sprawls well and throws a nice strike on the way out which just misses.
Burns is on the wrong end of a nice combination from The Diamond.
The Diamond fakes and then throws a beautiful body shot. Burns looks a bit winded and takes a step backwards to take a breath.
Burns looks gassed!
The Diamond misses with a double jab.
The Diamond paws at his opponent with the jab and then lunges in with a straight, right on the button.
The Diamond misses with a looping left.
Burns throws a front kick aimed at The Diamond's knee but The Diamond avoids it well.
Burns is trying desperately to land a takedown but The Diamond is having absolutely none of it. This is turning into a bit of a nightmare for Burns.
The Diamond misses with a body shot. Nice footwork from Burns.
Burns motions for The Diamond to come forward. Burns throws a leg kick but it misses it's target.
Burns throws and low kick but The Diamond moves out of range easily.
Burns scores with a slapping inside leg kick.
Burns takes a big uppercut there. He seems a bit wobbly but no, he's OK.
Burns tries to work over The Diamond's front leg with a kick but The Diamond checks it.
The Diamond tries to land with a swinging hook to the body but Burns was well out of range. Poor timing from The Diamond.
The Diamond throws a hook to the side of Burns's head but Burns sees it coming and ducks under it beautifully.
The Diamond is looking to wear down Burns with body shots, infact he's throwing more body shots than head shots at the moment.
The Diamond tries to land with a swinging hook to the body but Burns was well out of range. Poor timing from The Diamond.

That's four minutes gone in the round.
The Diamond lands a two punch combo.
Fantastic stuff here - a very entertaining period of action, which has drawn cheers from the crowd.
The Diamond misses the jab.
The Diamond throws a hard body shot but it just misses.
The Diamond throws a jab when Burns was well out of range.
The Diamond moves out of range of the leg kick from Burns.

Burns shoots in looking for a single leg takedown. The Diamond is trying to defend but Burns finishes it well and ends up in half guard. Let's see if he can advance position further.

Burns is working for a kimura but The Diamond is defending it quite comfortably.
The Diamond looks like he's trying to stand up.
As the round comes to an end the crowd are showing their appreciation for a great round of action.
The Diamond trying desperately to get back to his feet here but he's not having any joy at all. He's going to tire himself out if he's not careful.
And thats the end of the round the fighters go back to their corners.
Jason The Diamond dominated that round.
OK. That's time! The bell goes and we're back to the action.

A jab from The Diamond misses.
Jason The Diamond seems to be the more aggressive standup fighter in this bout.
The Diamond just misses with a punch to the body.
Burns scores with a slapping inside leg kick.
Burns looks shocked there as he takes a right hand to the temple.
The Diamond cracks Burns with a good jab.
The Diamond misses with a hook. Burns ducked under it nicely.
Burns shoots in for a takedown - he's clinched up with The Diamond but The Diamond pushes him off and we're back to square one.
Burns tries to close the distance and clinch up but The Diamond swats him away and circles back towards the center.
Boom, another hit is landed. "You're gunna get knocked out" taunts The Diamond, as that shot connected.
Thud! ouch! good body kick from Burns - that will leave a mark!
The Diamond blocks a leg kick.
Burns slips under a jab from The Diamond.
Jason The Diamond is winning the standup battle so far.
The Diamond misses with a wild body shot.
The Diamond looks to throw the jab but Burns is out of range.
The Diamond fakes a head shot and lands one to the body.
The Diamond lands a jab, followed by a cross and another cross, as Burns backs up against the cage.
That's one minute gone in the round.
Burns scores with a one two! The Diamond had his feet all tangled up there and couldn't avoid the strikes.
The Diamond fakes a head punch and goes low to the body. Nicely done.
Burns is breathing heavily.
The Diamond missing with a left hand there. Burns was out of range so wasted energy throwing that one.
The Diamond listening to his corner there, landing a nice uppercut.
A big right from Burns misses.
The Diamond connects with a body shot.
The Diamond fakes high and swings low for a body shot but Burns manages to avoid it.
A cross from The Diamond lands.
The Diamond misses with an uppercut. Burns saw that one coming.
Burns throws a leg kick but he was too far away and it doesn't land.
Burns shoots in for a takedown and gets it. Let's see what he's got on the mat.
The ref warns both fighters not to hold the cage as they work up against the meshing.
Burns pushes down on The Diamond's leg and manages to get into half guard.
The fighters are pressed up against the cage, both looking to find a bit of space to work.
The Diamond is looking to escape.
Burns throwing shots but they're hitting the canvas more than the man.
The Diamond scrambles, trying to get to his feet, but Burns manages to mount him!
That's two minutes gone in the round.
The Diamond is trying to get to the cage to help him get back to his feet.
Burns breaks from The Diamond's wrist control and lands an elbow.
Fantastic stuff here - a very entertaining period of action, which has drawn cheers from the crowd.
Burns working away from the top, dropping strikes.
The Diamond's corner are shouting for him to stand up but that's bad cornering - how is he meant to stand up when he's mounted? He should be looking to improve his position on the ground before trying to stand back up.
A nice elbow there by Burns.
Burns cracks The Diamond with a nasty head shot there - the crowd let out an audible gasp there, as the noise reverberated around the arena.
Burns landing strikes from the mount.
Burns landing strikes from the mount and The Diamond is in trouble!
The Diamond wants to use the cage to get back to his feet here.
Burns breaks from The Diamond's wrist control and lands an elbow.
That's three minutes gone in the round.
Burns raining down shots from the mount!
Burns dominating with strikes here.
Burns with good strikes from the mount here!
You get the feeling that The Diamond really doesn't like being in this position too much.
Burns punishing his opponent with strikes.
Burns with good strikes from the mount here!
Burns has the superior BJJ but he's also working some ground strikes into his gameplan.
Burns trying to control but The Diamond is having none of it.
A nice elbow there by Burns.
The Diamond trying desperately to get to his feet.
That's four minutes gone in the round.
Burns scoring with some good ground and pound from mount here. Will he manage to finish The Diamond?
Burns lands a shot to the body, followed up by a shot to the exposed head of his trapped opponent.
Burns landing strikes, looking to finish!
Burns putting on the heat here with some good ground and pound!
Burns can't quite control the action as he would like just now, as The Diamond is looking to escape.
Burns connects with a couple of good shots from mount.
Burns punishing his opponent with strikes.
As the round comes to an end the crowd are showing their appreciation for a great round of action.
Burns is in full mount, looking to secure a guillotine but The Diamond is surviving well by controlling Burns's body position as best he can.
The Diamond trying desperately to get to his feet.
And thats the end of the round the fighters go back to their corners.
Johny Burns showed his class in that round. I'd imagine he'll take it on all the scorecards.
That's time! The Diamond's corner gives him a slap on the ass as he gets ready to fight.

The Diamond throws a hook to the side of Burns's head but Burns sees it coming and ducks under it beautifully.
The Diamond scores with a reasonable looking shot to the body. Burns doesn't seem bothered though.
Burns blocks a jab.
Ouch! a nice leg kick from Burns, right into the meat.
The Diamond throws an uppercut from half a mile away. Burns sees it coming and avoids it easily.
The Diamond thuds a left hand into Burns's body.
Burns uses good footwork to avoid the strikes from The Diamond.
Burns avoids the body shot from The Diamond.
Burns bobs and weaves well there to avoid the strikes.
Burns darts in and clinches The Diamond up against the cage.
Good anti-grappling being displayed by Burns as The Diamond tries to tie him up.
Burns tries to work over The Diamond's body with a swooping hook but it only glances the target.
Burns keeps control of The Diamond as he tries to wriggle out of the double underhooks.
Burns takes a big intake of breath there - he's definitely tired.
The Diamond escapes the clinch and we're back to striking.
Burns rushes The Diamond and pushes him back against the cage in a clinch.
Burns lands a body punch - he's looking to wear down The Diamond.
Burns is trying to slow down the pace in the clinch, to catch his breath.
Burns seems frustrated at his inability to get double underhooks.
That's one minute gone in the round.
A short body shot lands from Burns as the two fighters clinch.
Burns misses with a body punch.
Burns decides to pull guard.
Burns manages to land a sweep and now he's in mount on top!
The Diamond trying desperately to get to his feet.
Burns has his opponent pinned against the cage, landing some nasty ground and pound that is really making a bit of a mess out of The Diamond's face.
Burns with good strikes from the mount here!
The Diamond is squirming around, avoiding Burns's attempts to control the action.
The Diamond wants to get back to his feet.
That's two minutes gone in the round.
Burns working for a submission but The Diamond is keeping him at bay.
The Diamond tries to buck Burns off but he can't manage it.
Burns trying to control but he's not successful this time.
Burns is thinking about an arm triangle here, looking to tighten it up before moving to side control. The Diamond can see it coming though and defends well with a couple of strikes to the head and some good arm positioning.
Burns looking to ground and pound but The Diamond is blocking nicely.
Burns thowing shots but they're missing.

The Diamond bucks up and throws Burns to the side - he's got back to his feet. Great escape!
That's three minutes gone in the round.
The Diamond throws an uppercut from half a mile away. Burns sees it coming and avoids it easily.
Burns ducks under a wild hook from The Diamond.
This fight brought to you by 5M nutrition - it's mmmmm tasty. Nice jab by The Diamond.
Burns pushes The Diamond up against the cage in a clinch.
Burns manages to get underhooks and slows down the pace for a moment.
The Diamond is trying to break free.
The Diamond pushes off and circles away, back to the middle of the mat.
Burns slips a jab and a cross from The Diamond.
Burns has The Diamond up against the cage in a clinch.
Burns is trying to slow down the pace in the clinch, to catch his breath.
The Diamond is looking to control Burns's arms but Burns gets an underhook and turns him. Now The Diamond has his back to the cage.
The Diamond wants to break free. God knows he wants to breaaaak freeee.
Burns is trying to maintain a safe position but The Diamond gets an underhook and turns Burns into the cage.
A right hand to the body from The Diamond.
That's four minutes gone in the round.
The Diamond breaks from the clinch.
Burns tries to score with a low kick but The Diamond moves his leg out of the way.
Burns ducks under an overhand right and circles away with a smile on his face.
The Diamond throws an overhand right that lands on Burns's shoulder, as Burns tries to avoid the shot.
The Diamond looks to score with a jab to the body but Burns is just out of range.
Burns ducks under a wild hook from The Diamond.
Burns shoots in looking for a single leg takedown. The Diamond is trying to defend but Burns finishes it well and ends up in half guard. Let's see if he can advance position further.
The Diamond tries to kick Burns off but Burns keeps his base steady and stays in half guard.
Burns working over The Diamond with some ground and pound. The Diamond looks like he wants out of this position, which is understandable.
Burns is looking for a kimura. It's going to be difficult to finish that from half guard though and The Diamond defends it well.
The Diamond avoiding damage under a succession of punches from Burns.
And thats the end of the round the fighters go back to their corners.
Johny Burns really dominated that round.
The minute break is over - no more time for sponges and pep talks - back to the action!

Burns blocks a jab.
A big right from The Diamond misses.
Burns moves out of range as The Diamond strikes.
The Diamond is hobbling a little on that front leg after taking quite a few leg kicks so far in this fight.
Burns shoots in with a lovely double leg takedown. The Diamond manages to land in full guard to minimise the damage.
The Diamond is trying to stand up but he's not managed so far.
Burns is sitting in guard, working some ground and pound.
The Diamond knows he needs to get back to his feet asap. He's simply no match for Burns on the ground.
The Diamond has butterfly guard. He's looking to stand up here. He pushes Burns off him and springs to his feet nicely. The crowd applauds.
The Diamond jabs away that one connects to the head of his opponent.
The Diamond throws a lazy right hand but Burns sees it coming a mile off and sidesteps it easily.
A slow jab from The Diamond misses its intended target.
The Diamond lands three nice shots there - that looked like it hurt!
The Diamond throws the left hand but Burns avoids the punch easily.
The Diamond waving his hands out in front of him, looking to distract Burns.
It's got to the stage where if one of these guys blows hard enough, the other might fall over.
That's one minute gone in the round.
The Diamond keeps his opponent at a distance with a nice jab.
Burns gets cracked there but stands up to it.
Burns keeping a good distance there, avoiding the body shot.
Burns closes the distance and takes a jab right on the nose as he does so.
Burns showing good head movement there, avoiding the strikes from The Diamond.
The Diamond throws a lazy right hand but Burns sees it coming a mile off and sidesteps it easily.
The Diamond just misses with a punch to the body.
The Diamond looks to score with a jab to the body but Burns is just out of range.
Burns scores a takedown into full mount!
The Diamond on his back here. We all know that wrestlers don't like being on their back so let's see if The Diamond tries to get out of the position.
Burns lands an elbow that was bordering on illegal but the referee lets it go with a warning.
The Diamond wants to try and get back to his feet.
Burns fakes a shot to the body and cracks his opponent in the head. Nice ground and pound there!
Burns scoring with some good ground and pound from mount here. Will he manage to finish The Diamond?
That's two minutes gone in the round.
Burns working for a submission but The Diamond is keeping him at bay.
The Diamond wants to get back to his feet.
Burns is going olschool here, as he tries to force The Diamond to tap using a forearm choke. This isn't 1993 though, so The Diamond shrugs it off.
Wooooo! Give it up for these two warriors! They are putting on a show!
The Diamond is really trying hard to get back to his feet.
Burns scores with a couple of good head shots there.
The Diamond wants to use the cage to get back to his feet here.
Burns postures up and cracks his opponent a couple of times before moving back into close ground control. The Diamond looks a forlorn figure.
That's three minutes gone in the round.
Burns looking to finish The Diamond with some ground and pound. This is bad for The Diamond!
The Diamond in a bad spot here, taking shots to the head.
Burns with a couple of short strikes.
Burns looking to finish The Diamond with some ground and pound. This is bad for The Diamond!
The Diamond's corner are shouting for him to stand up but that's bad cornering - how is he meant to stand up when he's mounted? He should be looking to improve his position on the ground before trying to stand back up.
Burns looks like he's working for a submission but he's not found anything just yet.
Burns sends his fist crashing into the mat - the crowd let out a collective ooooooh. Let's hope he's not broken it!
The Diamond is bucking up trying to escape but Burns cracks him with another couple of good strikes.
The Diamond wants to use the cage to get back to his feet here.
That's four minutes gone in the round.
Burns punishing his opponent with strikes.
Burns with good strikes from the mount here!
Burns can't quite control the action as he would like just now, as The Diamond is looking to escape.
The Diamond wants to get back to his feet.
Johny Burns has got the better of the ground game so far.
Burns lands with some strikes.
The crowd applaud the fighters efforts here as the round comes to an end.
The Diamond wants to use the cage to get back to his feet here.
Burns with good strikes from the mount here!
And thats the end of the round the fighters go back to their corners.
Johny Burns dominated that fourth round.
Well, the break between rounds is over. Let's get back to the scrappin! And we move into the final round!

The Diamond looks to score with a combo but nothing lands.
The Diamond tries to land with a swinging hook to the body but Burns was well out of range. Poor timing from The Diamond.
Burns scores with a push kick.
The Diamond throws a shot from downtown. Burns moves away and avoids it.
Burns thuds a mid kick into his opponent's body. That will wear on The Diamond if he has to take too many more of those.
Burns thumps The Diamond with a low kick.
Burns scoring well with a low kick there.
Burns takes one on the button.
The Diamond thows a left - swing and a miss!
Burns moves away from the strike by The Diamond.
A solid leg kick lands there for Burns.
The Diamond gets taken down but at least he's managed to land in guard.
The Diamond is looking to get back to his feet but can't, whilst Burns is controlling him.
Both of our modern day gladiators look out of it here - an gruelling 5 rounds of action taking it's toll on them, no doubt.
That's one minute gone in the round.
Burns working some strikes from top position.
Burns advances position into side control!
Burns tries for a kimura but The Diamond is defending well.
Burns is trying to land an Americana. He has the arm isolated but The Diamond is keeping cool and he's avoided the danger for now.
Burns working hard here to secure a kimura but he's not really in the right position for it.
The Diamond is trying to escape and get back to his feet.
That's two minutes gone in the round.
Burns lands an elbow.
The Diamond is trying to stand back up. He's worked his way up against the cage but Burns has just dragged him back down to the mat.
The Diamond is working to avoid the ground and pound but Burns connects with a decent elbow.
The Diamond wants to get back to his feet.
Burns works a knee to the body and follows up with a nice elbow to the head.
Burns lands some shots froms side control.
The Diamond wants to get back to his feet but Burns drags him back down.
The Diamond tries to get back to his feet but has found himself mounted instead. Damn, that's gotta suck.
The referee warns The Diamond that he has to improve his position here as he takes two more clean shots to the head.
Johny Burns is fighting for a decision here - he's started to take the cautious approach.
That's three minutes gone in the round.
Burns controlling from the full mount.
Burns scoring with some good ground and pound from mount here. Will he manage to finish The Diamond?
The Diamond is trying to stand up.
Burns content just to control the position here.
The Diamond is bucking up trying to escape but Burns cracks him with another couple of good strikes.
Burns controlling from mount.
Burns breaks from The Diamond's wrist control and lands an elbow.
Burns unloading with bombs!
That's four minutes gone in the round.
Burns controlling from mount.
The Diamond is looking to get back to his feet - it's going to be hard from this position.
Burns tries to control but The Diamond wriggling away.
Burns takes a little breather and maintains the position. The referee will be looking for him to stay active from such a dominant position though.
You get the feeling that The Diamond really doesn't like being in this position too much.
The Diamond is squirming around, avoiding Burns's attempts to control the action.
Burns controlling his opponent.
The Diamond is not a happy chappy
he wants out of there.
And that's the end of the fight!
Johny Burns comfortably won the final round on my scorecard.
I think Burns has won this one but let's see whether the judges agree with me. Over to the ring announcer for the scorecards.
Ladies and gentlemen, after 5 rounds of action, we go to the scorecards for a decision.
Judge Frank Antenori scores the fight 45:49
Judge Jack Bonds scores the fight 45:49
Judge Percy O'Donnell scores the fight 45:49
In favor of your winner, by unanimous decision... Johny Burns!
Johny Burns is the new welterweight champion!
|
|
|
|
|
|
|
|
|
|
|
|
|
|
|
|
|
|
|
|
|
|
|
| S |
C
A |
G |
S |
C
B |
G |
|
S |
C |
G |
|
energy
A | B |
|
hype
A | B |
|
pop
A | B |
|
mgr
A | B |
|
FIGHT
RATING
100% |
|
|
|
|
|
|
