|
|
PBP Commentary |
Coming up we have a featherweight MMA rules bout between Keiji Hashimoto (ranked 0 p4p, 0 weight class) and Smarky Malarkey (ranked 0 p4p, 0 weight class). Hashimoto comes to the cage accompanied by Chopin's Funeral March in B flat minor. The crowd seem to be enjoying Malarkey's choice of entrance music: LL Cool J -- Momma said knock you out.. Over to our ring announcer for the fighter introductions!
 |
|
 |
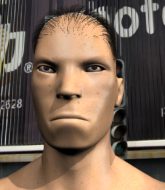
| 172 cm
23
151 lbs
9 - 5 - 1 |
|
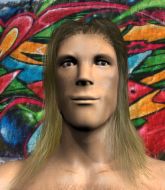
178 cm
23
150 lbs
6 - 3 - 0 |
BJJ Brown Belt
Basic striking
KO power |
|
Powerful takedowns
Decent boxing
Powerful |
|
| |
|
Ladies and gentlemen. This fight is 3 rounds, in the featherweight division.
Introducing the fighter to my left, fighting out of the red corner.
With a record of
9 - 5 - 1, fighting out of Rio de Janeiro, Keiji Hashimoto!
And introducing the fighter to my right, fighting out of the blue corner.
With a record of
6 - 3 - 0, fighting out of Rio de Janeiro, Smarky Malarkey!
The judges for this bout are Mauricio Rocha, Seu Braga and Felipe Paraventi.

The bell rings for round one and we are underway!
Malarkey stuns Hashimoto with a nice body shot, before stepping back out of range.
Malarkey throws a series of punches but Hashimoto avoids them all with ease.
Malarkey looks to score with a combo but nothing lands.
Hashimoto looks for a takedown but Malarkey sprawls well.
Malarkey staying out of range there.
Hashimoto misses with a body punch
letting Malarkey counter with a right hand.
Hashimoto throws a monster uppercut resembling something out of street fighter but it doesn't land.
Malarkey staying out of range there.
Hashimoto shoots in for a takedown. "I don't think so" says Malarkey as he avoids it easily.
Hashimoto loads up on a big right hand but Malarkey slips the punch.
Malarkey scores with a nice looking left hook and follows it up with an uppercut!
Malarkey looks to score with a jab to the body but Hashimoto is just out of range.
Hashimoto attempts a leg kick but it's missed by a good margin.
Malarkey cracks a nice hook into Hashimoto's ribs.
Malarkey misses with a body shot.
Malarkey uses some good footwork to avoid the body shot by Hashimoto.
Hashimoto wants to slow Malarkey down by chopping away at his legs.
Malarkey fakes high and swings low for a body shot but Hashimoto manages to avoid it.
Malarkey throws a hook to the side of Hashimoto's head but Hashimoto sees it coming and ducks under it beautifully.
Malarkey walks straight into a jab right on the nose. That one stung - he's blinking and trying to clear his head.

That's one minute gone in the round.
Malarkey just misses with a punch to the body.
Hashimoto changes levels and scores with a jab to the body.
Malarkey has his hands up protecting his head but a hook from Hashimoto finds it's way round the side to connect with Malarkey's head.
A jab from Hashimoto misses.
Hashimoto with a lazy takedown attempt
and Malarkey counters with a straight right hand.
That's three failed takedown attempts in the round for Keiji Hashimoto. That's going to take a lot out of him.
Malarkey uses good footwork to get in and out and land a nice right hand before Hashimoto has time to react.
Malarkey avoids a low kick by using good footwork.
Hashimoto gets cracked there but stands up to it.
Malarkey fakes high and swings low for a body shot but Hashimoto manages to avoid it.
Hashimoto throws an uppercut from half a mile away. Malarkey sees it coming and avoids it easily.
Hashimoto tries to land with a swinging hook to the body but Malarkey was well out of range. Poor timing from Hashimoto.
Good exchange - Hashimoto coming out on top.
Malarkey lands with a right hand.
Hashimoto shoots in for a takedown. "Ole!" shouts Malarkey as he jumps to the side.
Malarkey bobs and weaves well there to avoid the strikes.
Hashimoto misses with a jab, cross combination.
Hashimoto avoids the body shot from Malarkey.

That's two minutes gone in the round.
Malarkey bobs and weaves well there to avoid the strikes.
Malarkey throws a predictable looking body shot
and Hashimoto counters with a stiff right hand.
The fighters circling - Hashimoto throws out the jab but it was never going to land.
Malarkey uses good footwork to avoid the strikes from Hashimoto.
Malarkey keeping a good distance there, avoiding the body shot.
Malarkey cracks Hashimoto with an open hand slap.
Malarkey with a body punch. A glancing blow.
Malarkey misses with a telegraphed body shot
and Hashimoto counters with a nice low kick that buckles Malarkey's knee momentarily.
Hashimoto throws a hard body shot but it just misses.
The fighters circling - Hashimoto throws out the jab but it was never going to land.
Malarkey throws a hook but Hashimoto blocks it.
Good standup being displayed there by Hashimoto as he connects with a hook.
Fantastic stuff here - a very entertaining period of action, which has drawn cheers from the crowd.
Malarkey scores with a nice one two combo and darts back out of range to avoid anything coming in the opposite direction.
Malarkey lands a head shot.
Malarkey lands a nice hook to Hashimoto's body. Hashimoto takes it in his stride and looks to land his own strikes.
Malarkey fakes and then throws a beautiful body shot. Hashimoto looks a bit winded and takes a step backwards to take a breath.
Hashimoto misses with a jab and misses with a cross straight after too.
Malarkey lands three nice shots there - that looked like it hurt!

That's three minutes gone in the round.
Nice defenses there by Hashimoto.
Malarkey lands a straight punch to the body, keeping Hashimoto at a distance.
A combination from Malarkey does no damage.
Hashimoto takes a jab right on the nose. That must have hurt but he shrugs his shoulders and looks to return the favor.
Malarkey is landing a lot of head punches in this opening round!Hashimoto had better start moving his head a bit unless he wants his face to turn into pâté.
Malarkey lands a nice looking body shot.
Malarkey misses with a body shot.
Malarkey gets cracked there but stands up to it.
Hashimoto bobs and weaves and throws out a fast jab that snaps Malarkey's head backwards.
Hashimoto shapes like he's going to throw a leg kick but settles back down.
Hashimoto missing with a left hand there. Malarkey was out of range so wasted energy throwing that one.
Hashimoto misses with a hook to the body
and Malarkey counters with a straight right hand.

Malarkey shoots in and bounces Hashimoto off the cage to secure the takedown into guard.

Hashimoto is looking for a triangle here but Malarkey uses the submission attempt to pass into side control.
Malarkey working away diligently from side control. Landing strikes effectively there - that will score him some points on the judges scorecards.

That's four minutes gone in the round.
Malarkey working the ground and pound.
The fans in attendance giving it up for the two fighters, who have really let it all hang out in the last minute or so!
Hashimoto is looking to reverse the position.
Hashimoto is working hard here to advance position.
Malarkey lands a knee to the body and follows it up with some ground and pound to the head. That will wear Hashimoto down.
Malarkey looks up at the clock and then as Hashimoto takes his cue and looks up at the clock too, Malarkey smacks him right in the chops with a big elbow! How rude!
Hashimoto tries to get back to half guard but can't.
Malarkey lands a nice forearm strike.
Hashimoto parries the strikes from Malarkey easily there. Malarkey is wary of posturing up too much because it might enable Hashimoto to escape.
As the round comes to an end the crowd are showing their appreciation for a great round of action.
Malarkey throws a knee to the body but it doesn't do much damage.
Hashimoto takes a couple of big shots there - the referee warns him that he has to defend himself better.
Malarkey scores with a couple of nice shots to the head there. The referee takes a look at Hashimoto to see if he's OK.
Malarkey works a knee to the body and follows up with a nice elbow to the head.
And thats the end of the round the fighters go back to their corners.
Smarky Malarkey dominated that round.
The minute break is over - no more time for sponges and pep talks - back to the action!

Hashimoto lands a powerful looking uppercut that connected with his opponent's jaw.
Danga de danga de dang - Hashimoto scores with a four punch combination!
Hashimoto swings and misses with a shot to the body
and Malarkey counters with a straight punch to the midsection.
Malarkey avoids a lazy jab quite easily.
Malarkey ducks under a wild hook from Hashimoto.
Malarkey staying out of range there.
Malarkey scores with a hook to the body. Hashimoto takes a step back and tries to catch his breath.
Malarkey connects with a jab.
Smarky Malarkey seems to be getting the better of the standup.
Malarkey bobs and weaves and unloads with a good uppercut.
Hashimoto throws the left hand but Malarkey avoids the punch easily.
Hashimoto lands a head shot.
Malarkey throws a sloppy body shot
and Hashimoto counters with a nice body shot.
Malarkey throws a hard body shot but it just misses.
Hashimoto thows a left - swing and a miss!
Malarkey keeping a good distance there, avoiding the body shot.
Hashimoto shoots in for a takedown - he's clinched up with Malarkey but Malarkey pushes him off and we're back to square one.
Malarkey connects with a lovely right hand, straight down the pipe.
That's one minute gone in the round.
Hashimoto throws a right and a left that Malarkey avoids nicely.
Malarkey digs a good body shot into Hashimoto's ribs.
Hashimoto throws a looping overhand right but Malarkey ducks down to avoid it.
Malarkey works Hashimoto's body with a nice hook.
Malarkey scores with a hook.
Hashimoto looks for a takedown. He's got it. We're now in half guard.
Malarkey wants to improve his position but Hashimoto is controlling well.
Hashimoto wants to lay and pray for a moment but Malarkey keeps working.
Malarkey trying to control but Hashimoto postures up.
Malarkey wants to get back to full guard.
That's two minutes gone in the round.
Hashimoto is keen to just control but Malarkey is a slippery customer.
Malarkey keeps control of the position for the meantime.

It looks like we're going to have a standup here. Neither fighter is doing enough on the ground.
Malarkey with a jab.
Malarkey connects with a looping left hand that seems like it dazed Hashimoto momentarily.
Hashimoto takes a shot to the nose. Hopefully that hasn't broken it.
Hashimoto lunges at Malarkey with a hook that half lands and is half blocked by Malarkey's hand.
Hashimoto connects with a slap. Keep your fist closed son.
Malarkey lands a body shot.
Hashimoto defending well as Malarkey loads up on a big left hand.
Malarkey throws a body punch but Hashimoto moves out of range.
Hashimoto tries to land with a swinging hook to the body but Malarkey was well out of range. Poor timing from Hashimoto.
That's three minutes gone in the round.
Hashimoto misses with a shot to the body
and Malarkey counters with a lovely shot to the body.
Hashimoto keeping a good distance there, avoiding the body shot.
Hashimoto has his takedown stuffed
and Malarkey connects with a straight left hand counter down the middle.
Malarkey throws a good cross that connects.
Malarkey swings for the body but Hashimoto moves out of range.
Hashimoto uses some good footwork to avoid the body shot by Malarkey.
Malarkey displays good takedown defense there as he swats away a double leg from Hashimoto.
That's three failed takedown attempts in the round for Keiji Hashimoto. That's going to take a lot out of him.
Hashimoto gets his takedown attempt stuffed easily
and Malarkey counters with a stiff right hand.
Smarky Malarkey is looking to keep the fight on the feet at all costs.
Hashimoto fakes an overhand right and shoots for a takedown. Malarkey sprawls well initially but Hashimoto persists and gets the takedown into half guard.
Malarkey trying to hold on to Hashimoto's head to control him but Hashimoto postures up.
Hashimoto is looking for a kimura. It's going to be difficult to finish that from half guard though and Malarkey defends it well.
The fighters are pressed up against the cage, both looking to find a bit of space to work.
Malarkey trying to control but Hashimoto postures up.
That's four minutes gone in the round.
Hashimoto is pressing down on Malarkey's thigh, looking to free his foot. Malarkey is holding on for now.
Malarkey tries to roll over but Hashimoto keeps him under control.
Malarkey is working for an escape here. He's hooked one of Hashimoto's legs and he's managed to sneak out and take Hashimoto's back!
Hashimoto rolls, trying to escape but Malarkey keeps control of the position.
Malarkey scores with punches to the body.
Malarkey trying to control momentarily.
The crowd applaud the fighters efforts here as the round comes to an end.
Hashimoto rolls and manages to get back to half guard. Nicely done.
Hashimoto avoiding damage under a succession of punches from Malarkey.
And thats the end of the round the fighters go back to their corners.
A close second round but Smarky Malarkey will probably get the nod - 10:9.
The fighters' corners scream their final instructions, as the referee calls time. Here we go, back to the action! This is the final round!

Malarkey throws an overhand right that lands on Hashimoto's shoulder, as Hashimoto tries to avoid the shot.
Malarkey is throwing a lot of body shots here, looking to wear down Hashimoto rather than just go for the knockout.
Malarkey keeping a good distance there, avoiding the body shot.
Hashimoto looks like he's developed a pretty tasty lump over his left eye. He'll need to avoid taking much more damage to that.
Hashimoto throws an uppercut from half a mile away. Malarkey sees it coming and avoids it easily.
A jab from Malarkey misses.
Malarkey's corner calls for a 1-2. Malarkey obliges with the 1 part as he scores the single shot and moves back out of range.
Hashimoto looks to land a left hand but Malarkey moved out of range nicely.
Hashimoto throws a body punch but Malarkey moves out of range.
Hashimoto on the wrong end of a vicious looking body shot.
Hashimoto feints and then dives in with a takedown. That was a long way out but the feint bought him enough time to close the distance and complete the takedown. Now we'll play guard for a bit and see who can get the better of that position.
Hashimoto sneaks a leg through and gets to half guard. That was like a knife through butter how easily he passed Malarkey's guard.
Hashimoto content to control rather than advance.
Malarkey manages to get to full guard.
Malarkey tries to land a sweep but no joy.
That's one minute gone in the round.
Malarkey is persisting with the attempt to improve his position.
Malarkey keeping moving, preventing Hashimoto from controlling successfully.
Hashimoto throwing strikes but missing.
Malarkey wants to sweep but no luck.
Malarkey keeping full guard, as Hashimoto tries to pass.
The referee decides to stand the fighters back up.
The fighters circle momentarily. Malarkey darts into range and connects with a nice straight punch.
That's two minutes gone in the round.
Well. There's a bit of a lull in the action here and the crowd are starting to get restless.
Malarkey misses with a jab and misses with a cross straight after too.
Hashimoto changes levels and drives through with a really nice takedown into side control. Malarkey looks really pissed at himself for not defending that better.
Hashimoto taking a break here but Malarkey is having none of it and regains half guard.
The ref warns both fighters not to hold the cage as they work up against the meshing.
Hashimoto prevents Malarkey from improving his position.
Keiji Hashimoto has stepped it up - he knows he needs a finish here!
Hashimoto looking for a kimura but he'll have to free his other leg if he wants to finish that. Perhaps he's just using it as a distraction technique.
Hashimoto thows a huge punch but Malarkey dodges it nicely.
That's three minutes gone in the round.
Hashimoto throwing punches and elbows but they're not doing any damage.
Hashimoto is looking to take a break and control but Malarkey is keeping him honest, looking to work from the bottom.
Smarky Malarkey has got the better of the ground game so far.
Malarkey is looking for a sweep. Hashimoto is wise to his cunning plan and keeps the top position.
Malarkey is working for an escape here. He's hooked one of Hashimoto's legs and he's managed to sneak out and take Hashimoto's back!
Malarkey loading up with punches from the back mount - how long can Hashimoto hold on?
Hashimoto wants to escape the position.
Malarkey throwing damaging strikes from the back! Hashimoto could be in trouble here!
Hashimoto manages to reverse the position and now he's in Malarkey's guard. Nice work there by Hashimoto.
Hashimoto slows down the pace of the fight, as he sits in guard.
Hashimoto looking to pass the guard.
That's four minutes gone in the round.
Hashimoto stopping the sweep attempt from Malarkey.
Malarkey keeping moving, preventing Hashimoto from controlling successfully.
Smarky Malarkey is fighting for a decision here - he's started to take the cautious approach.
Malarkey is trying to keep Hashimoto in close.
Hashimoto with a flurry of punches that miss.
Hashimoto throwing strikes but missing.
The referee decides to stand the fighters back up.
Hashimoto throws out a loose jab but Malarkey uses good head movement to avoid it.
Hashimoto lands a jab to Malarkey's midsection.
The fighters circling - Hashimoto throws out the jab but it was never going to land.
And that's the end of the fight!
That was a close round. You could make an argument for either fighter but I would give it to Keiji Hashimoto.
Well Malarkey has outworked and out performed his opponent in all aspects of the game today. He was simply too good and the decision should be no more than a formality. Over to the ring announcer for the scorecards.
Ladies and gentlemen, after 3 rounds of action, we go to the scorecards for a decision.
Judge Mauricio Rocha scores the fight 29:28
Judge Seu Braga scores the fight 28:29
Judge Felipe Paraventi scores the fight 29:28
In favor of your winner, by split decision... Keiji Hashimoto!
|
|
|
|
|
|
|
|
|
|
|
|
|
|
|
|
|
|
|
|
|
|
|
| S |
C
A |
G |
S |
C
B |
G |
|
S |
C |
G |
|
energy
A | B |
|
hype
A | B |
|
pop
A | B |
|
mgr
A | B |
|
FIGHT
RATING
79% |
|
|
|
|
|
|

