|
|
PBP Commentary |
Coming up we have a lightweight MMA rules bout between Angel Pain (ranked 0 p4p, 0 weight class) and Eddard Stark (ranked 0 p4p, 0 weight class). Pain comes into the arena with "Meet the Monster" Five Finger Death Punch blaring out of the sound system. Angel Pain had real problems making weight for this fight. After initially coming in at 157.4lbs, he had two hours to make the official fight weight. He made it but it will have taken a lot out of him to cut those extra few pounds. Angel Pain had a look across the cage there at his opponent. He definitely means business
 |
|
 |
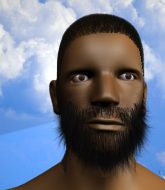
| 180 cm
24
165 lbs
4 - 7 - 0 |
|
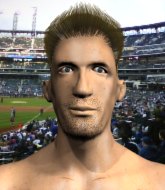
178 cm
18
165 lbs
0 - 1 - 0 |
BJJ Blue Belt
Basic striking
Good chin |
|
BJJ Blue Belt
Brawler
Tends to cut |
|
| |
|
Ladies and gentlemen. This fight is 3 rounds, in the lightweight division.
Introducing the fighter to my left, fighting out of the red corner.
With a record of
4 - 7 - 0, fighting out of St Petersburg, Angel Pain!
And introducing the fighter to my right, fighting out of the blue corner.
With a record of
0 - 1 - 0, fighting out of St Petersburg, Eddard Stark!
The judges for this bout are Fedor Mirinova, Vladimir Khabensky and Igor Prikhodko.

The bell rings for round one and we are underway!
Pain shoots in for a takedown. "Ole!" shouts Stark as he jumps to the side.

Stark shoots in for a takedown and gets it. Oh and he's advanced to full mount straight away.
A nice elbow there by Stark.
Pain flailing away with punches but nothing is landing.
Stark fakes a shot to the body and cracks his opponent in the head. Nice ground and pound there!
Pain is desperately trying to get back to half guard.
A nice elbow there by Stark.
Stark controlling his opponent.
Stark putting on the heat here with some good ground and pound!
Pain tries to lock up and control but Stark gives him a forearm to the face and pushes him away.
Stark has the superior BJJ but he's also working some ground strikes into his gameplan.
Stark controlling the position easily from mount.
Pain is squirming around, avoiding Stark's attempts to control the action.
Stark scoring with strikes but Pain is staying in there.

That's one minute gone in the round.
Pain tries to hold on but Stark postures up.
Pain is trying to escape the mount.
Pain is breathing heavily.
Stark lands a big elbow.
Stark avoids the attempt from Pain to control.
Stark lands with some strikes.

Stark looks like he's working for a submission but he's not found anything just yet.
The ref warns both fighters not to hold the cage as they work up against the meshing.
Stark pausing momentarily but resumes with a couple of decent strikes that do a bit of damage.
Pain is working to get back to half guard.
Stark controlling the pace for now.

That's two minutes gone in the round.
Stark lands a big elbow.
Stark is in the full mount, landing strikes.
Pain wants to control but Stark is having none of it.
The fighters are starting to get a bit slippery now, which will make submissions a bit more difficult.
Stark with the ground and pound from mount.
Stark landing shots from mount.
Stark working Pain over with strikes here.
Stark controlling from mount.
Pain keeping his composure momentarily, calmly looking to get back to half guard.

That's three minutes gone in the round.
Stark is still in mount, landing shots to his trapped opponent. Pain can't stay in a position like this for much longer.
Stark takes a little breather and maintains the position. The referee will be looking for him to stay active from such a dominant position though.
Stark punishing his opponent with strikes.
Pain is bucking up trying to escape but Stark cracks him with another couple of good strikes.
Pain wants to control but Stark is having none of it.
Stark lands with some vicious ground and pound - can Pain hang on?
Pain is bucking up trying to escape but Stark cracks him with another couple of good strikes.
Pain tries to reverse the position but Stark maintains control.
Stark wants to control the pace but Pain is squirming around nicely.

That's four minutes gone in the round.
Pain is bucking up trying to escape but Stark cracks him with another couple of good strikes.
Stark tries to control but Pain wriggling away.
Stark is in the full mount, landing strikes.
Stark is in full mount, looking to secure a guillotine but Pain is surviving well by controlling Stark's body position as best he can.
Stark lands a big shot there that rocks Pain but he's holding on and managing to survive for now.
The crowd applaud the fighters efforts here as the round comes to an end.
Pain is working to get back to half guard.
Stark tries to control but Pain wriggling away.
And thats the end of the round the fighters go back to their corners.
Eddard Stark dominated that round.
OK. That's time! The bell goes and we're back to the action.

Pain throws a head kick that misses and slips in the process. He scrambles back to his feet and the fighters circle.
Pain tries to close the distance and clinch up but Stark swats him away and circles back towards the center.
Stark shoots for a double leg takedown but Pain sprawls well. He's pushed Stark's face into the mat and manages to get back to his feet relatively easily.
Stark misses with a takedown attempt
and Pain counters with a nice single leg takedown and he's in Stark's guard now.
Pain stopping the sweep attempt from Stark.
Pain slips nicely into half guard.
Pain sitting and controlling from the half guard.
Eddard Stark has got the better of the ground game so far.
Pain thows a wild elbow that connects with the canvas.
Stark is looking to control Pain's leg but it's slowly edging free. Can Stark avoid being mounted?
Both fighters are absolutely exhausted here.
Pain is keen to just control but Stark is a slippery customer.
That's one minute gone in the round.
Pain throwing shots but they're hitting the canvas more than the man.
Stark moves his hips nicely and gets into full guard.
Pain trying to control the position from guard on top but Stark is wriggling around, looking for whatever he can.
Stark has a closed guard, preventing Pain from standing up.
Pain preventing the sweep.

The referee has ruled that neither fighter is active enough on the ground and has stood them back up.
Stark feints and then dives in with a takedown. That was a long way out but the feint bought him enough time to close the distance and complete the takedown. Now we'll play guard for a bit and see who can get the better of that position.
Stark is intent on slowing down the pace of the fight, simply looking to control.
Pain is working from a closed guard but he's struggling to control his opponent.
Stark is just sitting in guard, looking to avoid any submissions.
That's two minutes gone in the round.
Pain working a defensive guard here.
Pain lands a beautiful switch and he's in full mount! That could spell trouble for Stark!
Stark is desperately trying to improve his position but Pain has a good base and remains in mount.
Stark manages to regain half guard. Good work.
Stark is staying active underneath Pain, who seems content to just control the action from this position.
Stark is pressing down on Pain's left leg trying to get back to full guard. He's managed it.
Pain trying to control but Stark is working from the bottom.
That's three minutes gone in the round.
Pain preventing the sweep.
Stark keeping moving, preventing Pain from controlling successfully.
Pain looking to pass the guard.
Stark is pulling down on Pain's head. It's preventing any offense from Pain, at least for the moment.
Pain wants to control from the top but Stark keeps moving.
Pain trying to pass the guard but can't manage it just yet.
That's four minutes gone in the round.
Neither fighter has done anything of merit for a good minute or two here and the crowd are not happy about it.
Neither fighter is doing enough for the referee's liking and he's decided to stand them back up.
Pain misses with a takedown
and Stark counters with a good right hand that lands right on the jaw.
Angel Pain seems to be the more aggressive standup fighter in this bout.
Stark feints and as Pain raises his hands in defense, Stark changes levels and drives through with a takedown into guard.
Pain is trying to keep Stark in close.
The fighters are pressed up against the cage, both looking to find a bit of space to work.
Stark lands a nice shot whilst sitting in his opponent's guard.
Stark slows down the pace of the fight, as he sits in guard.
Pain pulls Stark in close to prevent any damage.
Stark prevents Pain from getting back to his feet.
Stark controlling from the guard. I say controlling but really, he's stalling.
Stark postures up and lands a big shot to Pain's brow.
And thats the end of the round the fighters go back to their corners.
Eddard Stark showed his class in that round. I'd imagine he'll take it on all the scorecards.
The fighters get back to their feet, the hooter sounds and we're back to the action! This is the final round!

Stark shoots in for a takedown and gets it.
Stark controlling the action here.
Stark has hold of the far side arm. He's working for the Kimura, can Pain defend it? Stark steps over the head and cranks it - Pain is tapping out! That was textbook stuff right there - nice submission victory for Stark!
Ladies and gentlemen, after 0:22 of round 3, we have a winner by way of Submission (Kimura). Eddard Stark!
|
|
|
|
|
|
|
|
|
|
|
|
|
|
|
|
|
|
|
|
|
|
|
| S |
C
A |
G |
S |
C
B |
G |
|
S |
C |
G |
|
energy
A | B |
|
hype
A | B |
|
pop
A | B |
|
mgr
A | B |
|
FIGHT
RATING
100% |
|
|
|
|
|
|
