|
|
PBP Commentary |
Coming up we have a welterweight MMA rules bout between Selly Sel (ranked 0 p4p, 0 weight class) and Koda Saunders (ranked 0 p4p, 0 weight class). Selly Sel has the edge in experience - let's see if he can make that count tonight.
 |
|
 |
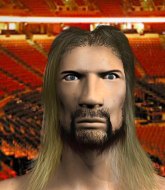
| 179 cm
18
167 lbs
1 - 1 - 0 |
|
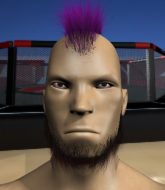
180 cm
18
167 lbs
0 - 0 - 0 |
BJJ Blue Belt
Solid boxing
Intelligent |
|
Dangerous GnP
Brawler
Tends to cut |
|
| |
|
Ladies and gentlemen. This fight is 3 rounds, in the welterweight division.
Introducing the fighter to my left, fighting out of the red corner.
With a record of
1 - 1 - 0, fighting out of Sydney, Selly Sel!
And introducing the fighter to my right, fighting out of the blue corner.
With a record of
0 - 0 - 0, fighting out of Sydney, Koda Saunders!
The judges for this bout are Hugh Johnson, John Mangel and Bruno Hogan.

The bell rings for round one and we are underway!
Sel throws a looping left and ducks down for a takedown. He's got his arms around Saunders's waist but Saunders gets an underhook and avoids the takedown by throwing Sel off to one side.
Sel pulls out of a head kick attempt.
Saunders throws a push kick but Sel slaps the foot to one side.
Sel lands a jab. Then a cross. Then finally a nice hook to the body. Good work there by Sel.

It looks like Koda Saunders has been cut.
Sel circles away from the clinch attempt.
Sel throws a wild combination but nothing lands.
Sel's corner calls for a 1-2. Sel obliges with the 1 part as he scores the single shot and moves back out of range.
A good leg kick by Saunders.
Sel fakes high and shoots in for a takedown but Saunders avoids it really well and circles away.
Saunders fails with a takedown attempt from distance.

Saunders fakes with an overhand right and moves in to clinch with Sel, pushing him back against the cage.
Saunders is trying to drag Sel to the mat but Sel just about manages to keep his footing. He used the cage to his advantage there.

Saunders escapes the clinch and we're back to striking.
Saunders tries to clinch up but Sel circles away and keeps his distance.
A punch combination from Sel misses.

That's one minute gone in the round.
Sel attempts a leg kick but it's missed by a good margin.
Sel takes a step back and watches a body kick go sailing past his mid section.
Sel fakes with the hands and throws a leg kick but Saunders is out of range.
Sel tests Saunders's chin there with a solid looking shot.
Sel with a body punch. A glancing blow.
Sel defends well against a solid takedown attempt from Saunders.
Selly Sel has stuffed three takedown attempts in the round now. That's going to take a lot out of Koda Saunders.
Sel scores with a crisp jab that stopped Saunders in his tracks.
Saunders throws a series of punches but Sel moves out of range.
Sel throws a right and a left that Saunders avoids nicely.
Sel listening to his corner there, landing a nice uppercut.
Selly Sel seems to be the more aggressive standup fighter in this bout.
Saunders circles away from the clinch attempt
and Saunders counters with a big head kick but Sel shrugs it off.
Sel swinging wilding here.
Some wild striking there from Sel.

That's two minutes gone in the round.
Sel looks frustrated there after his takedown attempt is stuffed easily.
Sel is looking to clinch.
Saunders fails with an attempt to clinch.
Sel slaps away a takedown attempt from Saunders, before circling back to the center of the mat.
Sel connects with a lovely jab that went straight through the gap between Saunders's hands.
Sel slaps away a takedown attempt from Saunders, before circling back to the center of the mat.
Nice body punch from Sel.
Saunders looks gassed!
Sel stuffs the takedown attempt from Saunders. Saunders gets slowly back to his feet.
This is a great period of action - very entertaining stuff!
Sel lands a jab to Saunders's midsection.
Sel lands with an uppercut that bounces Saunders off the cage and back into rage.

That's three minutes gone in the round.
Sel throws a sloppy head kick and Saunders moves out of range easily.
Sel lands with a two punch combination before moving back out of range.
Sel scores with a shot to the body.
Saunders has his takedown stuffed
and Sel makes him pay by landing a nice hook to the body before moving out of range.
Sel throws a wild body kick that Saunders sees coming a mile off.
Sel wings a very wild body shot but it does the job and lands to the midsection.
Sel lands an overhand right.
Saunders moves his head to the side to avoid a jab but walks straight into a cross.
Sel lands a jab-cross combination.
Sel digs a good hook to Saunders's body.
Sel misses with a jab and misses with a cross straight after too.
Sel lands a vicious shot with the stealth of a sniper and the strength of a viper. Are vipers that strong? I can think of lots of things that are stronger than a viper - not many rhyme with sniper though.
Sel looking to land some kicks to the body here.

That's four minutes gone in the round.
Saunders avoids a kick to the body.
Saunders has his head slapped from side to side by a 3 punch combination. That must have hurt him.
Saunders is trying desperately to land a takedown but Sel is having absolutely none of it. This is turning into a bit of a nightmare for Saunders.
Fantastic stuff here - a very entertaining period of action, which has drawn cheers from the crowd.
Saunders shoots and misses
and Sel counters with a two punch combo.
Sel lands a slapping body shot.
Sel will have to do better than that with his takedown attempts.

Saunders shoots in and scores a nice double leg takedown into half guard.
Sel avoiding damage under a succession of punches from Saunders.
As the round comes to an end the crowd are showing their appreciation for a great round of action.
Sel is pressing down on Saunders's left leg trying to get back to full guard. He's managed it.
Saunders trying to control but Sel is working from the bottom.
And thats the end of the round the fighters go back to their corners.
Selly Sel dominated that round.
The cut man is working on Koda Saunders's cut.
The fighters get back to their feet, the hooter sounds and we're back to the action!

Sel smiles there as he lands a nice right hand right on the button.
Sel tries to land with a swinging hook to the body but Saunders was well out of range. Poor timing from Sel.
Selly Sel is looking to throw some combinations by the looks of things.
Sel leaves Saunders with his face pressed against the mat as he sprawls beautifully, defending against a solid takedown attempt.
Saunders tries for a takedown but Sel sees it coming a mile off and avoids it easily.
Sel lets the fists fly and connects with a left straight followed by a right hook.
Saunders seems to be squinting his left eye. Perhaps he got a poke in that previous exchange. Sel shows no mercy and swarms him with a barage of strikes! Saunders is backing up but Sel catches him with a final right hook that drops him! Saunders covers up and the referee steps in to end the fight! Sel Jumps to his feet and flashes his guns to the crowd. Oh yeah, baby! How'd you like them apples?!
Ladies and gentlemen, after 0:35 of round 2, we have a winner by way of TKO (Strikes). Selly Sel!
|
|
|
|
|
|
|
|
|
|
|
|
|
|
|
|
|
|
|
|
|
|
|
| S |
C
A |
G |
S |
C
B |
G |
|
S |
C |
G |
|
energy
A | B |
|
hype
A | B |
|
pop
A | B |
|
mgr
A | B |
|
FIGHT
RATING
100% |
|
|
|
|
|
|
