|
|
PBP Commentary |
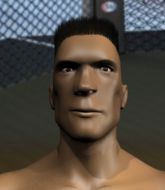
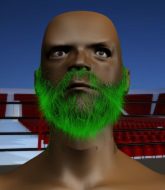
Coming up we have a middleweight MMA rules bout between Aruki Masura (ranked 0 p4p, 0 weight class) and Paul Ooka (ranked 0 p4p, 0 weight class). We have two fighters making their debuts here, so let's see who comes out of this one with their first professional victory.
 |
|
 |
| 181 cm
18
185 lbs
0 - 0 - 0 |
|
180 cm
22
185 lbs
0 - 0 - 0 |
BJJ Blue Belt
Brawler
Good chin |
|
BJJ Blue Belt
Brawler
Solid chin |
|
| |
|
Ladies and gentlemen. This fight is 3 rounds, in the middleweight division.
Introducing the fighter to my left, fighting out of the red corner.
With a record of
0 - 0 - 0, fighting out of Helsinki, Aruki Masura!
And introducing the fighter to my right, fighting out of the blue corner.
With a record of
0 - 0 - 0, fighting out of Helsinki, Paul Ooka!
The judges for this bout are Marco Blurström, Ben Zyskovitsi and Anni Minnemäki.

The bell rings for round one and we are underway!
Masura wants to clinch.
Ooka throws a right hand that Masura ducks under and follows up with a left that Masura also avoids with ease.
Masura takes a shot to the nose. Hopefully that hasn't broken it.
Masura shoots in looking for a double leg takedown. Ooka defends it nicely.
Ooka lands a powerful looking uppercut that connected with his opponent's jaw.
Masura tries to clinch but Ooka moves out of range.
Ooka swings away but doesn't land with a series of punches.
Masura dodges the punch combination from Ooka.
Masura tries to shoot in for a takedown. He's got hold of a leg but Ooka swivels and escapes.
We've had a slow start to the round here - hopefully the action picks up.
Masura throws a right hand that Ooka ducks under and follows up with a left that Ooka also avoids with ease.
Good shot there by Ooka.

Masura gets to the clinch - let's see what his plan is here.
Masura drops to a knee looking for a takedown but Ooka gets the underhooks and prevents it.
That's three failed takedown attempts in the round for Aruki Masura. That's going to take a lot out of him.
Masura looking for a takedown.

That's one minute gone in the round.
Masura keeps the fight in the clinch, despite Ooka's efforts to push away.
Ooka lands a right hand that snaps the head of Masura backwards.
Masura drops down looking for an ankle pick but Ooka pulls his leg out and moves away.
Ooka misses with a series of wild punches.
Nice takedown defense from Ooka. No joy for Masura on that attempt.
Masura has his hands up protecting his head but a hook from Ooka finds it's way round the side to connect with Masura's head.
Masura doesn't manage to clinch there - Ooka circles away.
Ooka connects with a lovely right hand, straight down the pipe.
Masura is on the wrong end of a nice combination from Ooka.
Ooka connects with a lovely jab that went straight through the gap between Masura's hands.
A lazy left from Ooka finds it's target.

That's two minutes gone in the round.
Masura on the wrong end of an overhand right that came out of nowhere.
Masura with poor footwork there. He got himself in a bit of a tangle, enabling Ooka to score with a decent uppercut.
Ooka with a body punch. A glancing blow.
Nice jab there from Ooka.
Ooka bobs and weaves and throws out a fast jab that snaps Masura's head backwards.

Masura shoots in and bounces Ooka off the cage to secure the takedown into guard.
Masura is breathing heavily.
Masura pressing down on his opponent's thigh, looking to pass guard. Ooka is keeping the position for now.
Ooka is working an open guard here, looking to improve his position. No doubt that will leave him open to counters but at least he's being more offensive.
Ooka throws a couple of shots from the bottom but they don't land.
Ooka wants to stand and escape but Masura is having none of it.
Masura wants to control from the top but Ooka keeps moving.

That's three minutes gone in the round.

Ooka has butterfly guard. He's looking to stand up here. He pushes Masura off him and springs to his feet nicely. The crowd applauds.
Ooka scores with a jab to the jaw of his opponent.
Ooka misses with a series of wild punches.
Ooka tries to bum rush Masura with a series of wild strikes but Masura uses good footwork to avoid the assault.
Masura blocks a jab.
Masura tried to score with a low kick but Ooka checks it.
Masura tries to clinch there but Ooka circles away.
Masura dodges the punch combination from Ooka.
Masura tries to close the distance and clinch up against the cage but Ooka paws at him with a jab and circles away.

That's four minutes gone in the round.
Neither fighter has done anything of merit for a good minute or two here and the crowd are not happy about it.
Masura bobs and weaves well there to avoid the strikes.
Paul Ooka seems to be the more aggressive standup fighter in this bout.
Masura closes the distance and clinches up with Ooka, looking for a takedown. Masura pushes Ooka against the cage but Ooka circles to the side and manages to break the clinch.
A combination from Ooka does no damage.
The fight stays on the outside here - Masura looks like he's thinking about clinching though.
Ooka keeps the fight on the outside.
Paul Ooka is looking to keep the fight on the feet at all costs.
Masura takes a shot right to the liver - Bas would have been proud of that punch.
Masura is looking to clinch but Ooka is avoiding it.
The fight moves into the clinch position.
Masura goes for a takedown in the clinch but Ooka prevents it.
Masura wants a takedown.
Ooka lands a body shot in the clinch.
Ooka has had enough of the clinch and is looking to separate.
And thats the end of the round the fighters go back to their corners.
Paul Ooka dominated that round.
That's time! Back to the action!

Ooka looks to score with a combo but nothing lands.
Masura dodges the punch combination from Ooka.
Ooka jabs Masura right on the nose. Masura blinks but takes it well.
Ooka lands a jab to the head.
Ooka might want to mix his strikes up a bit more. He's just going for head shots at the moment and that can become a bit predictable.
Masura gets his head snapped back by a nice shot there.
Ooka lands a jab followed by a nice looking cross.
Masura tries to clinch up.
We've had a slow start to the round here - hopefully the action picks up.
Masura tries to clinch but is not successful on this occasion.
Masura fails miserably with a takedown attempt.
A decent looking cross lands there for Ooka.
Masura takes a shot right to the liver - Bas would have been proud of that punch.
Both fighters are absolutely exhausted here.
That's one minute gone in the round.
A left lands for Ooka.
Masura slips under a jab.
Masura is looking to take this fight into the clinch.
Masura tries to clinch but is not successful on this occasion.
Ooka looks to score with a combo but nothing lands.
Masura gets the takedown into side control.
The fighters are pressed up against the cage, both looking to find a bit of space to work.
Ooka is trying to buck Masura off.
Ooka wants to control but Masura postures up.

Masura wants to work for a kimura but he's foiled early by Ooka, who protects the arm well.
Masura working hard here to secure a kimura but he's not really in the right position for it.
That's two minutes gone in the round.
Masura landing strikes.
Masura working away.
Masura looking for an arm triangle but it's way too loose to do anything.
Ooka manages to land a sweep and he's now on top! Lovely Jiu Jitsu!
That's three minutes gone in the round.
Masura makes some distance and scrambles quickly back to his feet. Nice work!
Masura uses good footwork to avoid the strikes from Ooka.
No luck for Masura with that takedown attempt.
Ooka takes a swing at Masura's ribcage but misses.
Ooka checks a leg kick.
Ooka lets the fists fly and connects with a left straight followed by a right hook.
Masura avoids a lazy jab quite easily.
Masura fails to land with the punch combination there - jab, cross, hook, miss, miss, miss.
Masura shoots in and drives through. Ooka sprawls well.
That's three failed takedown attempts in the round for Aruki Masura. That's going to take a lot out of him.
Ooka swinging wilding here.
Nice shot lands for Ooka.
That's four minutes gone in the round.
There's not a lot going on here and the crowd are letting the fighters know they're not willing to tolerate a lack of action.
Ooka blocks a leg kick.
Masura throws a left and a right that both miss
enabling Ooka to counter with a crisp jab.
Ooka connects with a slap. Keep your fist closed son.
Masura bobs and weaves well there to avoid the strikes.
Ooka misses with a series of wild punches.
Ooka keeps the fight on the outside.
Masura misses with a takedown attempt. He shot from a bit too far out.
Decent striking displayed by Ooka there.
The crowd thankful this round is nearly over.
Ooka swings wildly with a couple of big hooks
and Masura counters with a nice double leg into side control. Ooka won't be happy with that.
Masura tries to advance to mount but can't.
And thats the end of the round the fighters go back to their corners.
Aruki Masura dominated that second round.
That's time! Back to the action! This is the final round!

Masura walks into a straight right hand from Ooka.
Ooka throws out a token jab with nothing on it.
Ooka throws a hard body shot but it just misses.
Ooka's corner calls for a 1,2 combination and Ooka duly obliges.
The fighters circling - Ooka throws out the jab but it was never going to land.
Masura throws a looping overhand right but Ooka ducks down to avoid it.
Masura looks like he's developed a pretty tasty lump over his left eye. He'll need to avoid taking much more damage to that.
Ooka throws a jab but it's blocked by Masura.
Ooka stalks Masura and leaps in with a furious combination of punches. Uppercuts and crosses smash into Masura's face. Masura staggers backwards, shaken.
We've had a slow start to the round here - hopefully the action picks up.
Masura closes the distance looking to clinch
enabling Ooka to counter with a crisp jab.
Both fighters are breathing heavily.
Ooka misses with a series of wild punches.
Masura shoots in for a takedown and gets it.
That's one minute gone in the round.
Masura wants to control but Ooka is keeping him busy.
Masura is looking for a kimura but he's never going to get it from there.
Masura is nestled in close to Ooka, controlling him well. He's worked in a nice elbow to the side of the head as well, for good measure.
Masura is sneakily working for an arm triangle but Ooka sees it coming and defends easily.
Ooka is trying to stand back up but Masura is controlling him
Masura wants to pass the guard but Ooka is defending well.
That's two minutes gone in the round.
The crowd are showing their displeasure at the lack of action as loud boos ring out around the arena.
Masura is trying to control. Ooka wants to improve his position but can't escape this time.
Ooka is in trouble now - Masura has advanced to mount!
Ooka throwing hammer fists to the chest of Masura. What's that going to do exactly?
Masura is going olschool here, as he tries to force Ooka to tap using a forearm choke. This isn't 1993 though, so Ooka shrugs it off.
Masura moves into side control, trying to work for a kimura. That looks painful! Will he finish!!?? No, Ooka has worked his arm free - good work by Ooka!
Ooka prevents Masura from improving position.
Masura is trying to move to mount but Ooka reverses beautifully and ends up in Masura's guard.
That's three minutes gone in the round.
Ooka has decided he wants to stand but the closed guard of Masura is proving hard to escape from.
Masura pushes Ooka off for just long enough to get back to his feet. Very athletic spring there.
Masura throws a head kick that misses and slips in the process. He scrambles back to his feet and the fighters circle.
Ooka displaying good standup as he scores with a three punch combination.
Masura shoots in with a takedown attempt and he has Ooka pinned against the cage. Ooka gets the underhooks and manages to circle away.
Ooka looks to land a combination but Masura avoids it well.
That's four minutes gone in the round.
The crowd are getting on the fighters' backs, as the pace has dropped off in the last minute or so.
A right-left combo lands from Ooka.
Masura shoots in and bounces Ooka off the cage to secure the takedown into guard.
Masura is pushing down on Ooka's leg trying to pass to half guard. Ooka is fighting to maintain full guard but Masura has managed to sneak the leg through.
Ooka is looking to control Masura's leg but it's slowly edging free. Can Ooka avoid being mounted?
Ooka pushes Masura off looking to stand but Masura dives back in and keeps control.
Masura winds up and cracks Ooka with a swinging punch to the side of the head.
Masura is sneakily working for an arm triangle but Ooka sees it coming and defends easily.
Ooka tries to kick Masura off but Masura keeps his base steady and stays in half guard.
And that's the end of the fight!
Aruki Masura showed his dominance in that final round.
I think Masura has won this one but let's see what the judges have to say. Over to the ring announcer for the scorecards.
Ladies and gentlemen, after 3 rounds of action, we go to the scorecards for a decision.
Judge Marco Blurström scores the fight 29:28
Judge Ben Zyskovitsi scores the fight 29:28
Judge Anni Minnemäki scores the fight 29:28
In favor of your winner, by unanimous decision... Aruki Masura!
|
|
|
|
|
|
|
|
|
|
|
|
|
|
|
|
|
|
|
|
|
|
|
| S |
C
A |
G |
S |
C
B |
G |
|
S |
C |
G |
|
energy
A | B |
|
hype
A | B |
|
pop
A | B |
|
mgr
A | B |
|
FIGHT
RATING
41% |
|
|
|
|
|
|
