|
|
PBP Commentary |
Coming up we have a middleweight MMA rules bout between Matt Kota (ranked 0 p4p, 0 weight class) and Nas Brutten (ranked 0 p4p, 0 weight class). Nas Brutten has the better chin. Will he look to stand and bang today?
 |
|
 |
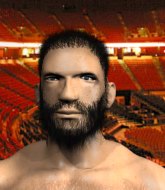
| 190 cm
22
195 lbs
1 - 2 - 0 |
|
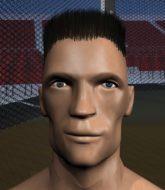
184 cm
22
182 lbs
0 - 1 - 0 |
BJJ Blue Belt
Counter striker
Big heart |
|
BJJ Blue Belt
Brawler
Solid chin |
|
| |
|
Ladies and gentlemen. This fight is 3 rounds, in the middleweight division.
Introducing the fighter to my left, fighting out of the red corner.
With a record of
1 - 2 - 0, fighting out of Hilo, Matt Kota!
And introducing the fighter to my right, fighting out of the blue corner.
With a record of
0 - 1 - 0, fighting out of Hilo, Nas Brutten!
The judges for this bout are , and .

The bell rings for round one and we are underway!
Brutten will have to do better than that with his takedown attempts.
Kota shoots in for a takedown - he's clinched up with Brutten but Brutten pushes him off and we're back to square one.
Brutten tries to clinch but Kota is having none of it.
Kota moves out of range as Brutten strikes.

Kota looking to shoot here. He's gone for it and he's landed a takedown into mount! Oh, that's bad for Brutten!

Kota goes for an armbar but Brutten turns quickly into his guard - lovely anticipation from Brutten.
Kota throws a couple of shots from the bottom but they don't land.
Kota preventing the ground and pound from doing any damage.
Kota controls Brutten momentarily but Brutten frees himself.
Brutten missing there with some ground and pound from the guard.
Brutten thows a big elbow that misses.

That's one minute gone in the round.
Kota preventing the ground and pound from doing any damage.

Kota is working an open guard so Brutten takes the opportunity to get back to his feet.
Kota lands a jab-cross combination.

Kota has closed the distance and engaged Brutten in a clinch.
Brutten has had enough of the clinch and is looking to separate.
Brutten is trying to work for a single leg takedown but Kota pulls him back up using the underhooks.
Brutten pushes Kota back against the cage and unloads with a body punch.

Brutten breaks the clinch and we return to the middle of the mat.
Brutten scores a trip takedown into side control. Nice.
Brutten wants to lay and pray for a moment but Kota keeps working.
Kota is looking for a sweep.
Kota can't do much from the bottom here.
Sloppy strikes there by Brutten.
Brutten throwing shots but missing, from side control.
Kota regains half guard.

That's two minutes gone in the round.
Brutten throwing shots but they're hitting the canvas more than the man.
Kota is looking to regain full guard. Not this time though.

The referee decides to stand the fighters back up.
Kota scores with a takedown into Brutten's guard.
Kota is breathing heavily.
This has been an exciting period of action!
Brutten pushes Kota off and gets back to his feet.
Kota gets a takedown into half guard.
Brutten is pressing down on Kota's left leg trying to get back to full guard. He's managed it.

That's three minutes gone in the round.
Kota wants to control from the top but Brutten keeps moving.
Kota looking to pass the guard.
Brutten wants to stand and escape but Kota is having none of it.
Kota wanted to stand there but Brutten had control of the position.

That's four minutes gone in the round.
The crowd are hurling abuse towards the fighters... You can hardly blame them though because there isn't a lot going on in the fight.
Kota throws a strike but Brutten rolls with it and manages to sweep. Now he's in guard on top.
The ref warns both fighters not to hold the cage as they work up against the meshing.
Kota wants to sweep here but Brutten controlling him for the moment.
Brutten thows a big elbow that misses.
Brutten is looking to work some ground and pound but Kota has wrist control.
Well, the referee has seen enough. Neither fighter is active enough on the ground so he's stood them back up.
Brutten tries to clinch up
and Kota counters with a crisp hook to the side of the head.
The crowd applaud the fighters efforts here as the round comes to an end.
Brutten misses with a looping left.
And thats the end of the round the fighters go back to their corners.
Matt Kota dominated that round.
The fighters' corners scream their final instructions, as the referee calls time. Here we go, back to the action!

Kota closes the distance and gets a double leg, slamming Brutten to the mat! Brutten manages to get full guard.
Kota looking to sit in guard and control but Brutten gets the butterfly guard and sweeps. He's now in the guard on the top.
Brutten postures up.
Kota is adopting a defensive guard.
Brutten gets to his feet - Kota follows without any prompting.
Brutten gets taken down but at least he's managed to land in guard.
Kota has gone for a leg lock! Brutten slips out almost immediately though and dives into Kota's guard.
Both fighters are absolutely exhausted here.
That's one minute gone in the round.
Brutten won't allow Kota to get back to his feet.
Brutten with a couple of shots to the head there. Not particularly brutal.
Brutten has the superior BJJ but he's also working some ground strikes into his gameplan.
Brutten trying to land body shots but he keeps hitting the mat.
Kota looking for a sweep. Not yet Kota, not yet.
Brutten works over Kota with some ground and pound from guard.
Kota is pulling down on Brutten's head to control his posture.
Brutten scoring with punches to the head and body.
Kota kicks Brutten off and gets to his feet.
Kota fakes high and swings low for a body shot but Brutten manages to avoid it.
Brutten wants to clinch but Kota slips to the side
and Brutten takes a counter punch right on the button for his troubles.
Kota doesn't manage to clinch there - Brutten circles away.
Brutten wants to clinch
so Kota counters with a double leg into guard. Good agility.
That's two minutes gone in the round.
Brutten has his hands on Kota's head, controlling the position.
Brutten uses the cage to get back to his feet.
Brutten tries to grapple but his opponent circles
and Kota counters with a nice single leg takedown and he's in Brutten's guard now.
That's three minutes gone in the round.
Brutten is trying to control the position but Kota postures up.
Brutten uses the cage to get back to his feet.
Kota throws a wild combination but nothing lands.
Kota moves into range and clinches up with Brutten.
Still in the clinch, Brutten scores with a nice short uppercut.
Brutten is working for a takedown up against the cage. He can't get it on this occasion though.
Brutten breaks the clinch and we're back to striking at distance.
Brutten wants to clinch but Kota slips to the side
and Kota counters with a takedown into full mount! That could mean trouble for Brutten!
Kota is standing up, even though he is in mount.
Matt Kota is looking to throw some combinations by the looks of things.
Brutten wants to clinch
and Kota counters with a shoot takedown into half guard.
That's four minutes gone in the round.
The crowd are loving this. Great action here.
Kota missing with the ground and pound from half guard.
Kota is trying to work for a kimura. He's got his hands clasped together - this could be trouble! No, Brutten has managed to free his arm - good work.
Kota is looking for a kimura. It's going to be difficult to finish that from half guard though and Brutten defends it well.
As the round comes to an end the crowd are showing their appreciation for a great round of action.
Kota thows a huge punch but Brutten dodges it nicely.
And thats the end of the round the fighters go back to their corners.
Matt Kota dominated that second round.
That's the end of the interval. I'm sure that seemed a lot quicker than a minute for our two fighters! Back to the action. This is the final round!

Brutten pushes Kota up against the cage in a clinch.
Brutten working hard to break the clinch.
Brutten misses with a hook from the clinch.
Kota gets control of Brutten's arms and successfully pulls guard. Kota will no doubt be looking for submissions off his back.
Kota trying to control the position.
Kota lands a beautiful switch and he's in full mount! That could spell trouble for Brutten!
Kota goes for an armbar but he's not got it
Brutten turns into him and now he's in Kota's guard.
There's a bit of a scramble here and now Kota is on top in guard.
Both fighters are breathing heavily.
That's one minute gone in the round.
Brutten is working the butterfly guard. He manages to land a nice scissor sweep and is now in half guard on the top. Nice move.
Kota blocking the ground and pound attempt from Brutten.
Brutten trying to control the action but Kota is working from the bottom.
The fighters are pressed up against the cage, both looking to find a bit of space to work.
Brutten tries to stand but can't do so whilst Kota controls his leg.
Kota keeping his head moving to avoid the ground and pound.
Brutten working Kota over with strikes.
Kota blocking the ground and pound attempt from Brutten.
That's two minutes gone in the round.
The crowd are starting to boo a lack of action.
Kota moves into full guard.
Kota working the defensive guard well to avoid strikes from Brutten.
Kota wants to sweep here but Brutten controlling him for the moment.
Kota wriggles free and stands up.
Brutten moves into the clinch.
Kota blocks a couple of punches on the inside.
Brutten lands a shoulder strike.
Kota wants to get back to striking at distance but Brutten won't allow it.
Kota is trying to trip Brutten. He has hold of a leg but Brutten is hopping around, keeping his balance for the moment. Kota persists though and gets the takedown into guard.
Kota pressing down on his opponent's thigh, looking to pass guard. Brutten is keeping the position for now.
Brutten bucks up whilst keeping hold of a body lock, managing to reverse the position. Now he's in top in Kota's guard.
That's three minutes gone in the round.
Kota is trying to keep Brutten in close.
Kota utilising some decent striking defenses from the guard, preventing the ground and pound.
Kota looking to hit a scissor sweep but Brutten is one step ahead there.
Brutten landing with the ground and pound.
Kota utilising some decent striking defenses from the guard, preventing the ground and pound.
Kota is trying to keep Brutten in close.
That's four minutes gone in the round.
My god... these two guys really need to pick up the pace or everyone will leave to go get a beer.
Brutten wants to control from the top but Kota keeps moving.
Brutten throwing strikes but missing.
Neither fighter is doing enough for the referee's liking and he's decided to stand them back up.
Brutten gets his takedown attempt stuffed easily
and Kota counters with a single leg into guard. Brutten didn't expect that.
Brutten trying to control the position.
Brutten keeping moving, preventing Kota from controlling successfully.
Matt Kota is fighting for a decision here - he's started to take the cautious approach.
Brutten keeping full guard, as Kota tries to pass.
And that's the end of the fight!
Matt Kota showed his dominance in that final round.
Well I reckon that's a shut out for Kota, winning every round. Will the judges agree? They are the ones who matter, even if they are often depressingly incompetent. Over to the ring announcer for the scorecards.
Ladies and gentlemen, after 3 rounds of action, we go to the scorecards for a decision.
Judge Andi Peters scores the fight 30:27
Judge Gordon Ramsey scores the fight 30:27
Judge Frank Skinner scores the fight 30:27
In favor of your winner, by unanimous decision... Matt Kota!
|
|
|
|
|
|
|
|
|
|
|
|
|
|
|
|
|
|
|
|
|
|
|
| S |
C
A |
G |
S |
C
B |
G |
|
S |
C |
G |
|
energy
A | B |
|
hype
A | B |
|
pop
A | B |
|
mgr
A | B |
|
FIGHT
RATING
53% |
|
|
|
|
|
|

