|
|
PBP Commentary |
Coming up we have a welterweight MMA rules bout between Shane Miyagi (ranked 0 p4p, 0 weight class) and Obi Uzoma (ranked 0 p4p, 0 weight class). Miyagi comes to the cage accompanied by Ready for war. These two fighters really are very evenly matched on the feet - it will be fascinating to see who can assert themselves in that aspect of the fight.
 |
|
 |
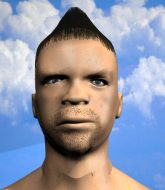
| 184 cm
24
170 lbs
7 - 5 - 0 |
|
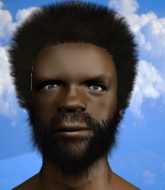
185 cm
24
181 lbs
4 - 1 - 0 |
BJJ Purple Belt
Counter striker
Granite chin |
|
BJJ Purple Belt
Decent boxing
Heavy handed |
|
| |
|
Ladies and gentlemen. This fight is 3 rounds, in the welterweight division.
Introducing the fighter to my left, fighting out of the red corner.
With a record of
7 - 5 - 0, fighting out of Los Angeles, Shane Miyagi!
And introducing the fighter to my right, fighting out of the blue corner.
With a record of
4 - 1 - 0, fighting out of Los Angeles, Obi Uzoma!
The judges for this bout are , Frank Antenori and .

The bell rings for round one and we are underway!
Miyagi steps to the side to avoid the strikes from Uzoma.
Uzoma loads up on a big right hand but Miyagi slips the punch.
Miyagi misses with a wild combination.
Miyagi throws a nice looking combination but Uzoma bobs and weaves to avoid any damage.
Uzoma with a jab.
Uzoma swings and misses with a hook to the body.
Uzoma tries to shoot in for a takedown. He's got hold of a leg but Miyagi swivels and escapes.
Uzoma misses the shot to the body.
Miyagi takes a shot to the nose. Hopefully that hasn't broken it.
Miyagi moves his head to the side to avoid a jab but walks straight into a cross.
A telegraphed right hand from Miyagi misses the target.
Uzoma throws a jab when Miyagi was well out of range.
Miyagi ducks under a wild hook from Uzoma.
Uzoma throws a looping overhand right but Miyagi ducks down to avoid it.
Uzoma looks to land a right hand but Miyagi moved out of range.

Miyagi closes the distance and pushes Uzoma back into the cage.
Uzoma has had enough of the clinch and is looking to separate.

That's one minute gone in the round.

Miyagi wants the takedown. Uzoma is fighting it off but Miyagi persists and manages to bring the fight to the ground, ending up in Uzoma's guard against the cage.
Uzoma wants to get back to his feet but Miyagi is in a dominant position and won't allow it.
Miyagi working some ground and pound from guard but it's not doing any damage.
Uzoma has momentary wrist control but Miyagi slips an elbow through the middle.
Uzoma throws some sloppy strikes off his back.
Miyagi working some ground and pound from guard but it's not doing any damage.
Miyagi with a flurry of punches that miss.
Miyagi loading up with the ground and pound but he's missing more than he's landing in this flurry.
Uzoma managing to control the position.
Miyagi loading up with the ground and pound but he's missing more than he's landing in this flurry.
Uzoma not looking particularly offensive just at the moment.
Miyagi chips away with some ground and pound.
Uzoma is looking to get back to his feet but can't, whilst Miyagi is controlling him.

It looks like we're going to have a standup here. Neither fighter is doing enough on the ground.
Uzoma jabbing away but nothing is landing.

That's two minutes gone in the round.
Uzoma shoots in but no luck this time.
Uzoma throws a lazy right hand but Miyagi sees it coming a mile off and sidesteps it easily.
Uzoma changes levels and looks for a double leg takedown. Miyagi tries to avoid it but Uzoma manages to keep hold of a leg and drag Miyagi to the ground. Miyagi escapes though and pops straight back up to his feet.
Shane Miyagi has stuffed three takedown attempts in the round now. That's going to take a lot out of Obi Uzoma.
Miyagi throws a right and a left that Uzoma avoids nicely.
Uzoma throws a series of punches but Miyagi avoids them all with ease.
Miyagi fails to land with a series of punches.
Miyagi misses with an uppercut.
Uzoma might want to mix his strikes up a bit more. He's just going for head shots at the moment and that can become a bit predictable.
Uzoma is the aggressor but that punch slipped nicely by Miyagi.
Miyagi throws a right and a left that Uzoma avoids nicely.
Uzoma throws a looping overhand right but Miyagi ducks down to avoid it.
Miyagi stuffs the takedown attempt from Uzoma. Uzoma gets slowly back to his feet.
Miyagi looks to land a combination but Uzoma avoids it well.

That's three minutes gone in the round.
Miyagi gets his head snapped back by a nice shot there.
The fighters circling - Uzoma throws out the jab but it was never going to land.
Miyagi throws an overhand right that lands on Uzoma's shoulder, as Uzoma tries to avoid the shot.
Miyagi leaves Uzoma with his face pressed against the mat as he sprawls beautifully, defending against a solid takedown attempt.
Miyagi moves out of range as Uzoma strikes.
No joy there for Miyagi, who threw a few shots but didn't land.
Uzoma throws a series of punches but Miyagi moves out of range.
Uzoma scores with a nice looking left hook and follows it up with an uppercut!
Miyagi bobs and weaves and throws out a fast jab that snaps Uzoma's head backwards.
Miyagi throws an uppercut from half a mile away. Uzoma sees it coming and avoids it easily.
Uzoma throws a jab when Miyagi was well out of range.
Uzoma scores with a one two! Miyagi had his feet all tangled up there and couldn't avoid the strikes.
Miyagi looks to land a right hand but Uzoma moved out of range.

That's four minutes gone in the round.
Miyagi throws a front kick aimed at Uzoma's knee but Uzoma avoids it well.
A slow jab from Uzoma misses its intended target.
A shot to de liver by Uzoma. Beautiful body shot.
Uzoma connects with a looping right hand.
Uzoma stuffs the takedown.
Uzoma tries for a takedown but Miyagi sees it coming a mile off and avoids it easily.
The crowd cheers as Uzoma lands an impressive looking overhand right. Miyagi doesn't seem phased though.
A punch combination from Miyagi misses.
Miyagi is looking to chop away at Uzoma's legs.
Uzoma lands with a straight right. Miyagi didn't see that one coming.
Uzoma works over Miyagi's head and body with a nice combination.
Uzoma swings for the body but Miyagi moves out of range.
Uzoma connects with a body shot.
And thats the end of the round the fighters go back to their corners.
Obi Uzoma dominated that round.
OK. That's time! The bell goes and we're back to the action.

Miyagi chopping away at his opponent's legs.
Uzoma scores with a sloppy punch to the body. Not much technique there but it did the business.
Miyagi wants to clinch.
Uzoma throws a shot from downtown. Miyagi moves away and avoids it.
Uzoma scores with a punch to the head.
Uzoma throws a monster uppercut resembling something out of street fighter but it doesn't land.
Miyagi misses with a series of wild punches.
Uzoma swinging wilding here.
Miyagi tries to clinch but Uzoma moves out of range.
Miyagi lands a jab to the head.
That's one minute gone in the round.
Miyagi moves into the clinch.
Miyagi misses with the head strike.
Uzoma is trying to break the clinch but Miyagi has him pressed against the cage.
Miyagi lands with a quick shot inside that doesn't really do much damage.
Miyagi is looking to score with knees to the body. Maybe he'll change it up and go body then head. Uzoma is defending well for now.
Uzoma is trying to force a seperation but Miyagi has the dominant position.
Miyagi misses with a short punch on the inside.
Uzoma has Miyagi pressed up against the cage and is working for takedown. Miyagi manages to improve position though and keeps the fight standing.
A body shot lands from Miyagi.
A frustrated look appears on Uzoma's face as he tries to break the clinch.
Uzoma blocks a knee to the body. He'll have a nicely bruised forearm in the morning.
Miyagi misses with an elbow over the top.

Miyagi breaks the clinch and we're back to striking at distance.
Obi Uzoma seems to be getting the better of the standup.
Uzoma throws a good cross that connects.
Miyagi swinging wilding here.
Good standup being displayed there by Miyagi as he connects with a hook.
Miyagi moves in looking to clinch but Uzoma pushes him off.
That's two minutes gone in the round.
Jab, cross, leg kick. Nice combination by Uzoma!
Uzoma will have to do better than that with his takedown attempts.
Uzoma throws out a token jab with nothing on it.
Uzoma throws a right and a left that Miyagi avoids nicely.
Uzoma defends well against a solid takedown attempt from Miyagi.
Miyagi has Uzoma up against the cage in a clinch.
Miyagi lands a body punch - he's looking to wear down Uzoma.
Miyagi prevents a takedown attempt there.
Shane Miyagi has stuffed three takedown attempts in the round now. That's going to take a lot out of Obi Uzoma.
Miyagi tries a knee to the head but he's missed.
Miyagi throws a hook to the body. More of an arm punch but it's all scoring with the judges.
Uzoma is breathing heavily.
Miyagi's corner calls for him to break the clinch, which he does.
Miyagi throws a right and a left that Uzoma avoids nicely.
Miyagi defending well as Uzoma loads up on a big left hand.
That's three minutes gone in the round.
Miyagi takes a swing at Uzoma's ribcage but misses.
Uzoma connects with a single shot there.
Uzoma lands three nice shots there - that looked like it hurt!
Uzoma lands a jab. Then a cross. Then finally a nice hook to the body. Good work there by Uzoma.
Uzoma swinging wilding here.
Miyagi misses with a double jab
and Uzoma counters with a shoot takedown into half guard.
Miyagi is looking to improve his position.
Miyagi punching from the bottom.
Uzoma tries to stand but his hand is stuck under Miyagi.
Miyagi is looking for a sweep. Uzoma is wise to his cunning plan and keeps the top position.
That's four minutes gone in the round.

Uzoma is trying a forearm choke
I don't think that's going to do much at this level of the game.
Miyagi is looking for a sweep. Uzoma is wise to his cunning plan and keeps the top position.
Miyagi has no desire to be mounted, so is trying to control. Uzoma is working away from the top position though.
The referee decides to stand the fighters back up.
Nice shot lands for Uzoma.
Uzoma lands an overhand left. A wild punch that just about connected.
Shane Miyagi is looking to throw some combinations by the looks of things.
The crowd applaud the fighters efforts here as the round comes to an end.
Miyagi showing good head movement there, avoiding the strikes from Uzoma.
Miyagi drops his hands momentarily and Uzoma takes advantage with a crisp shot to the head.
And thats the end of the round the fighters go back to their corners.
Obi Uzoma showed his class in that round. I'd imagine he'll take it on all the scorecards.
The minute break is over - no more time for sponges and pep talks - back to the action! Let's hear some noise people - this is the final round!

Miyagi looks to land a body kick but Uzoma moved away.
This fight brought to you by 5M nutrition - it's mmmmm tasty. Nice jab by Uzoma.
Miyagi misses with a double jab
and Uzoma cracks him with a counter punch right on the button.
Uzoma throws a looping overhand right but Miyagi ducks down to avoid it.
Uzoma shoots in for a double leg but Miyagi sprawls well. That's going to sap some energy.
Uzoma misses with a looping left.
Miyagi shakes his hands off, looking to compose himself, but takes a jab to the jaw whilst he does it.
Uzoma missing with a left hand there. Miyagi was out of range so wasted energy throwing that one.
Uzoma fails to land with a series of punches.
Uzoma waving his hands out infront of him, looking to distract Miyagi.
Miyagi takes a shot to the nose. Hopefully that hasn't broken it.
Obi Uzoma seems to be the more aggressive standup fighter in this bout.
Miyagi throws a hook to the body but it doesn't connect.
Miyagi misses with a jab and misses with a cross straight after too.
That's one minute gone in the round.
Miyagi moves into the clinch successfully.
Miyagi misses with a short punch on the inside.
Miyagi lands a nice knee to the body.
Miyagi manages to break the clinch.
Miyagi is the aggressor but that punch slipped nicely by Uzoma.
A right-left combo lands from Uzoma.
Miyagi slips a straight right by Uzoma.
Uzoma moves away from the strike by Miyagi.
A punch lands to the side of Miyagi 's head but he takes it in his stride.
Uzoma fails miserably with a takedown attempt.
Uzoma takes a big intake of breath there - he's definitely tired.
Uzoma swats away the attempt to clinch by Miyagi.
Miyagi lands a jab followed by a nice looking cross.

It looks like Obi Uzoma has been cut.
That's two minutes gone in the round.
Miyagi avoids the body shot from Uzoma.
A big left from Uzoma misses.
Miyagi thows a body shot but no joy.
Uzoma shoots in for a takedown - he's clinched up with Miyagi but Miyagi pushes him off and we're back to square one.
Shane Miyagi has stuffed three takedown attempts in the round now. That's going to take a lot out of Obi Uzoma.
Nice shot by Miyagi.
Uzoma throws out a loose jab but Miyagi uses good head movement to avoid it.
Miyagi fails with an attempt to clinch.
Uzoma ducks down and throws a hook to the body but Miyagi moves away.
Miyagi doesn't react quick enough there as he takes a shot to the body.
Miyagi bobs and weaves well there to avoid the strikes.
Miyagi blocks a jab.
Miyagi stuns Uzoma with a nice body shot, before stepping back out of range.
That's three minutes gone in the round.
A big right from Uzoma misses.
Miyagi tries to clinch but is not successful on this occasion.
Miyagi just misses with a punch to the body.
Miyagi ducks under a wild hook from Uzoma.
Miyagi throws a chopping leg kick but Uzoma manages to avoid taking any serious damage.
Miyagi misses with a hook. Uzoma ducked under it nicely.
Uzoma throws a big shot that misses.
Uzoma closes this distance looking for a takedown but Miyagi circles away.
Miyagi moves out of range as Uzoma strikes.
Uzoma swings wildly with a right hand that was never going to find it's target.
Uzoma fakes high and shoots in for a takedown but Miyagi avoids it really well and circles away.
Miyagi tries to bum rush Uzoma with a series of wild strikes but Uzoma uses good footwork to avoid the assault.
That's four minutes gone in the round.
The crowd are hurling abuse towards the fighters... You can hardly blame them though because there isn't a lot going on in the fight.
Miyagi closes the distance and clinches.
Miyagi manages to break the clinch.
Uzoma slips a jab and a cross from Miyagi.
Miyagi misses with a jab and misses with a cross straight after too.
Miyagi stuffs the takedown.
Uzoma looks to throw the jab but Miyagi is out of range.
Miyagi steps to the side to avoid the strikes from Uzoma.
Uzoma swings wildly with a couple of big hooks
and Miyagi counters with a one-two to the body.
A good leg kick by Miyagi.
Miyagi tries to work over Uzoma's front leg with a kick but Uzoma checks it.
Uzoma fails to land with the punch combination there - jab, cross, hook, miss, miss, miss.
Uzoma slips a jab from Miyagi.
That's a knee to de groin and it's over and out! Uzoma crumples to the ground after an illegal strike from Miyagi - the referee stops the clock and Uzoma gets 5 minutes to recover from that one. "I'm sorry" says Miyagi. Uzoma manages to get back to his feet and the fight resumes.
And that's the end of the fight!
Shane Miyagi showed his dominance in that final round.
I think Uzoma has won this one but let's see whether the judges agree with me. Over to the ring announcer for the scorecards.
Ladies and gentlemen, after 3 rounds of action, we go to the scorecards for a decision.
Judge Suge Night scores the fight for Obi Uzoma!
Judge Frank Antenori scores the fight for Obi Uzoma!
Judge Percy O'Donnell scores the fight for Obi Uzoma!
Obi Uzoma wins by unanimous decision!
|
|
|
|
|
|
|
|
|
|
|
|
|
|
|
|
|
|
|
|
|
|
|
| S |
C
A |
G |
S |
C
B |
G |
|
S |
C |
G |
|
energy
A | B |
|
hype
A | B |
|
pop
A | B |
|
mgr
A | B |
|
FIGHT
RATING
61% |
|
|
|
|
|
|
