|
|
PBP Commentary |
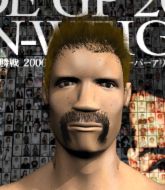
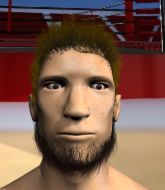
Coming up we have a light heavyweight MMA rules bout between Dexter Woods (ranked 4671 p4p, 4253 weight class) and Mark Atherton (ranked 0 p4p, 0 weight class). We have two fighters making their debuts here, so let's see who comes out of this one with their first professional victory.
 |
|
 |
| 187 cm
18
210
0 - 0 - 0 |
|
183 cm
25
204
0 - 0 - 0 |
Good takedowns
Counter fighter
Very quick |
|
Good takedowns
Counter fighter
Prefers standup |
|
| |
|
Ladies and gentlemen. This fight is 3 rounds, in the light heavyweight division.
Introducing the fighter to my left, fighting out of the red corner.
With a record of 0 - 0 - 0, fighting out of Helsinki, Dexter Woods!
And introducing the fighter to my right, fighting out of the blue corner.
With a record of 0 - 0 - 0, fighting out of Tokyo, Mark Atherton!
The judges for this bout are Marco Blurström, Tarja Halkonen and Arvi Lind.

The bell rings for round one and we are underway!
Atherton bobs and weaves and unloads with a good uppercut.
Mark Atherton seems to be the more aggressive standup fighter in this bout.
Atherton misses with an uppercut. Woods saw that one coming.
Woods feinted with a counter takedown.
Atherton throws a hook to the body but it doesn't connect.
Woods on the wrong end of a decent looking cross there.

It looks like Dexter Woods has been cut.
Atherton misses with a body shot.
Atherton pushing out the jab but it's not landing.
Woods feinted with a counter takedown.
Atherton looks to throw the jab but Woods is out of range.
We've had a slow start to the round here - hopefully the action picks up.
Atherton swings and misses with a hook to the body.
Woods appears to be looking for a counter takedown.
Woods moves out of range as Atherton strikes.
Woods tries to counter with a takedown but Atherton is quick to defend against it.
Woods looks for a takedown here. Will he get it? Atherton is fending him off so far but Woods persists. Nope, Atherton circles away and we're back to standing.

That's one minute gone in the round.
Atherton misses with a series of wild punches.
Atherton throws a jab when Woods was well out of range.
Atherton throws a jab but it's blocked by Woods.
Atherton tries to land with a swinging hook to the body but Woods was well out of range. Poor timing from Atherton.
Atherton lands a nice shot that snaps Woods's head back.
Atherton throws a hard body shot but it just misses.
Atherton throws a looping overhand right but Woods ducks down to avoid it.
Woods appears to be looking for a counter takedown.

That's two minutes gone in the round.
A shot to the liver by Atherton. Beautiful body shot.
Atherton missing with a left hand there. Woods was out of range so wasted energy throwing that one.
Atherton scores with a shot to the body.
Woods moves forwards but Atherton connects with a nice, crisp jab.
Mark Atherton is looking to keep the fight on the feet at all costs.
Atherton throws a body shot but no joy.
Atherton lands a jab to Woods's midsection.
Atherton misses the jab.
This has been an exciting period of action!
Atherton throws a hook to the body but it doesn't connect.
Woods changes levels looking for a counter takedown but doesn't commit.

That's three minutes gone in the round.
Atherton with a jab.
Atherton fakes low and throws an overhand right that catches Woods on the side of the head.
Woods uses some good footwork to avoid the body shot by Atherton.
Woods half commits to a counter takedown before pushing away, out of range.
Atherton throws a jab when Woods was well out of range.
Woods appears to be looking for a counter takedown.
Atherton scores with a jab to the body.
Atherton misses with a hook. Woods ducked under it nicely.
Woods changes levels looking for a counter takedown but doesn't commit.
Atherton misses the shot to the body.

That's four minutes gone in the round.
Woods avoids a lazy jab quite easily.
Woods tries to counter with a takedown but Atherton is quick to defend against it.
Atherton throws a hook to the side of Woods's head but Woods sees it coming and ducks under it beautifully.
Woods half commits to a counter takedown before pushing away, out of range.
Atherton swings and misses with a hook to the body.
Woods attempts a counter takedown but Atherton avoids it well and moves away.
Woods takes a jab on the nose. He smiles like he loves it and keeps coming.
Woods moves out of range of the strikes.
Woods takes a shot to the body in his stride.
Atherton throws a jab when Woods was well out of range.
Woods defending well as Atherton loads up on a big left hand.
Woods drops down looking for a counter takedown but Atherton sprawls and moves away.
And that is the end of the round. The fighters go back to their corners.
Mark Atherton dominated that round.
The cut man is working on Dexter Woods's cut.
Well, the break between rounds is over. Let's get back to the scrappin!

Woods keeping a good distance there, avoiding the body shot.
Woods attempts a counter takedown but Atherton avoids it well and moves away.
Woods avoids the body shot from Atherton.
Woods appears to be looking for a counter takedown.
Atherton misses with a two punch combination.
Woods tries to counter with a takedown but Atherton is quick to defend against it.
Atherton swings wildly with a right hand that was never going to find it's target.
Woods uses good footwork to avoid the strikes from Atherton.
Woods changes levels looking for a counter takedown but doesn't commit.
Atherton takes a swing at Woods's ribcage but misses.
We've had a slow start to the round here - hopefully the action picks up.
Atherton throws a lazy right hand but Woods sees it coming a mile off and sidesteps it easily.
Woods half commits to a counter takedown before pushing away, out of range.
Atherton looks to score with a jab to the body but Woods is just out of range.
Mark Atherton seems to be getting the better of the standup.
Atherton tries to land with a swinging hook to the body but Woods was well out of range. Poor timing from Atherton.
Woods tries to counter with a takedown but Atherton is quick to defend against it.
That's one minute gone in the round.
Woods ducks under a wild hook from Atherton.
Woods drops down looking for a counter takedown but Atherton sprawls and moves away.
Atherton scores with a sloppy right hand. Woods should have avoided that one.
Atherton dips to his left and cracks Woods with an uppercut!
Woods uses decent footwork to sidestep a right hand from Atherton.
Atherton loads up on a big right hand but Woods slips the punch.
Atherton connects with a looping left hand that seems like it dazed Woods momentarily.
Atherton smiles there as he lands a nice right hand right on the button.
That's two minutes gone in the round.
A big right from Atherton misses.
Woods appears to be looking for a counter takedown.
Woods slips under a jab.
Woods half commits to a counter takedown before pushing away, out of range.
Atherton lands with a good body shot.
Atherton looks to score with a jab to the body but Woods is just out of range.
Woods half commits to a counter takedown before pushing away, out of range.
Atherton throws a hook to the body but it doesn't connect.
A swing and a miss from Atherton.
Woods appears to be looking for a counter takedown.
Atherton tests Woods's chin there with a solid looking shot.
Wooooo! Give it up for these two warriors! They are putting on a show!
Woods shoots for a takedown but Atherton saw that one coming a mile off and avoided it easily.
Atherton looked like he wanted to counter with a punch but didn't throw it.
That's three minutes gone in the round.
Atherton misses the shot to the body.
Woods gets cracked with a nice right hand there by Atherton.
This entire fight has taken place on the feet so far and you wonder whether Woods might be better served trying to take this one to the ground because he's losing the standup battle so far.
Atherton misses with a wild body shot.
Atherton fakes a head shot and lands one to the body.
Atherton throws out a loose jab but Woods uses good head movement to avoid it.
Atherton throws an ugly left hook that misses

and Woods counters with a shoot takedown into half guard.
We could do with one of the fighters taking the initiative a bit more on the ground - they're both waiting to capitalize on a mistake.

Woods decides to return to a standing position.
Atherton misses the shot to the body.
Woods appears to be looking for a counter takedown.
That's four minutes gone in the round.
Atherton throws an uppercut from half a mile away. Woods sees it coming and avoids it easily.
Woods appears to be looking for a counter takedown.
Atherton just misses with a punch to the body.
Woods tries to counter with a takedown but Atherton is quick to defend against it.
This fight brought to you by 5M nutrition - it's mmmmm tasty. Nice jab by Atherton.
The fighters circling - Atherton throws out the jab but it was never going to land.
Woods half commits to a counter takedown before pushing away, out of range.
We've seen a great period of action over the last minute or so - credit to both fighters for going all out!
Atherton misses the shot to the body.
Woods drops down looking for a counter takedown but Atherton sprawls and moves away.
Atherton throws a lazy right hand but Woods sees it coming a mile off and sidesteps it easily.
Woods changes levels looking for a counter takedown but doesn't commit.
A looping hook to the body misses from Atherton. Woods does a little dance to reset his feet.
Woods half commits to a counter takedown before pushing away, out of range.
And that is the end of the round. The fighters go back to their corners.
Mark Atherton showed his class in that round. I'd imagine he'll take it on all the scorecards.
The cut man is working on Dexter Woods's cut.
That's the end of the round. The referee orders the cornermen out of the cage so we can get back down to business. This is the final round!

A looping hook to the body misses from Atherton. Woods does a little dance to reset his feet.
Atherton throws a shot from downtown. Woods moves away and avoids it.
Woods slips under a jab.
Woods changes levels looking for a counter takedown but doesn't commit.
Woods takes an uppercut right on the jaw but it doesn't phase him.
Atherton looks to score with a jab to the body but Woods is just out of range.
Atherton has been the more effective fighter overall so far.
Atherton throws a right and a left that both miss.
Woods half commits to a counter takedown before pushing away, out of range.
We've had a slow start to the round here - hopefully the action picks up.
Donk. Atherton catches Woods right on the button with a cross.
Nice cross by Atherton.
That's one minute gone in the round.
Atherton looks to score with a jab to the body but Woods is just out of range.
Atherton misses with a wild combination.
Woods showing good head movement there, avoiding the strikes from Atherton.
Atherton scores with a jab.
Woods blocks a jab.
Woods tries to counter with a takedown but Atherton is quick to defend against it.
Mark Atherton is fighting for a decision - hopefully he's judged it right and he's actually winning the fight.
That's two minutes gone in the round.
Atherton scores with a crisp jab that stopped Woods in his tracks.
A slow jab from Atherton misses its intended target.
Woods changes levels looking for a counter takedown but doesn't commit.
Woods gets his head snapped back by a nice shot there.
Woods moves his head to the side to avoid a jab but walks straight into a cross.
Atherton scores with a punch to the gut of his opponent.
Atherton throws a body shot but no joy.
Woods changes levels looking for a counter takedown but doesn't commit.
Woods moves away from the strike by Atherton.
Woods appears to be looking for a counter takedown.
That's three minutes gone in the round.
Atherton throws a hard body shot but it just misses.
Atherton throws a monster uppercut resembling something out of street fighter but it doesn't land.
Atherton throws a combination but it was largely blocked by Woods.
Woods drops down looking for a counter takedown but Atherton sprawls and moves away.
Woods avoids the body shot from Atherton.
Woods changes levels looking for a counter takedown but doesn't commit.
Atherton tries to land with a swinging hook to the body but Woods was well out of range. Poor timing from Atherton.
Woods slips under a jab.
Woods avoids a lazy jab quite easily.
That's four minutes gone in the round.
A lazy left from Atherton finds it's target.
Atherton darts in and out, connecting with a jab.
Woods uses good footwork to avoid the strikes from Atherton.
Atherton throws a good cross that connects.
Atherton pushing out the jab but it's not landing.
Atherton is the aggressor but that punch slipped nicely by Woods.
The crowd thankful this round is nearly over.
Atherton throws out a loose jab but Woods uses good head movement to avoid it.
Woods steps to the side to avoid the strikes from Atherton.
Woods attempts a counter takedown but Atherton avoids it well and moves away.
And that's the end of the fight!
Mark Atherton comfortably won the final round on my scorecard.
I've got Atherton winning every round here. Surely the decision will go his way and he'll pick up a well deserved decision victory. Over to the ring announcer for the scorecards.
Ladies and gentlemen, after 3 rounds of action, we go to the scorecards for a decision.
Judge Marco Blurström scores the fight 25:30
Judge Tarja Halkonen scores the fight 25:30
Judge Arvi Lind scores the fight 25:30
In favor of your winner, by unanimous decision... Mark Atherton!
Mark Atherton seemed lost for words in his post fight interview but he remembered to thank his fans and directed everyone to his website.
|
|
|
|
|
|
|
|
|
|
|
|
|
|
|
|
|
|
|
|
|
|
|
| S |
C
A |
G |
S |
C
B |
G |
|
S |
C |
G |
|
energy
A | B |
|
hype
A | B |
|
pop
A | B |
|
mgr
A | B |
|
FIGHT
RATING
37% |
|
|
|
|
|
|
