|
|
PBP Commentary |
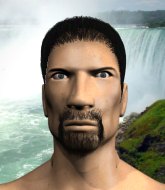
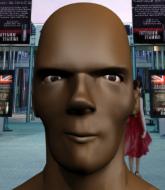
Coming up we have a bantamweight MMA rules bout between Jin Matsushima (ranked 5016 p4p, 5619 weight class) and Lightest Island Try (ranked 284 p4p, 306 weight class). Over to our ring announcer for the fighter introductions!
 |
|
 |
| 168 cm
25
138
0 - 1 - 0 |
|
159 cm
25
140
0 - 1 - 0 |
BJJ White Belt
Excellent boxer
Granite chin |
|
BJJ White Belt
Excellent MT
Granite chin |
|
| |
|
Ladies and gentlemen. This fight is 3 rounds, in the bantamweight division.
Introducing the fighter to my left, fighting out of the red corner.
With a record of 0 - 1 - 0, fighting out of The Island, Jin Matsushima!
And introducing the fighter to my right, fighting out of the blue corner.
With a record of 0 - 1 - 0, fighting out of The Island, Lightest Island Try!
The judges for this bout are David Hoff, Winston Alpacca and Bart Greer.

The bell rings for round one and we are underway!
Try misses with a looping left.
Try dips down and scores with a jab to the body.
Jab, jab by Matsushima - just one landing.
Lightest Island Try seems to be the more aggressive standup fighter in this bout.
Try misses with a hook.
A slow jab from Try misses its intended target.
Matsushima is trying to close the distance and clinch up, after that failed offence from Try.
Try misses with a left hand
and Matsushima counters with a left to the body.
Try misses with an uppercut
and Matsushima counters with a lovely shot to the body.
Try misses with a left hand
and Try takes a counter punch right on the button for his troubles.
We've been informed that Try has been sparring a lot of Muay Thai in the buildup to this fight so let's see if that has an impact on the result.
Try misses with a looping right.
Matsushima seem to be loading up, looking for a big counter.
A cross from Matsushima lands.
A big left from Try misses.
Matsushima definitely looks more muscular than last time we saw him fight.
Try misses with a hook
and Matsushima counters with a straight right hand.
The fans in attendance giving it up for the two fighters, who have really let it all hang out in the last minute or so!
Try misses with a hook.
Matsushima ducks under a wild hook from Try.
Matsushima is looking to counter the offense by Try and move into the clinch.
Try just misses with a punch to the body.

Matsushima rushes Try and pushes him back against the cage in a clinch.
Try working aggressively here.
Try working some nice short punches in the clinch.
Matsushima takes a shot to the head.

That's one minute gone in the round.
An uppercut on the inside fails to land for Try.
Matsushima swings wildly with an uppercut but Try uses good head movement to avoid it.
Try throws a head punch that misses.
A shot in the inside from Try.
Try makes some space for himself and lands an uppercut.
Try throws a head punch that misses.
Try lands a nice uppercut.
Try fails to land with a short punch on the inside.
Try is really struggling to land any decent head shots against his taller opponent.
Matsushima fails to land with a short punch on the inside.
Try has a couple of punches blocked by Matsushima.
Try throws a punch but it's blocked by Matsushima.
Matsushima lands a body punch.
Try lands a hook to the side of the head.
Try blocks a couple of punches on the inside.
Try has a couple of punches blocked by Matsushima.
Matsushima misses with the head strike.
A head punch on the inside from Try fails to land.
Try working on landing some head shots here - that one got through nicely.
The crowd cheering loudly, showing their appreciation for the quality fight we're seeing here.
Matsushima working on landing some head shots here - that one got through nicely.

That's two minutes gone in the round.
Try misses with a hook from the clinch.
Matsushima has a couple of punches blocked by Try.
Matsushima lands a body punch - he's looking to wear down Try.
A head punch blocked on the inside by Try.
Matsushima blocks a couple of punches on the inside.
Try makes some space for himself and lands an uppercut.
Try just leaning against Matsushima, taking a breather.
Matsushima lands with a good tight uppercut to the head.
Try swings away with an uppercut that misses.
Try working some nice short punches in the clinch.
Try lands a right hand that snaps the head of Matsushima backwards.
Try misses with some punches.
Matsushima lands with a quick shot inside that doesn't really do much damage.
Try blocks a couple of punches on the inside.
Try lands a hook that snaps the head of Matsushima backwards.
Try misses with a short punch on the inside.
A body shot lands from Matsushima.
Matsushima blocking some punches.
A right hook to the body lands for Matsushima.

That's three minutes gone in the round.
An uppercut on the inside fails to land for Try.
Matsushima lands a right uppercut that snaps the head of Try backwards.
An uppercut on the inside fails to land for Matsushima.
A head punch blocked on the inside by Matsushima.
Matsushima swings away with an uppercut that misses.
Try misses with some punches.
Try lands punches inside but they're not really causing much damage.
Matsushima misses with the head strike.
Matsushima misses with a hook from the clinch.
Nice body punch from Matsushima.
Try working aggressively here.
Matsushima scores with a shoulder strike.
Matsushima lands punches inside but they're not really causing much damage.
An uppercut on the inside fails to land for Matsushima.
Matsushima blocks an uppercut.
Matsushima misses with a punch on the inside.
Matsushima blocks a couple of punches on the inside.
Try working aggressively here.
Matsushima swings wildly with an uppercut but Try uses good head movement to avoid it.
A head punch on the inside from Try fails to land.

That's four minutes gone in the round.
Try fails to land with a short punch on the inside.
Fantastic stuff here - a very entertaining period of action, which has drawn cheers from the crowd.
Try tries a shoulder strike but it doesn't do any damage.
Matsushima blocks a couple of punches on the inside.
A right hand to the body from Matsushima.
Try blocks a punch to the side of the head.
Matsushima lands with a short head shot on the inside.
Matsushima blocks a punch to the side of the head.
Try blocks a punch to the side of the head.
A head punch blocked on the inside by Matsushima.
Matsushima misses with a body punch.
Try lands with a light punch inside.
Try tries to land a knee to the head but Matsushima blocks with his arms.
A short right hand to the side of the head by Matsushima.
The crowd applaud the fighters' efforts here as the round comes to an end.
Try has a couple of punches blocked by Matsushima.
Try blocks a punch to the side of the head.
Try lands a shoulder strike.
Try misses with a punch on the inside.
Try misses with a hook from the clinch.
And that is the end of the round. The fighters go back to their corners.
Lightest Island Try dominated that round.
The fighters' corners scream their final instructions, as the referee calls time. Here we go, back to the action!

Matsushima moves away from the strike by Try.
Matsushima slips a straight right by Try.
Matsushima wants to take advantage of his opponent's missed offense by moving into the clinch.
Try throws a nice hook to the body that draws an oooh from the crowd.
Matsushima moves away from the strike by Try.
Try might want to mix his strikes up a bit more. He's just going for head shots at the moment and that can become a bit predictable.
Try takes a shot right to the bread basket.
Matsushima slips a jab from Try.
Nice defenses there by Matsushima.
Try throws a poor cross that misses
and Matsushima counters with a lovely straight right hand!
Try ducks low and lands a nice hook to the body of his opponent.
Try throws a hook but Matsushima avoids it easily.
Matsushima changes levels and scores with a jab to the body.
Matsushima blocks a jab.
Try missing with a left hand there. Matsushima was out of range so wasted energy throwing that one.
Try throws out a token jab with nothing on it.
Try fakes a head shot and lands one to the body.
Fantastic stuff here - a very entertaining period of action, which has drawn cheers from the crowd.
Try misses with a body shot
and Matsushima counters with a stiff right hand.
Matsushima lands a really nice looking cross but Try seems unphased.
Matsushima blocks a jab.
Matsushima is using his height advantage well here, landing a good percentage of his punches.
That's one minute gone in the round.
Try misses with a straight left.
Matsushima closes the distance and presses his opponent up against the cage.
Matsushima tries a shoulder strike but it doesn't do any damage.
Try misses with a punch on the inside.
Try throws a punch but it's blocked by Matsushima.
Lightest Island Try seems to be working more effectively in the clinch in the fight so far.
Matsushima lands punches inside but they're not really causing much damage.
A short right from Try.
Matsushima throws a blind hook that connects with the side of Trys head.
Try lands a left hand.
Matsushima working aggressively here.
A short uppercut from Matsushima.
Matsushima goes for a body shot but it's blocked.
An uppercut on the inside fails to land for Matsushima.
Try tries a knee to the head but Matsushima blocks it.
Try throws a punch but it's blocked by Matsushima.
Matsushima blocks an uppercut.
An uppercut on the inside fails to land for Try.
Try lands a left hand that snaps the head of Matsushima backwards.
The crowd cheering loudly, showing their appreciation for the quality fight we're seeing here.
Try takes a shot to the head.
That's two minutes gone in the round.
A head punch blocked on the inside by Matsushima.
An uppercut on the inside fails to land for Try.
Try prevents a body shot from Matsushima.
Try misses with a short punch on the inside.
An uppercut to the body lands inside from Matsushima.
Try misses with the head strike.
An uppercut on the inside fails to land for Try.
Matsushima tried to land a shot to the body but connects with Try's elbow.
An uppercut on the inside fails to land for Try.
Try misses with the head strike.
Matsushima works for underhooks and lands a body shot in the process.
Matsushima blocks a punch to the side of the head.
Matsushima has a couple of punches blocked by Try.
Matsushima blocks a couple of punches on the inside.
Try gets an overhook and lands an elbow to the side of the head.

It looks like Jin Matsushima has been cut.
Try throws a punch but it's blocked by Matsushima.
Matsushima blocks a punch to the side of the head.
Try working some nice short punches in the clinch.
Matsushima lands a hook that snaps the head of Try backwards.
That's three minutes gone in the round.
Matsushima blocking some punches.
Matsushima blocks an uppercut.
Matsushima lands a shoulder strike that jolts his opponent's head backwards.
Matsushima swings wildly with an uppercut but Try uses good head movement to avoid it.
A nice right hand lands inside from Matsushima.
Try tries a shoulder strike but it doesn't do any damage.
Try misses with a short punch on the inside.
Try misses with the head strike.
A right handed body shot lands from Matsushima.
Try blocks a body shot from Matsushima.
A shot in the inside from Matsushima.
Matsushima blocking some punches.
A head punch on the inside from Matsushima fails to land.
Matsushima blocks a couple of punches on the inside.
Try lands a left hand that snaps the head of Matsushima backwards.
Try throws an elbow that misses.
Matsushima lands a hook to the side of the head.
Matsushima lands a nice looking hook to the body, against the cage.
That's four minutes gone in the round.
Matsushima has a couple of punches blocked by Try.
Wooooo! Give it up for these two warriors! They are putting on a show!
Matsushima working on landing some head shots here - that one got through nicely.
Try trying to stall but Matsushima improves his position.
Matsushima throws a hook to the body. More of an arm punch but it's all scoring with the judges.
Try misses with the head strike.
Matsushima presses Try against the cage and delivers a mid-strength body shot.
Matsushima lands a hook that snaps the head of Try backwards.
Matsushima is working Try over against the cage.
Try throws a punch but it's blocked by Matsushima.
Try misses with a hook from the clinch.
A shot in the inside from Try.
Matsushima stays in close to his opponent and throws a right hand to the body.
Try throws a punch but it's blocked by Matsushima.
Try is breathing heavily.
A head punch blocked on the inside by Try.
Matsushima lands a nice uppercut.
The crowd applaud the fighters' efforts here as the round comes to an end.
Matsushima blocks an elbow strike from Try.
Try misses with a punch on the inside.
Matsushima has a couple of punches blocked by Try.
Matsushima lands with a short shot to the head.
Matsushima tries a shoulder strike but it doesn't do any damage.
And that is the end of the round. The fighters go back to their corners.
That was a close second round but I would say that Jin Matsushima will probably get the nod.
The cut man is working on Jin Matsushima's cut.
That's time! Matsushima's corner gives him a slap on the ass as he gets ready to fight. Ladies and gentlemen, this is the final round!

Matsushima wings a very wild body shot but it does the job and lands to the midsection.
Try is the aggressor but that punch slipped nicely by Matsushima.
Matsushima dips to his left and cracks Try with an uppercut!
Try is the aggressor but that punch slipped nicely by Matsushima.
Try throws an ugly left hook that misses
and Matsushima counters with a right hand to the body.
Matsushima takes one on the chin but keeps coming.
Donk. Matsushima catches Try right on the button with a cross.
Try throws a lazy right hand but Matsushima sees it coming a mile off and sidesteps it easily.
Matsushima thuds a left hand into Try's body.
Matsushima bobs and weaves well there to avoid the strikes.
Try takes a shot to the nose. Hopefully that hasn't broken it.
Try throws a monster uppercut resembling something out of street fighter but it doesn't land.
Try lands a nice shot that snaps Matsushima's head back.
We've seen a great period of action over the last minute or so - credit to both fighters for going all out!
Matsushima moves out of range of the strikes.
Try gets cracked there but stands up to it.
Try swings wildly with a right hand that was never going to find it's target.
Try swings widly with a right hand
letting Matsushima counter with a right hand.
Try is the aggressor but that punch slipped nicely by Matsushima.
That's one minute gone in the round.
Try misses with a looping right.
Try takes a big intake of breath there - he's definitely tired.
Try misses with a hook
and Try takes a counter punch right on the button for his troubles.
Try swings for the body but Matsushima moves out of range.
Matsushima is looking to counter the offense by Try and move into the clinch.
Try swings wildly with a right hand that was never going to find it's target.
Try swings widly with a right hand
and Matsushima counters with a lovely straight right hand!
Matsushima steps to the side to avoid the strikes from Try.
Matsushima's corner calls for a 1-2. Matsushima obliges with the 1 part as he scores the single shot and moves back out of range.
Matsushima cracks Try with a hook to the jaw. Both fighters smile at eachother and high-five before getting back down to business.
Try misses with an uppercut
and Matsushima counters with a nice jab to the body that keeps Try thinking.
Try moves forwards but Matsushima connects with a nice, crisp jab.
Try dips down and scores with a jab to the body.
Matsushima closes the distance and clinches.
The crowd cheering loudly, showing their appreciation for the quality fight we're seeing here.
Try swings wildly with an uppercut but Matsushima uses good head movement to avoid it.
Matsushima throws a blind hook that connects with the side of Trys head.
Matsushima blocks an uppercut.
Good anti-grappling being displayed by Matsushima as Try tries to tie him up.
That's two minutes gone in the round.
Matsushima lands with a short head shot on the inside.
Matsushima lands with a short head shot on the inside.
Try throws a punch but it's blocked by Matsushima.
Try fails to land with a short punch on the inside.
A short right from Matsushima on the inside.
Try taking a breather.
Matsushima blocks an uppercut.
Try has a couple of punches blocked by Matsushima.
Try misses with a knee strike.
Try fails to land with a short punch on the inside.
Try misses with the head strike.
Matsushima swings away with an uppercut that misses.
Matsushima scores with a nice hook to the head.
Try misses with some punches.
Matsushima lands a shoulder strike that jolts his opponent's head backwards.
Matsushima lands a body shot in the clinch.
Matsushima can't find room to land a body shot as Try controls the action.
Try blocks a punch to the side of the head.
That's three minutes gone in the round.
Matsushima misses with a short punch on the inside.
Matsushima working on landing some head shots here - that one got through nicely.
Matsushima misses with a hook from the clinch.
Matsushima misses with a punch on the inside.
Try working aggressively here.
Try throws a head punch that misses.
A short uppercut from Try.
A head punch blocked on the inside by Matsushima.
Matsushima lands a shot to the body.
Matsushima lands a right uppercut that snaps the head of Try backwards.
Try is trying to slow down the pace in the clinch, to catch his breath.
Try misses with the head strike.
Try swings wildly with an uppercut but Matsushima uses good head movement to avoid it.
Try misses with a short punch on the inside.
Matsushima lands a short shot on the inside that snaps the head of Try backwards.
Try fails to land with a short punch on the inside.
Matsushima blocks a couple of punches on the inside.
That's four minutes gone in the round.
A shot in the inside from Matsushima.
Try working aggressively here.
Try throws a head punch that misses.
Nice body punch from Matsushima.
Wooooo! Give it up for these two warriors! They are putting on a show!
A head punch blocked on the inside by Matsushima.
Matsushima lands with a short shot to the head.
Matsushima lands with a right to the head.
Matsushima throws a punch but it's blocked by Try.
Matsushima working on landing some head shots here - that one got through nicely.
An uppercut on the inside fails to land for Matsushima.
Try lands with a short head shot on the inside.
Matsushima lands with a right to the head.
Matsushima lands a short shot on the inside that snaps the head of Try backwards.
Try is looking to control Matsushima's arms but Matsushima gets an underhook and turns him. Now Try has his back to the cage.
The crowd applaud the fighters' efforts here as the round comes to an end.
Try misses with a punch on the inside.
A quick uppercut on the inside from Try.
With the two fighters working up against the cage, Try just misses with a elbow thrown towards Matsushima's brow.
Try throws a punch but it's blocked by Matsushima.
And that's the end of the fight!
Jin Matsushima showed his dominance in that final round.
Well Matsushima has outscored his opponent in every aspect of the fight today. Only a scarily incompetent judge or two will keep him from a well deserved win... Over to the ring announcer for the scorecards.
Ladies and gentlemen, after 3 rounds of action, we go to the scorecards for a decision.
Judge David Hoff scores the fight for Jin Matsushima!
Judge Winston Alpacca scores the fight as a draw!
Judge David Hoff scores the fight as a draw!
The fight ends as a draw!
|
|
|
|
|
|
|
|
|
|
|
|
|
|
|
|
|
|
|
|
|
|
|
| S |
C
A |
G |
S |
C
B |
G |
|
S |
C |
G |
|
energy
A | B |
|
hype
A | B |
|
pop
A | B |
|
mgr
A | B |
|
FIGHT
RATING
100% |
|
|
|
|
|
|
