|
|
PBP Commentary |
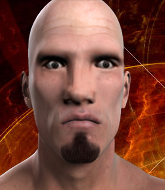
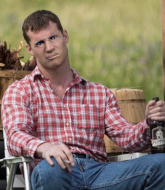
Coming up we have a welterweight MMA rules bout between Stanley Reynolds (ranked 3778 p4p, 2690 weight class) and Sean Faolin (ranked 434 p4p, 324 weight class). Stanley Reynolds had a look across the cage there at his opponent. He definitely means business
 |
|
 |
| 180 cm
25
170
1 - 3 - 0 |
|
180 cm
25
170
2 - 2 - 0 |
BJJ White Belt
Excellent boxer
Big right hand |
|
Good takedowns
Decent boxing
Solid chin |
|
| |
|
Ladies and gentlemen. This fight is 3 rounds, in the welterweight division.
Introducing the fighter to my left, fighting out of the red corner.
With a record of 1 - 3 - 0, fighting out of Las Vegas, Stanley Reynolds!
And introducing the fighter to my right, fighting out of the blue corner.
With a record of 2 - 2 - 0, fighting out of Montreal, Sean Faolin!
The judges for this bout are Daniel Bishop, Chris Edwards and William Gold.

The bell rings for round one and we are underway!
Reynolds works Faolin's body with a nice hook.
Reynolds tries for a takedown but Faolin circles away easily

and Faolin counters with a nice shoot takedown that brings the fighters to the ground.
Reynolds controlling Faolin's posture.
The ref warns both fighters not to hold the cage as they work up against the meshing.
Reynolds wants to sweep but no luck.
Reynolds is working hard here to advance position.
Faolin looks more muscular than last time we saw him. He must have been on the weights.
Faolin stands and throws Reynolds's legs to the side, diving into side control.
We've had a slow start to the round here - hopefully the action picks up.
Faolin trying to control the position but Reynolds is working away.
Faolin looking to punish the body of his opponent here but Reynolds is avoiding damage well.

That's one minute gone in the round.
Faolin scoring with punches from side control.
Faolin lands a nice forearm strike.
Faolin fails to land a wild elbow strike.
Reynolds tries to escape but Faolin is in control.
Reynolds managing to avoid any damage from the strikes thrown by Faolin.
Reynolds is looking for a sweep.
Reynolds is trying to escape the position but Faolin is controlling the position.
Faolin cracks Reynolds with an elbow. That is naaassty.
Reynolds on his back here. We all know that wrestlers don't like being on their back so let's see if Reynolds tries to get out of the position.
Faolin scores with punches from side control.
The fighters are pressed up against the cage, both looking to find a bit of space to work.
Reynolds can't do much from the bottom here.
Faolin creates a bit of distance and throws down some hard shots.
Reynolds is trying to buck Faolin off.

That's two minutes gone in the round.
Reynolds is not content to let Faolin control the position.
We may be looking at a referee standup if the pace doesn't pick up soon.
Faolin working the ground and pound but Reynolds is defending the strikes.

The referee has decided to stand the fighters back up, so we'll restart on the feet.
Reynolds tries to close the distance and clinch up against the cage but Faolin paws at him with a jab and circles away.
Faolin throws out a counter right but Reynolds avoids it with no problem.
Reynolds connects with a crisp jab.
Reynolds misses with a half-hearted attempt at a head kick.
Reynolds lands the left hand.

That's three minutes gone in the round.
Reynolds shoots in for a takedown. He's persisting with it as Faolin sprawls well. Faolin wins this battle and keeps the fight standing. Reynolds gets slowly back to his feet.
Faolin was about to counter that last move with a leg kick but changes his mind.
A head kick misses from Reynolds.
Reynolds throws a low kick, looking for Faolin's leg but Faolin calmly moves out of range.
It seemed like Faolin was going to counter with the hook but didn't fully commit to it.
Reynolds scores with a nice one two combo and darts back out of range to avoid anything coming in the opposite direction.
Reynolds throws a head kick that misses
and Faolin counters with a nice double leg into half guard.
Reynolds is breathing heavily.
Reynolds is trying to stand up here but Faolin is controlling him well.

That's four minutes gone in the round.
Faolin lands with a punch from half guard.
Faolin lands strikes from half guard.
Faolin looks towards his corner to check for any instructions. The corner give him nothing to work with, so he cracks Reynolds with a short hammerfist. I guess that's as good as any advice he could get in this position.
Reynolds trying to control from the bottom.
Faolin winds up and cracks Reynolds with a swinging punch to the side of the head.
Faolin lands with a punch from half guard.
Faolin seems content to maintain position for now, rather than mounting any offense.
Faolin scores with a couple of good hammerfists.
The crowd thankful this round is nearly over.
Faolin is keeping good posture, landing some ground and pound.
Faolin missing with some ground and pound from the half guard.
And that is the end of the round. The fighters go back to their corners.
Sean Faolin dominated that round.
That's the end of the interval. I'm sure that seemed a lot quicker than a minute for our two fighters! Back to the action.

Reynolds shoots for a takedown but Faolin saw that one coming a mile off and avoided it easily.
Reynolds doesn't manage to clinch there - Faolin circles away.
Reynolds fails in his attempt to clinch.
It seemed like Faolin was going to counter with the hook but didn't fully commit to it.
Reynolds fakes high and shoots in for a takedown but Faolin avoids it really well and circles away.
A little jabbing left from Faolin on the counter but it doesn't find it's target.
We've had a slow start to the round here - hopefully the action picks up.

Reynolds closes the distance and clinches.
That's one minute gone in the round.
Reynolds tries to take the fight to the ground by pulling guard but can't manage it.
That's three failed takedown attempts in the round for Stanley Reynolds. That's going to take a lot out of him.

Reynolds manages to break the clinch.
Reynolds fails with a takedown attempt.
Faolin feints the counter takedown.
Reynolds shoots in looking for a takedown. Faolin tries to sprawl out of it but Reynolds keeps driving through. The fighters are pinned against the cage. Faolin manages to get underhooks and after a bit of a struggle, circles away and we're back to standing.
Faolin doesn't fully commit to the body shot counter.
Stanley Reynolds is looking to throw some combinations by the looks of things.
Both fighters are absolutely exhausted here.
That's two minutes gone in the round.
A lull in the action here being met with boos from the crowd.
Reynolds fails with a takedown attempt from distance.
A countering left hand to the body from Faolin misses.
Stanley Reynolds seems to be the more aggressive standup fighter in this bout.
Reynolds tries to drive through with a takedown attempt but Faolin defends well and Reynolds ends up having to push Faolin into the cage where they will battle it out in the clinch.
Faolin swings away with a counter right hand but no contact made.
Reynolds wants to break free. God knows he wants to breaaaak freeee.
Reynolds tries to jump guard but he falls flat on his backside. Faolin smiles and moves away.
Sean Faolin is looking to keep the fight on the feet at all costs.
Reynolds misses with a jab, cross combination.
Reynolds changes levels and looks for a double leg takedown. Faolin tries to avoid it but Reynolds manages to keep hold of a leg and drag Faolin to the ground. Faolin escapes though and pops straight back up to his feet.
It seemed like Faolin was going to counter with the hook but didn't fully commit to it.
Faolin defends well against a solid takedown attempt from Reynolds.
A telegraphed takedown attempt from Reynolds is defended easily by Faolin.
And an attempted straight right on the counter from Faolin! But no joy.
That's three minutes gone in the round.
Reynolds tries to clinch up.
Faolin let fly with a counter punch to the body but it didn't land.
Nice takedown defense from Faolin. No joy for Reynolds on that attempt.
Faolin drops down looking to force a counter takedown but Reynolds defends it well.
Reynolds pushes Faolin up against the cage in a clinch.
Reynolds pushes off and circles away, back to the middle of the mat.
Reynolds definitely looks more muscular than last time we saw him fight.
Reynolds tries to land a front kick but Faolin steps back. That was a bit too telegraphed.
Reynolds shoots in with a takedown attempt and he has Faolin pinned against the cage. Faolin gets the underhooks and manages to circle away.
That's four minutes gone in the round.
Reynolds shoots in and drives through. Faolin sprawls well.
A nice side step and Faolin releases a counter shot to the body, but it doesn't find it's home.
Faolin avoids the clinch attempt nicely.
Reynolds rushes Faolin and pushes him back against the cage in a clinch.
Boooooooooooooooooooo!!! God, this has been a terrible round. Come on you two, sort yourselves out!
Reynolds is looking for a takedown.
Faolin is trying to work out of this bad position, with his back against the cage.
And that is the end of the round. The fighters go back to their corners.
Sean Faolin showed his class in that round. I'd imagine he'll take it on all the scorecards.
The corners get their ten second warning. Both fighters stand from their stools and stare each other down, ready to get back to the action. This is the final round!

Reynolds throws a nice looking combination but Faolin bobs and weaves to avoid any damage.
Faolin is clearly trying to counter these attacks from Reynolds with a body shot.
Reynolds tries to close the distance and clinch up but Faolin swats him away and circles back towards the center.
Reynolds tries to close the distance and clinch up against the cage but Faolin paws at him with a jab and circles away.
Reynolds shoots and misses
and Reynolds takes a counter punch right on the button for his troubles.
Faolin circles away from the clinch attempt
and Faolin counters with a stiff right hand.
Both fighters are breathing heavily.
We've had a slow start to the round here - hopefully the action picks up.
Reynolds throws a series of punches but Faolin moves out of range.
That's one minute gone in the round.
Reynolds fails with a takedown attempt.
Faolin with the counter takedown but Reynolds avoids it easily.
Reynolds looks frustrated there after his takedown attempt is stuffed easily.
Faolin unleashes a big counter combination but Reynolds bobs and weaves and avoids any damage.
That's three failed takedown attempts in the round for Stanley Reynolds. That's going to take a lot out of him.
Faolin keeps the fight on the outside.
Reynolds shoots in for a takedown - he's clinched up with Faolin but Faolin pushes him off and we're back to square one.
Reynolds shoots in but no luck this time.
That's two minutes gone in the round.
The crowd are starting to boo a lack of action.
Faolin blocks a head kick by Reynolds.
Faolin with the counter takedown but Reynolds avoids it easily.
Reynolds pulls out of a head kick attempt.
A head kick by Reynolds misses
and Faolin counters with a right hand to the body.
Reynolds shoots in but doesn't get the takedown
and Faolin counters with a crisp hook to the side of the head.
Sean Faolin seems to be getting the better of the standup.
Reynolds wants to clinch up but Faolin keeps it at a distance.
Faolin now looks to counter with a shot at the body.
Reynolds lands a jab-cross combination.
That's three minutes gone in the round.
Reynolds shoots in and drives through. Faolin sprawls well.
Faolin doesn't fully commit to the body shot counter.
Faolin slips a jab and a cross from Reynolds.
Reynolds tries to clinch but Faolin moves away
letting Faolin counter with a right hand.
Reynolds shoots and misses
and Faolin counters with a lovely straight right hand!
Reynolds tries to clinch up
and Faolin counters with a nice double leg into side control. Reynolds won't be happy with that.
That's four minutes gone in the round.
Faolin working the body and head with strikes.
Faolin working the ground and pound.
Faolin works a knee to the body and follows up with a nice elbow to the head.
Faolin in side control lands a decent elbow.
Faolin is chipping away with strikes.
Reynolds is working to avoid the ground and pound but Faolin connects with a decent elbow.
The crowd cheering loudly, showing their appreciation for the quality fight we're seeing here.
Reynolds wants to control but Faolin postures up.
Faolin is chipping away with strikes.
Reynolds wings away with a couple of strikes but they don't land.
The crowd thankful this round is nearly over.
Reynolds takes a couple of big shots there - the referee warns him that he has to defend himself better.
Faolin lands a few punches from side control.
Stanley Reynolds has stepped it up - he knows he needs a finish here!
Faolin creates a bit of distance and throws down some hard shots.
And that's the end of the fight!
Sean Faolin comfortably won the final round on my scorecard.
I've got Faolin winning every round here. Surely the decision will go his way and he'll pick up a well deserved decision victory. Over to the ring announcer for the scorecards.
Ladies and gentlemen, after 3 rounds of action, we go to the scorecards for a decision.
Judge Daniel Bishop scores the fight 27:30
Judge Chris Edwards scores the fight 27:30
Judge William Gold scores the fight 27:30
In favor of your winner, by unanimous decision... Sean Faolin!
Sean Faolin seemed lost for words in his post fight interview but he remembered to thank his fans and directed everyone to his website.
|
|
|
|
|
|
|
|
|
|
|
|
|
|
|
|
|
|
|
|
|
|
|
| S |
C
A |
G |
S |
C
B |
G |
|
S |
C |
G |
|
energy
A | B |
|
hype
A | B |
|
pop
A | B |
|
mgr
A | B |
|
FIGHT
RATING
29% |
|
|
|
|
|
|
