|
|
PBP Commentary |
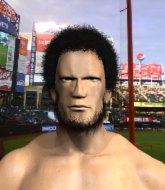
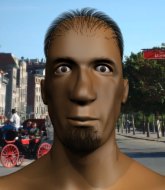
Coming up we have a featherweight MMA rules bout between Kiba Yamasaki (ranked 4174 p4p, 4301 weight class) and Ant Youngblood (ranked 317 p4p, 325 weight class). We have two fighters making their debuts here, so let's see who comes out of this one with their first professional victory.
 |
|
 |
| 165 cm
18
145
0 - 0 - 0 |
|
172 cm
18
145
0 - 0 - 0 |
Dangerous GnP
Excellent boxer
Big right hand |
|
BJJ White Belt
Excellent MT
Granite chin |
|
| |
|
Ladies and gentlemen. This fight is 3 rounds, in the featherweight division.
Introducing the fighter to my left, fighting out of the red corner.
With a record of 0 - 0 - 0, fighting out of Los Angeles, Kiba Yamasaki!
And introducing the fighter to my right, fighting out of the blue corner.
With a record of 0 - 0 - 0, fighting out of Las Vegas, Ant Youngblood!
The judges for this bout are Roosa Järviläinen, Ben Zyskovitsi and Johanna Lukiainen.

The bell rings for round one and we are underway!

Youngblood has closed the distance and engaged Yamasaki in a clinch.
Yamasaki goes for a takedown in the clinch but Youngblood prevents it.
Yamasaki has hold of a leg and is looking for a trip takedown. Youngblood avoids it nicely though and we remain in the clinch.
Youngblood lands a left hand.
An uppercut on the inside fails to land for Youngblood.
With the fighters up against the cage, Youngblood throws an elbow but misses.
Yamasaki has a body lock and is looking for a takedown. Youngblood is bouncing around trying to prevent the takedown and somehow he has indeed managed to stay on his feet.
That's three failed takedown attempts in the round for Kiba Yamasaki. That's going to take a lot out of him.
Yamasaki wants a takedown but no success here.
Youngblood tries a body shot but Yamasaki blocks it.
Youngblood lands punches inside but they're not really causing much damage.
Youngblood prevents the takedown attempt.
Yamasaki wants a takedown.
Youngblood is defending well against a takedown attempt.
Yamasaki blocks a couple of punches on the inside.
Yamasaki wants a takedown but no success here.
We've had a slow start to the round here - hopefully the action picks up.
Yamasaki can't get the takedown.
Come on Youngblood - let's have some action - none of this stalling nonsense.
Yamasaki is looking for a takedown.
Youngblood swings away with an uppercut that misses.
Yamasaki is looking to take this one to the mat.
Youngblood swings wildly with an uppercut but Yamasaki uses good head movement to avoid it.
Yamasaki has Youngblood pressed up against the cage and is working for takedown. Youngblood manages to improve position though and keeps the fight standing.

That's one minute gone in the round.
Yamasaki is looking for a takedown.
Youngblood struggles to land a body shot inside as Yamasaki controls his hands.
A shot in the inside from Youngblood.
Youngblood misses with some punches.
Yamasaki goes for a takedown in the clinch but Youngblood prevents it.
Yamasaki is trying to stall.
Youngblood gets double underhooks to prevent a takedown attempt from Yamasaki.
Yamasaki is looking for a takedown.
Yamasaki drops to a knee looking for a takedown but Youngblood gets the underhooks and prevents it.
The fighters are pressed against the cage, as the pace of the fight slows.
A hook to the body from Youngblood.
Youngblood working aggressively here.

That's two minutes gone in the round.
Yamasaki blocks a punch to the side of the head.
A head punch blocked on the inside by Yamasaki.
Youngblood just leaning against Yamasaki, taking a breather.
Youngblood swings wildly with an uppercut but Yamasaki uses good head movement to avoid it.
Youngblood misses with a knee to the head.
Yamasaki displaying some good clinch control by pressing Youngblood up against the cage.
Youngblood tries to land a shot to the body but it's blocked.
Youngblood working aggressively here.
Yamasaki blocks an uppercut.
Yamasaki drops to a knee looking for a takedown but Youngblood gets the underhooks and prevents it.
Yamasaki drops down for a takedown but doesn't get it.
Yamasaki blocking some punches.
A head punch on the inside from Youngblood fails to land.
Yamasaki can't get the takedown.
Youngblood swings wildly with an uppercut but Yamasaki uses good head movement to avoid it.

That's three minutes gone in the round.
Youngblood struggles to land a body shot inside as Yamasaki controls his hands.
Youngblood looking to slow down the pace here.
Youngblood just leaning against Yamasaki, taking a breather.
Youngblood misses with a short punch on the inside.
Yamasaki has Youngblood pressed up against the cage and is working for takedown. Youngblood manages to improve position though and keeps the fight standing.
Youngblood lands an uppercut.
Yamasaki tries to score a body lock takedown but Youngblood shows good agility there to stay on his feet.
Yamasaki can't get the takedown.
Youngblood fails to land with a short punch on the inside.
Yamasaki wants a takedown.
Yamasaki has hold of a leg and is looking for a trip takedown. Youngblood avoids it nicely though and we remain in the clinch.
Yamasaki being controlled against the cage.
Youngblood swings wildly with an uppercut but Yamasaki uses good head movement to avoid it.
Yamasaki drops to a knee looking for a takedown but Youngblood gets the underhooks and prevents it.
Youngblood lands a nice uppercut.

That's four minutes gone in the round.
Yamasaki wants to take the fight to the mat but Youngblood manages to get underhooks and keep the fight in the clinch.
Yamasaki is trying to slow down the pace of the fight but Youngblood is keeping busy.
Yamasaki wants to take the fight to the mat but Youngblood manages to get underhooks and keep the fight in the clinch.
Youngblood misses with a punch on the inside.
Youngblood misses with the head strike.
Youngblood throws a punch but it's blocked by Yamasaki.
A head punch blocked on the inside by Yamasaki.
Nice elbow from Youngblood.
Youngblood misses with a short punch on the inside.
Youngblood tries to work over Yamasaki's body with a swooping hook but it only glances the target.
Youngblood misses with a hook from the clinch.
Yamasaki is looking for a takedown.
Yamasaki looking to slow down the pace here.
Yamasaki blocks a punch to the side of the head.
Youngblood misses with a short punch on the inside.
Youngblood lands a right uppercut that snaps the head of Yamasaki backwards.
The crowd are loving this. Great action here.
Youngblood lands an uppercut.
Yamasaki tries for a takedown. No joy.
And that is the end of the round. The fighters go back to their corners.
Ant Youngblood dominated that round.
Well, the break between rounds is over. Let's get back to the scrappin!

Youngblood staying out of range there.
Youngblood misses with an uppercut. Yamasaki saw that one coming.
Yamasaki lunges in with an uppercut that skims his opponent's chin.
Youngblood takes a shot to the eye socket. That's gotta hurt.
A slow jab from Youngblood misses its intended target.
Youngblood throws a monster uppercut resembling something out of street fighter but it doesn't land.
Youngblood looks to score with a jab to the body but Yamasaki is just out of range.
Youngblood just misses with a punch to the body.
Yamasaki is looking to counter punch.
Yamasaki uses decent footwork to sidestep a right hand from Youngblood.
Youngblood on the wrong end of an overhand right that came out of nowhere.
Yamasaki swings wildly with a hook that is half blocked by Youngblood.
Youngblood throws out a loose jab but Yamasaki uses good head movement to avoid it.
Good work by Yamasaki as he checks the leg kick.
Youngblood takes a big uppercut there. He seems a bit wobbly but no, he's OK.
Yamasaki lands a nice hook to Youngblood's body. Youngblood takes it in his stride and looks to land his own strikes.
This has been an exciting period of action!
Youngblood avoids the body shot from Yamasaki.
Yamasaki uses decent footwork to sidestep a right hand from Youngblood.
Youngblood looks to score with a combo but nothing lands.
Yamasaki throws out a powerful jab.
That's one minute gone in the round.
Youngblood has his hands up protecting his head but a hook from Yamasaki finds it's way round the side to connect with Youngblood's head.
Yamasaki swings and misses with a hook to the body.
Youngblood tries to counter by closing the distance.
Youngblood takes a really solid shot there but just smiles back and shrugs his shoulders.
Yamasaki tries to land with a swinging hook to the body but Youngblood was well out of range. Poor timing from Yamasaki.
Youngblood tries to counter with a clinch but Yamasaki shakes him off and moves away.
Yamasaki goes for a double leg but Youngblood avoids the attempt and the two fighters end up clinched against the cage as Youngblood continues to drive forward.
Youngblood tried to land a shot to the body but connects with Yamasaki's elbow.
Youngblood gets underhooks to prevent Yamasaki's takedown attempt.
Yamasaki wants a takedown.
That's three failed takedown attempts in the round for Kiba Yamasaki. That's going to take a lot out of him.
Youngblood lands with a left to the head.
Yamasaki drops down for a takedown but doesn't get it.
Youngblood misses with a short punch on the inside.
Youngblood struggles to land a body shot inside as Yamasaki controls his hands.
Youngblood tries to work over Yamasaki's body with a swooping hook but it only glances the target.
Youngblood tries a knee to the head but he's missed.
Yamasaki is working for a takedown up against the cage. He can't get it on this occasion though.
A battle for position here, against the cage.
Youngblood doesn't land with the attempted body shot.
That's two minutes gone in the round.
An uppercut on the inside fails to land for Youngblood.
Youngblood lands an elbow just above Yamasaki 's eye.
Yamasaki has hold of a leg and is looking for a trip takedown. Youngblood avoids it nicely though and we remain in the clinch.
Yamasaki blocks a couple of punches on the inside.
Youngblood dictating the pace here, as the fighters clinch against the cage.
Youngblood scores with a shoulder strike.
Yamasaki goes for a takedown in the clinch but Youngblood prevents it.
The crowd cheering loudly, showing their appreciation for the quality fight we're seeing here.
Youngblood tries to work over Yamasaki's body with a swooping hook but it only glances the target.
Yamasaki is working for a takedown up against the cage. He can't get it on this occasion though.
Ant Youngblood seems to be working more effectively in the clinch in the fight so far.
Youngblood tries a body shot but Yamasaki blocks it.
Yamasaki wants to take the fight to the mat but Youngblood manages to get underhooks and keep the fight in the clinch.
Youngblood tries to throw a body punch but Yamasaki avoids it by throwing Youngblood back against the cage.
Youngblood fails to land with a short punch on the inside.
Youngblood has been the more effective fighter overall so far.
Yamasaki is working for a takedown up against the cage. He can't get it on this occasion though.
Both fighters are absolutely exhausted here.
Yamasaki goes for a takedown in the clinch but Youngblood prevents it.
Yamasaki goes for a takedown attempt but Youngblood pushes him away and we're back to fighting at a distance.
Kiba Yamasaki seems to be the more aggressive standup fighter in this bout.
A jab from Youngblood misses.
It looked like Yamasaki wanted to counter with a hook but didn't fully commit.
That's three minutes gone in the round.
Yamasaki steps to the side to avoid the strikes from Youngblood.
Ant Youngblood is looking to keep the fight on the feet at all costs.
Youngblood wants to clinch up but Yamasaki keeps it at a distance.
Youngblood slips under a jab from Yamasaki.
A little jabbing left from Youngblood on the counter but it doesn't find it's target.
Yamasaki misses with a hook.
A swing and a miss from Youngblood.
Yamasaki ducks down and throws a hook to the body but Youngblood moves away.
Yamasaki avoids a lazy jab quite easily.
Youngblood takes a jab on the nose. He smiles like he loves it and keeps coming.
Youngblood takes a body punch that cleary hurt but he's trying not to show any weakness.

Yamasaki looks for a takedown. He's got it. We're now in half guard.
Yamasaki looks towards his corner to check for any instructions. The corner give him nothing to work with, so he cracks Youngblood with a short hammerfist. I guess that's as good as any advice he could get in this position.
Yamasaki stops Youngblood from getting back to his feet.
Youngblood is looking to improve his position.

Youngblood looking for submissions from an awkward position here.
The two fighters exchange a few words. I couldn't hear what they were saying but maybe it's more fun if you make it up yourself. Yamasaki connects with a nice short shot to Youngblood's temple.
That's four minutes gone in the round.
This is a great period of action - very entertaining stuff!
Youngblood wants to get back to his feet.
Youngblood wants to get back to full guard.
Youngblood is trying to stand.
Youngblood tries to get to full guard but Yamasaki has control of the leg.
Youngblood has hold of Yamasaki's hands but Yamasaki slips his arm to the side and lands an elbow.
Nice strikes from Yamasaki there.
Youngblood pushes Yamasaki off looking to stand but Yamasaki dives back in and keeps control.
Yamasaki wants to take a breather but Youngblood is having none of it.
Youngblood flails away from the bottom but he's not doing any damage.
Yamasaki stops Youngblood from getting back to his feet.
Yamasaki scoring with strikes to the body and head.
The ref warns both fighters not to hold the cage as they work up against the meshing.
Yamasaki landing with strikes to the body and head, softening up his opponent.
Youngblood is trying to defend against the ground and pound but Yamasaki scores with a couple of nice shots.
Yamasaki winds up and cracks Youngblood with a swinging punch to the side of the head.
And that is the end of the round. The fighters go back to their corners.
Kiba Yamasaki dominated that second round.
That's the end of the interval. I'm sure that seemed a lot quicker than a minute for our two fighters! Back to the action. This is the final round!

Youngblood with poor footwork there. He got himself in a bit of a tangle, enabling Yamasaki to score with a decent uppercut.
Youngblood misses with a shot to the body
and Yamasaki counters with a stiff right hand.
Youngblood tries to clinch but Yamasaki moves out of range.
Yamasaki changes levels and scores with a jab to the body.
Yamasaki is moving around nicely and scores here with a single head shot.
A swing and a miss from Youngblood.
Youngblood misses with a hook.
Youngblood displays some good footwork, moving neatly out of range as Yamasaki throws out the jab.
Yamasaki keeps his opponent at a distance with a nice jab.
Youngblood tries to score with an inside leg kick but telegraphs it and Yamasaki is able to avoid easily.
Yamasaki keeps his opponent at a distance with a nice jab.
Youngblood closes the distance and clinches.
Youngblood lands with a short punch from the clinch.
The fans in attendance giving it up for the two fighters, who have really let it all hang out in the last minute or so!
Youngblood lands with a quick shot inside that doesn't really do much damage.
Yamasaki is working for takedown but Youngblood is calmly controlling the position for now.
Yamasaki changes levels and goes for a takedown here. Youngblood fights it off and pushes away nicely.
Yamasaki connects with a body shot that sends Youngblood's belly button to the back.
That's one minute gone in the round.
Youngblood loads up on a big right hand but Yamasaki slips the punch.
A jab from Yamasaki finds it's way through Youngblood's defenses.
Youngblood misses the jab.
Youngblood misses with a head kick.
Yamasaki scores with a punch to the head.
Youngblood loads up on a big right hand but Yamasaki slips the punch.
Jab by Yamasaki.
Yamasaki is the aggressor but that punch slipped nicely by Youngblood.
Yamasaki throws a hook to the body but it doesn't connect.
Yamasaki fakes high and swings low for a body shot but Youngblood manages to avoid it.
Youngblood staying out of range there.
Yamasaki jabbing away but nothing is landing.
Youngblood looks like he wants to counter punch here.
Yamasaki throws a shot from downtown. Youngblood moves away and avoids it.
Youngblood throws an off balance right hand
enabling Yamasaki to counter with a crisp jab.
Yamasaki throws a hook to the side of Youngblood's head but Youngblood sees it coming and ducks under it beautifully.
Youngblood misses with a shot to the body
and Yamasaki counters with a good right hand that lands right on the jaw.
Yamasaki digs a good body shot into Youngblood's ribs.
That's two minutes gone in the round.
Wooooo! Give it up for these two warriors! They are putting on a show!
Yamasaki lands with a cross.
Kiba Yamasaki is winning the standup battle so far.
Youngblood looks to clinch
and Yamasaki counters with a nice uppercut.
Yamasaki lands a straight punch to the body, keeping Youngblood at a distance.
Yamasaki slips under a jab from Youngblood.
Yamasaki blocks a leg kick.
Nice defenses there by Youngblood.
A big left from Yamasaki misses.
And an attempted straight right on the counter from Youngblood! But no joy.
Yamasaki fails with a takedown attempt.
That's three failed takedown attempts in the round for Kiba Yamasaki. That's going to take a lot out of him.
Both fighters are breathing heavily.
Youngblood looks to throw the jab but Yamasaki is out of range.
Youngblood fails with an attempt to clinch.
Youngblood takes a jab right on the kisser.
Youngblood throws a wild combination but nothing lands.
The fighters circling - Yamasaki throws out the jab but it was never going to land.
Youngblood tries to counter by closing the distance.
Decent striking displayed by Yamasaki there.
Yamasaki lands a body shot.
Yamasaki throws the left hand but Youngblood avoids the punch easily.
That's three minutes gone in the round.
Yamasaki scores with a jab. Youngblood acknowledges it with a nod of the head.
Yamasaki throws the left hand but Youngblood avoids the punch easily.
Yamasaki misses with a wild body shot.
A little jabbing left from Youngblood on the counter but it doesn't find it's target.
Yamasaki takes a swing at Youngblood's ribcage but misses.
Youngblood tries to clinch but Yamasaki moves away
and Yamasaki counters nicely by changing levels and landing a hook to the body.
Youngblood has a pretty nasty looking mouse under his right eye.
Youngblood throws an overhand right that lands on Yamasaki's shoulder, as Yamasaki tries to avoid the shot.
Yamasaki connects with a single shot there.
Youngblood has closed the distance and engaged Yamasaki in a clinch.
Yamasaki is working on a leg, looking for a takedown but Youngblood is defending well.
Yamasaki blocking some punches.
Youngblood working aggressively here.
An uppercut on the inside fails to land for Youngblood.
An uppercut on the inside fails to land for Youngblood.
A right handed body shot lands from Youngblood.
Youngblood has a couple of punches blocked by Yamasaki.
A battle for position here, against the cage.
Youngblood misses with some punches.
That's four minutes gone in the round.
Youngblood lands a shoulder strike.
Yamasaki blocks an uppercut.
Yamasaki has dropped down and is looking to force the takedown but it's defended by Youngblood after a bit of a struggle.
Yamasaki blocks a body shot from Youngblood.
A short right from Youngblood on the inside.
Wooooo! Give it up for these two warriors! They are putting on a show!
Youngblood swings away with an uppercut that misses.
Come on Youngblood - let's have some action - none of this stalling nonsense.
Youngblood tries a shoulder strike but it doesn't do any damage.
Good anti-grappling being displayed by Youngblood as Yamasaki tries to tie him up.
Youngblood goes for a body shot but it's blocked.
Youngblood prevents a takedown attempt there.
Yamasaki blocks an uppercut.
A real battle for position is taking place between these two warriors.
Yamasaki blocks an uppercut.
Yamasaki changes levels and goes for a takedown here. Youngblood fights it off and pushes away nicely.
Yamasaki throws a nice hook to the body that draws an oooh from the crowd.
And that's the end of the fight!
Kiba Yamasaki showed his dominance in that final round.
I think Yamasaki has won this one but let's see what the judges have to say. Over to the ring announcer for the scorecards.
Ladies and gentlemen, after 3 rounds of action, we go to the scorecards for a decision.
Judge Roosa Järviläinen scores the fight 28:28
Judge Ben Zyskovitsi scores the fight 28:28
Judge Johanna Lukiainen scores the fight 28:28
The fight is ruled a draw!
|
|
|
|
|
|
|
|
|
|
|
|
|
|
|
|
|
|
|
|
|
|
|
| S |
C
A |
G |
S |
C
B |
G |
|
S |
C |
G |
|
energy
A | B |
|
hype
A | B |
|
pop
A | B |
|
mgr
A | B |
|
FIGHT
RATING
58% |
|
|
|
|
|
|
