|
|
PBP Commentary |
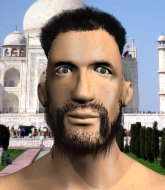
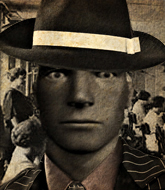
Coming up we have a welterweight MMA rules bout between Nakagome Kakuzo (ranked 5153 p4p, 4631 weight class) and Sam Walker (ranked 540 p4p, 519 weight class). Walker has chosen Larva as his entrance music. Both fighters look fresh as a daisy as they make their way towards the cage.
 |
|
 |
| 185 cm
19
180
4 - 0 - 0 |
|
183 cm
25
170
1 - 1 - 0 |
Good takedowns
Counter fighter
Cuts easily |
|
BJJ Blue Belt
Decent boxing
Prefers standup |
|
| |
|
Ladies and gentlemen. This fight is 3 rounds, in the welterweight division.
Introducing the fighter to my left, fighting out of the red corner.
With a record of 4 - 0 - 0, fighting out of Tokyo, Nakagome Kakuzo!
And introducing the fighter to my right, fighting out of the blue corner.
With a record of 1 - 1 - 0, fighting out of Los Angeles, Sam Walker!
The judges for this bout are Lou da Vinci, Joseph Jones and John Kavanagh.

The bell rings for round one and we are underway!
Kakuzo shoots in for a takedown - he's clinched up with Walker but Walker pushes him off and we're back to square one.
Walker scores with a punch to the gut of his opponent.
Kakuzo takes a shot to the body in his stride.
Kakuzo fakes and then throws a beautiful body shot. Walker looks a bit winded and takes a step backwards to take a breath.
Kakuzo fails with a takedown attempt.
We've had a slow start to the round here - hopefully the action picks up.
Walker cracks a nice hook into Kakuzo's ribs.
Kakuzo tries to score with a low kick but Walker moves his leg out of the way.
Walker avoids the clinch attempt nicely.

That's one minute gone in the round.
Walker fails to land with a series of punches.
Kakuzo takes a body punch that cleary hurt but he's trying not to show any weakness.
Walker leaves Kakuzo with his face pressed against the mat as he sprawls beautifully, defending against a solid takedown attempt.
That's three failed takedown attempts in the round for Nakagome Kakuzo. That's going to take a lot out of him.
Kakuzo misses with a jab, cross combination.
Walker takes a thudding leg kick, right into the meat of the thigh.
Nice body punch from Walker.
Walker checks a leg kick.
Kakuzo ducks right into an uppercut from Walker.
Walker has tried to improve his agility in the runup to this fight.
Kakuzo shoots in with a takedown attempt and he has Walker pinned against the cage. Walker gets the underhooks and manages to circle away.
Walker is throwing a lot of body shots here, looking to wear down Kakuzo rather than just go for the knockout.

That's two minutes gone in the round.
Walker scores with a jab to the body.
Kakuzo throws a lazy right hand but Walker sees it coming a mile off and sidesteps it easily.
Kakuzo misses with a combination
and Walker counters with a left and a right that stings Kakuzo.
The crowd cheering loudly, showing their appreciation for the quality fight we're seeing here.
Kakuzo slips under a jab.
Kakuzo connects with a body shot that sends Walker's belly button to the back.

Walker has Kakuzo up against the cage in a clinch.

That's three minutes gone in the round.
Kakuzo has a couple of punches blocked by Walker.
Walker just leaning against Kakuzo, taking a breather.
Kakuzo swings wildly with an uppercut but Walker uses good head movement to avoid it.
Kakuzo tries a shoulder strike but it doesn't do any damage.
Kakuzo goes for a body shot but it's blocked.
Kakuzo tries to throw a body punch but Walker avoids it by throwing Kakuzo back against the cage.
Walker has Kakuzo pressed against the cage.
Kakuzo misses with a hook from the clinch.
Kakuzo misses with a shot to the kidneys.
Kakuzo swings away with an uppercut that misses.
Walker stalling.
Walker is stalling here.
Walker continues to stall. The referee tells him to work or he's going to break them up.

That's four minutes gone in the round.
Kakuzo misses with a shot to the kidneys.
Kakuzo misses with the head strike.
Kakuzo being controlled against the cage.
Kakuzo throws a blind hook that connects with the side of Walkers head.
Kakuzo lands a body shot.
Walker has Kakuzo pushed against the cage.
Kakuzo has a couple of punches blocked by Walker.
Kakuzo effectively controlling the action here.
Kakuzo goes for a body shot but it's blocked.
Kakuzo throws a head punch that misses.

Kakuzo has Walker pressed up against the cage. He's trying to work for a single leg takedown. Kakuzo pulls back from the cage and twists to the side, sending Walker tumbling to the mat - Kakuzo dives into Walker's guard.
And that is the end of the round. The fighters go back to their corners.
Sam Walker dominated that round.
The corners get their ten second warning. Both fighters stand from their stools and stare each other down, ready to get back to the action.

Kakuzo tries to bum rush Walker with a series of wild strikes but Walker uses good footwork to avoid the assault.
Walker lands a jab to Kakuzo's midsection.
Walker connects with a body shot.
Kakuzo takes an uppercut right on the jaw but it doesn't phase him.
Kakuzo fails with a rather predictable takedown attempt.
Walker blocks a leg kick.
Sam Walker seems to be getting the better of the standup.
We've had a slow start to the round here - hopefully the action picks up.
Walker scores with a reasonable looking shot to the body. Kakuzo doesn't seem bothered though.
Walker lands with a good body shot.
Kakuzo throws a hook but Walker blocks it.
Walker has managed to clinch.
That's one minute gone in the round.
Kakuzo controlling the action here for a moment.
Kakuzo lands with a good tight uppercut to the head.
A hook to the body from Walker.
Kakuzo has hold of a leg and is looking for a trip takedown. Walker avoids it nicely though and we remain in the clinch.
A right hand to the body from Walker.
A bit of stalling here from Walker.
Both fighters working to control the clinch.
Walker holding his opponent close, against the cage.
Good anti-grappling being displayed by Walker as Kakuzo tries to tie him up.
Kakuzo prevents Walker from breaking the clinch.
Kakuzo is trying to slow down the pace of the fight but Walker is keeping busy.
That's two minutes gone in the round.
Walker pushes Kakuzo back against the cage and unloads with a body punch.
Kakuzo is trying to maintain a safe position but Walker gets an underhook and turns Kakuzo into the cage.
Kakuzo is trying to drag Walker to the mat but Walker just about manages to keep his footing. He used the cage to his advantage there.
That's three failed takedown attempts in the round for Nakagome Kakuzo. That's going to take a lot out of him.

Walker is trying to trip Kakuzo. He has hold of a leg but Kakuzo is hopping around, keeping his balance for the moment. Walker persists though and gets the takedown into guard.
Walker must be cautious of submissions here, given that his opponent has the superior Jiu Jitsu.

Kakuzo throwing his legs up looking for a triangle.
Walker not doing a lot at the moment. He'll have to show some more aggression or the fight will get stood up.
Kakuzo is trying to control the position from the bottom.
Walker has been the more effective fighter overall so far.
Kakuzo throws a couple of weedy looking strikes off his back.
That's three minutes gone in the round.
Kakuzo has his foot on Walker's thigh. He's trying to push off and get in position for a triangle, I think. Walker works his way back into a safe position though.
Walker sitting in guard here, content to control.
Kakuzo looking for submissions off his back, moving his hips, looking for an opening.
Kakuzo has his foot on Walker's thigh. He's trying to push off and get in position for a triangle, I think. Walker works his way back into a safe position though.
Walker controlling from the guard. I say controlling but really, he's stalling.
The fighters are pressed up against the cage, both looking to find a bit of space to work.
Kakuzo is trying to control the position from the bottom.
Kakuzo had isolated an arm as going for a kimura. Walker defends it easily.
That's four minutes gone in the round.
Walker landing some decent shots from guard.
Kakuzo can't do much from the bottom at the moment, as Walker controls the pace.
Kakuzo working the defensive guard well to avoid strikes from Walker.
Walker really doesn't want to stay on the ground with Kakuzo. If he can't get it back to his feet, it's only a matter of time before he'll be tapping out.
Kakuzo looking for submissions off his back, moving his hips, looking for an opening.
Walker engaging in some classic timewasting tactics.
The crowd thankful this round is nearly over.
Kakuzo has a loose triangle. He'll be looking to tighten that up but Walker can see exactly what he's planning and manages to posture up and free himself.
And that is the end of the round. The fighters go back to their corners.
Sam Walker showed his class in that round. I'd imagine he'll take it on all the scorecards.
Well, the break between rounds is over. Let's get back to the scrappin! This is the final round!

Walker with a body punch. A glancing blow.
Kakuzo fails with a takedown attempt.
Kakuzo tries to clinch up but Walker circles away and keeps his distance.
Walker scores with a hook to the body. Kakuzo takes a step back and tries to catch his breath.
We've had a slow start to the round here - hopefully the action picks up.
Walker lands a straight punch to the body, keeping Kakuzo at a distance.
Kakuzo takes a swing at Walker's ribcage but misses.
Kakuzo looks to have improved his striking defense since last time we saw him fight.

Kakuzo darts in and clinches Walker up against the cage.
Walker gets underhooks to prevent Kakuzo's takedown attempt.
That's one minute gone in the round.
Walker tries to throw a body punch but Kakuzo avoids it by throwing Walker back against the cage.
Nakagome Kakuzo has scored more points in the clinch so far.
Walker blocks an uppercut.
Kakuzo can't get the takedown.
That's three failed takedown attempts in the round for Nakagome Kakuzo. That's going to take a lot out of him.
Kakuzo is trying to slow down the pace of the fight but Walker is keeping busy.
Walker lands a hook to the body. It's hard to tell if that hurt Kakuzo or not.
Both fighters are breathing heavily.
Kakuzo trying to land knees to the body.
A real battle for position is taking place between these two warriors.
Kakuzo fails to land with a short punch on the inside.
Kakuzo pushes off an throws an elbow but Walker leans to the side and avoids it. We're back to clinching against the cage.
Kakuzo stalling in the clinch but Walker improves position.
Kakuzo throws a punch but it's blocked by Walker.
Walker gets double underhooks to prevent a takedown attempt from Kakuzo.
Kakuzo changes levels and goes for a takedown here. Walker fights it off and pushes away nicely.
Sam Walker is looking to keep the fight on the feet at all costs.
That's two minutes gone in the round.
Walker comes forward and lands a shot to the body, then darts back out of range.
Kakuzo misses with a body shot. Nice footwork from Walker.
Kakuzo doesn't manage to clinch there - Walker circles away.
Kakuzo doesn't react quick enough there as he takes a shot to the body.
Walker scores with a hook to the body. Kakuzo takes a step back and tries to catch his breath.
Kakuzo showing good head movement there, avoiding the strikes from Walker.
No luck for Kakuzo with that takedown attempt.
That's three minutes gone in the round.
Walker digs a good body shot into Kakuzo's ribs.
Walker scores with a hook to the body. Kakuzo takes a step back and tries to catch his breath.
Walker with a nice cross.
Nakagome Kakuzo has stepped it up - he knows he needs a finish here!
Kakuzo looks to land a left hand but Walker moved out of range nicely.
Walker stuns Kakuzo with a nice body shot, before stepping back out of range.
Kakuzo takes a shot to the body in his stride.
A shot to the liver by Walker. Beautiful body shot.
Walker changes levels and scores with a jab to the body.
That's four minutes gone in the round.
Walker punishes Kakuzo's body with a nice straight punch.
Walker forces Kakuzo back against the cage and clinches.
The crowd are loving this. Great action here.
Walker blocks an elbow strike.
Walker lands a shot to the body.
Kakuzo tries a shoulder strike but it doesn't do any damage.
Walker will no doubt start fighting again in a minute but for now he's just having a little rest, leaning Kakuzo up against the cage.
Walker taking a break, stalling in the clinch.
An uppercut on the inside fails to land for Kakuzo.
Walker stalling in the clinch.
Kakuzo doesn't land with the attempted body shot.
Sam Walker is fighting for a decision - hopefully he's judged it right and he's actually winning the fight.
Walker tried to land a shot to the body but connects with Kakuzo's elbow.
A head punch on the inside from Kakuzo fails to land.
And that's the end of the fight!
Sam Walker comfortably won the final round on my scorecard.
I've got Walker winning every round here. Surely the decision will go his way and he'll pick up a well deserved decision victory. Over to the ring announcer for the scorecards.
Ladies and gentlemen, after 3 rounds of action, we go to the scorecards for a decision.
Judge Lou da Vinci scores the fight 27:30
Judge Joseph Jones scores the fight 27:30
Judge John Kavanagh scores the fight 27:30
In favor of your winner, by unanimous decision... Sam Walker!
Sam Walker really struggled to get his t-shirt on before his hand was raised. Making sure that Bondi MMA logo gets some air time is pretty tricky when you're all sweaty.
|
|
|
|
|
|
|
|
|
|
|
|
|
|
|
|
|
|
|
|
|
|
|
| S |
C
A |
G |
S |
C
B |
G |
|
S |
C |
G |
|
energy
A | B |
|
hype
A | B |
|
pop
A | B |
|
mgr
A | B |
|
FIGHT
RATING
40% |
|
|
|
|
|
|

