|
|
PBP Commentary |
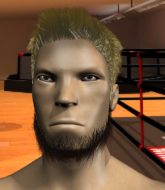
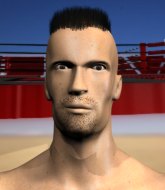
Coming up we have a bantamweight MMA rules bout between Jay Cartwright (ranked 1762 p4p, 1862 weight class) and Andre Mahesa (ranked 107 p4p, 112 weight class). The crowd seem to be enjoying Mahesa's choice of entrance music: You're Going Down . These two fighters really are very evenly matched on the feet - it will be fascinating to see who can assert themselves in that aspect of the fight.
 |
|
 |
| 178 cm
29
143
11 - 3 - 0 |
|
190 cm
26
145
13 - 6 - 0 |
Abu Dhabi Champ
Counter fighter
Very strong |
|
Good wrestler
Decent boxing
Powerful |
|
| |
|
Ladies and gentlemen. This fight is 3 rounds, in the bantamweight division.
Introducing the fighter to my left, fighting out of the red corner.
With a record of 11 - 3 - 0, fighting out of Rio de Janeiro, Jay Cartwright!
And introducing the fighter to my right, fighting out of the blue corner.
With a record of 13 - 6 - 0, fighting out of Hilo, Andre Mahesa!
The judges for this bout are Chad Campbell, Jonathan Paton and David Schapiro.

The bell rings for round one and we are underway!
Cartwright looks for a takedown but Mahesa sprawls well.
Mahesa lunges in with swinging rights and lefts but Cartwright circles away quickly and effectively.
Andre Mahesa seems to be the more aggressive standup fighter in this bout.
Cartwright showing good head movement there, avoiding the strikes from Mahesa.
Cartwright shoots in but doesn't get the takedown
and Mahesa connects with a straight left hand counter down the middle.

Mahesa closes the distance and presses his opponent up against the cage.
A short right from Mahesa on the inside.
Cartwright has dropped down and is looking to force the takedown but it's defended by Mahesa after a bit of a struggle.
That's three failed takedown attempts in the round for Jay Cartwright. That's going to take a lot out of him.
We've had a slow start to the round here - hopefully the action picks up.
Mahesa misses with a shot to the kidneys.
Mahesa lands with a short head shot on the inside.
Mahesa lands a right hand.
Mahesa misses with a hook to the ribs.

That's one minute gone in the round.
A short right hand to the side of the head by Mahesa.
Mahesa lands a body shot.
Cartwright has dropped down and is looking to force the takedown but it's defended by Mahesa after a bit of a struggle.
Cartwright has Mahesa pressed up against the cage and is working for takedown. Mahesa manages to improve position though and keeps the fight standing.
Mahesa landing knees to the body. They look like they could hurt.
A body shot lands from Mahesa.
Mahesa lands a nice uppercut.
Mahesa lands a hook to the side of the head.
Mahesa lands a body punch - he's looking to wear down Cartwright.
Nice body punch from Mahesa - that landed with a thud.
Cartwright is looking to take this one to the mat.
Cartwright drops down for a takedown but doesn't get it.
Mahesa lands a knee to the head.

That's two minutes gone in the round.
Mahesa works on Cartwright's body with a couple of short punches.
Cartwright goes for a takedown in the clinch but Mahesa prevents it.
The crowd cheering loudly, showing their appreciation for the quality fight we're seeing here.
Cartwright has a body lock and is looking for a takedown. Mahesa is bouncing around trying to prevent the takedown and somehow he has indeed managed to stay on his feet.
A right hand to the body from Mahesa.
Mahesa lands a shoulder strike.
Mahesa lands a body shot in the clinch.
Mahesa scores with a hook to the body.
Mahesa digs a right hand underneath Cartwright's ribcage. Cartwright let out a lung full of air as it connected.
Cartwright tries for a takedown. No joy.
Mahesa lands a body punch - he's looking to wear down Cartwright.
Cartwright is trying to work for a single leg takedown but Mahesa pulls him back up using the underhooks.
Cartwright is breathing heavily.

That's three minutes gone in the round.
Mahesa putting his Muay Thai to good use. He has Cartwright in a tight clinch and is doing some damage with knees to the body.
Still in the clinch, Mahesa scores with a nice short uppercut.
Cartwright is working for takedown but Mahesa is calmly controlling the position for now.
Mahesa scores with a nice hook to the head.
Mahesa presses Cartwright against the cage and delivers a mid-strength body shot.
Mahesa gets through Cartwright's defenses to land a nice punch to the side of the head.
Mahesa is defending well against a takedown attempt.
Mahesa is pressed up against the cage. Cartwright has hold of a leg and is looking to drag Mahesa down to the mat. Mahesa avoids the attempt though and has circled away. We're back to striking at a distance.
Mahesa scores with a jab to the jaw of his opponent.

Cartwright is rocked!
Mahesa moves into the clinch.
Oh Cartwright is still all over the place! His legs are completely gone! Will he be able to recover?!!
Mahesa pushes Cartwright back against the cage and unloads with a body punch.
Mahesa lands with a right to the head.
Mahesa lands a body punch.

That's four minutes gone in the round.
The crowd cheering loudly, showing their appreciation for the quality fight we're seeing here.
A nice left hand lands by Mahesa.
Mahesa lands a hook that snaps the head of Cartwright backwards.
Mahesa lands punches inside but they're not really causing much damage.
Still in the clinch, Mahesa scores with a nice short uppercut.
Mahesa gets through Cartwright's defenses to land a nice punch to the side of the head.
Mahesa is pressed up against the cage. Cartwright has hold of a leg and is looking to drag Mahesa down to the mat. Mahesa avoids the attempt though and has circled away. We're back to striking at a distance.
Mahesa forces Cartwright back against the cage and clinches.
Cartwright has Mahesa pressed up against the cage and is working for takedown. Mahesa manages to improve position though and keeps the fight standing.
Mahesa lands a hook that snaps the head of Cartwright backwards.
Cartwright has Mahesa pressed up against the cage and is working for takedown. Mahesa manages to improve position though and keeps the fight standing.
Mahesa is working Cartwright over against the cage.
Mahesa is working Cartwright over against the cage.
Mahesa lands a knee to the body.
And that is the end of the round. The fighters go back to their corners.
Andre Mahesa dominated that round.
The fighters' corners scream their final instructions, as the referee calls time. Here we go, back to the action!

The fight moves into the clinch position.
Cartwright seems to have got his legs back now.
A short right hand to the side of the head by Mahesa.
Mahesa prevents a takedown attempt there.
Still in the clinch, Mahesa scores with a nice short uppercut.
Mahesa doesn't land with the attempted body shot.
Mahesa lands a hook that snaps the head of Cartwright backwards.
A right hook to the body lands for Mahesa.
We've had a slow start to the round here - hopefully the action picks up.
Cartwright goes for a takedown attempt but Mahesa pushes him away and we're back to fighting at a distance.
Mahesa clinches up with Cartwright and pushes him back against the cage.
Mahesa lands with a short punch from the clinch.
Mahesa has been the more effective fighter overall so far.
That's one minute gone in the round.
Cartwright changes levels and goes for a takedown here. Mahesa fights it off and pushes away nicely.
That's three failed takedown attempts in the round for Jay Cartwright. That's going to take a lot out of him.

Cartwright closes the distance, clinches up and gets a nice trip takedown into side control. Very smooth.
Mahesa is putting a lot of effort into getting back to his feet here.

Mahesa explodes and escapes back to his feet! Nice escape there!
Mahesa gets in close and instigates a clinch.
Mahesa pushes Cartwright back against the cage and lands a hook to the side of the head.
Mahesa throws a blind hook that connects with the side of Cartwrights head.
The crowd cheering loudly, showing their appreciation for the quality fight we're seeing here.
A short uppercut from Mahesa.
A short right from Mahesa on the inside.
Mahesa throws a big uppercut that drops Cartwright! More strikes from Mahesa and the referee jumps in to stop the fight! Cartwright lies dazed against the cage as Mahesa celebrates with his cornermen!
Ladies and gentlemen, after 2:58 of round 2, we have a winner by way of TKO (Strikes). Andre Mahesa!
During a confident post fight interview, Andre Mahesa thanked all his fans. He seemed very genuine when describing how motivated his fans keep him.
|
|
|
|
|
|
|
|
|
|
|
|
|
|
|
|
|
|
|
|
|
|
|
| S |
C
A |
G |
S |
C
B |
G |
|
S |
C |
G |
|
energy
A | B |
|
hype
A | B |
|
pop
A | B |
|
mgr
A | B |
|
FIGHT
RATING
58% |
|
|
|
|
|
|
