|
|
PBP Commentary |
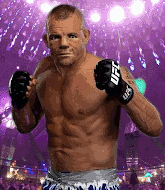
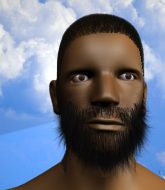
Coming up we have a lightweight MMA rules bout between Desmond Bright (ranked 2169 p4p, 3024 weight class) and Abdullah Keita (ranked 252 p4p, 334 weight class). Bright comes to the cage accompanied by Bon Jovi - Wanted Dead Or Alive. Over to our ring announcer for the fighter introductions!
 |
|
 |
| 184 cm
18
170
3 - 0 - 0 |
|
185 cm
26
157
8 - 2 - 0 |
Decent wrestler
Basic striking
Cardio machine |
|
BJJ Blue Belt
Excellent boxer
Powerful |
|
| |
|
Ladies and gentlemen. This fight is 5 rounds, in the lightweight division.
Introducing the fighter to my left, fighting out of the red corner.
With a record of 3 - 0 - 0, fighting out of Las Vegas, Desmond Bright!
And introducing the fighter to my right, fighting out of the blue corner.
With a record of 8 - 2 - 0, fighting out of New York, Abdullah Keita!
The judges for this bout are James Glass, Steven Brown and Phil Schofield.

The bell rings for round one and we are underway!

Bright closes the distance and scores a nice trip takedown into half guard. Keita did well to prevent Bright getting side control.

Bright is trying to work for a kimura but Keita is defending well.
The fighters are pressed up against the cage, both looking to find a bit of space to work.
Bright trying to control from half guard but Keita is working away.
Keita is trying to stand up here but Bright is controlling him well.
Bright is sneakily working for an arm triangle but Keita sees it coming and defends easily.
Bright looking for a kimura but he'll have to free his other leg if he wants to finish that. Perhaps he's just using it as a distraction technique.
Bright is pressing down on Keita's thigh, looking to free his foot. Keita is holding on for now.
We've had a slow start to the round here - hopefully the action picks up.
Keita looks like he's trying to stand up.
Bright wants to pass to mount but Keita is defending the position.
Neither fighter is being very active at the moment, with Bright in particular looking to stall.

That's one minute gone in the round.
Bright is trying to work for a kimura. This could be trouble! No, Keita has managed to free his arm - good work.
Keita wants to get back to his feet.
Bright is looking for a kimura but Keita is holding onto that half guard position, so it's hard for Bright to get the leverage.
Bright performing his best blanket impression for a moment.
Bright wants to work for an arm triangle but Keita is really keeping half guard well and defending the submission attempt.
Bright is trying to control. Keita wants to improve his position but can't escape this time.
Bright is working for a kimura but Keita is defending it quite comfortably.
Keita is concentrating on defense, preventing Bright from advancing position.

That's two minutes gone in the round.
A lull in the action here being met with boos from the crowd.
Bright is keen to just control but Keita is a slippery customer.
Bright wants to pass the guard but Keita is defending well.
Keita tries to kick Bright off but Bright keeps his base steady and stays in half guard.
Bright is looking for a kimura here.
Bright is looking for a kimura here.
Bright is sneakily working for an arm triangle but Keita sees it coming and defends easily.
Bright looking for a kimura but he'll have to free his other leg if he wants to finish that. Perhaps he's just using it as a distraction technique.
Bright has improved his flexibility recently so we will have to see if he can use that to his advantage.
The ref warns both fighters not to hold the cage as they work up against the meshing.
Bright is looking for a kimura here.

That's three minutes gone in the round.
Bright seems to be looking for submissions.
Bright is looking for an arm triangle, whilst trying to pass to side control. Keita doesn't seem that keen to cooperate though. No luck this time Bright.
Bright seems content to maintain position for now, rather than mounting any offense.
Bright is trying to control. Keita wants to improve his position but can't escape this time.
Bright wants to work for an arm triangle but Keita is really keeping half guard well and defending the submission attempt.
Keita won't allow Bright to pass to mount.

That's four minutes gone in the round.
A few boos can be heard. I'm sure they will multiply if the fighters don't pick up the pace.
Bright trying to control the action but Keita is working from the bottom.
Bright is looking for a kimura here.
Bright is thinking about going for an arm triangle but he can't free his leg.
Bright perhaps working for something from half guard, or maybe not. It looks like he's just sitting there.
Bright has freed up his trapped foot and advances to mount.
Bright working for a submission but Keita is keeping him at bay.
Boooooooooooooooooooo!!! God, this has been a terrible round. Come on you two, sort yourselves out!
Keita tries to hold on but Bright pushes him away.
Bright is working for a guillotine from mount but Keita frees his head quite easily.
Bright with some aggressive grappling here. He's looking for submissions here, rather than waiting for the opportunity to counter.
And that is the end of the round. The fighters go back to their corners.
Desmond Bright dominated that round.
OK. That's time! The bell goes and we're back to the action.

Bright fails with the takedown.
Keita stuffs the takedown.
Bright ducks down and throws a hook to the body but Keita moves away.
Bright decides to change it up a bit and drives through with a nice takedown into half guard.

Keita has one foot on Bright's thigh - he pushes off and manages to get back to his feet.
Keita scores with a jab to the head.
A nice combination there by Keita.
Wooooo! Give it up for these two warriors! They are putting on a show!

Bright forces Keita back against the cage and clinches.
Bright jumps into guard, dragging Keita to the mat.
Keita is looking to stand up but Bright won't let him.
Bright working for a triangle but Keita defends it easily.
Bright looking for a guillotine here but Keita defends easily.
Keita got a little sloppy there for a moment and Bright has worked his way into a loose triangle - can he finish it?! No, Keita has managed to get both his arms back between Bright's legs - danger averted.
Bright is really dominating this fight. Is there anything that Keita can do to turn this around?
That's one minute gone in the round.
Bright manages to sweep nicely, so he's now on top. Keita manages to get himself to full guard.

Bright passes easily into side control. Nice work.
Keita prevents Bright from improving position.
Bright is working hard here to advance position.
Keita is not content to let Bright control the position.
A bit of a lull in the action. I'm sure it will pick up again soon... even if the ref has to physically pick them up and put them back on their feet.
Bright is looking to finish here, going for an Americana. Keita knows the correct defense though, so he's OK.
Bright looking for an arm triangle but it's way too loose to do anything.
That's two minutes gone in the round.
Bright is trying to get an arm triangle but Keita is defending well.
Bright is trying to get an arm triangle but Keita is defending well.
You can see the frustration on Keita's face, being in this tough position on the bottom.
Keita is trying to avoid being dragged into an even worse position than he's already in but Bright is staying active.
Bright happy to just control the position for now.
Bright has controlled the position for a good 20 seconds, which will no doubt be starting to frustrate his opponent.
Bright looking for an arm triangle but it's way too loose to do anything.
That's three minutes gone in the round.
Bright is looking for a kimura. He might have it! No, Keita has escaped the position, nice work there.
Bright thinks about going for a far side armbar but bails out and retains the dominant position instead.
Bright prevents Keita from escaping the position.
Bright is trying to get an arm triangle but Keita is defending well.
Bright tries for a kimura but Keita is defending well.
Bright wants to control but Keita is keeping him busy.
Bright looking for an arm triangle but it's way too loose to do anything.
That's four minutes gone in the round.
The crowd are starting to boo a lack of action.
Bright is looking for a kimura. He might have it! No, Keita has escaped the position, nice work there.
Bright thinks about going for a far side armbar but bails out and retains the dominant position instead.
Bright is trying to get an arm triangle but Keita is defending well.
Bright working away.
The crowd thankful this round is nearly over.
Keita prevents Bright from moving into mount.
Bright wants to work for a kimura but he's foiled early by Keita, who protects the arm well.
Bright tries for a kimura but Keita is defending well.
And that is the end of the round. The fighters go back to their corners.
Desmond Bright dominated that second round.
That's the end of the round. The referee orders the cornermen out of the cage so we can get back down to business.

Keita looks to land a combination. Bright sees it coming but can only parry a couple of the shots.

It looks like Desmond Bright has been cut.
Sloppy strikes from Keita. Those never looked like landing.
Bright moves into the clinch successfully.
Bright pulls guard successfully.
Bright is working actively off his back, looking to secure an arm or perhaps work for a triangle.
Keita must be cautious of submissions here, given that his opponent has the superior Jiu Jitsu.
Bright not looking particularly offensive just at the moment.
Keita is looking to stand up but Bright won't let him.
Bright is looking for a triangle but Keita pushes his legs off easily.
Bright escapes his hips to the side and looks to be working for an armbar. Keita gives him a little smile and shakes his head. No chance.
We've had a slow start to the round here - hopefully the action picks up.
Keita avoids a guillotine attempt easily.
Bright is working an open guard here, looking to improve his position. No doubt that will leave him open to counters but at least he's being more offensive.
That's one minute gone in the round.
Keita wants to stand and escape but instead Bright has hit a sweep and he's now on top in guard.
Bright sitting in guard here, content to control.
Keita wants to get back to his feet but Bright is in a dominant position and won't allow it.
Bright wants to pass the guard but Keita is keeping the position.
Bright trying to control but Keita is working from the bottom.
Bright sneaks a leg through and gets to half guard. That was like a knife through butter how easily he passed Keita's guard.
Bright tries to pass to full mount but Keita defends it.
Bright stops Keita from getting back to his feet.
Keita is refusing to be controlled, as Bright sits in half guard.
Keita wants to get back to his feet.
That's two minutes gone in the round.
Bright seems to be looking for submissions.
Bright trying to mount his opponent but Keita defends it.
Bright is trying to work for a kimura. This could be trouble! No, Keita has managed to free his arm - good work.
Keita is a painfully thin specimen of a man. You do wonder whether a good body kick would snap him clean in two.
Bright is looking for a kimura. It's going to be difficult to finish that from half guard though and Keita defends it well.
Bright is working for submissions here but there's nothing on.
Keita is defending against the submission attempts here by Bright.
Bright is looking for an arm triangle, whilst trying to pass to side control. Keita doesn't seem that keen to cooperate though. No luck this time Bright.
That's three minutes gone in the round.
Keita is trying to stand back up but Bright is controlling him
Bright seems to be looking for submissions.
Bright is looking for a kimura but Keita is holding onto that half guard position, so it's hard for Bright to get the leverage.
Bright is looking for an arm triangle, whilst trying to pass to side control. Keita doesn't seem that keen to cooperate though. No luck this time Bright.
Bright is working for a kimura but Keita is defending it quite comfortably.
Keita wants to get back to his feet.
That's four minutes gone in the round.
There's not a lot going on here and the crowd are letting the fighters know they're not willing to tolerate a lack of action.
Keita is using up a lot of energy trying to get back to his feet. Perhaps he should improve his position first.
Bright tries to pass the half guard into mount. Keita knows what he's doing though and prevents the attempt.
Bright seems very keen to just sit and control from half guard but Keita does not like that idea so much and is remaining active off his back.
Bright wants to work for an arm triangle but Keita is really keeping half guard well and defending the submission attempt.
Bright wants to work for an arm triangle but Keita is really keeping half guard well and defending the submission attempt.
Bright looking for a kimura but he'll have to free his other leg if he wants to finish that. Perhaps he's just using it as a distraction technique.
Keita is trying to stand back up but Bright is controlling him
And that is the end of the round. The fighters go back to their corners.
Desmond Bright clearly takes that round.
The cut man is working on Desmond Bright's cut.
Well, the break between rounds is over. Let's get back to the scrappin!

Keita fails to land with a series of punches.
Bright fakes a strike and closes the distance, dragging Keita to the ground. Bright is now in Keita's guard.
Bright thinks about going for a leg but decides against it, in order to maintain the position.
Bright wants to control from the top but Keita keeps moving.
Bright stands up and looks to throw the legs aside to pass to side control. Keita swivels though and keeps the full guard.
Bright thinks about going for a leg but decides against it, in order to maintain the position.
Bright postures up.
Keita keeping moving, preventing Bright from controlling successfully.
Bright works a leg free and moves into half guard.
We've had a slow start to the round here - hopefully the action picks up.
Keita is staying active underneath Bright, who seems content to just control the action from this position.
Keita wants to get back to full guard.
Keita is trying to maintain the position but Bright is very close to passing his half guard.
Bright works his foot free and advances to mount.
That's one minute gone in the round.
Bright is in full mount, looking to secure a guillotine but Keita is surviving well by controlling Bright's body position as best he can.
Bright is working on an americana here. Ooh, that looks pretty nasty! Nope, Keita has managed to escape the submission attempt.
Keita defends a decent attempt at a guillotine from Bright.
Bright jumps to side control looking for an arm triangle but Keita manages to avoid the submission attempt.
Keita pushes Bright away and creates a bit of space to escape. He's almost out here... but no, Bright gets a good hold of his legs and remains firmly in side control.
Bright wants to work for a kimura but he's foiled early by Keita, who protects the arm well.
Bright is trying to land an Americana. He has the arm isolated but Keita is keeping cool and he's avoided the danger for now.
That's two minutes gone in the round.
A few boos can be heard. I'm sure they will multiply if the fighters don't pick up the pace.
Bright thinks about going for a far side armbar but bails out and retains the dominant position instead.
Bright tries for a kimura. Not really close to a finish though.
Bright is looking for a kimura. He might have it! No, Keita has escaped the position, nice work there.
You can see the frustration on Keita's face, being in this tough position on the bottom.
Bright working hard here to secure a kimura but he's not really in the right position for it.
That's three minutes gone in the round.
Bright is looking for a kimura. He might have it! No, Keita has escaped the position, nice work there.
A lull in the action here as Bright stalls from top position.
Keita wants to escape from the position here - easier said than done!
Bright tries for a kimura but Keita is defending well.
Bright is pausing for a moment. What's he doing? It looks like he's clearing his nose. Oh dude! He's shot a load of snot all down Keita's shoulder. That is not cool.
Bright is looking for a kimura. He might have it! No, Keita has escaped the position, nice work there.
Bright working hard here to secure a kimura but he's not really in the right position for it.
That's four minutes gone in the round.
There's not a lot going on here and the crowd are letting the fighters know they're not willing to tolerate a lack of action.
Bright is looking to finish here, going for an Americana. Keita knows the correct defense though, so he's OK.
Keita is looking for a sweep.
Bright tries for a kimura but Keita is defending well.
Bright tries for an arm triangle. That looks pretty tight to me. Is this one over!?! Possibly, maybe, no Bright has let go of the choke. Obviously it wasn't as tight as we thought!
Boooooooooooooooooooo!!! God, this has been a terrible round. Come on you two, sort yourselves out!
Keita seems a little lost for a moment, as Bright dominates the positioning.
Keita can't do much from the bottom here.
Keita prevents Bright from moving into mount.
And that is the end of the round. The fighters go back to their corners.
Desmond Bright had his way with Abdullah Keita in that round.
The cut man is working on Desmond Bright's cut.
The corners get their ten second warning. Both fighters stand from their stools and stare each other down, ready to get back to the action. Let's get this one finished - here comes the final round!

Bright takes the fight into the clinch.
Bright has managed to pull guard. Let's see whether he can work an aggressive guard. It will also be interesting to see what tactics Keita uses from the top position.
Bright on his back here. We all know that wrestlers don't like being on their back so let's see if Bright tries to get out of the position.
Bright working for a triangle but Keita defends it easily.
Bright has a loose triangle. He'll be looking to tighten that up but Keita can see exactly what he's planning and manages to posture up and free himself.

Keita gets to his feet - Bright follows without any prompting.
Keita feints a jab promting Bright to slip. Keita then demonstrates his capabilities by jabbing again. Bright slips again and ducks right into an uppercut.
Keita throws a wild combination but nothing lands.
We've had a slow start to the round here - hopefully the action picks up.
Keita lands a lovely overhand right.
Keita looks to score with a combo but nothing lands.
Keita misses with a jab, cross combination.
Bright slips a jab and a cross from Keita.
Keita is wobbling all over the place through exhaustion. Will he make it to the final bell?
Fantastic stuff here - a very entertaining period of action, which has drawn cheers from the crowd.
Bright fakes a strike and closes the distance, dragging Keita to the ground. Bright is now in Keita's guard.
Bright passes into half guard.
That's one minute gone in the round.
Bright is looking for a kimura here.
Desmond Bright overall seems to be getting the better of the ground position in the fight so far.
Bright is working hard to pass the guard. He's done it - he's now in full mount! Trouble for Keita!
Bright controlling the pace for now.
Bright is going oldschool here, as he tries to force Keita to tap using a forearm choke. This isn't 1993 though, so Keita shrugs it off.
Bright is working for a guillotine from mount but Keita frees his head quite easily.
Bright has hold of Keita's left arm, perhaps looking for a submission. The two fighters tussle over control of the isolated limb and Keita manages to get his arm back to his side and away from danger.
Bright works his way to his opponent's back.
That's two minutes gone in the round.
Keita is trying to stand back up.
Bright is working really hard to secure the rear naked choke. Keita defends successfully for a significant amount of time. Both fighters are looking very determined.
Bright keeps control of the position as Keita tries to break free.
Bright has the hooks in and he's looking for a rear naked choke here. Keita is defending well but eventually Bright manages to get an arm under the chin and he's locked on the RNC! Keita has no choice but to tap now! He does! This one is all over!
Ladies and gentlemen, after 2:54 of round 5, we have a winner by way of Submission (RNC). Desmond Bright!
Desmond Bright seemed lost for words in his post fight interview but he remembered to thank his fans and directed everyone to his website.
|
|
|
|
|
|
|
|
|
|
|
|
|
|
|
|
|
|
|
|
|
|
|
| S |
C
A |
G |
S |
C
B |
G |
|
S |
C |
G |
|
energy
A | B |
|
hype
A | B |
|
pop
A | B |
|
mgr
A | B |
|
FIGHT
RATING
39% |
|
|
|
|
|
|
