 |
IFMMA 3: Uprising PBP Commentary |
Undercard bout
|
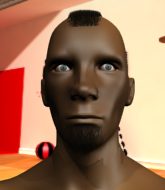
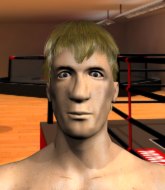
Coming up we have a featherweight MMA rules bout between Kenta Toma (ranked 4337 p4p, 4503 weight class) and Connor Jensen (ranked 301 p4p, 311 weight class). We have two fighters making their debuts here, so let's see who comes out of this one with their first professional victory.
 |
|
 |
| 173 cm
18
147
0 - 0 - 0 |
|
167 cm
18
145
0 - 0 - 0 |
Decent wrestler
Brawler
Big heart |
|
BJJ Blue Belt
Brawler
Powerful |
|
| |
|
Ladies and gentlemen. This fight is 3 rounds, in the featherweight division.
Introducing the fighter to my left, fighting out of the red corner.
With a record of 0 - 0 - 0, fighting out of London, Kenta Toma!
And introducing the fighter to my right, fighting out of the blue corner.
With a record of 0 - 0 - 0, fighting out of New York, Connor Jensen!
The judges for this bout are Johanna Lukiainen, Anni Minnemäki and Ben Zyskovitsi.

The bell rings for round one and we are underway!
Jensen tries to shoot in for a takedown. He's got hold of a leg but Toma swivels and escapes.
Jensen blocks a head kick by Toma.
Toma blocks a head kick by Jensen.
Toma is trying to close the distance and clinch up, after that failed offence from Jensen.
Jensen throws a half hearted mid kick.
It looked like Toma was looking amped, ready to throw a big counter but didn't commit.
Jensen pushes forward with a 1-2 combination that forces Toma back to the cage. Jensen follows up with a solid lead hook to the liver.
Toma looking to throw a kick but he's pulled out of it.
Jensen blocks a head kick by Toma.

Jensen instigates a clinch.

Jensen ties up his opponent against the cage and manages to drag the fight down to the ground. Jensen no doubt will be looking to work submissions from his guard.
Toma throws a big right hand that misses.
Jensen is looking to get back to his feet but can't, whilst Toma is controlling him.
Jensen controls Toma momentarily but Toma frees himself.

That's one minute gone in the round.
Toma wants to get up but he can't break Jensen's closed guard. He needs to be careful trying to break the legs open, as he's open to submissions here.
Toma trying to land body shots but he keeps hitting the mat.
Toma wants to stand but Jensen has a closed guard, so he can't escape.
Toma has to be careful here, sitting in the guard of a superior BJJ player.
Jensen wants to stand up but Toma is controlling him.

The referee decides to stand the fighters back up.
A nice inside leg kick there by Toma. That's going to slow Jensen down.
Toma throws a push kick but Jensen slaps the foot to one side.
Jensen shoots in and drives through. Toma sprawls well.
Toma avoids a kick to the body.
Toma seemed to be looking to counter by closing the distance.
No luck for Jensen with that takedown attempt.
Kenta Toma has stuffed three takedown attempts in the round now. That's going to take a lot out of Connor Jensen.

That's two minutes gone in the round.
Jensen gets in close and instigates a clinch.
Toma creates a bit of distance and throws an elbow that only just misses.
Toma using the Thai plumb to throw knees but Jensen has his back arched nicely, preventing the strike.
Jensen wants a takedown.
Toma tries to land a knee to the head but misses.
Toma looking to throw knees to the head but Jensen is blocking nicely.
Toma keeps the fight in the clinch, despite Jensen's efforts to push away.
Toma tries a knee to the head but he's missed.
Toma misses the knee to the body. Nice hip positioning from Jensen.
Jensen drags the fight down to the ground.
Jensen working a defensive guard here.
Toma trying to land body shots but he keeps hitting the mat.

That's three minutes gone in the round.
Toma has decided he wants to stand but the closed guard of Jensen is proving hard to escape from.

Jensen looking for a guillotine here but Toma defends easily.
Toma wants to control from the top but Jensen keeps moving.

Toma stands up and waves to Jensen to follow him.

That's four minutes gone in the round.
The crowd are starting to boo a lack of action.
Jensen throws a looping left and ducks down for a takedown. He's got his arms around Toma's waist but Toma gets an underhook and avoids the takedown by throwing Jensen off to one side.
Jensen shoots in for a takedown. He's persisting with it as Toma sprawls well. Toma wins this battle and keeps the fight standing. Jensen gets slowly back to his feet.
Toma throws a head kick that misses.

Toma clinches with his opponent.
Toma throws a nice elbow but it doesn't land.
Jensen wants to stall.
Toma using the Thai plumb to throw knees but Jensen has his back arched nicely, preventing the strike.
Jensen avoiding damage as Toma throws knees to the body.
Jensen blocks a couple of punches on the inside.
The crowd thankful this round is nearly over.
Toma pushes off an throws an elbow but Jensen leans to the side and avoids it. We're back to clinching against the cage.
Toma is looking to score with knees to the body. Maybe he'll change it up and go body then head. Jensen is defending well for now.
Toma tries to land a knee to the body but he is off balance and Jensen avoids it.
Toma tries to land a knee to the head but Jensen blocks with his arms.
And that is the end of the round. The fighters go back to their corners.
Kenta Toma dominated that round.
The fighters' corners scream their final instructions, as the referee calls time. Here we go, back to the action!

A big right from Toma misses.
Jensen shapes to counter with a head kick.
Toma stuffs the takedown.
Jensen throws a head kick that misses and slips in the process. He scrambles back to his feet and the fighters circle.
Jensen shoots in but no luck this time.
Toma looking to throw a kick but he's pulled out of it.
Jensen slips under a jab from Toma.
Jensen gets to the clinch - let's see what his plan is here.
Toma missing with knees to the body.
Toma misses with a knee strike.
Toma tries to work over Jensen's body with a swooping hook but it only glances the target.
We've had a slow start to the round here - hopefully the action picks up.
Toma with the Thai clinch. He's looking to land a big knee but he's not managed it this time.
Jensen jumps guard but Toma stands there with Jensen around his waist. Jensen gives up and drops back to his feet. We remain in the clinch.
Kenta Toma has stuffed three takedown attempts in the round now. That's going to take a lot out of Connor Jensen.
Toma misses with an elbow strike.
Toma pushes off and fires off an elbow that misses, before clinching up again, against the cage.
That's one minute gone in the round.
Toma tries to land a knee to the body but he is off balance and Jensen avoids it.
Jensen pulls Toma into guard.
Toma wants to stand but Jensen has a closed guard, so he can't escape.
Toma lands a couple of elbows.
Jensen is looking to stand up but Toma isn't so interested in that idea.
Toma knows he needs to get back to his feet asap. He's simply no match for Jensen on the ground.
Toma wanted to stand there but Jensen had control of the position.
Jensen looking to control.
Jensen working from the bottom, still in full guard. He's managed to get a loose triangle. Toma doesn't seem to be doing much to defend here, obviously he feels comfortable in the position. Toma manages to throw the legs off his shoulder and he's back into guard - no problem.
Toma throws an elbow that misses. Jensen uses the momentum to reverse the position. He's now in Toma's guard. Nice move by Jensen!

Toma on his back here. We all know that wrestlers don't like being on their back so let's see if Toma tries to get out of the position.
That's two minutes gone in the round.

The fighters are working up against the cage. Toma manages to wriggle his way back to his feet, so the fighters are now clinched against the cage.
Toma tries to land knees in the clinch but Jensen avoids the damage to the body.
Toma misses with a knee to the head.
Toma prevents Jensen from breaking the clinch.
Jensen blocks an elbow strike from Toma.
Toma keeps the fight in the clinch, despite Jensen's efforts to push away.
Toma using the Thai plumb to throw knees but Jensen has his back arched nicely, preventing the strike.
Toma tries a knee to the head but Jensen blocks it.
Jensen blocks a knee to the body. He'll have a nicely bruised forearm in the morning.
Toma trying to land knees to the body.
That's three minutes gone in the round.
Toma tries a body shot but Jensen blocks it.
Jensen wants to get back to striking at distance but Toma won't allow it.
Toma struggles to land a body shot inside as Jensen controls his hands.
Toma trying to land knees to the body.
Jensen takes an elbow to the forehead.
Toma tries a knee to the head but Jensen blocks it.
Toma tries a knee to the head but Jensen blocks it.
Jensen is trying to slow down the pace in the clinch, to catch his breath.
Toma throws a knee to the head but misses.
Jensen blocks a knee to the body. He'll have a nicely bruised forearm in the morning.
Toma is pressed up against the cage. Jensen has hold of a leg and is looking to drag Toma down to the mat. Toma avoids the attempt though and has circled away. We're back to striking at a distance.
Jensen misses with a takedown attempt
and Toma moves into the clinch.
Toma creates a bit of space for himself and sneaks an elbow through Jensen's defenses.
Jensen tries to score a body lock takedown but Toma shows good agility there to stay on his feet.
Toma misses with a knee to the head.
That's four minutes gone in the round.
Jensen successfully pulls guard.
Toma would like to get this fight back to the feet but can't get free from the closed guard.
Toma postures up and lands some nice ground and pound.
Toma would like to get this fight back to the feet but can't get free from the closed guard.
Toma got a little sloppy there for a moment and Jensen has worked his way into a loose triangle - can he finish it?! No, Toma has managed to get both his arms back between Jensen's legs - danger averted.
Jensen trying to strike from the bottom but really, it's not the best position to be doing that from!
The crowd thankful this round is nearly over.
Toma trying to control the position from guard on top but Jensen is wriggling around, looking for whatever he can.
And that is the end of the round. The fighters go back to their corners.
Kenta Toma dominated that second round.
The minute break is over - no more time for sponges and pep talks - back to the action! This is the final round!

A nice leg kick lands there from Toma.
Jensen throws a head kick but Toma moves out of range.
Toma misses with a kick to the body.
Jensen pulls out of a head kick attempt.
Toma moves into the clinch.
Toma tries to land a knee to the body but he is off balance and Jensen avoids it.
Toma has Jensen pressed against the cage, preventing Jensen from circling away and getting back to striking at range.
Toma struggles to land a body shot inside as Jensen controls his hands.
Jensen blocks the elbow strike.
We've had a slow start to the round here - hopefully the action picks up.
Jensen on the defensive, avoiding the knees to the body.
Toma trying to land knees to the body.
Kenta Toma has scored more points in the clinch so far.
Toma throws a vicious knee straight up the middle but Jensen blocks it with crossed arms.
Toma is looking to score with knees to the body. Maybe he'll change it up and go body then head. Jensen is defending well for now.
Jensen is looking for a takedown up against the cage. Toma gets underhooks though and prevents the takedown attempt.
That's one minute gone in the round.
Toma is looking to score with knees to the body. Maybe he'll change it up and go body then head. Jensen is defending well for now.
Toma throws an elbow but it misses.
Jensen stalling in the clinch but Toma improves position.
Toma is looking to score with knees to the body. Maybe he'll change it up and go body then head. Jensen is defending well for now.
Toma looking to throw knees to the head but Jensen is blocking nicely.
A head punch blocked on the inside by Jensen.
Jensen lands a body shot in the clinch.
Toma struggles to land a body shot inside as Jensen controls his hands.
Toma is looking to score with knees to the body. Maybe he'll change it up and go body then head. Jensen is defending well for now.
Toma misses with an elbow over the top.
Toma misses the knee to the body. Nice hip positioning from Jensen.
Jensen pulls guard successfully.
Toma is looking to stand up but Jensen won't let him.
That's two minutes gone in the round.
Toma trying to control the position from guard on top but Jensen is wriggling around, looking for whatever he can.
Toma wanted to stand there but Jensen had control of the position.
Jensen preventing the ground and pound from doing any damage.
Toma stands up and waves to Jensen to follow him.
Nice body kick from Toma.
Connor Jensen is looking to throw some combinations by the looks of things.
That's three minutes gone in the round.
Jensen dives in for a single leg takedown but Toma sprawls and the fighters end up clinched against the cage.
Toma throws a head kick that Jensen semi-blocks.
Toma tries to land a leg kick but Jensen saw it coming and moves away.
Toma tries to clinch there but Jensen circles away.
Toma throws out a leg kick but Jensen moves out of range and Toma only half commits.
Jensen shoots in for a takedown but Toma shows good takedown defense.
Kenta Toma has stuffed three takedown attempts in the round now. That's going to take a lot out of Connor Jensen.
Jensen tries to shoot in for a takedown. He's got hold of a leg but Toma swivels and escapes.
A head kick by Jensen misses
and Toma counters by moving into the clinch.
Jensen managing to block the knees to the body from Toma.
Toma tries a knee to the head but he's missed.
Jensen is working on a leg, looking for a takedown but Toma is defending well.
Toma misses the knee to the body. Nice hip positioning from Jensen.
That's four minutes gone in the round.
Jensen managing to block the knees to the body from Toma.
Jensen is working for takedown but Toma is calmly controlling the position for now.
Jensen takes a big intake of breath there - he's definitely tired.
Toma tries to land a knee to the body but he is off balance and Jensen avoids it.
Toma prevents a body shot from Jensen.
Toma lands a good knee to the midsection. Jensen won't want to take too many of those.
With the two fighters working up against the cage, Toma just misses with a elbow thrown towards Jensen's brow.
Toma throws a nice elbow but it doesn't land.
Jensen drops down for a takedown but doesn't get it.
With the fighters up against the cage, Toma throws an elbow but misses.
Toma misses with a knee strike.
The crowd cheering loudly, showing their appreciation for the quality fight we're seeing here.
The crowd thankful this round is nearly over.
Jensen managing to block the knees to the body from Toma.
Toma throws a vicious knee straight up the middle but Jensen blocks it with crossed arms.
Connor Jensen has stepped it up - he knows he needs a finish here!
Kenta Toma is fighting for a decision here - he's started to take the cautious approach.
Jensen tries a knee to the head but Toma blocks it.
Toma lands a knee to the body.
And that's the end of the fight!
Kenta Toma showed his dominance in that final round.
Well I reckon that's a shut out for Toma, winning every round. Will the judges agree? They are the ones who matter, even if they are often depressingly incompetent. Over to the ring announcer for the scorecards.
Ladies and gentlemen, after 3 rounds of action, we go to the scorecards for a decision.
Judge Johanna Lukiainen scores the fight 30:27
Judge Anni Minnemäki scores the fight 30:27
Judge Ben Zyskovitsi scores the fight 30:27
In favor of your winner, by unanimous decision... Kenta Toma!
|
|
|
|
|
|
|
|
|
|
|
|
|
|
|
|
|
|
|
|
|
|
|
| S |
C
A |
G |
S |
C
B |
G |
|
S |
C |
G |
|
energy
A | B |
|
hype
A | B |
|
pop
A | B |
|
mgr
A | B |
|
FIGHT
RATING
36% |
|
|
|
|
|
|
|
Undercard bout
|
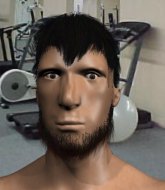
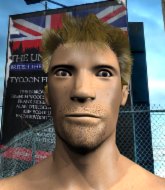
Coming up we have a featherweight MMA rules bout between Yuji Shimomura (ranked 4336 p4p, 4430 weight class) and Harry Brown (ranked 303 p4p, 306 weight class). We have two fighters making their debuts here, so let's see who comes out of this one with their first professional victory.
 |
|
 |
| 173 cm
18
152
0 - 0 - 0 |
|
170 cm
18
150
0 - 0 - 0 |
Dangerous GnP
Excellent boxer
Big right hand |
|
BJJ Brown Belt
Brawler
Granite chin |
|
| |
|
Ladies and gentlemen. This fight is 3 rounds, in the featherweight division.
Introducing the fighter to my left, fighting out of the red corner.
With a record of 0 - 0 - 0, fighting out of London, Yuji Shimomura!
And introducing the fighter to my right, fighting out of the blue corner.
With a record of 0 - 0 - 0, fighting out of London, Harry Brown!
The judges for this bout are Matti Vanhoillinen, Tarja Halkonen and Ben Zyskovitsi.
The bell rings for round one and we are underway!
Brown takes a hook to the side of the head. I wonder if that's got his ears ringing.
Sloppy strikes from Shimomura. Those never looked like landing.
Brown takes a body punch that cleary hurt but he's trying not to show any weakness.
Shimomura lands with a nice combination. Brown backs away looking to recover.
Brown misses with a jab and misses with a cross straight after too.
The fighters circle momentarily. Shimomura darts into range and connects with a nice straight punch.
Brown throws a sloppy head kick and Shimomura moves out of range easily.
Shimomura lunges in with swinging rights and lefts but Brown circles away quickly and effectively.
Shimomura stuns Brown with a nice body shot, before stepping back out of range.
This is a great period of action - very entertaining stuff!
Shimomura lands a lovely overhand right.
Shimomura throws a combination that misses
and Brown counters by moving into the clinch. Good anticipation by Brown.
Brown leaning his opponent against the cage.
Shimomura is working hard here but doesn't seem to be able to control effectively, up against the cage.
Brown pulls Shimomura into guard.
Shimomura working some ground and pound from guard but it's not doing any damage.
The ref warns both fighters not to hold the cage as they work up against the meshing.
Brown is actively looking for submissions from his back. He's worked himself a little space on the bottom and seems to be going for a triangle. No, he's switched into an armbar! That was slick! Shimomura rolls with it to try and escape but Brown cranks on the arm and Shimomura is forced to tap out! This one is aaaaaaaaall over!
Ladies and gentlemen, after 1:58 of round 1, we have a winner by way of Submission (Armbar). Harry Brown!
In his post fight interview, Harry Brown started talking himself up. Luckily his charisma kept the crowd on side and gave him a good reception.
|
|
|
|
|
|
|
|
|
|
|
|
|
|
|
|
|
|
|
|
|
|
|
| S |
C
A |
G |
S |
C
B |
G |
|
S |
C |
G |
|
energy
A | B |
|
hype
A | B |
|
pop
A | B |
|
mgr
A | B |
|
FIGHT
RATING
89% |
|
|
|
|
|
|
|
Co-main event
|
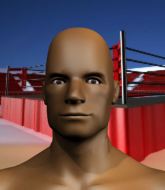
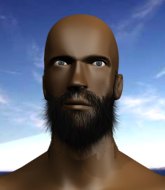
Coming up we have a lightweight MMA rules bout between Islam Margumedovic (ranked 4202 p4p, 4431 weight class) and Alex Chambers (ranked 375 p4p, 381 weight class). Islam Margumedovic has the better chin. Will he look to stand and bang today?
 |
|
 |
| 180 cm
18
160
1 - 0 - 0 |
|
175 cm
18
160
0 - 0 - 0 |
BJJ Brown Belt
Brawler
Good chin |
|
BJJ Brown Belt
Brawler
Heavy handed |
|
| |
|
Ladies and gentlemen. This fight is 3 rounds, in the lightweight division.
Introducing the fighter to my left, fighting out of the red corner.
With a record of 1 - 0 - 0, fighting out of St Petersburg, Islam Margumedovic!
And introducing the fighter to my right, fighting out of the blue corner.
With a record of 0 - 0 - 0, fighting out of London, Alex Chambers!
The judges for this bout are Johanna Lukiainen, Matti Vanhoillinen and Anni Minnemäki.
The bell rings for round one and we are underway!

Chambers gets caught on his heels momentarily as he allows Margumedovic to score an easy takedown into full guard.

Margumedovic postures up as if he's going to throw some strikes but drops back for an ankle! Chambers is in big trouble! He looks ready to tap! But no, he's escaped and dives on top of Margumedovic, into his guard.
Margumedovic keeping moving, preventing Chambers from controlling successfully.

Chambers stands up and waves to Margumedovic to follow him.
We've had a slow start to the round here - hopefully the action picks up.
Margumedovic moves in looking to clinch but Chambers pushes him off.
Chambers gets caught napping as Margumedovic dives in and scores a takedown. Chambers manages to retain guard.
Margumedovic drops back for a leg but he's not going to get it - he lets go and Chambers dives on top into guard.
Chambers trying to control but Margumedovic is working from the bottom.
That's one minute gone in the round.
Chambers in full guard, throwing the ground and pound. No damage this time.
Chambers looking to pass the guard.
Margumedovic preventing the ground and pound from doing any damage.
Chambers looking to sit in guard and control but Margumedovic gets the butterfly guard and sweeps. He's now in the guard on the top.

Chambers tries to strike from the bottom.

Chambers wriggles free and stands up.
Chambers gets to the clinch - let's see what his plan is here.
That's two minutes gone in the round.
Chambers jumps guard.
The fighters are pressed up against the cage, both looking to find a bit of space to work.
Chambers manages to sweep nicely, so he's now on top. Margumedovic manages to get himself to full guard.
Chambers is looking to advance position but Margumedovic has hit a scissor sweep - now he's on top in mount!
This is a great period of action - very entertaining stuff!
Chambers really trying hard to get back to half guard here.
Chambers regains half guard.
Margumedovic prevents Chambers from standing back up.
Chambers tries to roll over but Margumedovic keeps him under control.
Margumedovic is looking for a kimura but Chambers is holding onto that half guard position, so it's hard for Margumedovic to get the leverage.
Margumedovic is looking for a kimura but he's never going to get it from there.
Chambers wants to improve his position but Margumedovic is controlling well.
That's three minutes gone in the round.
Margumedovic is looking for an arm triangle, whilst trying to pass to side control. Chambers doesn't seem that keen to cooperate though. No luck this time Margumedovic.
Margumedovic is breathing heavily.
Chambers is looking to improve his position.
Margumedovic is looking for a kimura but Chambers is holding onto that half guard position, so it's hard for Margumedovic to get the leverage.
Margumedovic is looking for an arm triangle, whilst trying to pass to side control. Chambers doesn't seem that keen to cooperate though. No luck this time Margumedovic.
Margumedovic is trying to work for a kimura. This could be trouble! No, Chambers has managed to free his arm - good work.
That's four minutes gone in the round.
The crowd are hurling abuse towards the fighters... You can hardly blame them though because there isn't a lot going on in the fight.
Chambers wants to get back to full guard.
Margumedovic is working for a kimura here but Chambers manages to reverse the position and he's now in Margumedovic's guard.
Margumedovic keeping moving, preventing Chambers from controlling successfully.
Chambers controlling from the top position.
Chambers trying to control the position from guard on top but Margumedovic is wriggling around, looking for whatever he can.
And that is the end of the round. The fighters go back to their corners.
Alex Chambers dominated that round.
The referee calls time. The cornermen exit stage left and we're back to business.
Margumedovic tries to clinch but is not successful on this occasion.
Nice takedown defense from Margumedovic. No joy for Chambers on that attempt.
Chambers tries to score a power double leg takedown but Margumedovic sees that one coming and sprawls well. That will dishearten Chambers somewhat.
Margumedovic looks for a takedown. He's got it. We're now in half guard.
Margumedovic is looking for a kimura. It's going to be difficult to finish that from half guard though and Chambers defends it well.
Margumedovic wants to work for an arm triangle but Chambers is really keeping half guard well and defending the submission attempt.
We've had a slow start to the round here - hopefully the action picks up.
Margumedovic is thinking about going for an arm triangle but he can't free his leg.
Both fighters are absolutely exhausted here.
Chambers is trying to control but can't.
That's one minute gone in the round.
The fighters are battling for position here. Chambers manages to regain full guard. Nice work.
Chambers is working an open guard here, looking to improve his position. No doubt that will leave him open to counters but at least he's being more offensive.
Chambers controls Margumedovic momentarily but Margumedovic frees himself.
Margumedovic drops back, looking for a kneebar! Chambers looks panicked! The fighters roll across the mat, one looking to finish, one looking to escape. Chambers looks to have wriggled free... Yes, he's got his leg free and he's dived into side control! Good work there from Chambers!
Chambers trying to control the action but Margumedovic is working from the bottom.
Chambers throwing strikes but missing, from side control.
That's two minutes gone in the round.
Margumedovic is not content to let Chambers control the position.
Chambers is in a good position here but he's just trying to control... And he's not even managing to do that successfully.
Chambers throwing shots but missing, from side control.
Chambers wants to control but Margumedovic is keeping him busy.
That's three minutes gone in the round.
Chambers tries to move to mount but Margumedovic blocks the move with his legs.
Chambers throws a strike aimed at the side of Margumedovic's head but Margumedovic avoids it well.
Chambers wants to lay and pray for a moment but Margumedovic keeps working.
Chambers decides to stand back up. Chambers steps back and let's Margumedovic get back to his feet.
Margumedovic displays good takedown defense there as he swats away a double leg from Chambers.
Islam Margumedovic has stuffed three takedown attempts in the round now. That's going to take a lot out of Alex Chambers.
Chambers swats away the attempt to clinch by Margumedovic.
Chambers steps in looking to clinch after the strikes miss from Margumedovic.
That's four minutes gone in the round.
The crowd are starting to boo a lack of action.
Chambers goes for a double leg but Margumedovic avoids the attempt and the two fighters end up clinched against the cage as Margumedovic continues to drive forward.
The fight stays on the outside here - Margumedovic looks like he's thinking about clinching though.
Margumedovic fails miserably with a takedown attempt.
Margumedovic closes this distance looking for a takedown but Chambers circles away.
Chambers tries to bum rush Margumedovic with a series of wild strikes but Margumedovic uses good footwork to avoid the assault.
Chambers throws a looping left and ducks down for a takedown. He's got his arms around Margumedovic's waist but Margumedovic gets an underhook and avoids the takedown by throwing Chambers off to one side.
Chambers has been the more effective fighter overall so far.
Margumedovic closes the distance and clinches up with Chambers, looking for a takedown. Margumedovic pushes Chambers against the cage but Chambers circles to the side and manages to break the clinch.
Margumedovic moves out of range as Chambers strikes.
Chambers tries to shoot in for a takedown. He's got hold of a leg but Margumedovic swivels and escapes.
Margumedovic shoots in for a takedown. "I don't think so" says Chambers as he avoids it easily.
Boooooooooooooooooooo!!! God, this has been a terrible round. Come on you two, sort yourselves out!
Chambers tries a head kick but it misses.
Chambers forces Margumedovic back against the cage and clinches.
Margumedovic is trying to pull guard but Chambers turns him against the cage and we stay in the clinch.
Chambers tries to break the clinch but Margumedovic is controlling the position.
And that is the end of the round. The fighters go back to their corners.
Alex Chambers showed his class in that round. I'd imagine he'll take it on all the scorecards.
OK. That's time! The bell goes and we're back to the action. Let's hear some noise people - this is the final round!
Chambers darts in and clinches Margumedovic up against the cage.
Margumedovic is trying to pull guard but Chambers turns him against the cage and we stay in the clinch.
Margumedovic tries to pull guard but Chambers holds him up against the cage and eventually Margumedovic drops back down to his feet.
Margumedovic tries to pull guard but can't drag his opponent to the mat. Chambers just stands there and leans against the cage.
That's three failed takedown attempts in the round for Islam Margumedovic. That's going to take a lot out of him.
Margumedovic jumps guard but Chambers stands there with Margumedovic around his waist. Margumedovic gives up and drops back to his feet. We remain in the clinch.
Chambers digs a right hand into Margumedovic's ribs. Those have got to be taking their toll on Margumedovic's gas tank.
Chambers changes levels and goes for a takedown here. Margumedovic fights it off and pushes away nicely.
Margumedovic is looking to take this fight into the clinch.
Margumedovic slaps away a takedown attempt from Chambers, before circling back to the center of the mat.
Both fighters are breathing heavily.
We've had a slow start to the round here - hopefully the action picks up.
Chambers drives through and clinches with Margumedovic against the cage.
Margumedovic fails to pull guard.
Stalling in the clinch from Chambers.
That's one minute gone in the round.
Chambers has dropped down and is looking to force the takedown but it's defended by Margumedovic after a bit of a struggle.
Chambers avoiding damage.
Chambers lands a right hand.

Chambers escapes the clinch and we're back to striking.
Margumedovic shoots in for a takedown. "I don't think so" says Chambers as he avoids it easily.
Chambers throws a fast counter high kick but Margumedovic manages to duck under it in time.
Nice takedown defense from Margumedovic. No joy for Chambers on that attempt.
Margumedovic gets caught on his heels momentarily as he allows Chambers to score an easy takedown into full guard.
Chambers trying to control but Margumedovic is working from the bottom.
That's two minutes gone in the round.
Chambers wants to stand and escape but instead Margumedovic has hit a sweep and he's now on top in guard.
There's a bit of a scramble here and now Chambers is on top in guard.
Margumedovic looking to sweep here. No luck so far.
Margumedovic utilising some decent striking defenses from the guard, preventing the ground and pound.
That's three minutes gone in the round.
Margumedovic keeping moving, preventing Chambers from controlling successfully.
Alex Chambers has got the better of the ground game so far.
Chambers would like to get this fight back to the feet but can't get free from the closed guard.
That's four minutes gone in the round.
Neither fighter has done anything of merit for a good minute or two here and the crowd are not happy about it.
Margumedovic avoiding any damage from the ground and pound.
Chambers postures up in Margumedovic's guard and throws a big left but Margumedovic blocks it.
Chambers wants to control from the top but Margumedovic keeps moving.
The ref warns both fighters not to hold the cage as they work up against the meshing.
Chambers trying to pass the guard but can't manage it just yet.
The referee decides to stand the fighters back up.
Boooooooooooooooooooo!!! God, this has been a terrible round. Come on you two, sort yourselves out!
A head kick misses from Chambers.
Chambers keeps the fight standing with a nice sprawl.
And that's the end of the fight!
Alex Chambers comfortably won the final round on my scorecard.
Well Chambers has outworked and out performed his opponent in all aspects of the game today. He was simply too good and the decision should be no more than a formality. Over to the ring announcer for the scorecards.
Ladies and gentlemen, after 3 rounds of action, we go to the scorecards for a decision.
Judge Johanna Lukiainen scores the fight 27:30
Judge Matti Vanhoillinen scores the fight 27:30
Judge Anni Minnemäki scores the fight 27:30
In favor of your winner, by unanimous decision... Alex Chambers!
In his post fight interview, Alex Chambers started talking himself up. Luckily his charisma kept the crowd on side and gave him a good reception.
|
|
|
|
|
|
|
|
|
|
|
|
|
|
|
|
|
|
|
|
|
|
|
| S |
C
A |
G |
S |
C
B |
G |
|
S |
C |
G |
|
energy
A | B |
|
hype
A | B |
|
pop
A | B |
|
mgr
A | B |
|
FIGHT
RATING
31% |
|
|
|
|
|
|
|
Main event
|
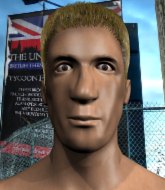
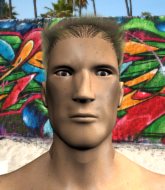
Coming up we have a lightweight MMA rules bout between Kiyoshi Kasai (ranked 2955 p4p, 4675 weight class) and Kalle Rosberg (ranked 284 p4p, 396 weight class). We have two fighters making their debuts here, so let's see who comes out of this one with their first professional victory.
 |
|
 |
| 177 cm
18
162
0 - 0 - 0 |
|
175 cm
18
155
0 - 0 - 0 |
BJJ White Belt
Decent elbows
KO power |
|
BJJ White Belt
Excellent MT
Solid chin |
|
| |
|
Ladies and gentlemen. This fight is 3 rounds, in the lightweight division.
Introducing the fighter to my left, fighting out of the red corner.
With a record of 0 - 0 - 0, fighting out of London, Kiyoshi Kasai!
And introducing the fighter to my right, fighting out of the blue corner.
With a record of 0 - 0 - 0, fighting out of St Petersburg, Kalle Rosberg!
The judges for this bout are Roosa Järviläinen, Matti Vanhoillinen and Ben Zyskovitsi.
The bell rings for round one and we are underway!
Kasai attempts a leg kick but it's missed by a good margin.
Kasai misses with a looping right.
Kasai tries to clinch up against the cage, rushing in to close the distance. Rosberg manages to break the clinch and circles back to the middle of the mat.
Kasai tries to clinch but Rosberg moves out of range.
A leg kick checked by Rosberg.
Kasai is looking to clinch.
Kasai misses with a head kick.
Kasai looks to throw a body kick
and Rosberg moves into the clinch.
Kasai pushes Rosberg back against the cage and unloads with a body punch.
Rosberg gets a nice trip takedown into half guard.
Rosberg throwing punches and elbows but they're not doing any damage.
The ref warns both fighters not to hold the cage as they work up against the meshing.
Rosberg not landing any meaningful shots this time.
Rosberg prevents Kasai from standing back up.
Rosberg content to control rather than advance.
That's one minute gone in the round.
Rosberg escapes and gets back to his feet.
Rosberg feints and as Kasai raises his hands in defense, Rosberg changes levels and drives through with a takedown into guard.
Rosberg stands up from guard. Let's bang!
Rosberg fakes high and shoots in for a takedown but Kasai avoids it really well and circles away.
Rosberg takes a step back and watches a body kick go sailing past his mid section.
Kasai throws a lazy head kick
and Rosberg counters with a good right hand that lands right on the jaw.
Kasai does a little shimmy and throws a leg kick. The leg kick missed by a considerable margin though, making him look a little bit silly for doing the shimmy.
Rosberg takes a kick to the side of the head.
That's two minutes gone in the round.
Rosberg throws a two punch combo that lands nicely.
Kasai tries to clinch but Rosberg is having none of it.
The crowd are loving this. Great action here.
Rosberg finds nothing but air with that leg kick attempt.
Rosberg looks frustrated there after his takedown attempt is stuffed easily.
Nice body punch from Rosberg.
A swing and a miss from Kasai.
Rosberg closes the distance and presses his opponent up against the cage.
Kasai trying to land knees to the body.
Kasai stops a takedown attempt from Rosberg.
Kiyoshi Kasai has stuffed three takedown attempts in the round now. That's going to take a lot out of Kalle Rosberg.
Rosberg lands a body punch - he's looking to wear down Kasai.
Kasai tries to work over Rosberg's body with a swooping hook but it only glances the target.
Kasai is defending well against a takedown attempt.
That's three minutes gone in the round.
A short right from Rosberg on the inside.
Kasai pushes off and fires off an elbow that misses, before clinching up again, against the cage.
Kasai misses with an elbow strike.
Kasai missing with knees to the body.
Kasai letting Rosberg take a breather here.
Rosberg is trying to pull guard but Kasai turns him against the cage and we stay in the clinch.
Rosberg is working on a single leg takedown against the cage. Kasai can't fight it off and eventually Rosberg manages to take the fight to the floor. Kasai looks annoyed but at least he's managed to land in guard.
Rosberg stands up from guard. Let's bang!
Rosberg uses decent footwork to sidestep a right hand from Kasai.
Rosberg decides to change it up a bit and drives through with a nice takedown into half guard.
Kasai pushes Rosberg off looking to stand but Rosberg dives back in and keeps control.
That's four minutes gone in the round.
Rosberg throwing shots but they're hitting the canvas more than the man.
Rosberg stops Kasai from getting back to his feet.
Rosberg is looking for a kimura but he's never going to get it from there.
The referee calls for the fighters to work.
Rosberg wants to work for an arm triangle but Kasai is really keeping half guard well and defending the submission attempt.
The referee is asking the fighters to pick up the pace.
Rosberg missing with some ground and pound from the half guard.
The referee has decided to stand the fighters back up, so we'll restart on the feet.
A clash of legs there as Rosberg blocks the low kick.
And that is the end of the round. The fighters go back to their corners.
Kalle Rosberg dominated that round.
That's the end of the interval. I'm sure that seemed a lot quicker than a minute for our two fighters! Back to the action.
Kasai tries to work over Rosberg's front leg with a kick but Rosberg checks it.
Kasai throws a leg kick but Rosberg sees it coming and moves out of range.
Kasai fails with an attempt to clinch.
Kasai throws a lazy body kick
and Rosberg counters with a nice shoot takedown that brings the fighters to the ground.
The fighters are starting to perspire pretty heavily.
Rosberg throws a strike but Kasai rolls with it and manages to sweep. Now he's in guard on top.
Rosberg looking to sweep here. No luck so far.
Kasai wants to control from the top but Rosberg keeps moving.
Rosberg has a closed guard, preventing anything of note from happening. Perhaps he's looking to stall.
We've had a slow start to the round here - hopefully the action picks up.
Kasai wants to control from the top but Rosberg keeps moving.
That's one minute gone in the round.
Rosberg has thrown up a leg looking for a triangle. Kasai doesn't defend quickly enough and Rosberg has managed to lock this one up! Can Kasai escape?! NO! He's tapping out! Damn, that was a quick submission - congrats to Rosberg on a fantastic submission victory.
Ladies and gentlemen, after 1:22 of round 2, we have a winner by way of Submission (Triangle). Kalle Rosberg!
|
|
|
|
|
|
|
|
|
|
|
|
|
|
|
|
|
|
|
|
|
|
|
| S |
C
A |
G |
S |
C
B |
G |
|
S |
C |
G |
|
energy
A | B |
|
hype
A | B |
|
pop
A | B |
|
mgr
A | B |
|
FIGHT
RATING
43% |
|
|
|
|
|
|
|
|
|
|
