 |
JDNC Las Vegas 4 PBP Commentary |
Undercard bout
|
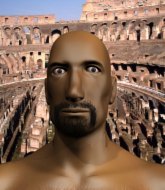
Coming up we have a heavyweight MMA rules bout between Arles Aloevera (ranked 2877 p4p, 3777 weight class) and Mc Muffin (ranked 327 p4p, 474 weight class). Both fighters really staring each other down here, as Mc Muffin enters the cage!
 |
|
 |
| 180 cm
20
164
3 - 1 - 0 |
|
188 cm
27
210
5 - 4 - 0 |
BJJ Blue Belt
Solid boxing
KO power |
|
BJJ Purple Belt
Counter fighter
Solid chin |
|
| |
|
Ladies and gentlemen. This fight is 3 rounds, in the heavyweight division.
Introducing the fighter to my left, fighting out of the red corner.
With a record of 3 - 1 - 0, fighting out of Hilo, Arles Aloevera!
And introducing the fighter to my right, fighting out of the blue corner.
With a record of 5 - 4 - 0, fighting out of Hilo, Mc Muffin !
The judges for this bout are George Francis, Alan Glass and Tiny Johnson.

The bell rings for round one and we are underway!
Muffin bobs and weaves well there to avoid the strikes.
Muffin keeping a good distance there, avoiding the body shot.
Muffin throws out a counter right but Aloevera avoids it with no problem.
Aloevera looks to land a combination but Muffin avoids it well.
Muffin throws out a token jab with nothing on it.
Muffin swings away with a body shot that misses
and Muffin takes a counter punch right on the button for his troubles.
Muffin misses with a telegraphed body shot
and Muffin takes a counter punch right on the button for his troubles.
Aloevera has been working on his boxing with his coaches at H!lo in the buildup to the fight.
Aloevera throws a nice head kick!
Aloevera misses with a half-hearted attempt at a head kick.
Muffin was about to counter that last move with a leg kick but changes his mind.
We've had a slow start to the round here - hopefully the action picks up.
Aloevera loads up on a big right hand but Muffin slips the punch.
Aloevera throws a head kick that misses and slips in the process. He scrambles back to his feet and the fighters circle.
Muffin defending well as Aloevera loads up on a big left hand.
Muffin is clearly trying to counter these attacks from Aloevera with a body shot.
Aloevera tries to bum rush Muffin with a series of wild strikes but Muffin uses good footwork to avoid the assault.

That's one minute gone in the round.
Muffin checks the leg kick.
Muffin throws a right hand that Aloevera ducks under and follows up with a left that Aloevera also avoids with ease.
No joy there for Muffin , who threw a few shots but didn't land.
Aloevera dodges the punch combination from Muffin .
Aloevera moves in looking to clinch but Muffin pushes him off.
Aloevera pulls out of a head kick attempt.
Muffin has tried to improve his agility in the runup to this fight.
Aloevera goes for a spinning back kick but it misses.
Muffin throws a combination but comes up with nothing but fresh air.
Aloevera misses with the combination.
It seemed like Muffin was going to counter with the hook but didn't fully commit to it.

That's two minutes gone in the round.
Aloevera scores with a head kick.
Aloevera throws a head kick that misses.
Aloevera bobs and weaves well there to avoid the strikes.
Aloevera throws a series of punches but Muffin avoids them all with ease.
Muffin just misses with a punch to the body.

Muffin closes the distance and gets a trip takedown into side control. Aloevera quickly recovers to half guard.
The crowd cheering loudly, showing their appreciation for the quality fight we're seeing here.
Aloevera trying to control but Muffin postures up.
Muffin is trying to control. Aloevera wants to improve his position but can't escape this time.
Aloevera wants to get back to his feet.

That's three minutes gone in the round.

Aloevera is looking to sinch up a guillotine here but Muffin pulls his head out easily.
Aloevera knows he needs to get back to his feet asap. He's simply no match for Muffin on the ground.

Muffin is looking for a kimura but Aloevera is holding onto that half guard position, so it's hard for Muffin to get the leverage.
Muffin content to control rather than advance.
Muffin is trying to work for a kimura but Aloevera is defending well.
Aloevera won't allow Muffin to pass to mount.
Muffin trying to control the pace.
Muffin is working for submissions here but there's nothing on.
Muffin is sneakily working for an arm triangle but Aloevera sees it coming and defends easily.

That's four minutes gone in the round.
Aloevera wants to control but Muffin is keeping busy.
Aloevera is trying to get back to full guard.
Muffin wants to take a breather but Aloevera is having none of it.
Aloevera is trying to get back to full guard.
Aloevera is trying to stand.
Muffin controlling the action here.
Muffin seems like he's working for an arm triangle here. He's freed his trapped foot and he's rotating nicely. Aloevera is in big trouble! He's tapping out! This one is aaaaaaaaaaaall over!
Ladies and gentlemen, after 4:59 of round 1, we have a winner by way of Submission (Arm Triangle). Mc Muffin !
An out of breath Mc Muffin thanked his loyal fans in his post fight interview, giving them credit for his success over the course of his career.
|
|
|
|
|
|
|
|
|
|
|
|
|
|
|
|
|
|
|
|
|
|
|
| S |
C
A |
G |
S |
C
B |
G |
|
S |
C |
G |
|
energy
A | B |
|
hype
A | B |
|
pop
A | B |
|
mgr
A | B |
|
FIGHT
RATING
37% |
|
|
|
|
|
|
|
Co-main event
|
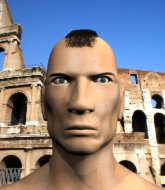
Coming up we have a super heavyweight MMA rules bout between Gee Wiz (ranked 2600 p4p, 2747 weight class) and Marquis Chriss (ranked 352 p4p, 371 weight class). Both fighters look pumped up here. Let's hope this is a good fight!
 |
|
 |
| 177 cm
27
170
4 - 2 - 0 |
|
169 cm
25
226
4 - 2 - 0 |
BJJ Blue Belt
Solid Muay Thai
Very strong |
|
BJJ Purple Belt
Counter fighter
Solid chin |
|
| |
|
Ladies and gentlemen. This fight is 3 rounds, in the super heavyweight division.
Introducing the fighter to my left, fighting out of the red corner.
With a record of 4 - 2 - 0, fighting out of Hilo, Gee Wiz!
And introducing the fighter to my right, fighting out of the blue corner.
With a record of 4 - 2 - 0, fighting out of Sydney, Marquis Chriss!
The judges for this bout are George Francis, Robert Twigg and Stewart Dunkirk.
The bell rings for round one and we are underway!
Wiz scores with a jab. Chriss acknowledges it with a nod of the head.
Chriss misses with a straight right.
Chriss throws a series of punches but Wiz moves out of range.
Chriss throws a body punch but Wiz moves out of range.
Wiz tries a head kick but it misses.
Chriss misses with a kick to the body.
Wiz fails with an attempt to clinch.
Chriss fails to land with a series of punches.
Wiz feinted with a counter takedown.
We've had a slow start to the round here - hopefully the action picks up.
Chriss misses the jab.
Wiz attempts a counter takedown but Chriss avoids it well and moves away.
Wiz lands a nice hook to Chriss's body. Chriss takes it in his stride and looks to land his own strikes.

Chriss gets in close and instigates a clinch.

Wiz breaks from the clinch.
That's one minute gone in the round.
Chriss throws a wild combination but nothing lands.
Chriss throws a right and a left that Wiz avoids nicely.
Chriss gets in close and instigates a clinch.

Chriss's corner calls for him to break the clinch, which he does.
Wiz ducks down and throws a hook to the body.
Chriss throws a nice looking combination but Wiz bobs and weaves to avoid any damage.
Wiz lands a right hook to the body.
Chriss fakes high and swings low for a body shot but Wiz manages to avoid it.
Chriss is on the wrong end of a nice combination from Wiz.
We can't be sure of the tactics at this early stage but we have heard that Chriss has been working on his takedowns a lot in the buildup to the fight and we can only assume he's going to look to take this to the mat.
Wiz scores with a nice head shot.
Chriss throws a left and a right that both miss

and Wiz moves into the clinch.
That's two minutes gone in the round.
This has been an exciting period of action!
Wiz breaks from the clinch.
Wiz looking to take his opponent's legs away with the low kicks.
Wiz wants to clinch up but Chriss keeps it at a distance.
Wiz lunges in with swinging rights and lefts but Chriss circles away quickly and effectively.
Wiz swings and misses with a hook to the body.
The fight stays on the outside here - Wiz looks like he's thinking about clinching though.
Wiz moves out of range as Chriss strikes.
Wiz slips under a jab.
A chopping leg kick lands by Wiz.
That's three minutes gone in the round.
A left and a right from Wiz both land. Nice combination.
Wiz closes the distance and clinches.
Wiz prevents Chriss from breaking the clinch.
Wiz manages to break the clinch.
Wiz definitely looks more muscular than last time we saw him fight.
Wiz ducks under an overhand right and circles away with a smile on his face.
Wiz lands with a right hand.
Wiz lands three nice shots there - that looked like it hurt!
Wiz lunges at Chriss with a hook that half lands and is half blocked by Chriss's hand.
Chriss avoids the head kick by Wiz.
Wiz lets the fists fly and connects with a left straight followed by a right hook.
The crowd cheering loudly, showing their appreciation for the quality fight we're seeing here.
Wiz throws a nice inside leg kick.
That's four minutes gone in the round.
Wiz keeping a good distance there, avoiding the body shot.
Wiz drops down looking for a counter takedown but Chriss sprawls and moves away.
Chriss has his front leg slapped to the side - a nice low kick landing there from Wiz.
Wiz is looking to take this fight into the clinch.
Chriss walks into a stiff left hand from Wiz.
Wiz throws a good cross that connects.
Chriss throws a sloppy body shot
and Wiz counters with a good right hand that lands right on the jaw.
Wiz moves into range and throws a lovely three punch combination.
And that is the end of the round. The fighters go back to their corners.
Gee Wiz dominated that round.
That's time! Back to the action!

Chriss clinches up against the cage.
Chriss scores with a shot to the side of Wiz's head.
Wiz tries to circle away but Chriss has him pinned against the cage.
Chriss is trying to break the clinch but Wiz has him pressed against the cage.
Wiz lands a right hand that snaps the head of Chriss backwards.
Chriss escapes the clinch and we're back to striking.
Wiz scores with a jab to the body.
Wiz uses good head movement to avoid the hook from Chriss.
Wiz is using his height advantage well here, landing a good percentage of his punches.
A punch combination from Chriss misses.
We've had a slow start to the round here - hopefully the action picks up.
Wiz gets a clinch.
Chriss throws a hook to the body. More of an arm punch but it's all scoring with the judges.
Chriss escapes the clinch and we're back to striking.
Wiz takes a body punch but keeps moving.
That's one minute gone in the round.
Chriss misses the jab.
Wiz throws a quick counter kick to the body but Chriss avoids it.
Chriss moves into range and clinches up with Wiz.
Wiz escapes the clinch and we're back to striking.
Chriss misses with a jab and misses with a cross straight after too.
A looping hook to the body misses from Chriss. Wiz does a little dance to reset his feet.
Wiz lands a nice shot to the body.
Wiz is really dominating this fight. Is there anything that Chriss can do to turn this around?
Good standup being displayed there by Wiz as he connects with a hook.
Chriss moves his head to the side to avoid a jab but walks straight into a cross.
Chriss gets tackled into the cage by Wiz. Wiz maintains the clinch.
Chriss goes for a body shot but it's blocked.
That's two minutes gone in the round.
Chriss lands with a short punch from the clinch.
Chriss tries to land a knee to the body but he is off balance and Wiz avoids it.
Chriss lands with a right to the head.
The fans in attendance giving it up for the two fighters, who have really let it all hang out in the last minute or so!
Wiz breaks the clinch and we return to the middle of the mat.
Chriss gets his head snapped back by a nice shot there.
Chriss is the aggressor but that punch slipped nicely by Wiz.
Wiz lands a straight punch to the body, keeping Chriss at a distance.
Chriss throws out a loose jab but Wiz uses good head movement to avoid it.
Wiz dodges the punch combination from Chriss.
Wiz scores with a big left there. The judges will like that one.
That's three minutes gone in the round.
Chriss takes a nasty kick to the mid section... That should keep him thinking. Does he try and block and risk a head kick landing?
Gee Wiz is winning the standup battle so far.
Chriss throws a hook to the side of Wiz's head but Wiz sees it coming and ducks under it beautifully.
Chriss swings widly with a right hand
and Wiz counters with a stiff right hand.
Gee Wiz is looking to throw some combinations by the looks of things.
Wiz takes a punch to the jaw and another one to the bread basket.
Wiz gets tackled into the cage by Chriss. Chriss maintains the clinch.
Chriss swings away with an uppercut that misses.
Wiz is trying to force a seperation but Chriss has the dominant position.
Chriss escapes the clinch and we're back to striking.
A head kick misses from Wiz.
Wiz avoids a lazy jab quite easily.
Wiz drops down looking for a counter takedown but Chriss sprawls and moves away.
Chriss keeps the fight on the outside.
That's four minutes gone in the round.
The fighters circle momentarily. Wiz darts into range and connects with a nice straight punch.
Chriss looks to score with a combo but nothing lands.
Wiz tries to counter by clinching up but Chriss breaks away and moves out of range.
Chriss looks to land a left hand but Wiz moved out of range nicely.
This is a great period of action - very entertaining stuff!
Wiz scores with a nice looking left hook and follows it up with an uppercut!
Wiz slips a jab and a cross from Chriss.
Wiz pushes Chriss away with a front kick.
Chriss keeps the fight on the outside.
Chriss is really struggling to land any decent head shots against his taller opponent.
Chriss clinches up with Wiz and pushes him back against the cage.
Chriss breaks from the clinch.
And that is the end of the round. The fighters go back to their corners.
A close second round but Marquis Chriss will probably get the nod - 10:9.
That's time! Back to the action! This is the final round!

Chriss swats away the attempt to clinch by Wiz.
Chriss wants to clinch up but Wiz keeps it at a distance.
Wiz digs a good hook to Chriss's body.
Wiz ducks under a wild hook from Chriss.
Wiz drops down looking for a counter takedown but Chriss sprawls and moves away.
Chriss misses with a looping left.
Chriss swings and misses with a hook to the body.
We've had a slow start to the round here - hopefully the action picks up.
Wiz ducks under a wild hook from Chriss.
Chriss connects with a lovely right hand, straight down the pipe.
Chriss swings wildly with a right hand that was never going to find it's target.
That's one minute gone in the round.
Wiz throws the kick towards the body but Chriss avoids it.
Chriss tries to clinch but is not successful on this occasion.
The fight moves into the clinch position.
Wiz keeps control of Chriss as he tries to wriggle out of the double underhooks.
Chriss swings away with an uppercut that misses.
Marquis Chriss seems to be working more effectively in the clinch in the fight so far.
Wiz avoiding damage.
Chriss manages to break the clinch.
Chriss rushes Wiz and presses him up against the cage.
Chriss works for underhooks and lands a body shot in the process.
Wiz using the Thai plumb to throw knees but Chriss has his back arched nicely, preventing the strike.
Wiz tries to break free but Chriss pushes him back against the cage.
Chriss pushes off and circles away, back to the middle of the mat.
Chriss on the wrong end of a nice hook.
That's two minutes gone in the round.
Wiz bobbing and weaving, closes the distance and lands a hook to the side of Chriss's head.
Chriss takes a punch to the jaw and another one to the bread basket.
Wiz uses good footwork to avoid the strikes from Chriss.
This has been an exciting period of action!
Chriss doesn't manage to clinch there - Wiz circles away.
Wiz attempts a counter takedown but Chriss avoids it well and moves away.
Wiz uses some good footwork to avoid the body shot by Chriss.
Wiz wants to clinch.
Chriss throws a hook to the body but it doesn't connect.
That's three minutes gone in the round.
Wiz throws a quick head kick that skims the top of Chriss's head.
Chriss tries to clinch up but Wiz circles away and keeps his distance.
Wiz drops down looking for a counter takedown but Chriss sprawls and moves away.
Wiz scores with a body shot.
Wiz tries to close the distance and clinch up but Chriss swats him away and circles back towards the center.
Wiz uses good footwork to avoid the strikes from Chriss.
Chriss clinches up against the cage.
Wiz wants to get back to striking at distance but Chriss won't allow it.
Wiz escapes the clinch and we're back to striking.
Chriss tries to check a leg kick but that clearly hurt him.
Wiz fails to land with the punch combination there - jab, cross, hook, miss, miss, miss.
That's four minutes gone in the round.
Chriss throws a right and a left that both miss.
Chriss looks to land a right hand but Wiz moved out of range.
Chriss avoids the head kick by Wiz.
Wiz ducks under a wild hook from Chriss.
The fighters are starting to get sweaty, which will make takedowns a bit more tricky.
Wiz works the jab nicely.
Chriss darts in and clinches Wiz up against the cage.
This is a great period of action - very entertaining stuff!
Chriss keeps the fight in the clinch, despite Wiz's efforts to push away.
Chriss is looking to break free of the clinch but Wiz has double underhooks.
Wiz breaks the clinch.
Chriss wants to clinch.
And that's the end of the fight!
That was a close round. You could make an argument for either fighter but I would give it to Gee Wiz.
I think Wiz has won this one but let's see what the judges have to say. Over to the ring announcer for the scorecards.
Ladies and gentlemen, after 3 rounds of action, we go to the scorecards for a decision.
Judge George Francis scores the fight 29:28
Judge Robert Twigg scores the fight 29:28
Judge Stewart Dunkirk scores the fight 29:28
In favor of your winner, by unanimous decision... Gee Wiz!
A loyal slave to those sponsorship dollars, Gee Wiz made sure he mentioned H!lo, along with how happy he was to win his fight.
|
|
|
|
|
|
|
|
|
|
|
|
|
|
|
|
|
|
|
|
|
|
|
| S |
C
A |
G |
S |
C
B |
G |
|
S |
C |
G |
|
energy
A | B |
|
hype
A | B |
|
pop
A | B |
|
mgr
A | B |
|
FIGHT
RATING
54% |
|
|
|
|
|
|
|
Main event
|
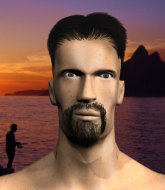
Coming up we have a super heavyweight MMA rules bout between Peter Smart (ranked 2043 p4p, 2262 weight class) and Ricky Rawse (ranked 60 p4p, 110 weight class). Peter Smart could well score a knockout today. He has the power to get to Ricky Rawse's chin.
 |
|
 |
| 180 cm
33
182
18 - 14 - 0 |
|
193 cm
39
269
21 - 27 - 1 |
Good wrestling
Excellent boxer
Insanely flexible |
|
Good wrestler
Excellent MT
Powerful |
|
| |
|
Ladies and gentlemen. This fight is 3 rounds, in the super heavyweight division.
Introducing the fighter to my left, fighting out of the red corner.
With a record of 18 - 14 - 0, fighting out of Amsterdam, Peter Smart!
And introducing the fighter to my right, fighting out of the blue corner.
With a record of 21 - 27 - 1, fighting out of Las Vegas, Ricky Rawse!
The judges for this bout are Robert Twigg, Wesley Smith and Stewart Dunkirk.
The bell rings for round one and we are underway!
Smart misses the jab.
Rawse tries to close the distance and clinch up against the cage but Smart paws at him with a jab and circles away.
Rawse takes a shot to the body in his stride.
Smart getting the better of the striking in that exchange.

Smart gets a takedown into half guard.
Smart wants to take a breather but Rawse is having none of it.
Smart throws a big elbow that misses, also allowing Rawse to regain full guard.
Rawse keeping moving, preventing Smart from controlling successfully.
Smart postures up in Rawse's guard and throws a big left but Rawse blocks it.
We've had a slow start to the round here - hopefully the action picks up.
Smart throwing shots from guard but he's hitting more mat than opponent.
Smart throwing strikes from guard but Rawse blocks nicely.
Smart stopping the sweep attempt from Rawse.
That's one minute gone in the round.
Rawse is persisting with the attempt to improve his position.
Smart throws an elbow that misses. Rawse uses the momentum to reverse the position. He's now in Smart's guard. Nice move by Rawse!

Rawse trying to control the position from guard on top but Smart is wriggling around, looking for whatever he can.
A big thud reverberates around the arena there as Rawse accidentally thumps the mat. Hopefully he's not broken his hand.
Smart wants to sweep here but Rawse controlling him for the moment.
Rawse tries to stand but Smart is controlling from the bottom.
The ref warns both fighters not to hold the cage as they work up against the meshing.
That's two minutes gone in the round.
The crowd are starting to boo a lack of action.
Smart not looking particularly offensive just at the moment.
Smart is working an open guard here, looking to improve his position. No doubt that will leave him open to counters but at least he's being more offensive.
Smart lands a beautiful sweep and he's now moved into his opponent's guard.

Smart missing there with some ground and pound from the guard.
Rawse utilising some decent striking defenses from the guard, preventing the ground and pound.
Smart pushes down on Rawse's leg and manages to get into half guard.
Smart tries to pass to full mount but Rawse defends it.
Smart missing with some ground and pound from the half guard.
That's three minutes gone in the round.
Smart missing with some ground and pound from the half guard.
Rawse is trying to stand up here but Smart is controlling him well.
Rawse is not content to let Smart control the position.
Smart throwing punches and elbows but they're not doing any damage.
Ground and pound from Smart.
Rawse is not content to let Smart control the position.
Rawse avoiding damage under a succession of punches from Smart.
Smart throwing punches and elbows but they're not doing any damage.
Smart thumps the canvas. Not on purpose obviously - he just missed Rawse's head.
That's four minutes gone in the round.
Smart throwing shots but Rawse is blocking nicely.
Rawse felt the need to train up his defensive grappling in the buildup to the fight. Presumably he was expecting to be in a difficult position like this, so let's see if he can get out of it.
Smart not throwing his punches with enough precision this time.
Smart missing with some ground and pound from the half guard.
Smart drops an elbow to the side of Rawse's head.
Smart working over Rawse with some ground and pound. Rawse looks like he wants out of this position, which is understandable.
Smart looks over to his corner - he wants some instructions but his corner are not responding.
Rawse blocking the ground and pound attempt from Smart.
Smart working some ground and pound from close in. He's looking to maintain this position and strike for a while by the looks of things... although he'll probably advance to full mount in a minute now I've said that.
The crowd thankful this round is nearly over.
Smart throwing shots but they're hitting the canvas more than the man.
Smart throwing punches and elbows but they're not doing any damage.
Smart trying to control the action but Rawse is working from the bottom.
And that is the end of the round. The fighters go back to their corners.
Peter Smart dominated that round.
That's time! Smart's corner gives him a slap on the ass as he gets ready to fight.
Smart lands an overhand right.
Rawse throws a hard body shot but it just misses.
Rawse looks to score with a jab to the body but Smart is just out of range.
Rawse ducks under an overhand right and circles away with a smile on his face.
Rawse wants to clinch but Smart slips to the side
and Smart counters with a left and a right that stings Rawse.
Rawse forces Smart back against the cage and clinches.
Smart fails to land with a short punch on the inside.
Rawse tries to throw a body punch but Smart avoids it by throwing Rawse back against the cage.
Rawse tries a shoulder strike but it doesn't do any damage.
Smart digs a right hand into Rawse's ribs. Those have got to be taking their toll on Rawse's gas tank.
Rawse swings wildly with an uppercut but Smart uses good head movement to avoid it.
Smart throws a head punch that misses.
We've had a slow start to the round here - hopefully the action picks up.
A head punch blocked on the inside by Rawse.
Smart blocks a body shot from Rawse.
Rawse tries to work over Smart's body with a swooping hook but it only glances the target.
A hook to the body from Rawse.
Smart is really dominating this fight. Is there anything that Rawse can do to turn this around?
A body shot lands from Rawse.
A body shot lands from Smart.
This is a great period of action - very entertaining stuff!
Rawse takes a shot to the head.
That's one minute gone in the round.
Smart misses with some punches.
Rawse misses with a hook to the ribs.
Smart misses with a hook from the clinch.
Smart goes for a body shot but it's blocked.
Rawse blocks a body shot from Smart.
A body shot lands from Rawse.
Rawse blocks a punch to the side of the head.
Smart working some nice short punches in the clinch.
Rawse misses with a shot to the kidneys.
Smart blocks a punch to the side of the head.
A left hand lands to the body for Smart.
Rawse blocks an uppercut.
Smart misses with a body punch.
A body shot lands from Smart.
Smart misses with some punches.
Smart makes some space for himself and lands an uppercut.
A nice left hand lands by Smart.
Smart throws a head punch that misses.
Rawse scores with a nice hook to the head.
A head punch on the inside from Smart fails to land.
A short right from Smart on the inside.
That's two minutes gone in the round.
The crowd cheering loudly, showing their appreciation for the quality fight we're seeing here.
Smart is trying to drag Rawse to the mat but Rawse just about manages to keep his footing. He used the cage to his advantage there.
Smart tries a body shot but Rawse blocks it.
A nice left hand lands by Smart.
Peter Smart has scored more points in the clinch so far.
Smart lands a left hand that snaps the head of Rawse backwards.
Smart throws a head punch that misses.
Smart lands on the inside with an uppercut.
Smart tries a shoulder strike but it doesn't do any damage.
Smart struggles to land a body shot inside as Rawse controls his hands.
Rawse lands a hook to the body. It's hard to tell if that hurt Smart or not.
Smart misses with a shot to the kidneys.
Good body shot from Rawse.
Both fighters are absolutely exhausted here.
Rawse lands a short shot on the inside that snaps the head of Smart backwards.
Rawse tries to work over Smart's body with a swooping hook but it only glances the target.
Rawse tries to throw a body punch but Smart avoids it by throwing Rawse back against the cage.
A short left from Rawse.
A nice left hand lands by Rawse.
Rawse tries to throw a body punch but Smart avoids it by throwing Rawse back against the cage.
With the fighters clinched against the cage, Smart creates a bit of distance for himself and scores with a nice uppercut.
That's three minutes gone in the round.
Rawse blocks an uppercut.
Smart prevents a body shot from Rawse.
Smart wants a takedown but no success here.
Rawse goes for a body shot but it's blocked.
Rawse tries to throw a body punch but Smart avoids it by throwing Rawse back against the cage.
Smart goes for a body shot but it's blocked.
Rawse tries to throw a body punch but Smart avoids it by throwing Rawse back against the cage.
Rawse misses with a hook to the ribs.
Rawse tries to throw a body punch but Smart avoids it by throwing Rawse back against the cage.
A nice right hand lands inside from Rawse.
Rawse working some nice short punches in the clinch.
Rawse presses Smart against the cage and delivers a mid-strength body shot.
Still in the clinch, Rawse scores with a nice short uppercut.
Smart lands a body shot in the clinch.
Rawse misses with a punch to the body.
Rawse misses with a punch on the inside.
Rawse doesn't land with the attempted body shot.
Rawse misses with a shot to the kidneys.
Smart tries to land a shot to the body but it's blocked.
Smart goes for a body shot but it's blocked.
That's four minutes gone in the round.
Smart goes for a takedown attempt but Rawse pushes him away and we're back to fighting at a distance.
That's three failed takedown attempts in the round for Peter Smart. That's going to take a lot out of him.
Rawse tries to close the distance and clinch up but Smart swats him away and circles back towards the center.
Rawse fails to land with a series of punches.
Smart thuds his right hand into Rawse's forehead from close range. That could be painful for both fighters.
Rawse rushes Smart and presses him up against the cage.
The crowd are loving this. Great action here.
Rawse throws a head punch that misses.
Smart can't find room to land a body shot as Rawse controls the action.
Smart scores with an uppercut up the middle.
Rawse scores with a hook to the body.
Smart looking for a takedown.
Rawse prevents a body shot from Smart.
Smart gets through Rawse's defenses to land a nice punch to the side of the head.
Rawse blocks an uppercut.
Smart doesn't land with the attempted body shot.
Smart lands on the inside with an uppercut.
Rawse misses with a punch to the body.
Smart makes some space for himself and lands an uppercut.
Rawse misses with a shot to the kidneys.
An uppercut on the inside fails to land for Smart.
And that is the end of the round. The fighters go back to their corners.
Peter Smart dominated that second round.
The referee calls time. The cornermen exit stage left and we're back to business. So, we enter the final round. Let's see if either fighter can bring us a finish, or whether we're going to the judges scorecards.
Smart scores with a head kick.
Rawse throws an uppercut from half a mile away. Smart sees it coming and avoids it easily.
A right-left combo lands from Smart.
Smart shoots in for a takedown and gets it.
Rawse is controlling Smart's position as best he can from this difficult position.
Rawse is trying to get back to full guard.
We've had a slow start to the round here - hopefully the action picks up.
Smart misses with a head shot. Rawse uses the momentum to regain guard.
A big thud reverberates around the arena there as Smart accidentally thumps the mat. Hopefully he's not broken his hand.
That's one minute gone in the round.
Smart throws a strike but Rawse rolls with it and manages to sweep. Now he's in guard on top.
Rawse working in close now, lands a nice elbow to the side of Smart's head.
Rawse trying to control the position from guard on top but Smart is wriggling around, looking for whatever he can.
Smart controls Rawse momentarily but Rawse frees himself.
Rawse trying to land body shots but he keeps hitting the mat.
Rawse won't allow Smart to sweep him here.
Smart is working hard here to advance position.
Smart controls Rawse momentarily but Rawse frees himself.
That's two minutes gone in the round.
Smart is working an open guard here, looking to improve his position. No doubt that will leave him open to counters but at least he's being more offensive.
Rawse lands a nice shot whilst sitting in his opponent's guard.
Rawse lands a nice shot whilst sitting in his opponent's guard.
Rawse is sitting in guard, working some ground and pound.
Smart is working from a closed guard but he's struggling to control his opponent.
Rawse landing some decent shots from guard.
Rawse content to stall in guard here.

The referee has stepped in and called for a break in the action. We'll restart on the feet.
Ricky Rawse is looking to keep the fight on the feet at all costs.
Rawse wants to clinch.
That's three minutes gone in the round.
Rawse moves to clinch but Smart breaks away
and Smart counters with a crisp hook to the side of the head.
Smart swats away the attempt to clinch by Rawse.
Rawse lands a jab.
Ricky Rawse has stepped it up - he knows he needs a finish here!
Smart throws a two punch combo that lands nicely.
Rawse throws a jab when Smart was well out of range.
Smart darts in looking for a takedown but Rawse gets double underhooks and turns Smart into the cage.
Rawse is trying to avoid his opponent's strikes and get into the clinch.
Smart tries to throw a body punch but Rawse avoids it by throwing Smart back against the cage.
Rawse softening up his opponent with strikes, against the cage.
Smart's head jolts backwards as he takes an uppercut right on the button!
Smart misses with a hook to the ribs.
Rawse gets through Smart's defenses to land a nice punch to the side of the head.
An uppercut on the inside fails to land for Smart.
That's four minutes gone in the round.
Rawse prevents a body shot from Smart.
Smart lands with a good tight uppercut to the head.
The fans in attendance giving it up for the two fighters, who have really let it all hang out in the last minute or so!
Smart swings wildly with an uppercut but Rawse uses good head movement to avoid it.
Peter Smart is fighting for a decision here - he's started to take the cautious approach.
Smart prevents a body shot from Rawse.
An uppercut on the inside fails to land for Rawse.
A head punch blocked on the inside by Rawse.
Smart throws a head punch that misses.
Smart blocks a body shot from Rawse.
Smart tries to work over Rawse's body with a swooping hook but it only glances the target.
Still in the clinch, Smart scores with a nice short uppercut.
Smart scores with a nice hook to the head.
Smart takes a shot to the head.
Rawse misses with a body punch.
Smart misses with a body punch.
Rawse misses with a shot to the kidneys.
Rawse lands a body shot in the clinch.
And that's the end of the fight!
That was a close round. You could make an argument for either fighter but I would give it to Peter Smart.
Well Smart has outscored his opponent in every aspect of the fight today. Only a scarily incompetent judge or two will keep him from a well deserved win... Over to the ring announcer for the scorecards.
Ladies and gentlemen, after 3 rounds of action, we go to the scorecards for a decision.
Judge Robert Twigg scores the fight 30:27
Judge Wesley Smith scores the fight 30:27
Judge Stewart Dunkirk scores the fight 30:27
In favor of your winner, by unanimous decision... Peter Smart!
Peter Smart seemed lost for words in his post fight interview but he remembered to thank his fans and directed everyone to his website.
|
|
|
|
|
|
|
|
|
|
|
|
|
|
|
|
|
|
|
|
|
|
|
| S |
C
A |
G |
S |
C
B |
G |
|
S |
C |
G |
|
energy
A | B |
|
hype
A | B |
|
pop
A | B |
|
mgr
A | B |
|
FIGHT
RATING
49% |
|
|
|
|
|
|
|
|
|
|
